Note
Access to this page requires authorization. You can try signing in or changing directories.
Access to this page requires authorization. You can try changing directories.
VERI*FACTU is Spain’s new mandatory e-invoicing standard, requiring businesses to report invoices in real time to the Spanish Tax Agency (AEAT) using digital signatures, hash chaining, and QR code verification for authenticity and traceability. This feature enables Spanish companies to submit invoices automatically to AEAT, embed official QR codes, and maintain legal audit trails, helping prevent fraud and streamline auditing.
Users can activate VERI*FACTU mode by using a dedicated toggle, which ensures full compliance with Spanish e-invoicing regulations and prevents SII mode from being enabled at the same time.
Once the setup for VERI*FACTU is complete, any invoices posted (Posted Sales Invoice) in Business Central are automatically sent to the AEAT for clearance through the E-Document framework.
After the invoice is successfully validated, the system incorporates the official QR code issued by the AEAT directly onto the invoice layout, allowing users to print or email invoices that are legally compliant and easily verifiable by customers.
Enable digital signing
To enable digital signing, perform the following steps:
Create yourself as a SUPER user.
On the Company information page, perform the following actions:
- Enter the VAT Registration No. from the qualified electronic certificate issued to you by the tax authorities. For example, 99999910G.
- Enter the company Name as mentioned in the certificate. For example, CERTIFICADO PRUEBAS.
- Enter the Post Code.
Fill up the fields in the Payments tab. This tab shouldn’t be blank.
On the Post Codes page, set the Time Zone for the post code.
Go to My Settings and set the Working Date to today’s date and set the Region as Spanish (Spain, International Sort). The Spanish Tax Authorities don't accept a date higher than today’s.
Set up VERI*FACTU
Choose the
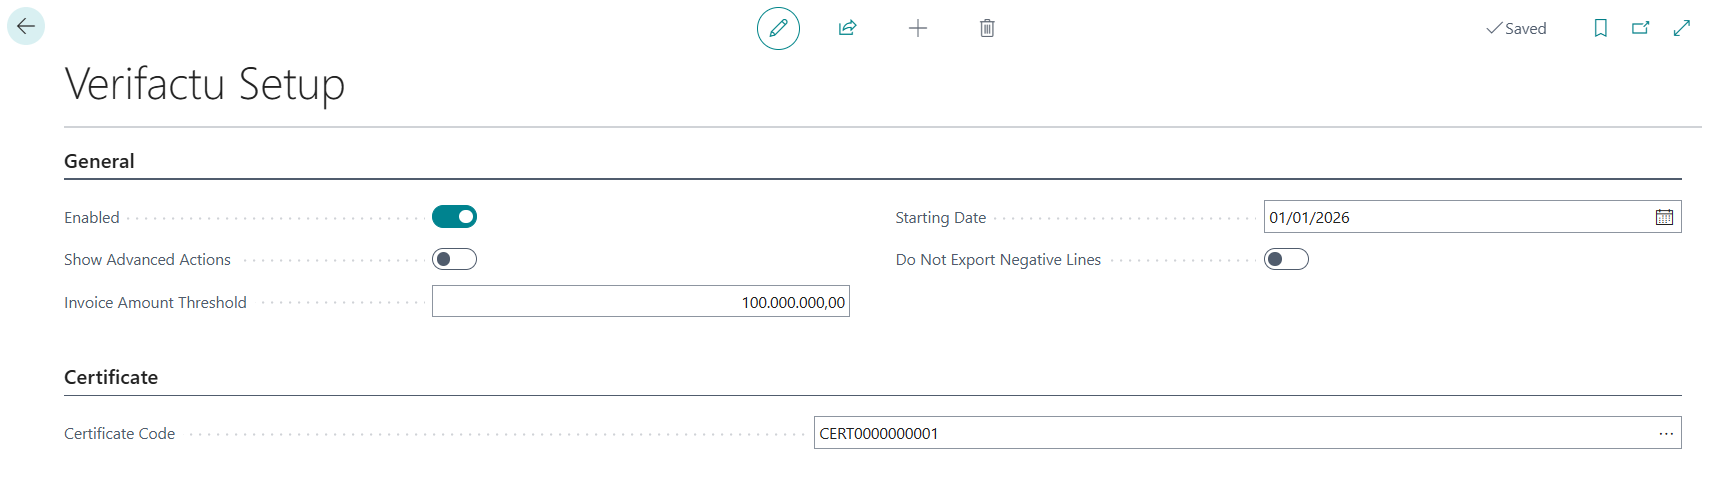
 icon, enter Verifactu Setup, and then select the related link. The Verifactu Setup page displays.
Upload your certificate in the Certificate Code field.
Select the Enabled toggle.
Set up the e-document service format
Choose the
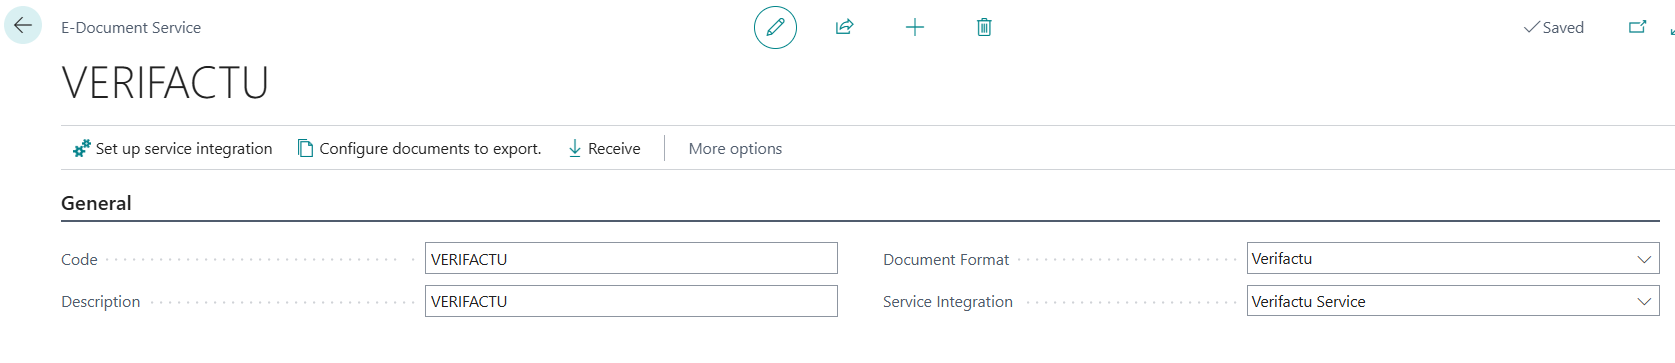
icon, enter E-Document Services, and then select the related link. The E-Document Services page displays.Select New to create a new e-document service setup.
Fill up the following fields:
- In the Code field, enter VERIFACTU.
- In the Description field, enter VERIFACTU.
- In the Document Format field, enter Verifactu.
- In the Service Integration field, enter Verifactu Service.
Tip
Go to Configure documents to export and select E-Document Service Supported Source Document Types to check the allowed documents for Verifactu.
Set up Workflows
Choose the
icon, enter Workflows, and then select the related link. The Workflows page displays.On the Workflows page, switch off the current one for e-documents.
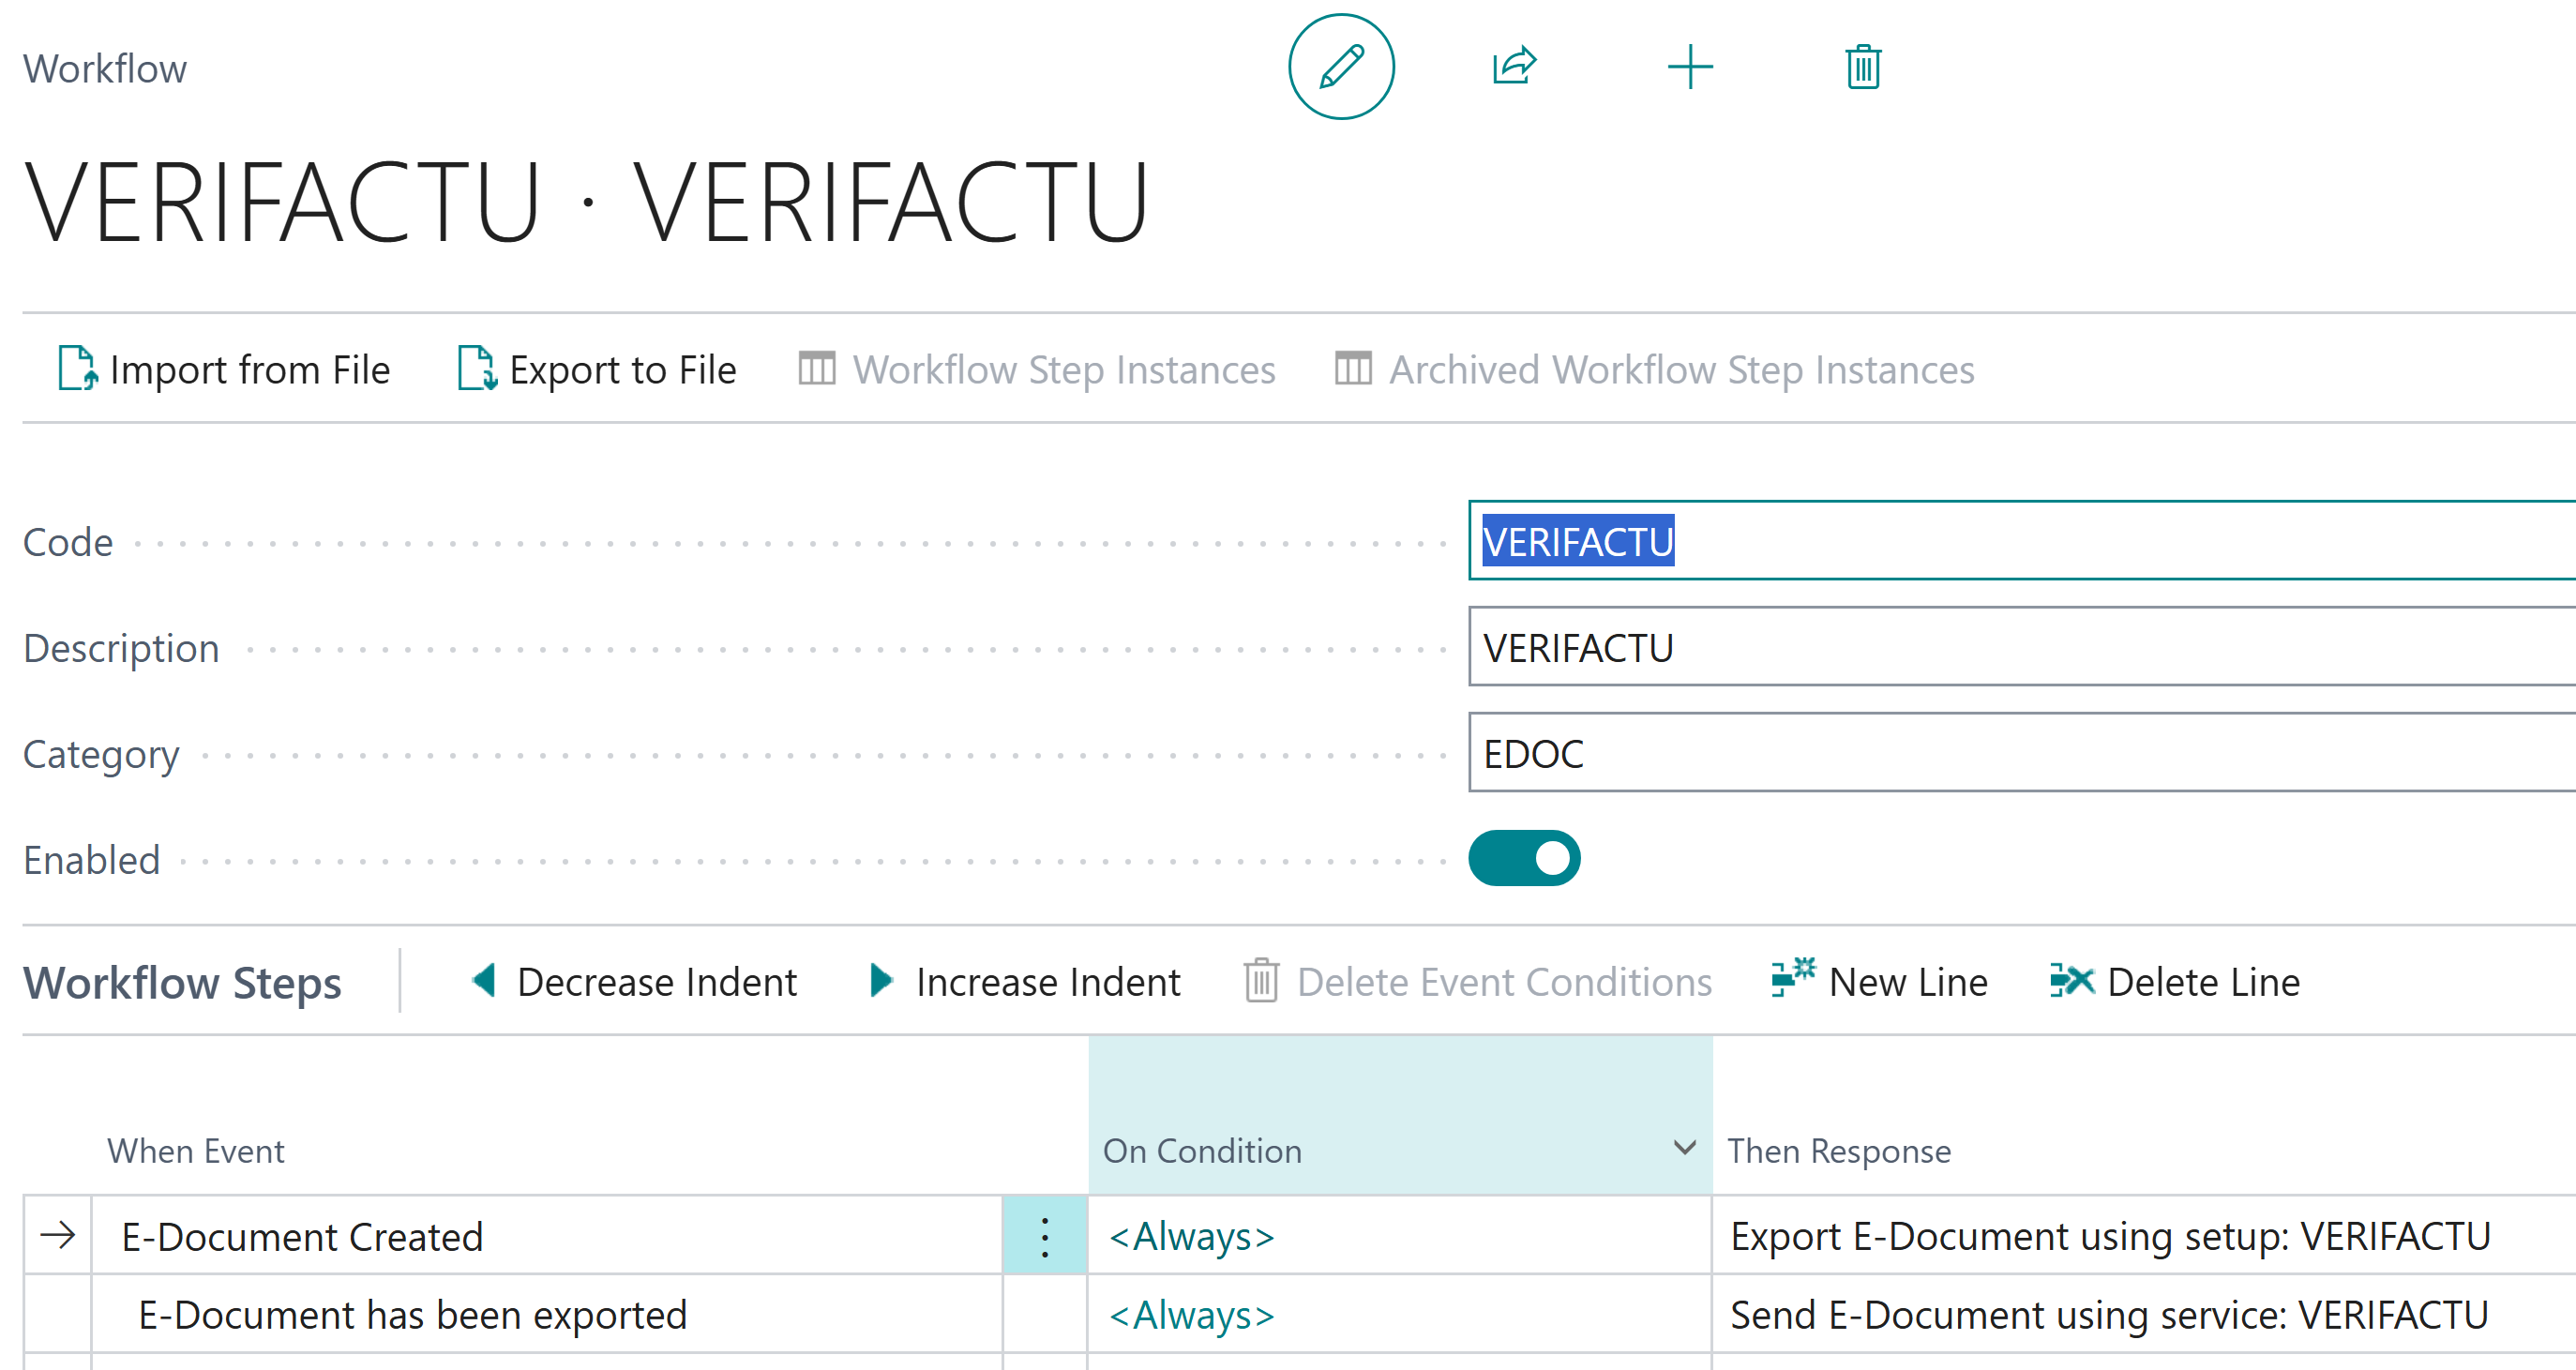
Create a new e-document for Verifactu by filling up the following fields:
- In the Code field, enter VERIFACTU.
- In the Description field, enter VERIFACTU.
- In the Category field, enter EDOC.
- Select the Enabled toggle.
On the lines, enter the following text in these fields:
- In When Event, enter E-Document Created.
- In Then Response, enter Export E-Document using setup: VERIFACTU
- In When Event, enter E-Document has been exported
- In Then Response, enter Send E-Document using service: VERIFACTU (indented)
Set up the Document Sending Profile
Choose the
icon, enter Document Sending Profiles, and then select the related link. The Document Sending Profiles page displays.Fill up the following fields:
- In the Code field, enter VERIFACTU.
- In the Description field, enter Verifactu.
- In Sending Options, enter values in these fields as follows:
- In the Electronic Document field, enter E-Document Workflow.
- In the E-Document Workflow field, enter VERIFACTU.
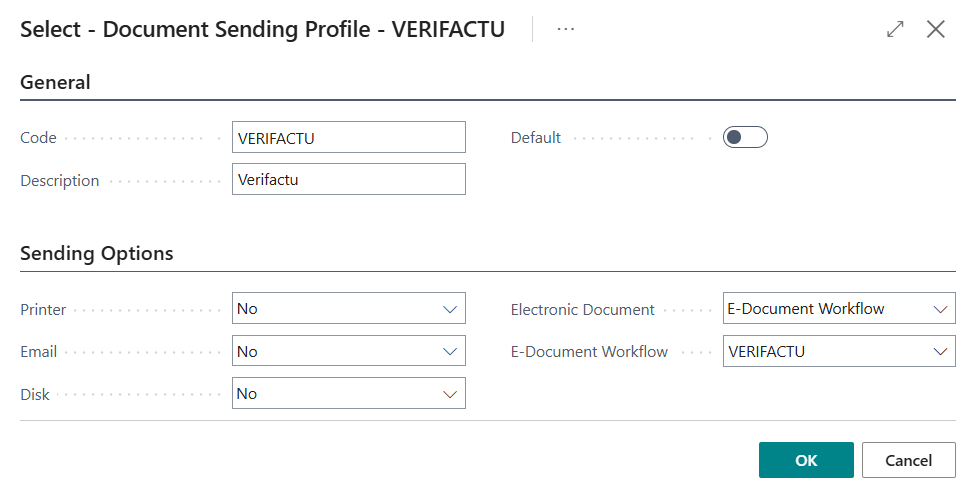
Select OK.
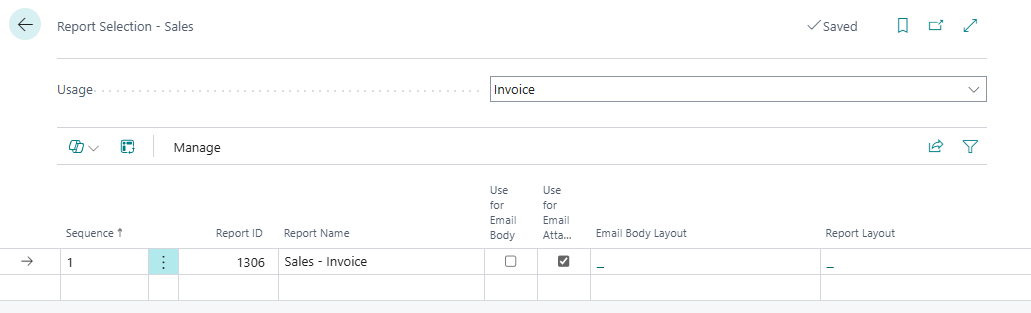
Set up Report Selection - Sales
If it's not set up already, perform the following steps:
Choose the
icon, enter Report Selection - Sales, and then select the related link. The Report Selection - Sales page displays.Ensure for the Usage - Invoice, the report ID 1306 is selected.
Set up/update the Customer
Choose the
icon, enter Customers, and then select the related link. The Customers page displays.Select a customer. For example, 50000 (Relecloud).
In the Document Sending Profile drop-down, select VERIFACTU.

Example scenario - Set up sales invoice for customers and post it
The following steps are based on a use case scenario where a sales invoice is created for the customer Relecloud and then posted, which triggers the VERI*FACTU process to send the invoice to AEAT and generate the QR code.
Choose the
icon, enter Sales Invoices, and then select the related link. The Sales Invoice page displays.In the Posting Date field, enter TODAY.
Add a line Item, with Quantity as 5 and amount as 1000 + VAT.
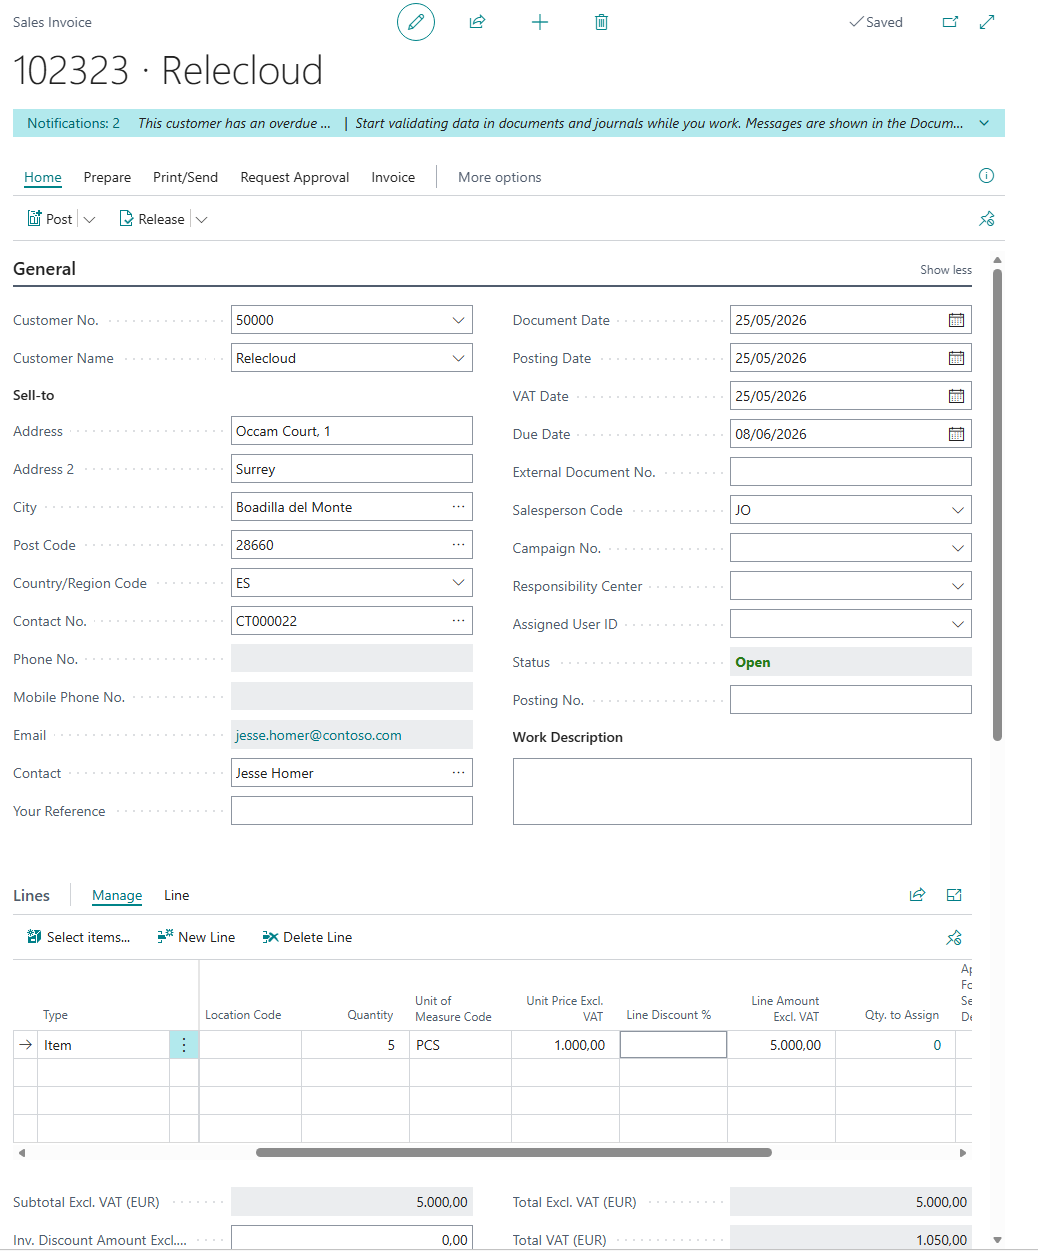
Post the sales invoice.
Choose the
icon, enter Posted Sales Invoices, and then select the related link. The Posted Sales Invoices page displays.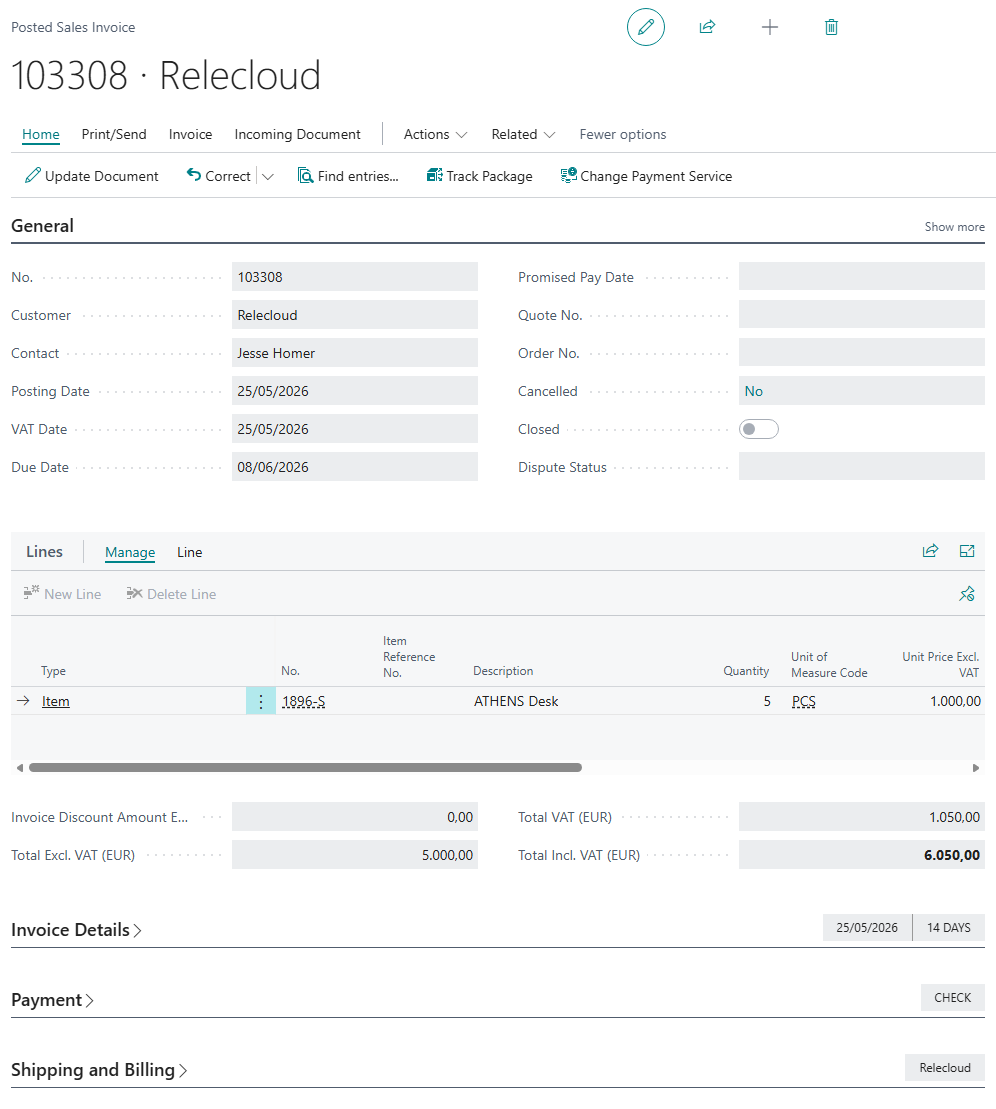
Select Print/Send > Print. The Sales Invoice window displays.
In the Report Layout drop-down, select the Standard Sales Invoice - E-Document (Word) layout and select OK.

You can select Preview to visualize the document and the E-Doc QR Code generated for Verifactu.
On the Posted Sales Invoices page, on the ribbon, select Related > E-Document > Open.
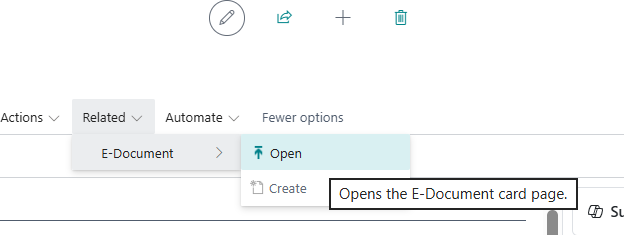
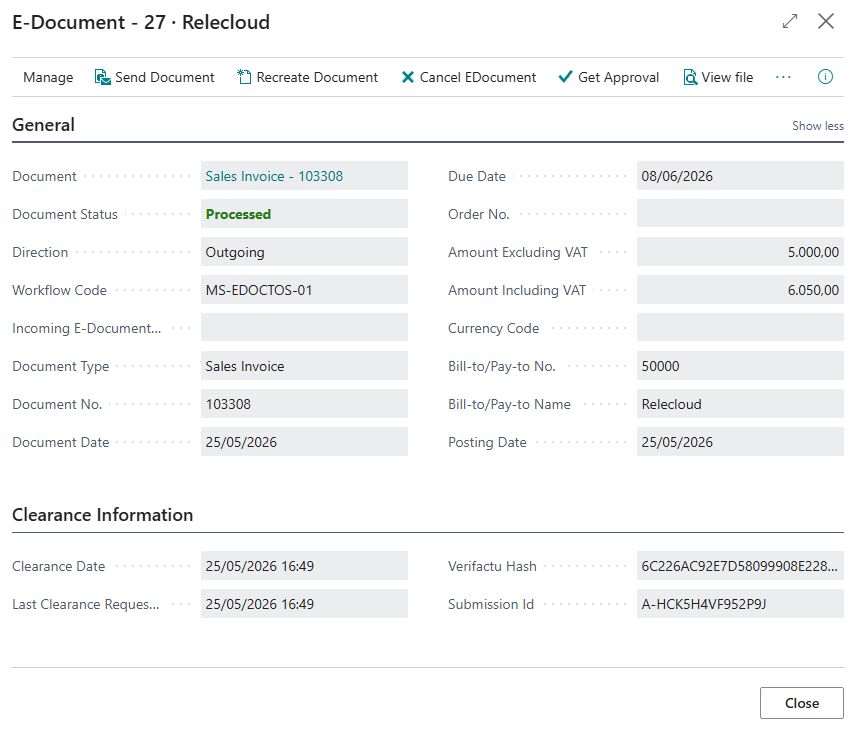
The E-Document Card page for the processed sales invoice for Relecloud displays with the clearance information.
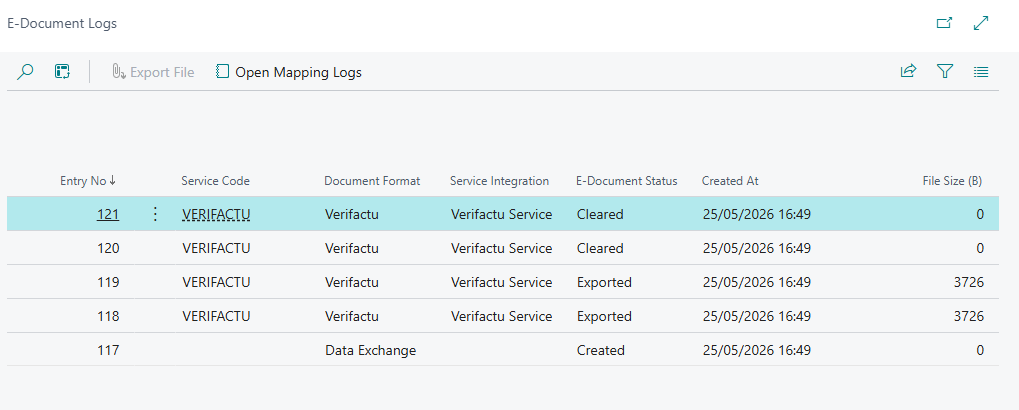
On the E-Document Card page, select Document Logs to see the invoice processing status. In this case, the status is cleared, and AEAT accepts the document.
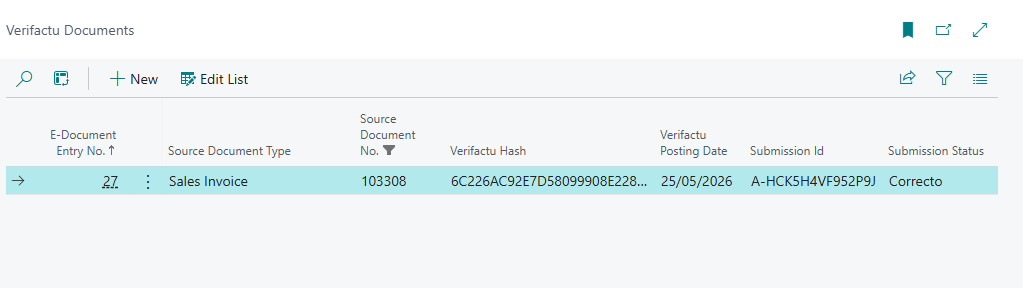
To view the submission status of the Verifactu document, choose the icon, enter Verifactu Document, and then select the related link. The Verifactu Document page displays with the submission status.