Note
Access to this page requires authorization. You can try signing in or changing directories.
Access to this page requires authorization. You can try changing directories.
Note
The Retail Interest Group by Dynamics 365 Commerce has moved from Yammer to Viva Engage. If you don't have access to the new Viva Engage community, fill out this form (https://aka.ms/JoinD365commerceVivaEngageCommunity) to be added and stay engaged in the latest discussions.
This article describes how to add a content delivery network (CDN) to your Microsoft Dynamics 365 Commerce environment.
When you set up an e-commerce environment in Dynamics 365 Commerce, you can configure it to work with your CDN service.
You can enable your custom domain during the provisioning process for your e-commerce environment. Alternatively, you can use a service request to set up your custom domain after the provisioning process is completed. The provisioning process for the e-commerce environment generates a host name that is associated with the environment. This host name has the following format, where <e-commerce-tenant-name> is the name of your environment:
<e-commerce-tenant-name>.commerce.dynamics.com
The host name or endpoint that the provisioning process generates supports a Transport Layer Security/Secure Sockets Layer (TSL/SSL) certificate only for *.commerce.dynamics.com. It doesn't support TSL/SSL for custom domains. Therefore, you must terminate TSL/SSL for custom domains in your CDN and forward traffic from the CDN to the host name or endpoint that Commerce generated.
Additionally, Commerce serves the statics (JavaScript or Cascading Style Sheets [CSS] files) from the endpoint that Commerce generated (*.commerce.dynamics.com). You can cache the statics only if you put the host name or endpoint that Commerce generated behind the CDN.
Set up TSL/SSL
After you provision your Commerce environment with the custom domain that you provide, or after you provide the custom domain for your environment by using a service request, you need to work with the Commerce onboarding team to plan the Domain Name System (DNS) changes.
As was previously mentioned, the generated host name or endpoint supports an SSL certificate only for *.commerce.dynamics.com. It doesn't support SSL for custom domains.
CDN services
You can use any CDN service with a Commerce environment. Here are two examples:
- Microsoft Azure Front Door Service – The Azure CDN solution. For more information about Azure Front Door Service, see Azure Front Door Service Documentation.
- Akamai Dynamic Site Accelerator – For more information, see Dynamic Site Accelerator.
CDN setup
The CDN setup process consists of these general steps:
- Add a frontend host.
- Configure a backend pool.
- Set up rules for routing.
Add a frontend host
You can use any CDN service, but for the example in this article, Azure Front Door Service is used.
For information about how to set up Azure Front Door Service, see Quickstart: Create a Front Door for a highly available global web application.
Configure a backend pool in Azure Front Door Service
To configure a backend pool in Azure Front Door Service, follow these steps:
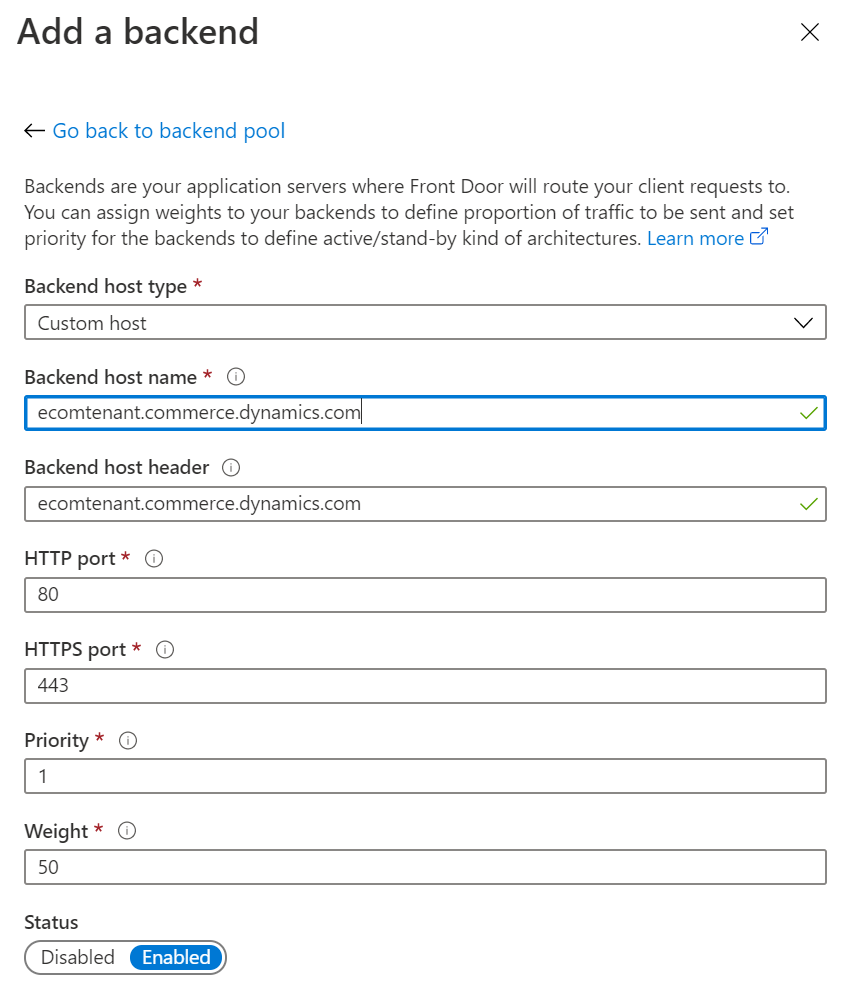
- Add <ecom-tenant-name>.commerce.dynamics.com to a backend pool as a custom host that has a backend host header that matches <ecom-tenant-name>.commerce.dynamics.com.
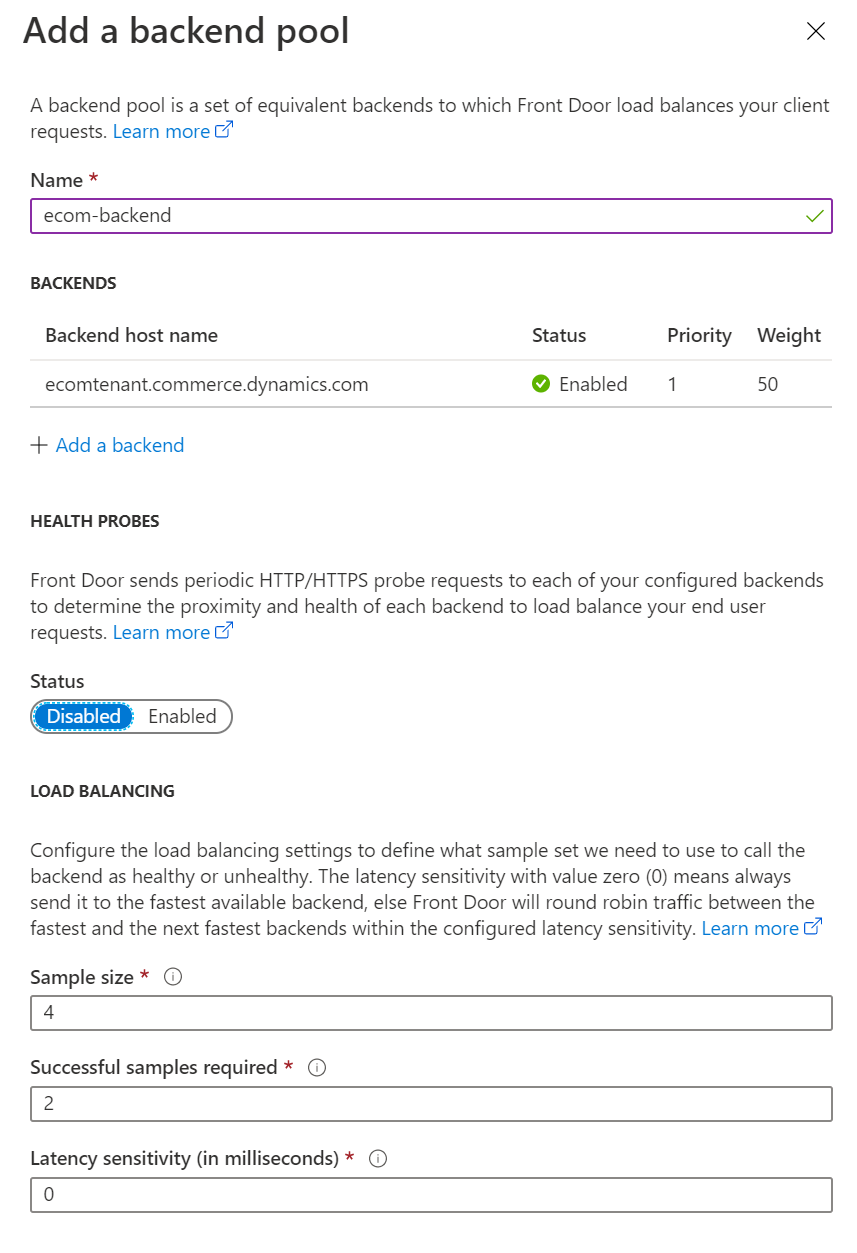
- Under Load balancing, use the default values.
- Disable health checks for the backend pool.
The following illustration shows the Add a backend dialog box in Azure Front Door Service with the backend host name entered.
The following illustration shows the Add a backend pool dialog box in Azure Front Door Service with the default load balancing values.
Note
Be sure to disable Health Probes when setting up your own Azure Front Door service for Commerce.
Set up rules in Azure Front Door Service
To set up a routing rule in Azure Front Door Service, follow these steps:
- Add a routing rule.
- In the Name field, enter default.
- In the Accepted protocol field, select HTTP and HTTPS.
- In the Frontend hosts field, enter dynamics-ecom-tenant-name.azurefd.net.
- Under Patterns to match, in the upper field, enter /*.
- Under Route Details, set the Route type option to Forward.
- In the Backend pool field, select ecom-backend.
- In the Forwarding protocol field group, select the Match request option.
- Set the URL rewrite option to Disabled.
- Set the Caching option to Disabled.
Warning
If the domain that you want to use is already active and live, create a support ticket from the Support tile in Microsoft Dynamics Lifecycle Services to get assistance for your next steps. For more information, see Get support for finance and operations apps or Lifecycle Services (LCS).
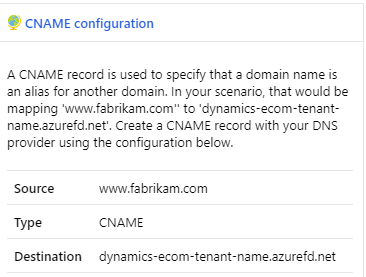
If your domain is new and isn't a preexisting live domain, you can add your custom domain to the configuration for Azure Front Door Service. This change enables web traffic to direct to your site via the Azure Front Door instance. To add the custom domain (for example, www.fabrikam.com), you must configure a Canonical Name (CNAME) for the domain.
The following illustration shows the CNAME configuration dialog box in Azure Front Door Service.
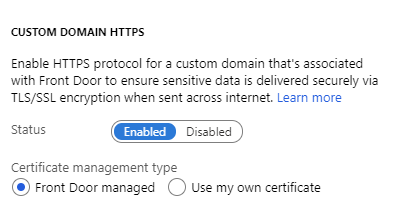
You can use Azure Front Door Service to manage the certificate, or you can use your own certificate for the custom domain.
The following illustration shows the Custom Domain HTTPS dialog box in Azure Front Door Service.
For detailed instructions on adding a custom domain to your Azure Front Door, see Add a custom domain to your Front Door.
Your CDN is now correctly configured so that it can be used with your Commerce site.