Note
Access to this page requires authorization. You can try signing in or changing directories.
Access to this page requires authorization. You can try changing directories.
Note
The Retail Interest Group by Dynamics 365 Commerce has moved from Yammer to Viva Engage. If you don't have access to the new Viva Engage community, fill out this form (https://aka.ms/JoinD365commerceVivaEngageCommunity) to be added and stay engaged in the latest discussions.
This article explains how to create a new product in Microsoft Dynamics 365 Commerce.
You primarily define a product by its product number, name, and description. However, you need to provide other data to fully describe a product or service.
Create a new product
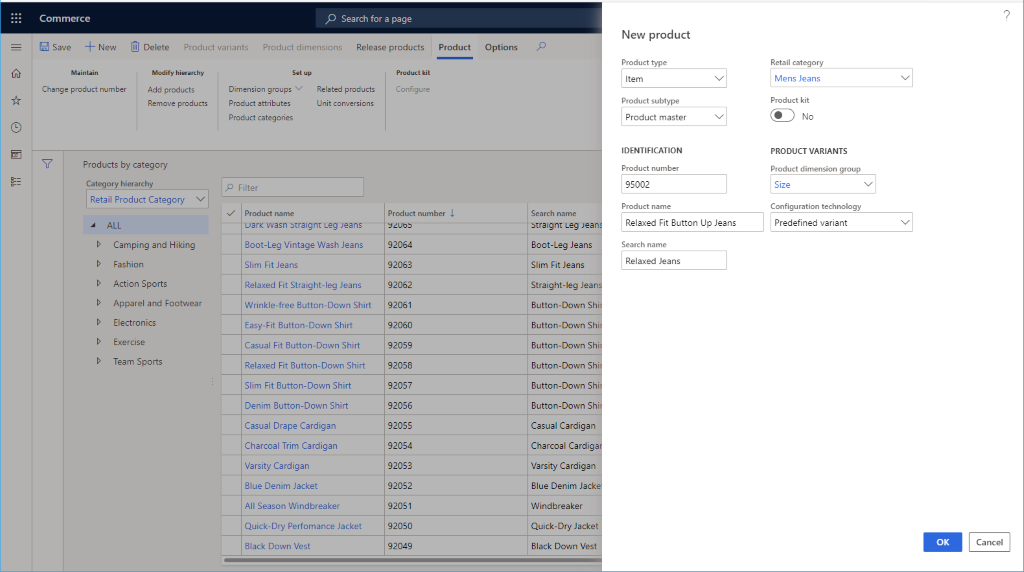
To create a new product, follow these steps:
- In the navigation pane, go to Modules > Retail and commerce > Products and categories > Products by category.
- On the action pane, select New.
- In the Product type drop-down list, select either Item or Service.
- In the Product subtype drop-down list, select either Product (if the product has no variants) or Product master (if the product has variants).
- In the Product number box, enter a product number if one isn't already prepopulated.
- In the Product name box, enter a product name.
- In the Search name box, enter a search name.
- In the Retail category drop-down list, select an appropriate category.
- If the product is a kit, select Yes for Product kit.
- If the product subtype is product master, set the Product dimension group to include the supported variants. Options include Color, Size, Style, and Configuration. You might need to create additional product dimension groups.
- In the Configuration technology drop-down list, select an appropriate option.
- Select OK.
The following image shows an example product being added.
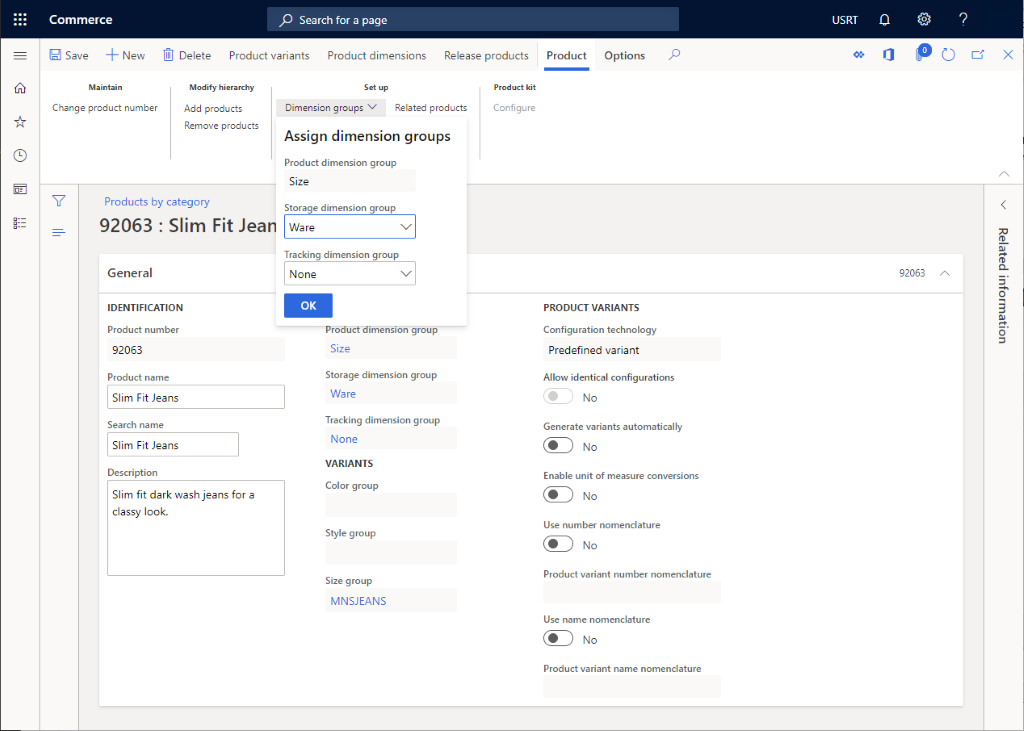
After you add a product, you can set more data for it, such as Product description, Variant groups, Dimension groups, Product attributes, and Related products.
The following image shows a product's additional details.
Create product variants
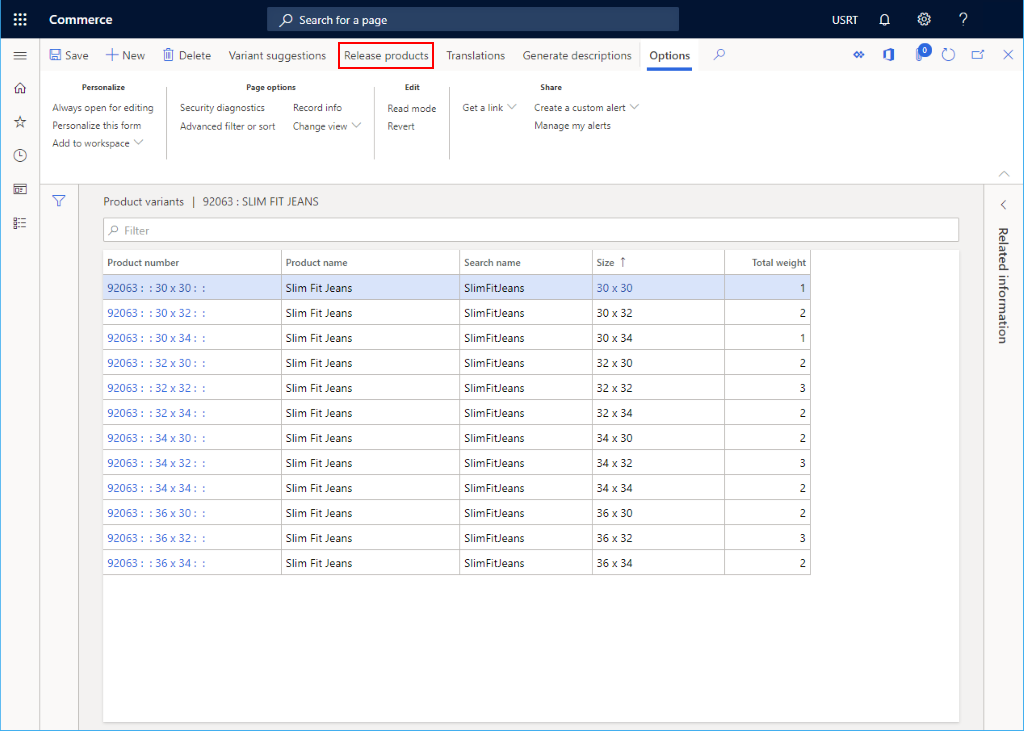
If the product subtype is Product master, you need to create specific variants.
To create product variants, follow these steps:
- Select Product variants on the action pane.
- If variant groups are selected on the action pane, select Variant suggestions.
- Select the variants you want to support for the product.
- Select Create.
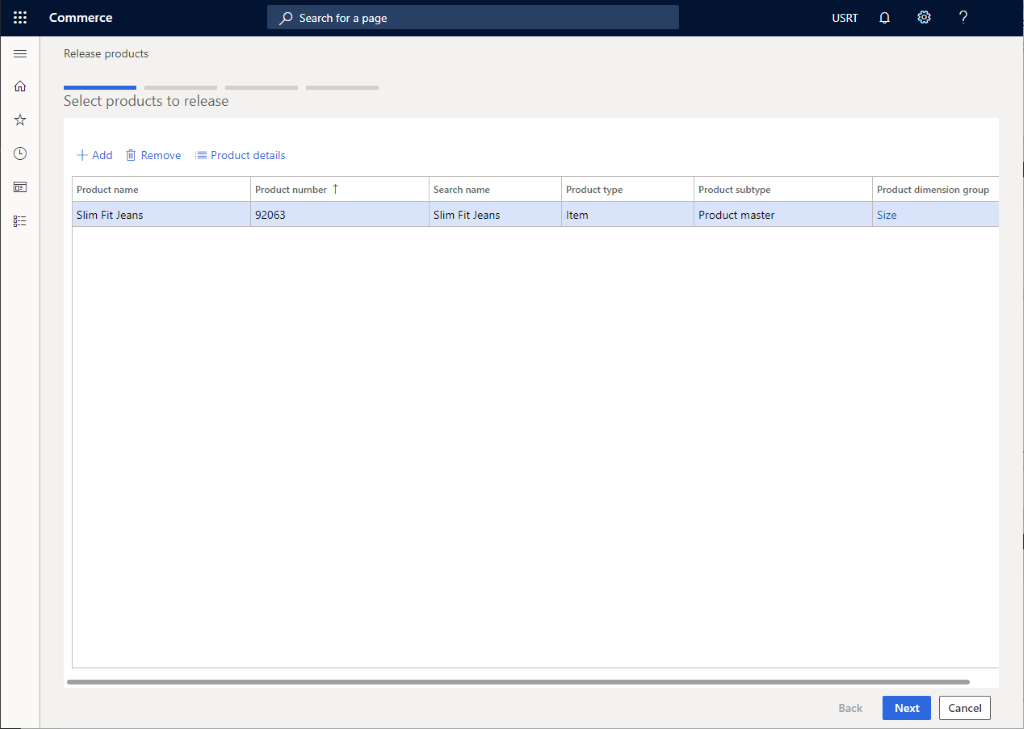
Release a product
To sell a product, first release it to a legal entity.
From the product page, select Release products.
Select the product to release, and then select Next.
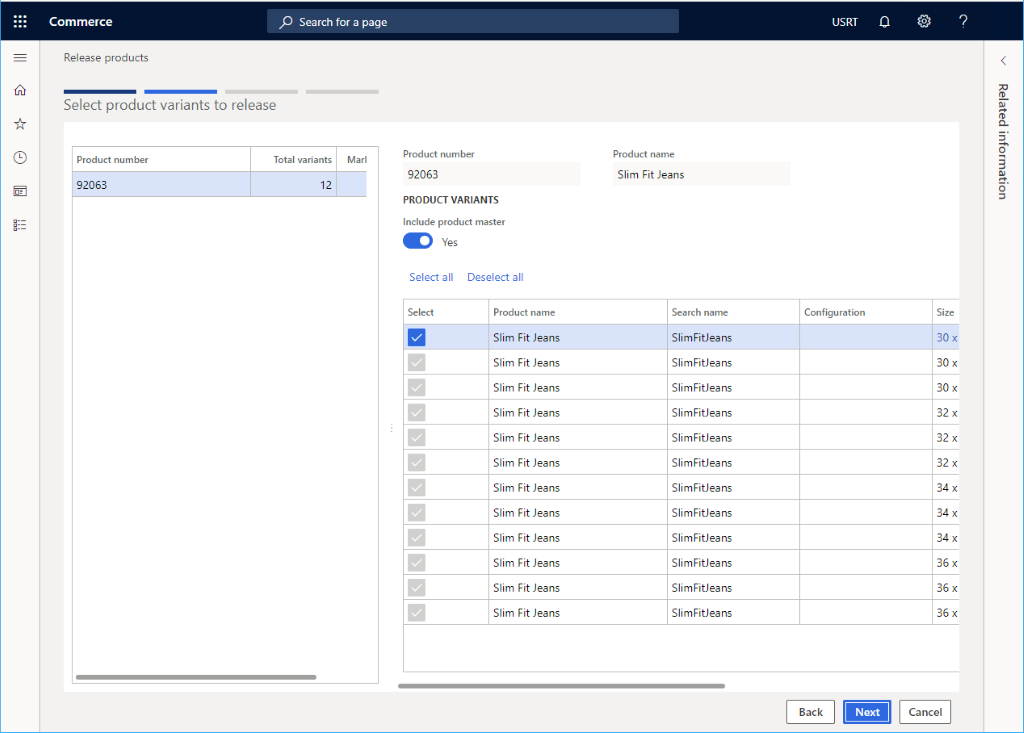
Select the set of product variants to release, and then select Next.
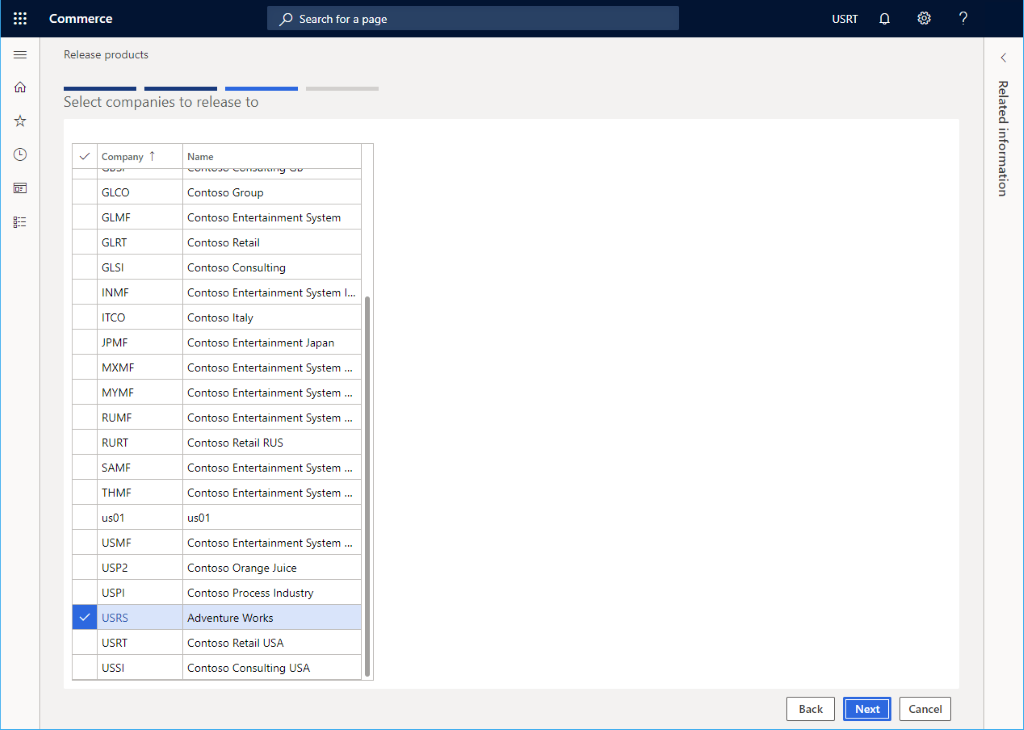
Select the legal entity, and then select Next.
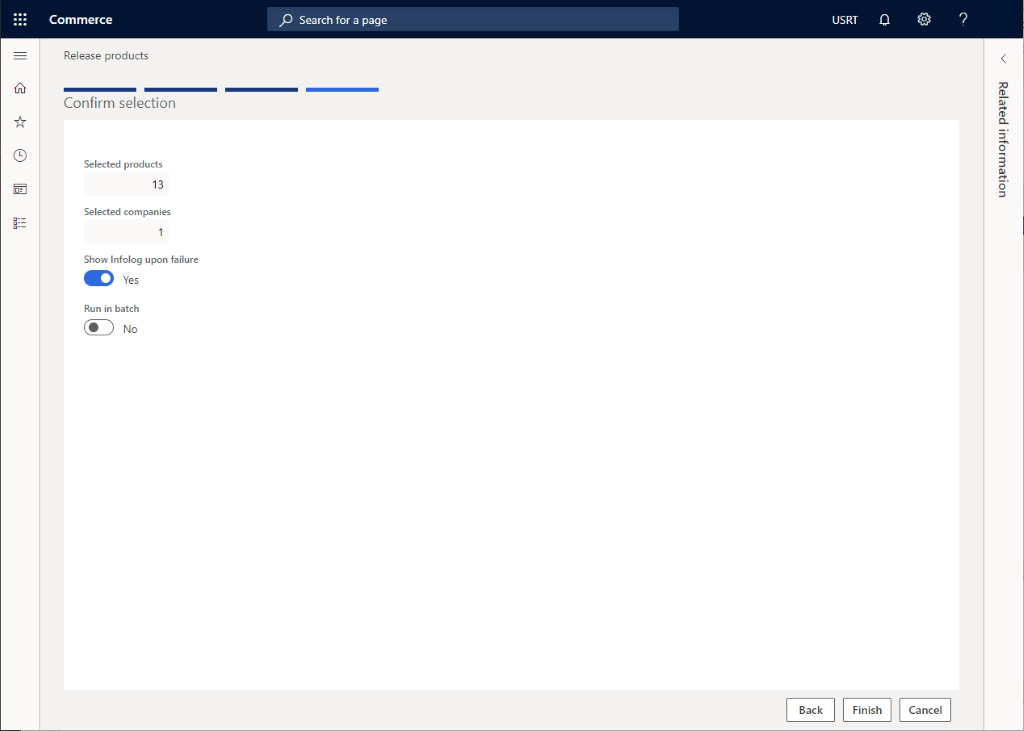
Select Finish.
Configure a released product
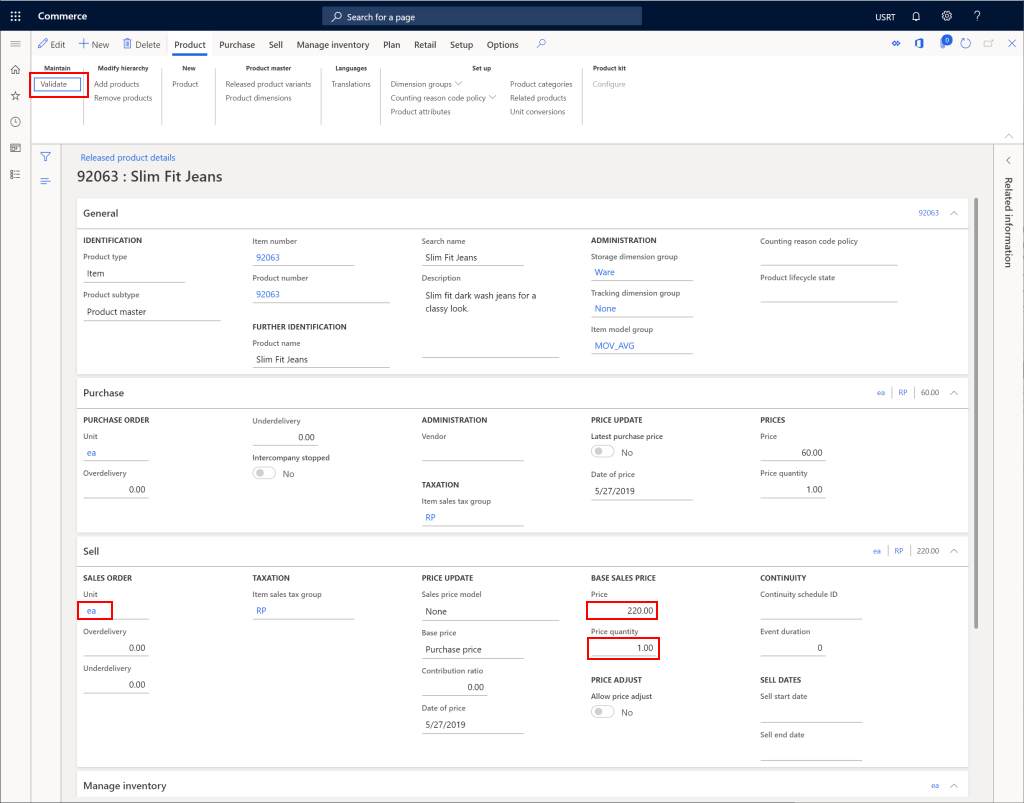
After you release a product, you can configure it further. For example, you can add a price to the product.
- In the navigation pane, go to Modules > Retail and commerce > Products and categories > Released products by category.
- Select the product category node for the product that you released. Then, select the product from the product list.
- On the action pane, select Edit.
- In the Purchase section, configure any required properties, including Unit, Price, and Quantity.
- On the action pane, select Validate to ensure that no errors exist for missing fields.
- On the action pane, select Save.
The following image shows an example configuration for a released product.