Note
Access to this page requires authorization. You can try signing in or changing directories.
Access to this page requires authorization. You can try changing directories.
Note
The Retail Interest Group by Dynamics 365 Commerce has moved from Yammer to Viva Engage. If you don't have access to the new Viva Engage community, fill out this form (https://aka.ms/JoinD365commerceVivaEngageCommunity) to be added and stay engaged in the latest discussions.
This article describes how to embed a credit card receipt from a payment processor directly into a customer's itemized transaction receipt in Microsoft Dynamics 365 Commerce. This capability is available starting with Commerce version 10.0.8.
In Dynamics 365 Retail version 10.0.7 and earlier, you can embed several elements from a customer's credit card receipt into the customer's itemized transaction receipt. However, you can't include the actual receipt that comes from the payment processor. This solution isn't acceptable for all retailers, because the configurable receipt fields in the customer's credit card receipt don't always include all the details that local statutory requirements stipulate.
Key terms
| Term | Description |
|---|---|
| Customer's receipt | The receipt that is generated for a cash-and-carry transaction at the point of sale (POS). |
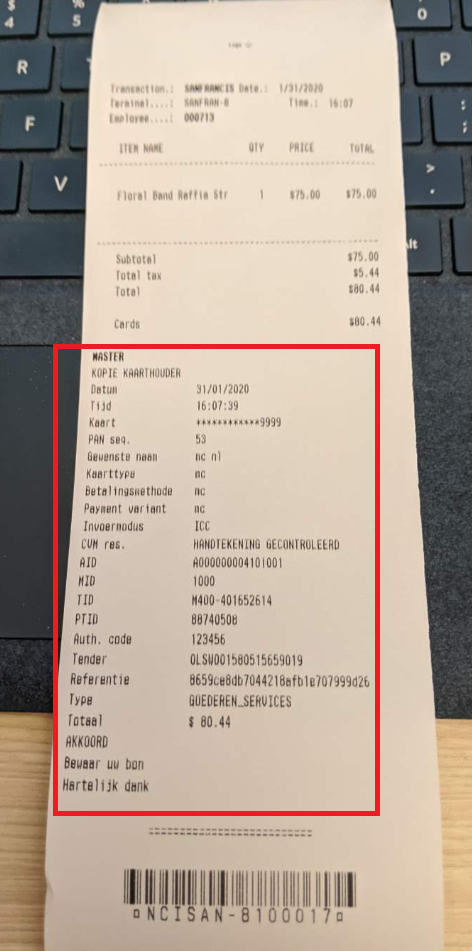
| Customer's credit card receipt | The credit card receipt that is printed as a record of the credit card payment or other electronic payment that is used in a transaction. |
Prerequisites
To embed processor credit card receipts into customer receipts, you need the following items:
- A payment connector that you implement in accordance with the payments software development kit (SDK)
- A POS that has a working printer
Set up receipts
In the POS, search for "receipt formats" to open the Receipt formats page.
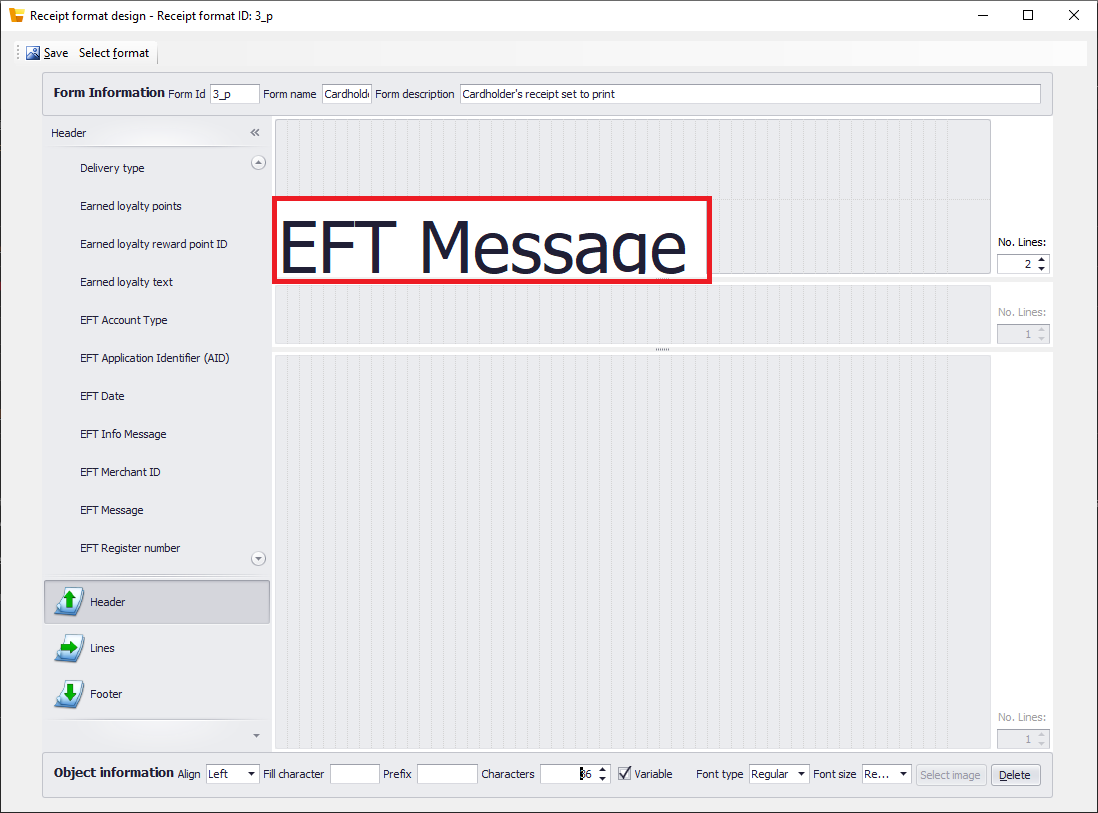
Select the receipt of the Customer's credit card receipt type that you use at the POS. If you're using demo data, select receipt format 3_P, and set the Print Behavior field to Do not print.
Select Designer to open the receipt designer.
Remove all the fields from the receipt format.
To edit a section of the receipt, first select that section at the bottom of the left pane in the receipt designer. Then select the desired receipt variable in the selected section. Finally, to delete the selected variable, use the Alt+D keyboard shortcut.
Select the Header section at the bottom of the left pane, and then drag the EFT Message receipt variable into the header.
Select Save.
While the receipt designer is still open, select Select format in the upper-left corner to open the receipt selector.
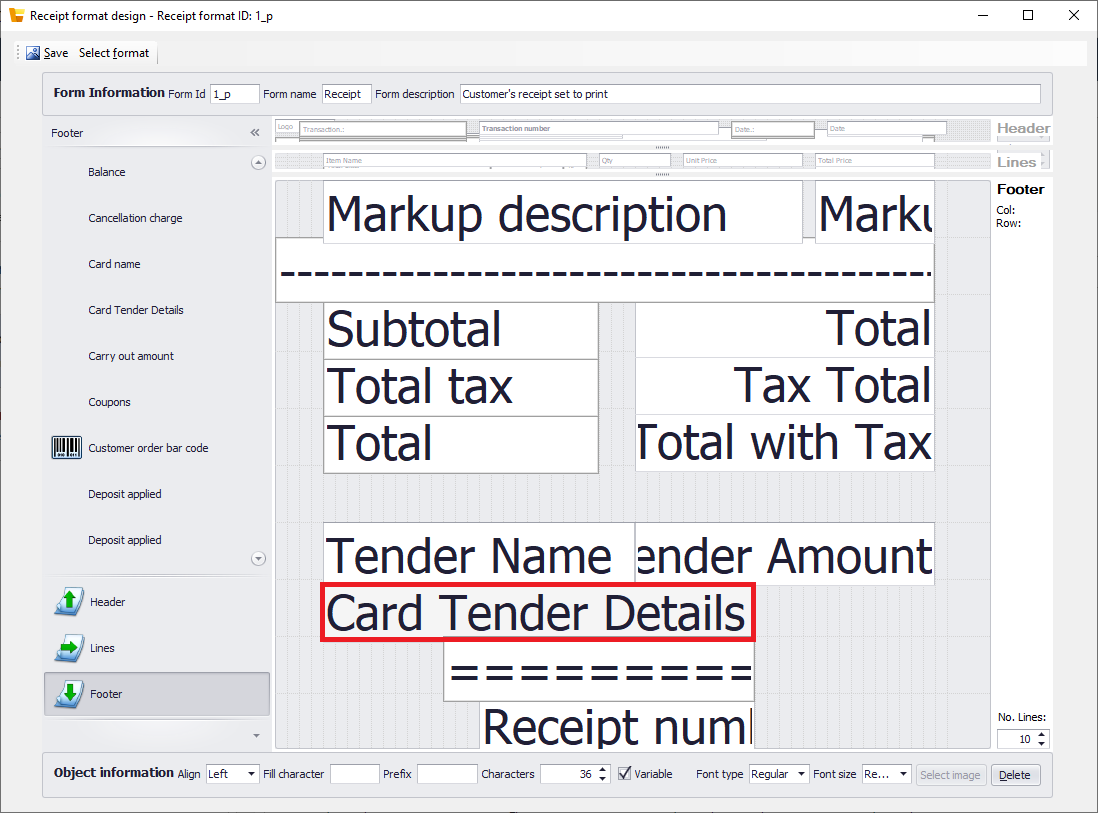
In the receipt selector, select the receipt of the Receipt type that you use at the POS. If you're using demo data, select receipt format 1_p.
In the receipt designer, select the Footer section at the bottom of the left pane, and then drag the Card Tender Details receipt variable into the footer.
Note
If the credit card receipt isn't printed correctly, move the Card Tender Details field to the left side, and increase the field length to at least 55 characters.
Select Save.
Sync the changes to the POS by using the 1090 distribution schedule.
Close the shift in the POS, and then open a new shift.
Perform a credit card transaction to confirm that the processor's credit card receipt is embedded into the customer's receipt.