Note
Access to this page requires authorization. You can try signing in or changing directories.
Access to this page requires authorization. You can try changing directories.
This article describes product comparison modules and how to implement them on Microsoft Dynamics 365 Commerce e-commerce websites.
Note
The product comparison and product comparison button modules are available as of the Dynamics 365 Commerce version 10.0.29 release. Use them for both business-to-consumer (B2C) and business-to-business (B2B) websites.
Product comparison functionality lets shoppers compare product details on a product comparison page to help them make better purchase decisions. Configure this functionality in Commerce site builder by using the product comparison module. On product list pages (PLPs), such as category results, search results, and product collections pages, you can configure a button for product comparison that lets shoppers add products to a comparison tray. Configure this functionality in site builder by using the product comparison button module, which works like the quick view module.
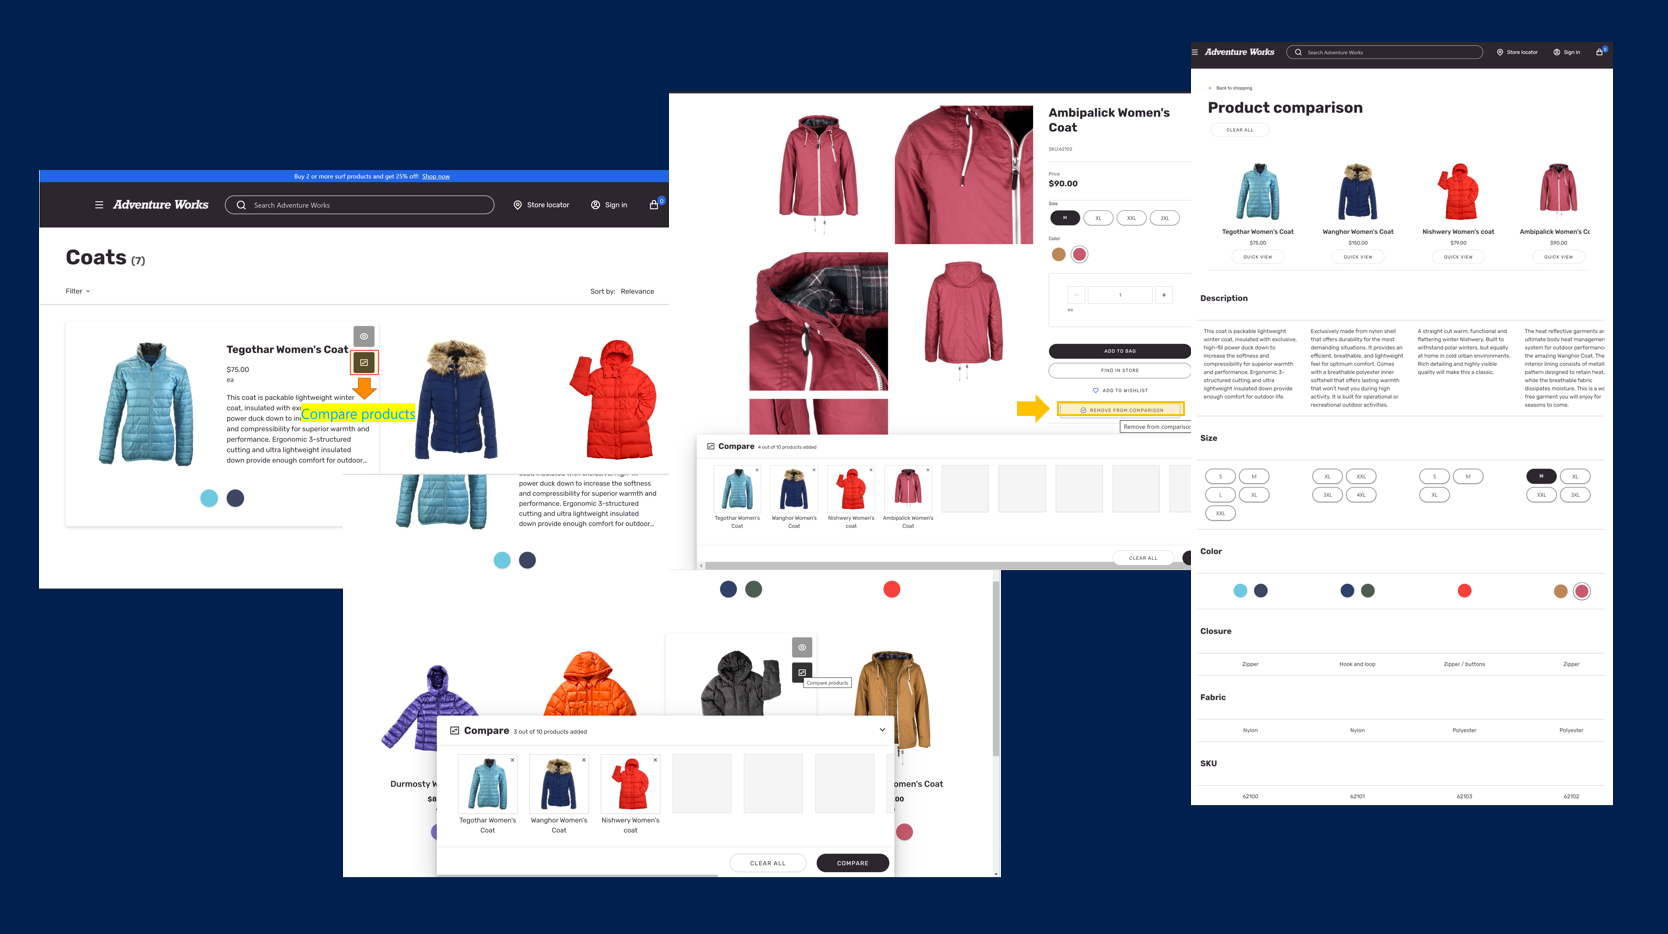
When site users add products for comparison by selecting them on product tiles, a comparison tray appears at the bottom of the page. The comparison tray shows the products that the shopper is currently comparing, together with short previews of the products. Site users can also add products from product details pages (PDPs), and they can add specific product variants to compare with product masters.
After customers add a few products to the comparison tray, they can select Compare to be redirected to a product comparison page. The product comparison page shows product details for each selected product so that customers can compare images, prices, product dimensions (size, style, and color), aggregated ratings information, and other product attributes.
The following illustration shows examples of the compare product button, the remove from comparison button, the comparison tray, and the product comparison page.
Note
- The product comparison page compares a default set of product properties and all attributes that you can view on a PDP for a given product.
- Properties such as the delivery mode, on-hand inventory, and unit of measure can't be viewed on a product comparison page.
- Customers can add products from different categories to the comparison tray, if the products are from the same catalog.
- Product comparison functionality is currently limited to comparing products in an individual catalog. Site users can't do cross-catalog comparisons.
- Ensure that the Render module client side property is cleared for all product comparison modules.
- Ensure that page-level caching is disabled for all pages where the product comparison module is used. These pages include PDPs, PLPs, and product comparison pages. For more information, see Configure page caching.
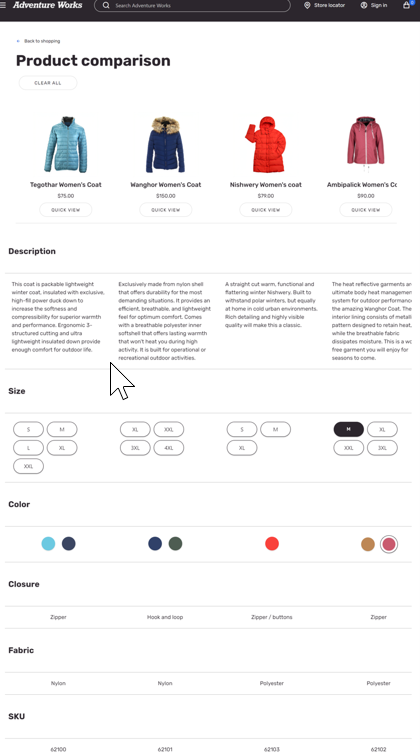
The following illustration shows an example of a product comparison page.
Add the product comparison module to a new product comparison page
You can create a dedicated product comparison page by adding a product comparison module to the body of a page. In addition to enabling customers to compare product details of different products, you can configure the product comparison module to give customers the option to quickly complete their purchase after they compare products. The product comparison module also contains an Empty comparison slot, where you can add a content block module that describes the empty state (for example "Your product comparison is empty").
To add a product comparison module to a new product comparison page, follow these steps:
- Go to Pages, and select New to create a new page.
- In the Create a new page dialog box, under Page name, enter an appropriate page name (for example, Product comparison), and then select Next.
- Under Choose a template, select the appropriate template (for example, the template that your default category page uses), and then select Next.
- Under Choose a layout, select a page layout (for example, Flexible layout), and then select Next.
- Under Review and finish, review the page configuration. If you must edit the page information, select Back. If the page information is correct, select Create page.
- In the Main slot, select the ellipsis (...), and then select Add module.
- In the Select modules dialog box, select the Container module, and then select OK.
- In the Container slot, select the ellipsis (...), and then select Add module.
- In the Select modules dialog box, select the Product comparison module, and then select OK.
- In the Quick view button slot, select the ellipsis (...), and then select Add module.
- In the Select modules dialog box, select the Product quick view module, and then select OK.
- In the properties pane on the right, configure the Product quick view module properties.
- In the Empty comparison slot, select the ellipsis (...), and then select Add module.
- In the Select modules dialog box, select the Content block module, and then select OK.
- In the properties pane on the right, configure the Content block module properties.
- Select Save, and then select Preview to preview the page.
- Select Finish editing to check in the page, and then select Publish to publish it.
The following illustration shows an example of an empty comparison page in site builder.

Add a product comparison button to product tiles on search and category results pages
The product comparison button lets users quickly add a product to the comparison tray when they browse products on a list page. They can add one or more products to the comparison tray from a list page without having to go to a PDP.
The product comparison button is supported by the product collection, search results, and PDP buy box modules.
To add a product comparison button to product tiles on search and category results pages, follow these steps:
- In site builder, go to Pages, and open the category page that you want to add a product comparison button to.
- In the Main slot, select the ellipsis (...), and then select Add module.
- In the Select modules dialog box, select the Search results module, and then select OK.
- In the Product comparison button slot of the Search results module, select the ellipsis (...), and then select Add module.
- In the Select modules dialog box, select the Product comparison button module, and then select OK.
- In the properties pane on the right, configure the Product comparison button module properties.
- Select Save, and then select Preview to preview the page.
- Select Finish editing to check in the page, and then select Publish to publish it.
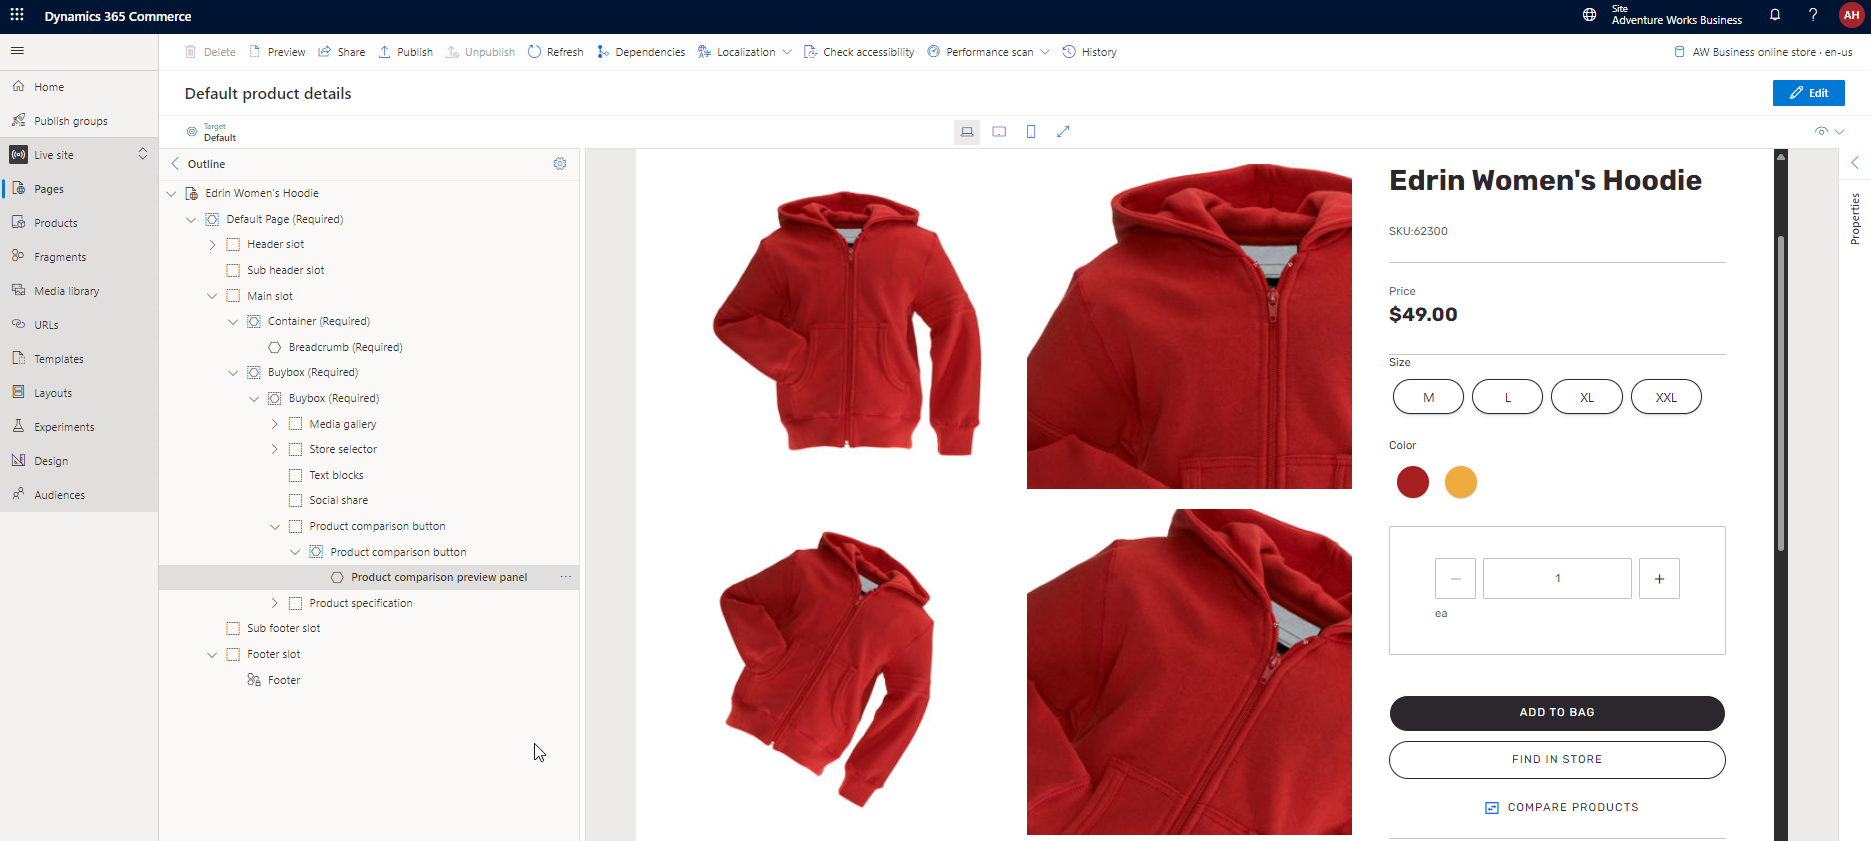
Add a product comparison preview panel module to pages on your website
A product comparison preview panel module provides your customers with the option to review products that they add to or remove from the comparison. The preview panel also provides the options to navigate to the comparison page directly or clear the entire list of products.
Enable the preview panel on all pages that have the Product comparison button enabled. Add the module to the Product comparison button as a slot, or use it as a standalone module that you can configure on any page, even when there's no functionality to add or remove products to compare.
You must manually add the product comparison preview panel module to a page. Add only one preview panel module on a page. If you add multiple instances of the module to a page, the first module is rendered and the rest are ignored.
If you specify a product comparison limit, you can enable gray placeholders on the preview panel that indicate how many more products can be added to the comparison. The gray placeholders are replaced with products as they're added to the comparison. To configure a product comparison limit and enable gray placeholders, in site builder, go to Site settings > Extensions, and make your changes in the Product comparisons section. The configuration applies to all preview panels for all pages.
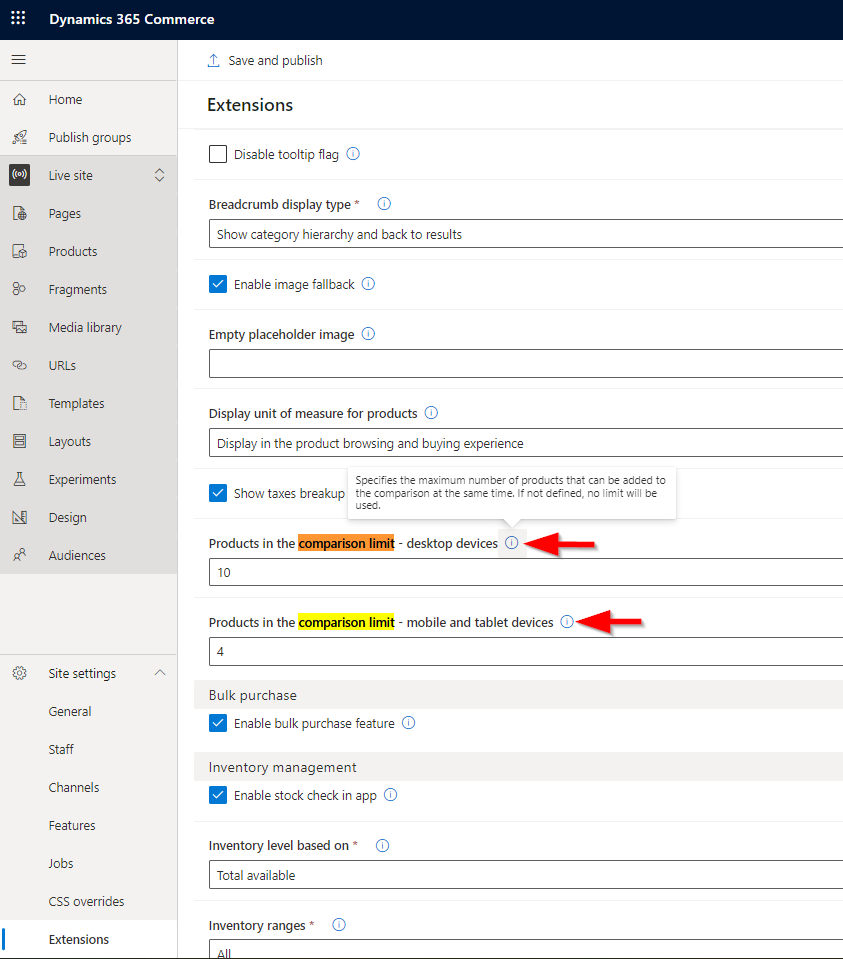
Set the maximum number of products to show in the comparison tray
You can set the maximum number of products to show in the comparison tray by going to Site settings > Extensions in site builder. You can set different maximum limits for desktop and mobile or tablet views. By default, no limit is enforced if you don't set a maximum limit.
Note
For the best browsing experience, set the maximum number of products in the comparison tray to 2 for the mobile viewport and 4 for the desktop viewport. This setting reduces the amount of horizontal scrolling.
To set the maximum number of products in the comparison tray, follow these steps:
- In site builder, go to Site settings > Extensions.
- For the Products in the comparison limit - desktop devices property, enter the maximum number of products that appear in the comparison tray for desktop viewports.
- For the Products in the comparison limit - mobile and tablet devices property, enter the maximum number of products that appear in the comparison tray for mobile and tablet viewports.
- On the command bar, select Save and publish.