Note
Access to this page requires authorization. You can try signing in or changing directories.
Access to this page requires authorization. You can try changing directories.
This article describes how to configure the number sequences that are required for retail statements in Microsoft Dynamics 365 Commerce.
Two types of retail statements are used in Dynamics 365 Commerce:
- Transactional statements are intended to be created and posted at a high frequency. They are used to post all non-financial transactions in the store to Dynamics 365 Commerce headquarters.
- Financial statements are intended to be created and posted one time per business day. They include only closed shifts from the retail stores that have been uploaded to Commerce headquarters through the p-job.
Configure a number sequence for statement posting
After you've completed the setup of a retail store, in Commerce headquarters, you must configure a unique number sequence that will be used for statements during the statement creation process.
To configure a number sequence for statement posting in Commerce headquarters, follow these steps.
Go to Organization administration > Number sequences > Number sequences.
Select New > Number sequence to create a new record.
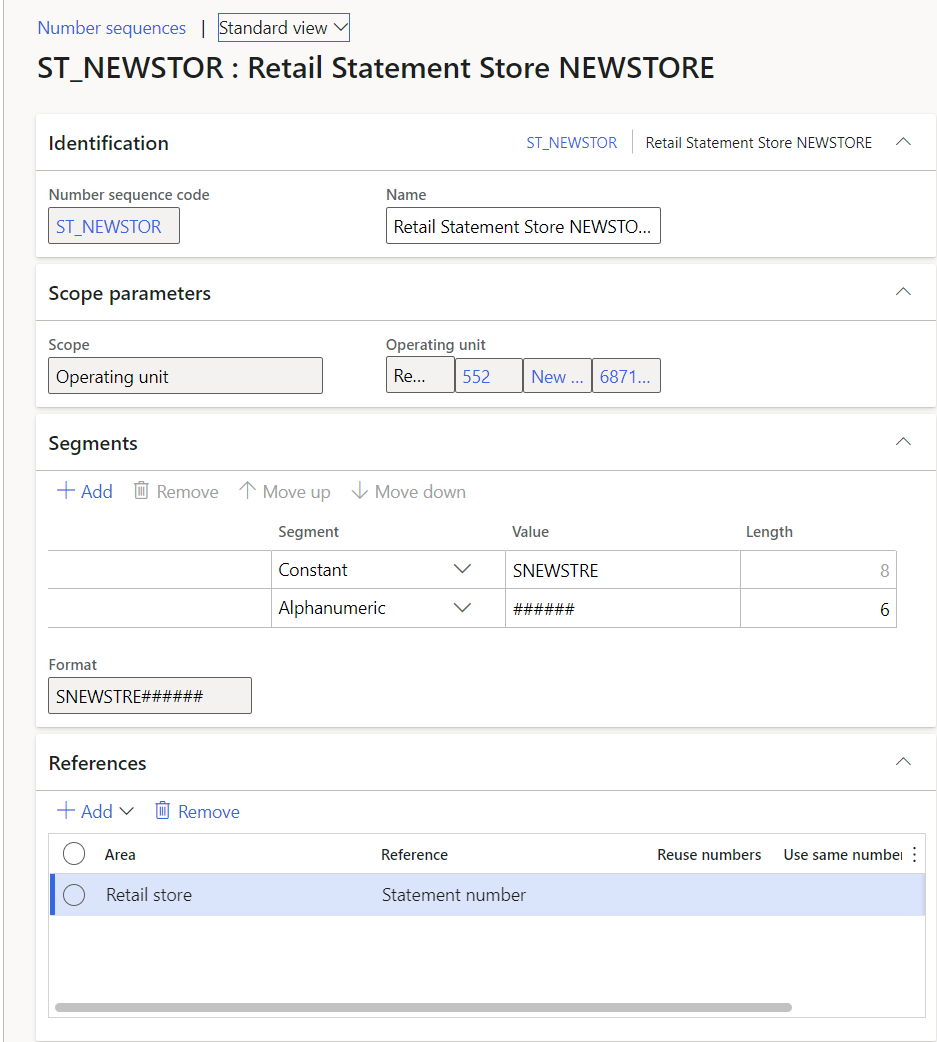
On the Identification FastTab, in the Number sequence code field, enter a number sequence code.
In the Number sequence name field, enter a name.
On the Scope parameters FastTab, in the Scope field, select Operating unit.
In the Operating unit field, select the store that the number sequence will be used for.
On the Segments FastTab, define the segments.
On the References FastTab, set the Area field to Retail store.
Set the Reference field to Statement number, and then select OK.
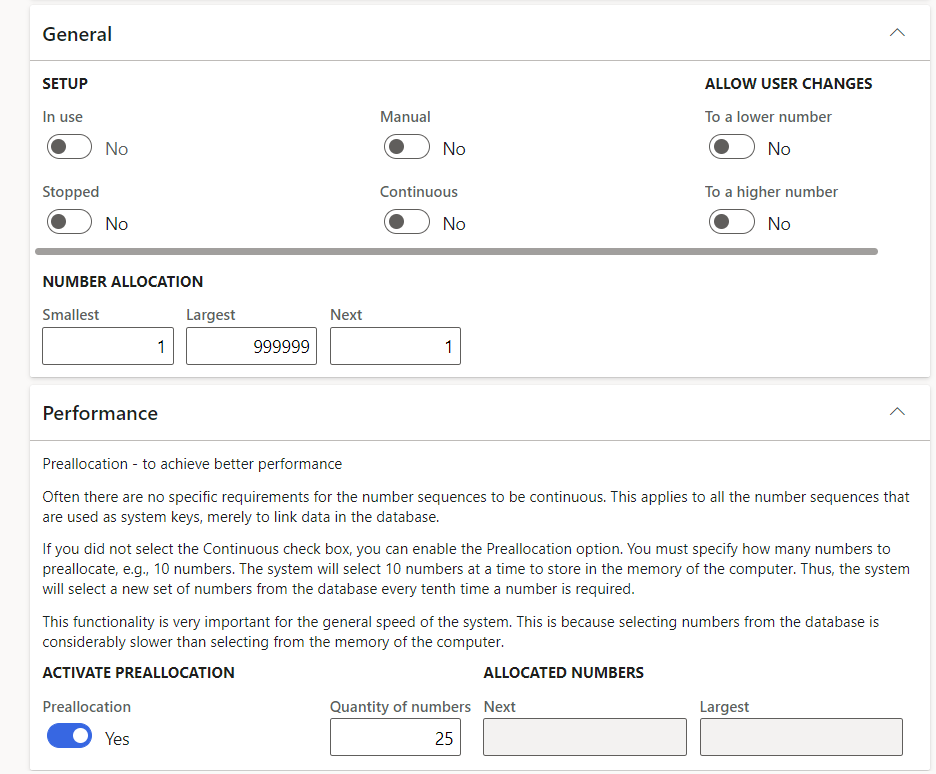
On the General FastTab, in the Number allocation section, update the Smallest and Largest fields so that they match the length of the Alphanumeric segment that you defined on the Segments FastTab.
On the Performance FastTab, we recommend that you set the Preallocation option to Yes and the Quantity of numbers field to 25.
On the Action Pane, select Save to save your changes and close the page.