Use "Send now" to send emails instantly
Important
The "Send now" functionality described in this article, only applies to Customer Insights - Journeys, not outbound marketing.
Tip
If you don’t see this feature in your app, contact your admin who can activate it by going to Settings > Overview > Feature switches, scrolling to the Email editor area, enabling the Send now feature switch, and saving the setting by selecting Save on the top right corner.
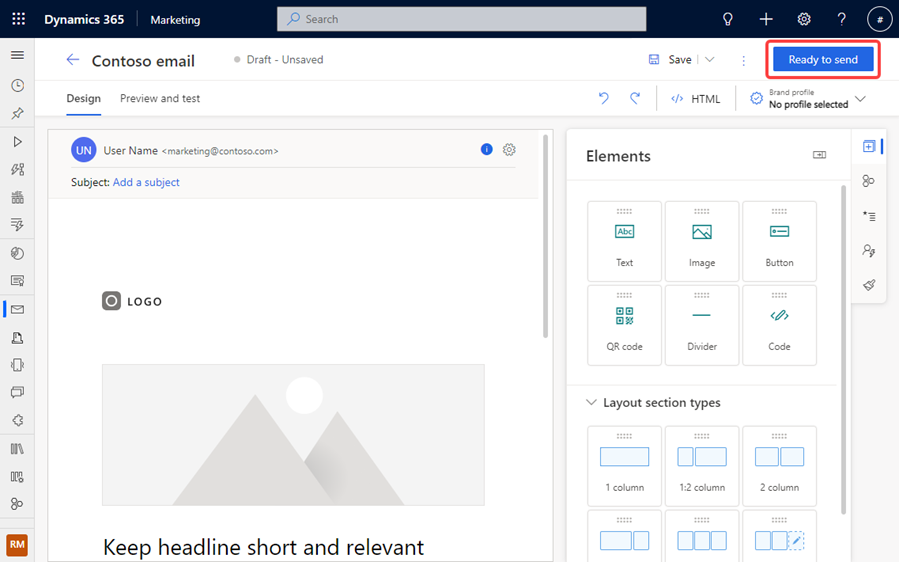
You can now send an email directly from the email editor with guidance through a straightforward flow, provided your email and journey scenarios are noncomplex. From the email editor, select the Ready to Send option. This directs you to select the Send option where you can select a segment, preview its contents, and then send the email. The process builds a simple journey in the background to assist you in sending your email.
Note
If you have a business unit assigned to the email, the journey created in the background doesn't pick up the business unit. The journey created in the background is owned by the user who created the email.
Use send now
To begin your email sending process, follow these steps:
Go to Customer Insights - Journeys > Channels > Emails and select + New in the top toolbar. Select the email template that you want to use. You can either use a predesigned template or create your own custom template by selecting Skip.
From the email editor, mark your email "Ready to Send" by selecting the Ready to Send button.

The button changes to Send now or Schedule for later and can be selected to start the flow. If you select Schedule for later, you're prompted to choose a date to send the email.
Select a segment and select Preview to preview the segment. You can only select published segments.
Note
If you have personalization in your email leveraging Contacts or Leads and you select a segment of the opposite type, you will not be allowed to move forward until the segment type matches the personalization type.
Select Send to send the mail. Your mail is queued up to be sent.
On the confirmation screen, select View Customer Journey to see the journey that was created to send the email. The journey name matches the name of your email. Select View Segment to view the segment to which the email was sent.
Note
If you experience a journey publish failure or email that doesn't send using send now, open the journey in the journey canvas and save a copy. Then edit the journey and the email in the journey canvas and republish.
Known issues
Send now is a simplified workflow that supports limited scenarios. It doesn't support the complete set of validations and capabilities available in the full journey editor canvas. If any of the following scenarios apply to you, you must use the journey canvas to ensure the features in your email are supported properly:
- If there's a business unit assigned to the email, the resulting journey doesn't pick up the business unit assignment.
- The journey created in the background is owned by the user who created the email and the "send now" flow.
- Send now only works with contact and lead segment-based journeys. We'll expand to support Customer Insights profiles in the future.
- Send now doesn't work with outbound marketing segments that you haven't used in real-time journeys. Once you use an outbound marketing segment in a real-time journey successfully, it's been processed and you can use it with the send now functionality.
- Send now doesn't stop users from selecting an email and a segment from two different business units. If you have permissions to more than one business unit, be careful to make sure you select an email and segment from the same business unit.
- When the "New look" switch in Dynamics 365 is enabled, the segment list sometimes doesn't load. The workaround is to turn the "New look" switch off.
- The following personalization variables don't work in send now:
- Triggers: Send now only supports segment-based journeys. It can't access trigger data used in email personalization.
- Complex inline conditions with 1:n relationships such as Contacts > Accounts.
- Dynamic text.
- Lists.