Note
Access to this page requires authorization. You can try signing in or changing directories.
Access to this page requires authorization. You can try changing directories.
For many business people, software-based calendars are an essential organizational tool. When attendees register for an event, they want a way to track not only the date of the event, but what sessions they plan to attend.
The Dynamics 365 Customer Insights - Journeys email editor includes the ability to automatically generate personalized iCalendar files to track events and sessions. Using the email editor, you can add a iCalendar file button that is personalized to the email contact. When the contact selects the button, the iCalendar file downloads, allowing the contact to add it to the calendar of their choice.
How to create a customized iCalendar file
iCalendar files are generated using the new Add to Calendar button option in the email editor.
To create an Add to Calendar button:
In the email designer, add a button.
Go to the button Properties tab. Select Add to Calendar from the Link to dropdown.
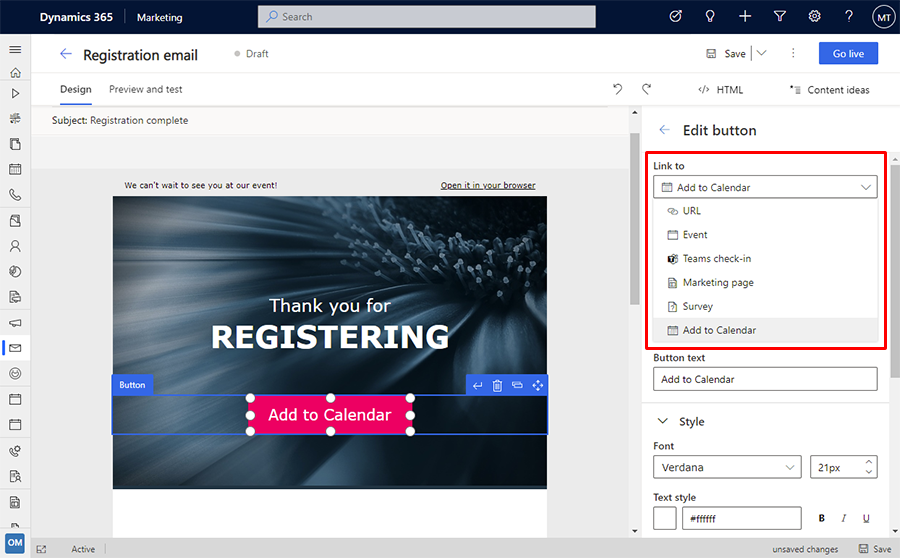
Choose the information you want to include in the iCalendar file using the What should be added to calendar dropdown. The options include:
- Only the event: The iCalendar file will contain only the event the contact has registered for.
- Only the sessions: The file will contain only the event sessions the contact has registered for.
- Both event and associated sessions: The file will contain information for the event and the sessions the contact has registered for.
Select the event you want to link to.
Enter the Button text that appears on the button. You can customize button style in the Style section.
When you send an email with the Add to Calendar button, contacts who registered for the event will receive a personalized link to download their agenda as an iCalendar file.
Note
If a contact didn't register for the event or session you select for the button, they will not see the Add to Calendar button in their email.
Customize the iCalendar file descriptions
Each event or session in the iCalendar file contains a configurable description. To configure the description content:
Go to the Event planning work area and choose the event you want to configure.
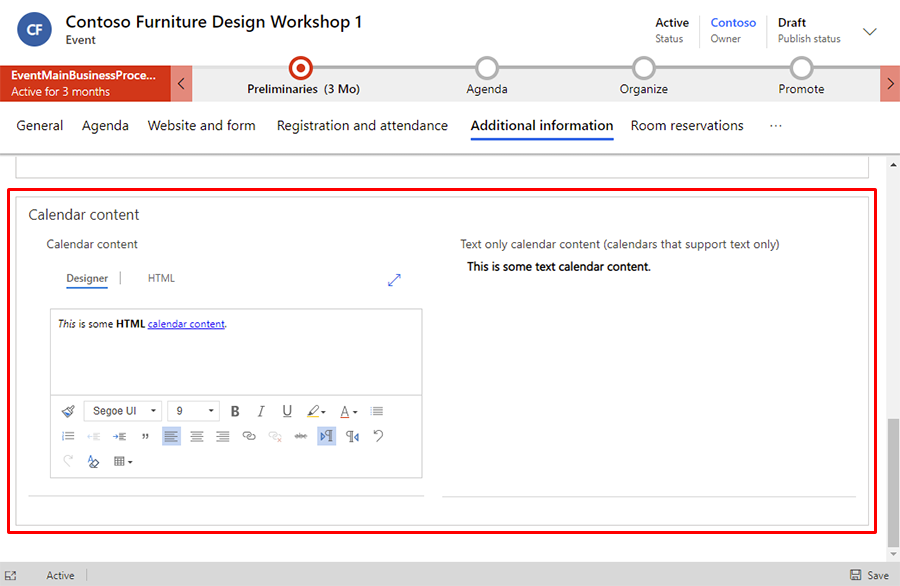
In the event, go to the Additional information tab.
To edit the iCalendar information, go to the Calendar content section. The left content section allows you to edit content for calendars that support HTML descriptions, such as Outlook. The right content section allows you to edit content for calendars that only support text descriptions, such as Gmail and Apple Calendar. Depending on which calendar the iCalendar file is imported into, either the HTML or the text only description will be used.
Streamed event check-ins
For streamed events, a check-in button is automatically added to the iCalendar file description if the calendar content is empty. You can remove the check-in button or add a new button with the link set to the following wildcard: {{msevtmgt_checkin_url}}. The wildcard is converted to a personalized check-in link for the streamed event when the contact downloads the iCalendar file.