One-click unsubscribe support for emails
Important
Google has clarified that senders that include an unsubscribe link in an email message have until June 1, 2024 to implement one-click unsubscribe in all commercial and promotional emails.
For more up-to-date information, refer to Google's one-click unsubscribe FAQ.
Tip
Starting on April 15, 2024, unsubscribe links will expire one year after the link is created and will no longer work.
Email providers and the underlying protocols support giving email recipients the ability to unsubscribe from emails using "one click" without leaving their email application. For example, Google surfaces an Unsubscribe link at the top of their email user interface:

When selected, a dialog asking the user to confirm the unsubscribe is shown. If the Unsubscribe button is selected, the user is unsubscribed from the email without visiting a web page:

To support this capability, the email sender provides information in the email headers telling the email client how to automatically unsubscribe. The receiving email client can use this information to surface to the user easy ways to unsubscribe from unwanted messages.
In October 2023, Google and Yahoo announced that they would require email senders to start supporting one-click unsubscribe and include a visible unsubscribe link in the message body for all promotional emails. Google made it a specific requirement for any sender who sends more than 5,000 emails per day to Gmail accounts to comply with this mandate.
Email providers presently utilize the presence of this information to determine spam and reputation scores for email senders, even if it isn't a strict requirement.
Enable one-click unsubscribe in Customer Insights - Journeys
Customer Insights - Journeys provides support for automatically including the one-click unsubscribe headers in all commercial emails, across outbound marketing and real-time journeys, without changing any existing email or journey.
To enable one-click unsubscribe:
- Go to Settings > Other settings > Feature switches.
- Set the One-click unsubscribe toggle to On.
- Select Save in the upper right corner of the page.
Important
To utilize the one-click unsubscribe feature, you need to upgrade to the December 2023 release or a later version.
It can take up to 30 minutes for the feature switch to take effect in the product. Any email that's sent after the feature is effective will automatically include the headers required to support one-click unsubscribe.
General functionality
When the one-click unsubscribe feature is enabled, the product automatically includes two additional headers in the email:
- List-Unsubscribe
- List-Unsubscribe-Post
These headers follow the guidance provided in the IETF RFC for one-click unsubscribe and enable email clients to surface easy unsubscribe options to users.
How does one-click unsubscribe work?
The concepts of consent management differ between real-time journeys and outbound marketing areas of the product, resulting in different actions being performed in the system for one-click unsubscribe. Let’s look at how one-click unsubscribe is handled for real-time journeys and outbound marketing.
One-click unsubscribe in real-time journeys
Note
Real-time journeys have a multi-brand consent feature that you must enable before you can use the one-click unsubscribe feature. For outbound marketing, the multi-brand consent feature is irrelevant and doesn't affect anything.
In real-time journeys, consent is collected, managed, and enforced at a contact point level (that is, an email address, phone number or a custom channel address). Each email can be sent to only one purpose and one (optional) topic. Any commercial email, sent from real-time journeys, will include the one-click unsubscribe headers.
If the email only has a commercial purpose selected, then once the recipient selects the one-click unsubscribe link in their email client, the app marks them as opted-out for the specific purpose. This ensures that any future emails for the same purpose aren't sent to that user.
If the email is being sent for a specific topic, then once the recipient selects the one-click unsubscribe link in their email client, the app marks them as opted-out for the specific topic only. This ensures that any future emails for the same topic aren't be sent to that user.
Any emails to the topic’s parent purpose remains unblocked, ensuring that other email messages with just the purpose selected or another topic, from underneath the same purpose, are still sent to that user.
Commercial emails using an external link type of compliance profile also automatically include the one-click unsubscribe headers. When the recipient selects the one-click unsubscribe link, they're opted out of the purpose or topic for which the email message was sent (as described above).
If a subscription center based compliance profile is used in the email that is sent through Customer Insights - Journeys and the recipient selects the one-click unsubscribe link, then there are two actions taken:
- The recipient’s email address is set to opted-out for the purpose or the topic for which the email was sent.
- The Bulk Email attribute of the recipient’s contact record is set to Do Not Allow (that is, future commercial emails won't be sent to this contact).
How to identify if a contact point consent record was updated because of a one-click unsubscribe action performed by the recipient
When contact point consent (CPC) records are updated due to the recipient selecting the one-click unsubscribe link in their email client, the system indicates the source of the update and the reason with the following values:
- Source: “Email - list-unsubscribe”
- Reason: “Opt-out - One-click unsubscribe”
Outbound marketing
If the user opens a commercial email sent from an outbound marketing journey and selects the one-click unsubscribe link presented to them in the email client, then their contact record’s Bulk Email field is set to Do Not Allow (that is, future commercial emails won't be sent to this contact).
Important
If you maintain a consent data store outside of Customer Insights – Journeys, you'll also need to consider how to synchronize consent changes made from one-click unsubscribe to your external systems.
Important
If you use outbound marketing journeys and manage consent separately for multiple lines of business, you may need to update your implementation to properly respond to one-click unsubscribe requests. Read the next section to understand how you can use a custom handler to manage this process according to your business needs.
In outbound marketing journeys, one-click unsubscribe sets a contact’s Bulk Email field to Do Not Allow to prevent sending any commercial emails to the contact in the future. One-click unsubscribe for outbound marketing doesn't update subscription lists or custom consent fields. Additional work may be required to handle subscription lists or custom content fields.
Creating a custom workflow to manage the one-click unsubscribe process
Outbound marketing users that manage consent for different brands separately and want to update different properties of the contact (instead of the Bulk Email property) can use the steps below to create and register a custom workflow to manage this process themselves.
Open the Settings menu
 at the top of the page and select Advanced settings.
The advanced-settings area opens in a new browser tab. Note that this area uses a horizontal navigator at the top of the page instead of a side navigator. Navigate to Settings > Process center > Processes.
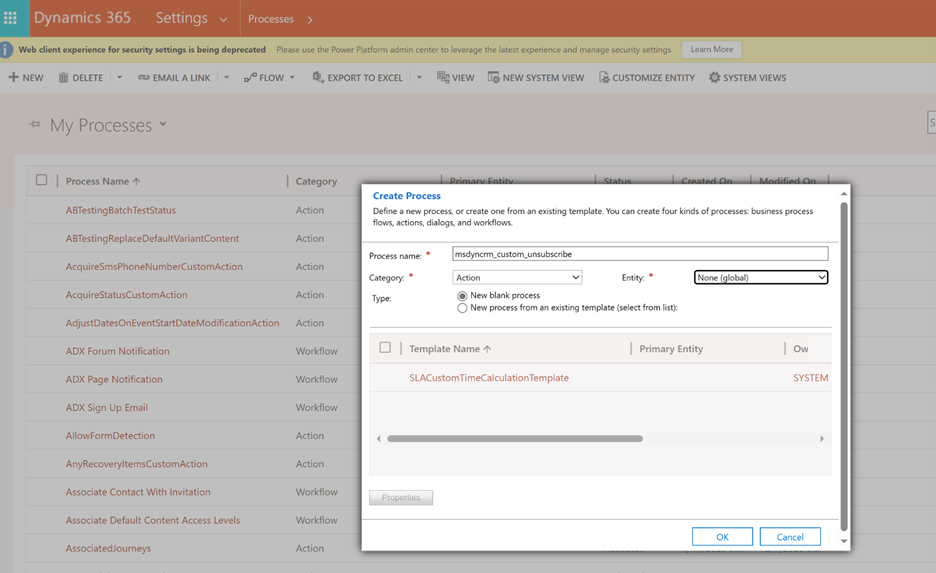
To create a process for custom unsubscribe, select the +New icon. Add a Process name. For Category, select Action and for Entity, select None (global).
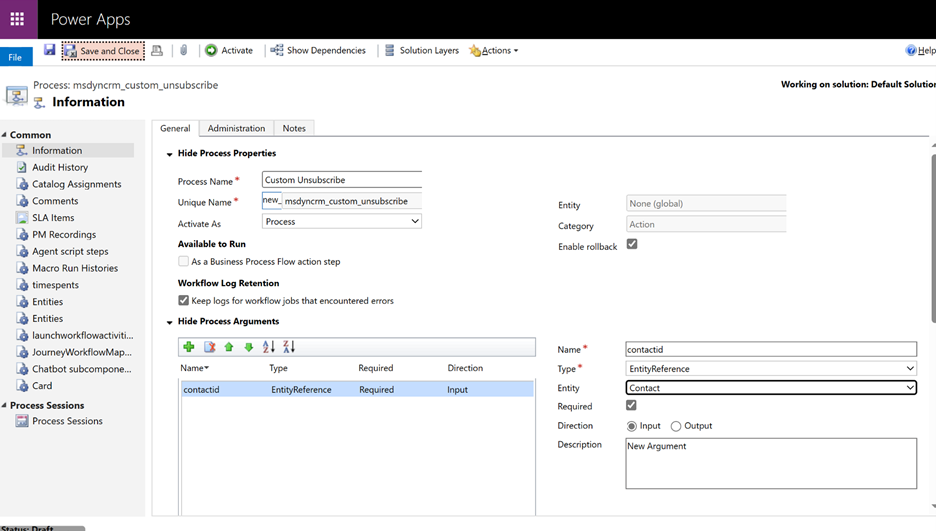
A new window opens to add process details. Create a mandatory input parameter name contactid. Make sure it's of the EntityReference type and points to the Contact entity.
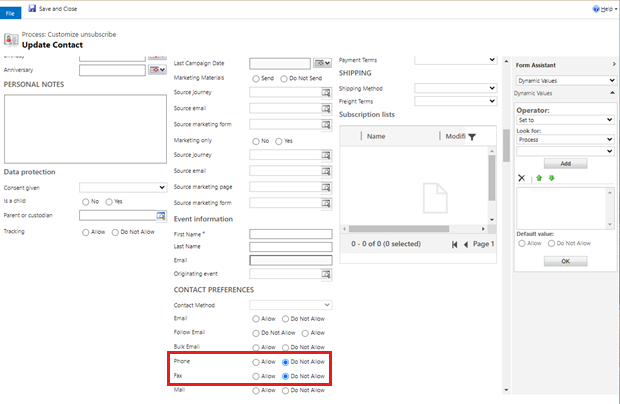
Select the Add Step dropdown at the bottom of the window and select Update record. Enter a description for the changes that should happen to contact on unsubscribe, then select Set properties. A new window opens where you can set the Contact preferences that change when a customer uses the one-click unsubscribe button. For example, in the image below, Phone and Fax are set to Do not allow on one-click unsubscribe.
Select Save and close. Then, on the main process window, select Save and then select Activate in the top toolbar to start the process.
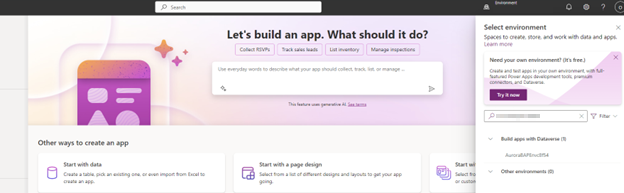
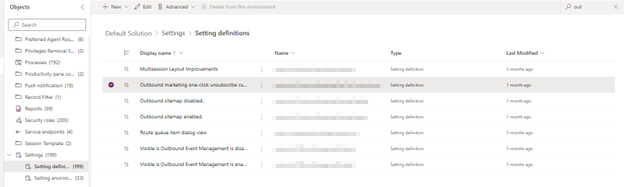
Go to the maker portal and select the applicable environment.
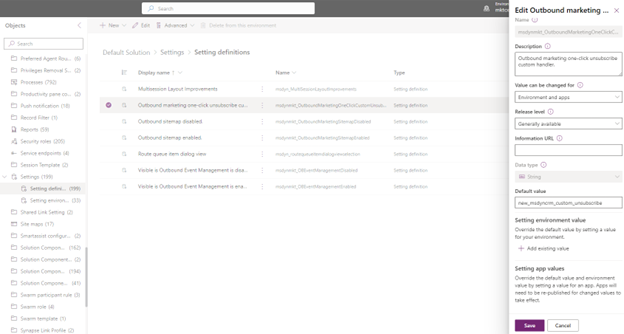
Select the Setting definition entity and search for Outbound marketing one-click unsubscribe.
Edit this value and make sure that it's pointing to the unique name of your custom workflow that you created earlier in Step 2. For example, in this case the name of the workflow is new_msdyncrm_custom_unsubscribe. Save the changes.
Test that your handler is executed when the one-click unsubscribe action is performed.


Frequently asked questions
What types of emails does the system include one-click unsubscribe headers on?
The one-click unsubscribe headers are included in emails that have a message designation of commercial (if they're sent from an outbound marketing journey) or the purpose type of commercial (if they're sent from a real-time journey).
Transactional emails don't include one-click unsubscribe headers.
What happens if the contact to which the email was sent is deleted and the recipient selects the one-click unsubscribe link?
For emails sent using outbound marketing, the system does nothing, as it would be unable to find the contact record.
For emails sent using real-time journeys, the system opts the recipient’s email address out of the purpose or topic for which the email was sent.
What happens if an email is updated after it's sent and is now associated to a new purpose or topic. If the recipient selects the one-click unsubscribe link, what action will the system take?
The recipient’s email address would be opted out of the purpose or topic that was associated to the email when it was sent.
How would the one-click unsubscribe feature work if the email is set up with an external link type of compliance profile? Would the customer be required to add POST support to their external preference center?
No. For all the compliance profile types, the product is designed to include a system generated one-click unsubscribe URL that is designed to handle the POST requests. You don't need to make any modifications to your own preference centers currently.
In the case of outbound marketing emails that are sent to a subscription list, how does the system manage one-click unsubscribe? Does clicking the unsubscribe link remove the recipient from the subscription list?
No. For any outbound marketing journey, only the Bulk Email field on the recipient’s contact record is set to Do Not Allow.
I've turned on the feature switch. Do I need to do anything else to enable one-click unsubscribe in my emails?
No.
Would one-click unsubscribe apply to emails that have already been sent out to my customers and are in their inbox?
No. We can't retroactively apply the one-click headers to emails that are already sent to your customers.
Why is Gmail not showing the one-click unsubscribe link even though I have the feature switch turned on? How would I know that the functionality is working as expected?
Gmail considers several factors before surfacing the one-click unsubscribe link in the email client, even when the one-click unsubscribe headers are present in the email. Here's a community thread from Google where this has been discussed: List-Unsubscribe header not providing the option to unsubscribe.
If you've turned on the feature switch, all the future emails sent from the system includes the one-click unsubscribe headers. As long as the email contains the headers as per the specification, you can be rest assured that you're complying with Google’s guidelines. To verify this, you can download the message or select “Show Original” in the menu item of the message to verify that the headers are present.