Note
Access to this page requires authorization. You can try signing in or changing directories.
Access to this page requires authorization. You can try changing directories.
Tip
If you’d like to try Dynamics 365 Customer Service for free, you can sign up for a 30-day trial.
Note
We recommend that you enable and use unified routing for automatically routing records in Customer Service. Learn more in Overview of unified routing.
Use routing rules in Customer Service to route cases to the right customer service representatives (service representatives or representatives) at the right time without any manual intervention. You can also use routing rules to route cases that are escalated to specific queues.
Add routing rulesets site map for custom apps
In custom apps, you might not have routing rulesets in your site map. To add routing rulesets to the site map, follow these steps:
Sign in to https://
<org>.dynamics.com/apps, and go to App Designer.Select the More Options ellipses (...) on your custom app, and then select OPEN IN APP DESIGNER. The App Designer page appears.
Select the pencil icon beside Site Map. The Customer Service Hub page appears.
Select the area in which you want to add the routing ruleset entity, such as Service Management, select Add, and then select Subarea. The SUB AREA section appears in the right pane.
On the Properties tab, in General section, do the following:
Type: Select Entity.
Entity: Select Routing Rule Sets.
Save and publish the site map.
The site map is created with the routing ruleset. Go to your custom app to locate routing rulesets in the site map.
Learn more in Create a site map for an app using the site map designer.
Create a routing ruleset
You can create routing rulesets in Customer Service to automatically route cases. This capability is also available in Dynamics 365 Customer Engagement (on-premises) 9.1. Learn more in New features in Dynamics 365 Customer Engagement (on-premises).
Prerequisites
Review the following prerequisites before creating a routing ruleset:
Verify that you have the Customer Service Manager, System Administrator, System Customizer security role, or equivalent permissions.
Check your security role
Follow the steps in View your user profile.
Don’t have the correct permissions? Contact your system administrator.
Create routing rulesets to route cases
When creating routing rulesets, you can add multiple rule items and arrange them in the required order. The rule items are evaluated in the order of their definition. Rule items are evaluated from top to bottom. If a rule item is evaluated as true, the case gets routed to the destination service representative and skips further evaluation. If a rule item is evaluated as false, further rule items are evaluated.
In the site map of Copilot Service admin center, select Routing. The Routing page appears.
Select Manage for Basic routing rule sets.
Select New on the command bar.
On the General tab, in Routing Rule Set Information, enter a Name and Description for the routing ruleset.
Select Save. The routing ruleset is saved, and the Rule Items section is displayed.
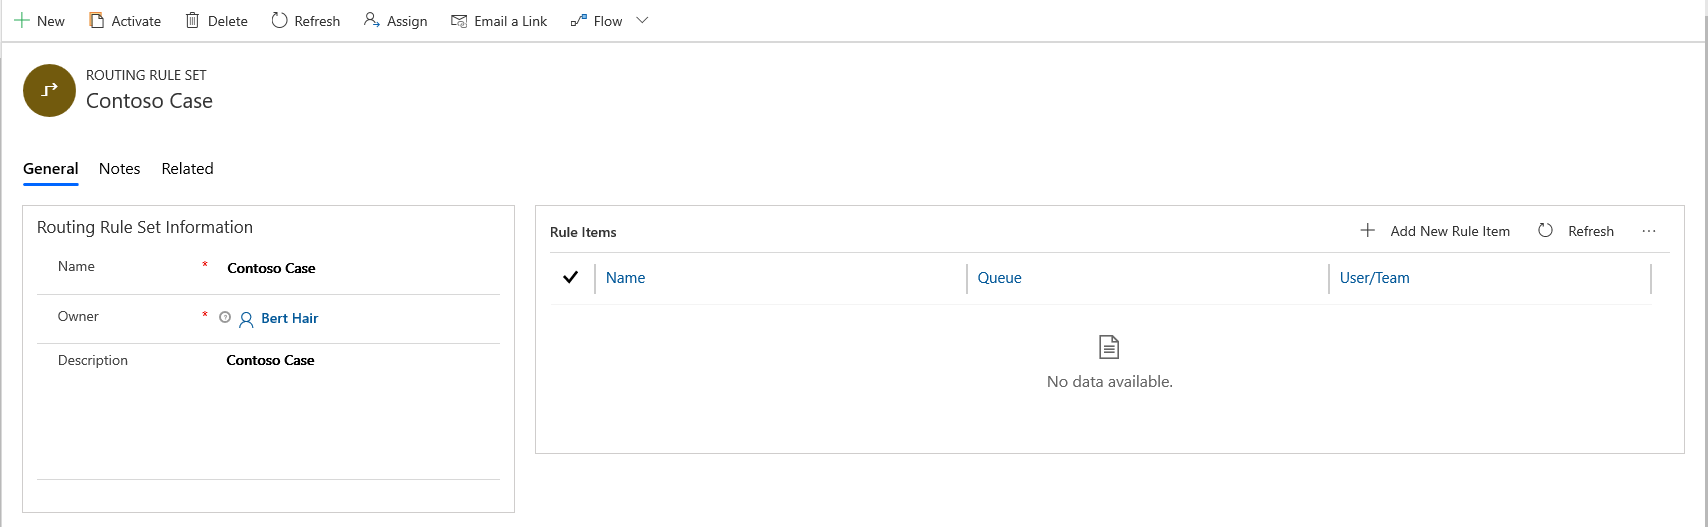
In the Rule Items section, select New Rule Item. The New Rule Item dialog box appears, in which you can specify conditions that are evaluated for routing cases to a queue, a service representative, or a team.
a. On the General tab, in Rule Item Information, enter a Name and Description.
b. In Rule Criteria, you can specify the conditions in one or a combination of the following to be evaluated for routing cases:
Add Row: Select … to group multiple rows of conditions into one group.
Add Group: Select … to ungroup a group of conditions.
Add related entity: Select to add a condition for a specific entity.
Note
The following limitations are applicable when you define a rule criteria in apps based on Unified Interface:
- You can’t select a time value for the Date and Time data type. If you try to edit an existing rule item that was created in the web client, the time will be set to 00:00.
- Only one level of the related entity hierarchy is supported though the application lets you select nested related entities.
- The related entity inside a group of the and/or clause is not supported.
- By design, the attribute with "Multi Select Option Set" data type is not supported.
- The "in" and "not in" operators for the Single Line of Text and Multiple Lines of Text data types and the "not-on" operator for the Date data type are not supported.
- For the lookups data type, only the "equal", "not equal", "null", and "not null" operators are supported.
- In the Add related entity list, the "One to Many" and "Many to Many" options are not supported even though the application lets you select them.
- If you use the same related entity more than once in the rule conditions, though the rule will be evaluated at runtime, you can't edit the rule in the app and an error message will be displayed.
c. In Action > Route to, select queue or user/team.
For example, all cases about printer issues from customers should be routed to a representative named Bert Heir, who is the subject matter expert in the team. The rule item for the condition can be configured as shown in the screenshot.

d. Select Save & Close to save and close the rule item.
In the Routing Rule Set record, select Activate. The ruleset is applied to cases that match the conditions in the rule.
Note
- When unified routing is not enabled, one routing ruleset only can be active at a time. If you try to activate a rule when another rule is active, it will deactivate the currently active rule. You can activate or deactivate the rules that you own.
- If you want to edit an active routing ruleset, you must deactivate it. To successfully import a solution that includes an active routing ruleset into an organization where a rule exists with the same ID, deactivate the rule in the organization.
Apply a routing ruleset
You can apply the routing rule when creating a case using the Save & Route button. Learn more in Create a case.
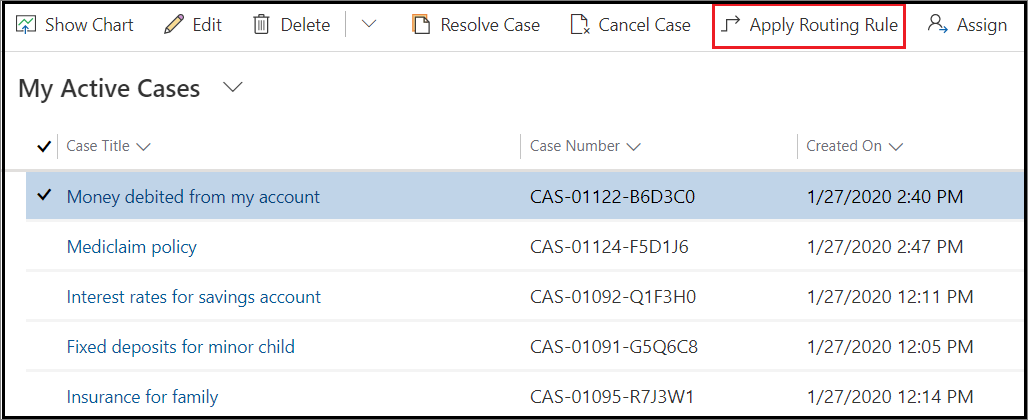
Perform the following steps to manually apply the rule to any existing or manually created cases:
- In the Customer Service Hub, go to the list of cases in the My Active Cases view.
- Select the cases that you want to route using this rule, and on the command bar, select Apply Routing Rule.
Note
- If you’re importing bulk records, and don’t want the routing rules to be applied to the cases that you’re importing, add a column Route Case to the spreadsheet used for importing the records, and add the value No for all the cases that you don’t want to route.
- Cases can be created and routed programmatically. If you want to override this behavior, set the value for the RouteCase attribute to "No".
Things to consider
Routing rules are solution-aware tables. You can export routing rules from one environment to another by using the solution import export tool. However, rules are mapped to a queue, user, or team that's not solution-aware data. Therefore, after exporting the data, you’ll need to edit mappings of each rule item to correspond to the queue, user, or team in the target environment.
Before an import or upgrade of the solution, deactivate the routing rule and remove the active layer on the routing rule. Activate the routing rule after the solution is successfully imported into the target environment or upgraded.
Don't activate the workflow linked to the routing rule directly using Advanced Find. When you activate the routing rule, the workflow is activated.