Enable tables for queues in unified routing
Any record that you want to enable for routing needs to be enabled for queues.
Enable a table for queues
In Power Apps, select the environment that contains your solution.
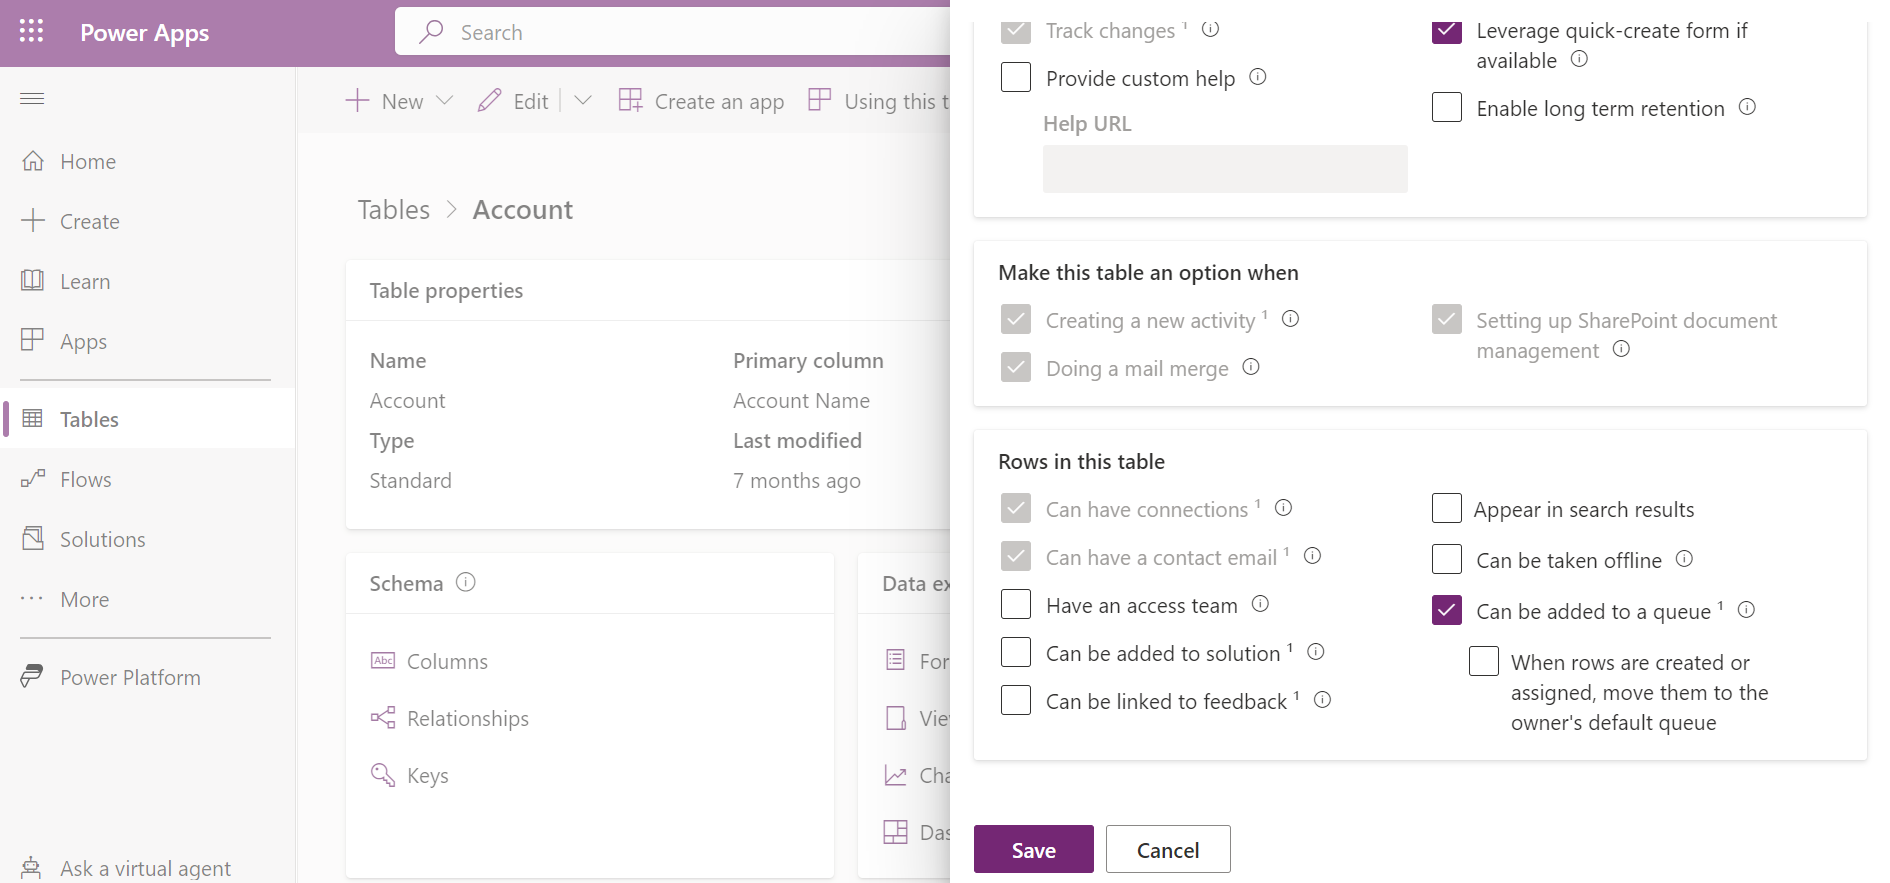
Select Tables and then select the required table such as Account or Email for which you want to enable queues.
In Table properties, select Properties.
Select Advanced options, and then select Can be added to a queue in the Rows in this table section .
Select Save.
Note
- You can't disable the table, if you enable it for a queue. The app disables the Can be added to a queue checkbox after you select it.
- If you enable the option When the rows are created or assigned, move them to the owner's default queue, in the table customization, then the record won't be automatically distributed to the agents. You must clear the checkbox to automatically distribute the records.

See also
Set up record routing
Set up unified routing for email records
Feedback
Coming soon: Throughout 2024 we will be phasing out GitHub Issues as the feedback mechanism for content and replacing it with a new feedback system. For more information see: https://aka.ms/ContentUserFeedback.
Submit and view feedback for