Note
Access to this page requires authorization. You can try signing in or changing directories.
Access to this page requires authorization. You can try changing directories.
Applies to: Dynamics 365 Contact Center—embedded, Dynamics 365 Contact Center—standalone, and Dynamics 365 Customer Service
Note
Copilot Studio bot is renamed as Copilot agent (agent or AI agent). Human agent is now renamed as customer service representative (service representative or representative). You might come across references to the old and new terms while we update the product UI, documentation, and training content.
Sentiment prediction for routing enables organizations to use the end customer sentiment scores as a factor in classifying work items to route to customer service representatives (service representatives or representatives).
By using sentiment prediction for routing, you can write rules to classify work items and assign them to service representatives who are best equipped to handle them.
The sentiment prediction uses the following seven-point scale that allows organizations flexibility to build nuanced rules while maintaining simplicity.
- Very positive
- Positive
- Slightly positive
- Neutral
- Slightly negative
- Negative
- Very negative
The sentiment model is configured to look for and use the messages provided by the customer and doesn't consider chat strings sent by the representative.
[This article is prerelease documentation and is subject to change.]
Important
- This is a preview feature.
- Preview features aren’t meant for production use and might have restricted functionality. These features are available before an official release so that customers can get early access and provide feedback.
Enable sentiment prediction
In the site map of Copilot Service admin center, select Routing. The Routing page appears.
Select Manage for Sentiment prediction for routing.
On the Sentiment Prediction for routing (preview) page, set the Enable sentiment prediction for routing toggle to Yes.
Dry run of sentiment prediction
You can optionally test the sentiment model by using the dry run option. You can test using real phrases that you expect to see when customers contact support. It helps you understand what the sentiment prediction on those might look like. You can see key information, such as the sentiment category on the seven-point scale, the sentiment score that is scaled from zero to 100, and keywords from the phrase that influenced the sentiment score.
To test the sentiment model
On the Sentiment Prediction for routing (preview) page, select Dry run.
On the Dry run panel, enter a word or phrase, such as "I am frustrated", and select Test. The model predicts the sentiment score, category, and the keyword that helped determine the score.
Create classification rules based on sentiment prediction model
After you enable sentiment prediction, you can create a classification rule based on the machine learning model, and select the type as Sentiment prediction. You can use the rule with other rules to help categorize the work items to be routed to the right representatives who will help with the customer issue.
To create a rule based on sentiment prediction
Create or edit a workstream. Learn more in Create workstreams.
Go to the Work classification (optional) section to create a classification rule. Learn more in Configure work classification rulesets.
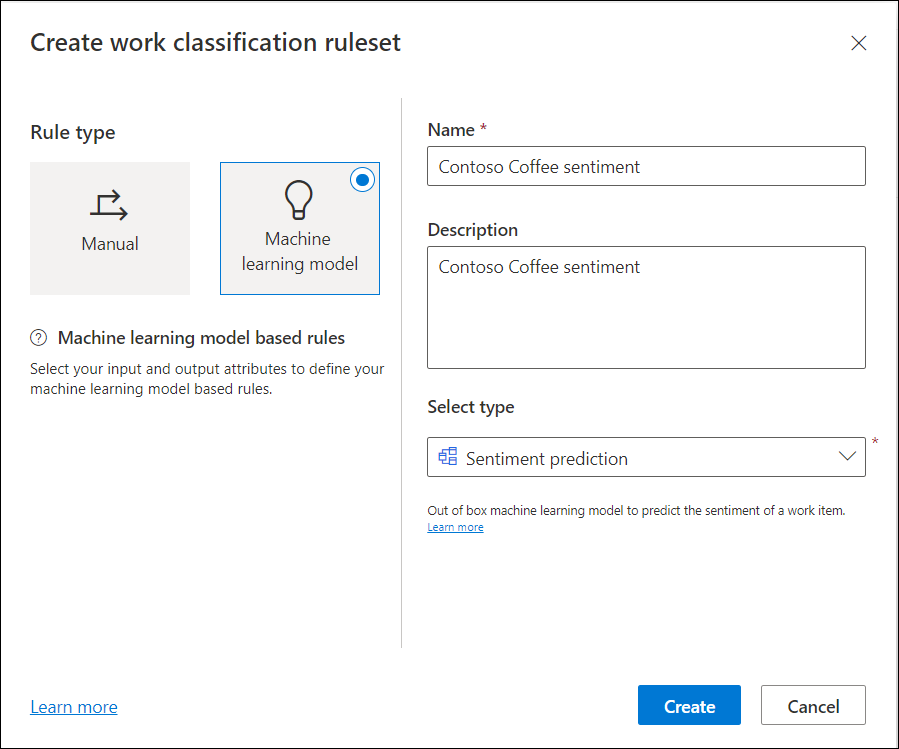
In the Create work classification ruleset dialog, select the rule type as Machine learning model, and then select type as Sentiment prediction.
Select the input attribute in which the customer sentiment is most likely to be found. For example, for a case workstream, you can select the related entity Routed record (Case), and the attribute as Description that might typically contain keywords indicating the sentiment.
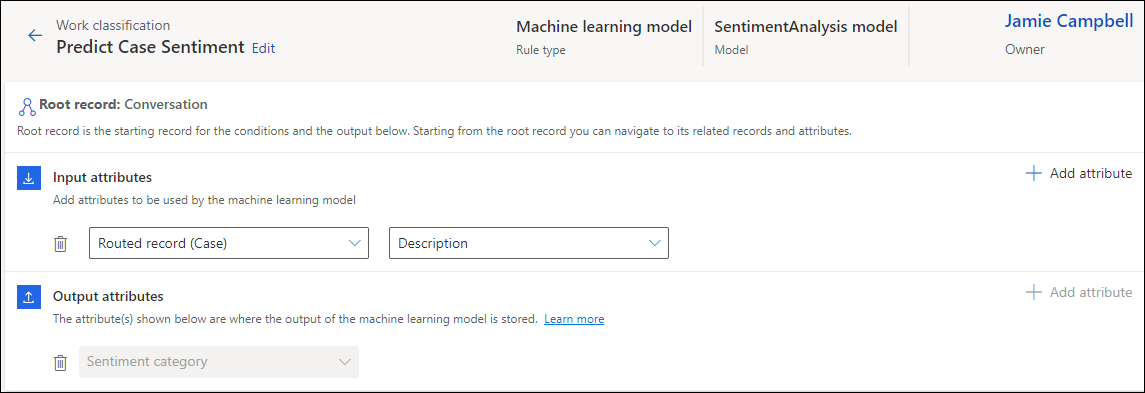
For a messaging channel, you can set the related entity as Context item value (Conversation), and then select the attribute. To use the input attribute, set context variables for the AI agent or pre-conversation survey. Frame the pre-conversation survey questions such that they elicit customer sentiment. For example, you could use a question such as "How has been your experience with the product?" or "How can we help you?".
You can define up to 10 attributes, whose values can be used to build the prediction model. At least one attribute, the first one, is mandatory and can't be deleted.
Save and close.
While the application doesn't prevent you from creating more than one rule that's based on the sentiment prediction model, a warning message is displayed when you try to create another rule based on the same model.
Additional work classification rules can then be created using the output from the sentiment prediction rule. The output is stored in the Sentiment Category attribute. You can use any of the values on the seven-point sentiment output to build the rule.
Create route-to-queue rules
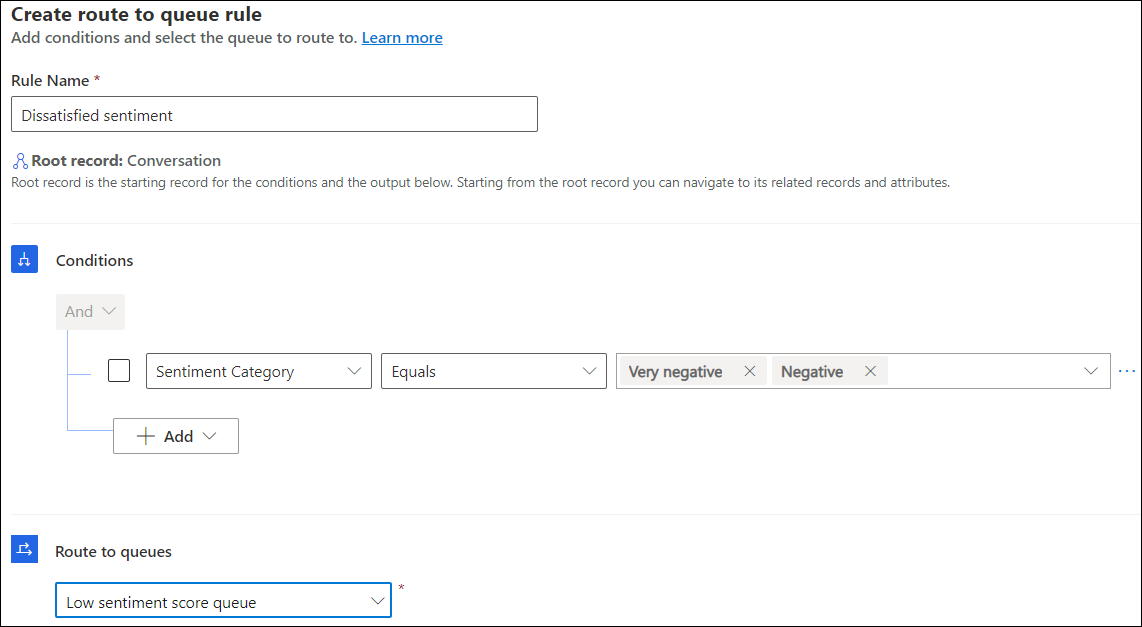
Create route-to-queue rules to route the work items based on the sentiment prediction.
For the workstream in which you created the rule based on sentiment prediction, in Routing rules, select Create ruleset or See more for Route to queues to create a rule. Learn more in Configure route-to-queues rulesets and rules.
Create a rule to define conditions. The Sentiment Category output attribute contains the sentiment prediction for the work item, and should be used in the rule builder to define the rule.
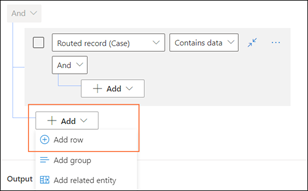
Note
If you've defined a condition on a routed record, make sure that you use the Add row option that's independent of the Routed record group.
Select the queue to which the work items need to be assigned when the conditions are met.
Use diagnostics to analyze the efficacy of sentiment prediction
Routing diagnostics help you see how the work items have been classified and routed after you've configured the rules.
You can view how the sentiment prediction model was used to route a work item.

Language support for sentiment prediction models
All Azure Cognitive Services supported languages are supported in sentiment prediction-based routing. Learn more in Language support - Translator - Azure Cognitive Services.