Note
Access to this page requires authorization. You can try signing in or changing directories.
Access to this page requires authorization. You can try changing directories.
If you replace the default Send button with a custom command, the built-in governance validation doesn't run automatically before an email is sent. Call governance validation from your custom code to ensure that governance policies are still enforced.
Use the returned validationResult to determine whether to send the email or display a policy violation dialog. If you display the dialog, your command handles the user's response before proceeding.
Prerequisites
- Your administrator enabled guardrail validation. Learn more in Configure governance policies. Always invoke
validateForSendto avoid permitting the email to be sent without additional validation checks. - The
Governance_main_system_library.jsweb resource is deployed in your environment as part of the existing Activities Patch solution.
Understand how the validation works
Governance guardrails inspect an email before it's sent. Depending on how your administrator configured the guardrails, they can do the following:
- Allow the email to be sent.
- Block the email and display a dialog that explains which policies are violated. The user can override the restriction and send the email, or cancel. The override is recorded.
- Run in shadow mode, which logs violations for reporting without blocking emails.
The module runs validation and, when requested by your code, displays the policy violation dialog. Your command uses the returned validationResult to determine whether to send the email or display the dialog and handle the user's response.
Add the governance library to the email form
The library must be available when the email form loads.
Go to Power Apps.
Include the governance library in the email form XML, or add it through the form designer:
- Go to Tables > Email > Forms.
- Select the email form that uses your custom Send command.
- Select Form libraries > Add library.
- Add
Governance_main_system_library.
Save and publish the form.
Configure the custom Send command
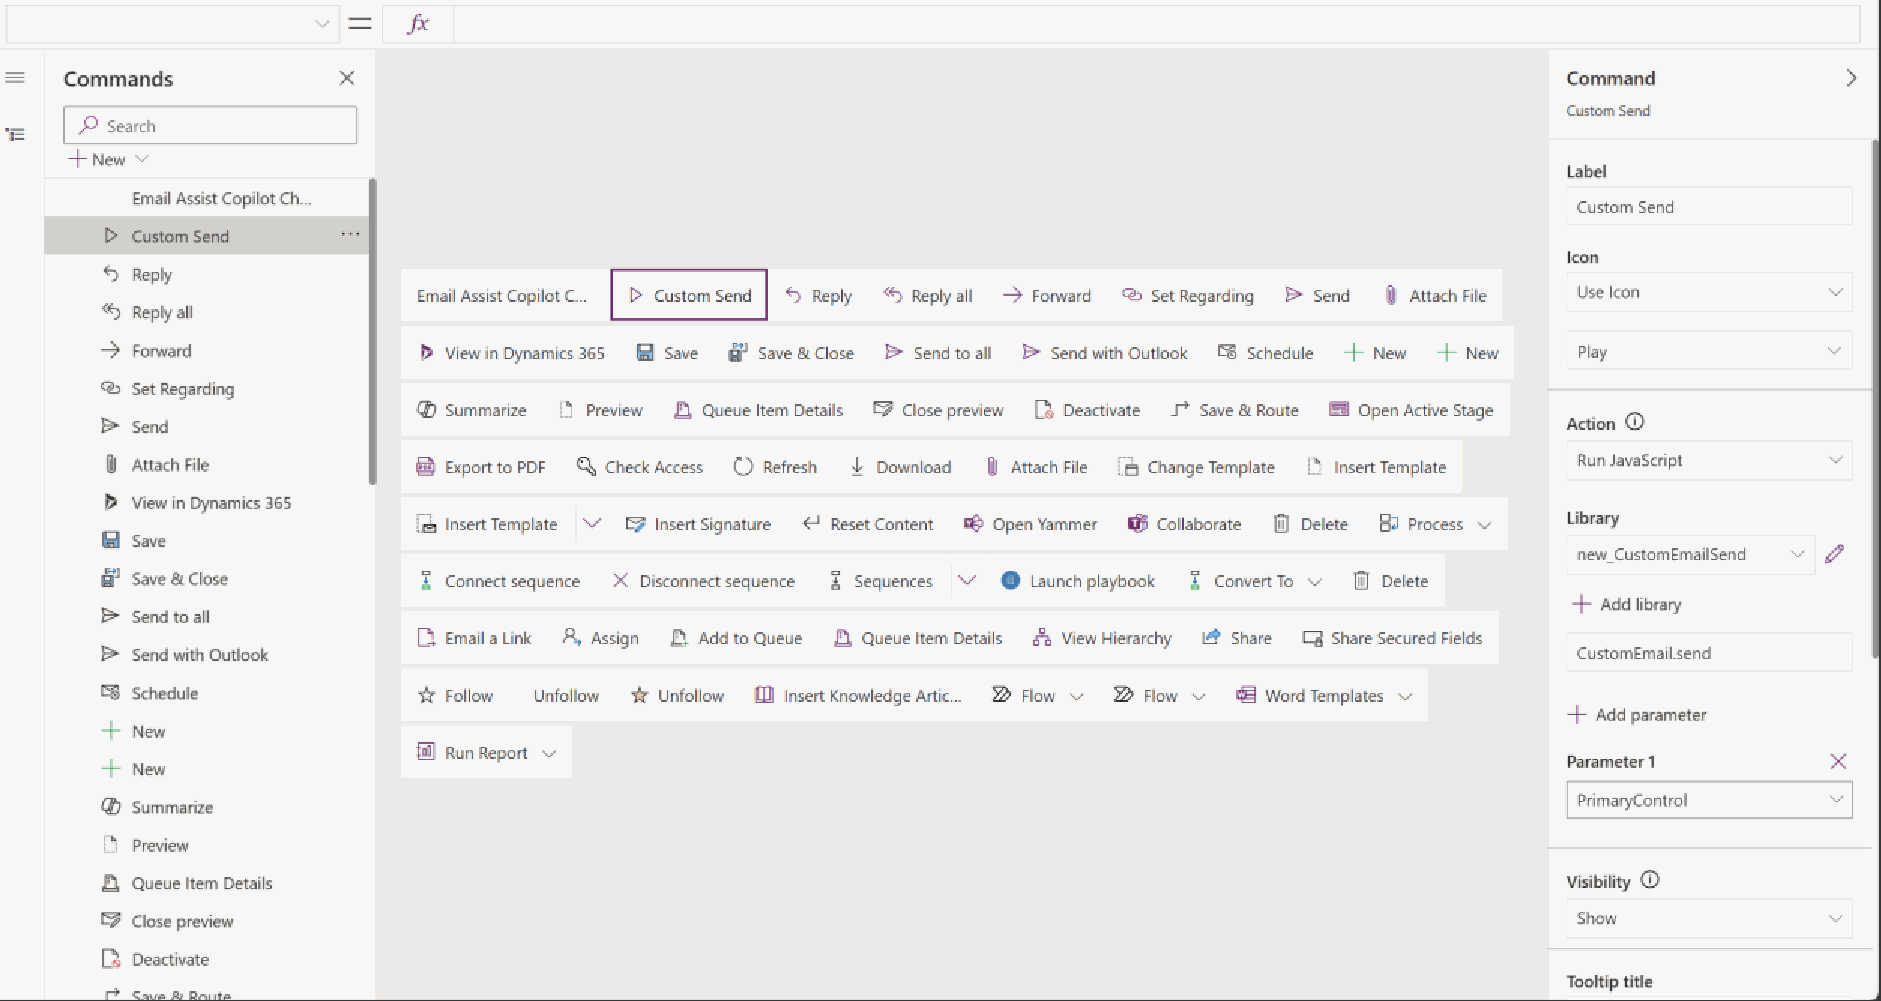
- Go to Tables > Email > Commands.
- Select the Custom Send command. The command name might differ in your environment.
- Select the Custom Send button on the designer tab.
- In the right pane, make sure that
PrimaryControlis included as a parameter. - Save and publish.
Call the guardrail validation from your custom code
Always call validateForSend from your custom command before sending the email. Add the following sample code to your custom JavaScript file to integrate governance validation.
// Send command on Email send button
CustomEmail.send = function (primaryControl) {
    // Existing custom code for Email send functionality
    var form = primaryControl;
    var gr = Activities && Activities.GovernanceGuardrail;
    if (!gr || typeof gr.validateForSend !== "function") {
        // Library not loaded - decide your own policy.
        // Here we block to be safe.
        return;
    }
    gr.validateForSend(form).then(function (validationResult) {
        if (validationResult.allowed) {
            <doSend(form)>; // Placeholder for method to send email
            return;
        }
        // Blocked: present the dialog, send only if the user overrides.
        gr.showViolationDialog(form, validationResult).then(function (sendAnyway) {
            if (sendAnyway) {
                <doSend(form)>; // Placeholder for method to send email
            }
            // Otherwise the user cancelled — do nothing.
        });
    });
};

function doSend(primaryControl) {
    // ---- Your existing custom send logic, unchanged ----
    var entityId = primaryControl.data.entity.getId();
    // ... save, call your action / SendEmailRequest, navigate.
}
Verify the integration
- Import the latest solution into your environment.
- Open the email form where governance is configured on email send.
- Select Send. Governance validation is triggered.