Note
Access to this page requires authorization. You can try signing in or changing directories.
Access to this page requires authorization. You can try changing directories.
Forms in Unified Interface-based apps provide improved user experience for optimum agent productivity and help maintain context while working on related records. You can see the forms enlisted in the solution explorer. The form type of the new forms is Main.
This topic explains how to edit a main form, and add or change various elements of the form.
Open the form editor
To edit a form or to add or change elements, use the form editor. The form editor lets you edit forms for all Unified Interface-based apps.
Follow the procedures given below to access the form editor:
Note
If you create any new solution components in the process of editing the form, the names of the components will use the solution publisher customization prefix for the default solution and these components will only be included in the default solution. If you want any new solution components to be included in a specific unmanaged solution, open the form editor through that unmanaged solution.
Access the form editor through App designer in Dynamics 365 Customer Engagement (on-premises)
Go to Settings > My Apps.
Select ... on an app and select Open in App designer.
Select the down arrow
 to expand the tile and see a list of forms.
Select the site map designer button
 corresponding to the form to edit the form in the Form designer.
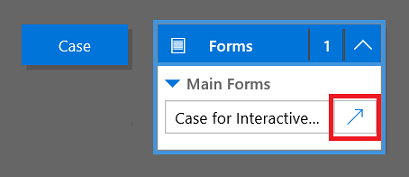
Select Save to save the changes and select Publish to publish them for use in the app.
Note
If you have made any changes to the app, publish them using the app level publish option. See Publish an app using the app designer for more information.
Note
The webclient Main form is also compatible with the Customer Service Hub and is available to be edited using the App designer.
Access the form editor through the default solution
- Open solution explorer.
- Under Components, expand Entities, expand the entity you want, and then select Forms.
- In the list of forms, open the form of type Main.
Access the form editor for an unmanaged solution
- Open solution explorer.
- Double-click the unmanaged solution you want to work with.
- Locate the entity with the form you want to edit. If the entity isn’t there, you’ll need to add it.
Add an entity to an unmanaged solution
- Select the Entities node and, in the toolbar above the list, select Add Existing.
- In the Select Solution Components dialog box, with the Component Type selector set to Entity, select the entity you want to add and select OK.
- If the Missing Required Components dialog box appears, you can select No, do not include required components if you don’t intend to export this unmanaged solution to another organization. If you don’t want to include missing required components at this time, you can add them later. You’ll receive notification again if you export this solution in the future.
- In the solution explorer expand the entity with the form you want to edit and select Forms.
- In the list of forms, open the form of type Main.
Publish the changes for use in the app
Certain customizations that make changes to the user interface require that they be published before people can use them in the application. To publish your customization, in the solution explorer, select Publish All Customizations.
Form editor user interface
Understand in detail about the form editor user interface, see Overview of the form editor user interface.
Form properties
To know in detail about the form properties, see Form properties.
Visibility options
Several types of form elements have the option to be shown or hidden by default. Tabs, sections, and fields all provide this option. Using form scripts or business rules, the visibility of these elements can be controlled to create a dynamic form to provide a user interface that adapts to conditions in the form.
Note
Hiding form elements is not a recommended way to enforce security. There are several ways people can view all the elements and data in the form when elements are hidden.
Rather than designing forms that depend on scripts to control visibility of options, consider whether a business process flow, a dialog, or switching to a different form may be better suited to meet your requirements. If you do use scripts, make sure that any element that might be hidden is hidden by default. Only show it with scripts when your logic calls for it. This way it isn’t displayed in presentations that don’t support scripts.
Note
When you use setVisible with the Client API, if a control spans more than one column in a section in Unified Interface, the control will be hidden but whitespace will not be removed.
Tab properties
To know in detail about the tab properties, see Tab properties.
Section properties
To know in detail about the section properties, see Section properties.
Timeline
The Timeline shows related activities for a specific entity.
The following types of activities are supported: Task, appointment, phone call, email, social activity, custom activity.
The Timeline also shows notes and, system and user posts. It shows those activities that have Regarding field set to the entity you’re viewing. For notes, the Regarding field isn’t shown to the user; It is implicit when created from the Timeline.
Each activity that’s shown in the Timeline, will have the same quick actions that are available on the activity’s command bar.
Common field properties
To know in detail about the common field properties, see Common field properties.
Special field properties
All fields have the properties listed in Common field properties, but certain fields have additional properties.
To know more, see Special Field Properties.
Sub-grid properties
To know in detail about the sub-grid properties, see Sub-grid properties.
Quick view control properties
To explore the Quick view control properties, see Quick view control properties.
Web resource properties
Know in detail about the Web resource properties. Go to Web resource properties.
IFRAME properties
To know more about the IFRAME properties, see IFRAME properties.
Edit Navigation
Navigation within the form allows people to view lists of related records. Each entity relationship has properties to control whether it should be shown. More information: Navigation Pane Item for Primary Entity
Any entity relationships that are configured to be displayed can be overridden within the form editor.
For step-by-step instructions, see Add form navigation for related entities.
To enable editing navigation you must first select Navigation from the Select group on the Home tab.
In the Relationship Explorer you can filter by 1:N (one-to-many) or N:N (many-to-many) relationships, or view all available relationships. The Only show unused relationships checkbox is disabled and selected. So you can only add each relationship one time.
To add a relationship from the Relationship Explorer just double-click it and it will be added below the currently selected relationship in the navigation area. Double-click a relationship in the navigation area and you can change the label on the Display tab. On the Name tab, you can see information about the relationship. Use the Edit button to open the definition of the entity.
There are five groups in the navigation area. You can drag them to reposition them and double-click them to change the label, but you can’t remove them. These groups are displayed only when there is something in them. If you don’t want a group to appear, just don’t add anything to it.
Configure event handlers
To know more about configuring event handlers, see Configure event handlers.
See Also
Create and design forms
Create and edit quick create forms
Create and edit quick view forms