Note
Access to this page requires authorization. You can try signing in or changing directories.
Access to this page requires authorization. You can try changing directories.
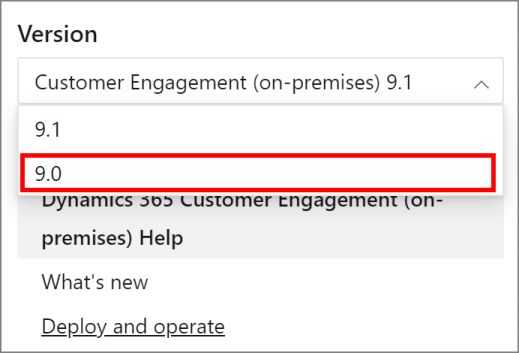
This article doesn't apply to the Dynamics 365 Customer Engagement (on-premises), version 9.1 update. For information about new features in update 9.1, see What's new.
For information about this topic for Dynamics 365 Customer Engagement (on-premises), version 9.0, select the version located above the left navigation pane.
The /config [drive:] [[path] configfilename.xml]] command-line parameter provides Microsoft Dynamics 365 Server Setup with required information. The information supplied by the XML configuration file is required by each installation screen.
Important
The XML elements must be in English (US). An XML configuration file that has localized XML elements won’t work correctly. For example, if you have a German version of Microsoft Dynamics CRM, the XML file elements must still be English (US).
By default, Setup will use UTF-8 encoding for the Setup XML configuration file. Setup can’t load an XML configuration file when there are extended characters in the file. You’ll receive an error message from Setup that the XML file is invalid. If the XML configuration file contains extended characters, you can work around this issue by saving the XML configuration file by using Unicode encoding. To do this, open the XML configuration file in Notepad, select Save As, in the Encoding list select Unicode, and then select Save.
An explanation of each XML element and a sample XML file for a Full Server installation follows. For information about how to install separate server roles by using the command prompt, see Install Microsoft Dynamics 365 Server roles in this guide.
Configuration file reference
<CRMSetup> </CRMSetup>
The configuration file must be a valid XML file that uses <CRMSetup> as the root element.
<Server> </Server>
Specifies a Dynamics 365 Server installation. All the entries that follow must be inside the <Server> elements.
<InstallType>Uninstall/Repair/Configure</InstallType>
Specifies the type of installation that Setup will perform. The following options are available:
Uninstall. Uninstalls Dynamics 365 Server.
Repair. Starts Setup in repair mode.
Configure. Starts Setup in configuration mode.
<Patch update="true"/"false">\\ServerName\ShareName\Patch_Location</Patch>
Determines the behavior of the update Microsoft Dynamics 365 Server Setup technology. This feature lets Setup perform a one-time search for, and if applicable, download and apply the latest installation files for Dynamics 365 Customer Engagement (on-premises).
By default, this element doesn’t specify a location, which configures Setup to search for available updates by using Microsoft Update. If you want Setup to install updates from another location, such as a share on your network, add the file paths to the .msp file in the element, as shown in the following topic.
Important
The patch update feature can only be used for updates to Setup, also known as self-healing Setup. It cannot be used to apply application updates. More information: Update Microsoft Dynamics 365
update
Specifies whether Setup will look for, download, and apply updates for Microsoft Dynamics 365 Server Setup. We recommend that you let Setup download the latest version by specifying true. By default, this value is set to false. If the value is set to false, Setup ignores this step and continues with the installation. However, if you run Setup by using the /Q or /QR parameter, you must specify this element.
<SqlServer>SQLServername\InstanceName</SqlServer>
Specifies the name of the instance of SQL Server that will manage the database files. If you use the default instance, you can provide the name of the computer where SQL Server is installed. If SQL Server is running on the computer where you’re installing , you can specify ". " or "localhost".
<Database create="true"/"false" update="true"/"false"/>
create
Values for this parameter are either true or false. True causes Setup to create a new configuration database. False causes Setup to connect to an existing configuration database.
update
Values for this parameter are either true or false. When you select true, Setup writes the appropriate server deployment information to the configuration database (MSCRM_CONFIG). Select false only when you are using a pre-existing configuration database and you don’t want Setup to update the server deployment information. When you select false, the appropriate server deployment information for the computer where Dynamics 365 Server is being installed must already exist in the configuration database for Setup to complete successfully. The default value is true.
<Organization>Organization friendly or long name</Organization>
Specifies the long name of your organization. The name can be up to 250 characters long and extended characters are supported.
<OrganizationUniqueName>Unique name</OrganizationUniqueName>
UniqueName
Specifies the name of your organization in the URL that users will use to access the deployment. There is a 30 character limit. Extended characters or spaces are not allowed. If you don’t specify this element or leave the value blank, Setup will generate a short name based on the <Organization> element value.
Important
The unique organization name will be used to construct the URL for users to sign-in to the application. Therefore, we recommend that you limit the length of the unique organization name to reduce the overall length of the URL.
<muoptin optin="true”/“false" />
Specifies whether to use Microsoft Update to download and install updates to Dynamics 365 Server and other installed applications. After the installation is completed, this feature helps keep your computer up-to-date on an ongoing basis.
True. When you specify this option, Setup will opt in to Microsoft Update as the update service and use the Windows automatic updating settings on the computer. Windows automatic update settings can be viewed in Windows Update in Control Panel. Microsoft Update helps make sure that your computer has the latest technology, which can help reduce the risk of vulnerabilities and security issues.
False. When you specify this option, Setup won’t change the existing Windows automatic update settings. If the computer isn’t already configured to use Microsoft Update as the update service, we recommend that you have another method to install updates on the computer, such as by using Windows Update Services. If left blank, a value of false will be selected.
<OU> OU=value,DC=value,DC=value,DC=value,DC=value</OU>
The <OU> element specifies the Active Directory organizational unit (OU) where the security groups will be created, for example, <OU> OU=Dynamics CRM, DC=MySubDomain, DC=MyDomain, DC=com</OU>.
Important
You can’t use the <Groups> element with the <OU> element. Setup won’t continue if you specify both elements together.
<PreferredDC>servername.domain.com</PreferredDC>
Specifies the domain controller to contact when performing operations that require Active Directory. If not specified, Setup will use the first domain controller available. This setting is only available when you use a configuration file.
<LicenseKey>KeyValue</LicenseKey>
Specifies the product key for this deployment. The configuration file can contain only one product key. For example:
<licenseKey>XXXXX-XXXXX-XXXXX-XXXXX-XXXXX</licenseKey>
Note
If you purchase Dynamics 365 Customer Engagement (on-premises) through a Microsoft Volume Licensing program, the product key is provided in the license.txt file. The license.txt file is included in the Dynamics 365 Customer Engagement (on-premises) installation files.
<WebsiteUrl Create="true"/"false" port="TCPportnumber">path</WebsiteUrl>
Specifies the website to be used for the application. Use Create="true" to create a new website and leave the value between the element tags blank. Use port="TCPportnumber", where TCPportnumber is a valid and available TCP port number, to specify the port for connecting to the application. If left blank, the port number that will be used is 5555.
Specify Create="false" to use an existing website and then you must type the website path in the element tags by using one of the following formats. When you use the Create="false" attribute, the port attribute is ignored.
For example:
https://server:port/ or https:// server.contoso.com
/LM/W3SVC/n, where n is the website ID. 1 is the default website.
<Help anonymous="true"/"false">https://host/Help</Help>
Optional element to specify a different URL where Dynamics 365 Customer Engagement (on-premises) Help is located. This setting is typically used in a multiserver deployment or to replace the default URL such as when using a host header. If you select false to disable anonymous access, it may produce repeated logon prompts for users who access Help. This setting is only available when you use a configuration file.
<InstallDir>c:\program files\Microsoft Dynamics CRM</InstallDir>
Specifies the folder in which application files will be installed. By default, Setup will use the folder C:\Program Files\Microsoft Dynamics CRM.
<basecurrency isocurrencycode="CurrencyCode" currencyname="CurrencyName" currencysymbol="CurrencySymbol" currencyprecision=”2"/"3"/"4”/>
isocurrencycode
Specifies the ISO three-letter currency-code, display name, and symbol to use for the base currency. For example, if you want to use U.S. dollars as the base currency, use isocurrencycode="USD". You must use a valid ISO currency description for the isocurrencycode attribute.
currencyname and currencysymbol
You must also specify the currency-name and currency-symbol display names for the ISO base currency. For example, if the ISO currency code is USD, the currency name should be "US Dollar" and the currency symbol should be "$". However, you can use any string that you want for these attributes.
Important
After Setup is complete, you cannot change the base ISO currency code. However, you can change the base-currency name, base-currency symbol, and base-currency precision.
The currency codes are provided from Microsoft .NET Framework and may change.
currencyprecision
You must specify the precision for the base currency that you specified in the currencycode attribute. Valid values depend on the type of currency that you specify. For example, USD valid values are 1 – 9 and the default value is 2.
<OrganizationCollation>CollationName</OrganizationCollation>
This optional element specifies the SQL Server database collation name to use for the organization database. The default collation depends on the language of Dynamics 365 Customer Engagement (on-premises) that you’re installing, for example, Latin1_General_Cl_Al, which is the default collation for English (US) language deployments. For more information about database collation, see Collation and Unicode Support.
<CrmServiceAccount type="DomainUser"/"NetworkService">
<ServiceAccountLogin>Domain\User</ServiceAccountLogin>
<ServiceAccountPassword>password</ServiceAccountPassword>
</CrmServiceAccount>
Specifies the service account used to run the Dynamics 365 Customer Engagement (on-premises) Unzip Service and ASP.NET AppPool application pool identity.
Accepted values are DomainUser, which will use the specified domain user provided in the <prefixServiceAccount> element or NetworkService, which uses the Network Service system account. However, using the Network Service system account isn’t recommended because it may limit some database operations such as organization create, import, upgrade, or update. By default, Setup will use the DomainUser option. If DomainUser or no type is specified, <ServiceAccountLogin> and <ServiceAccountPassword> are required. When you run Setup by using the /Q or /QR parameter, if this element isn’t specified, the Network Service account will be used.
Warning
Maintaining the configuration file that has <ServiceAccountLogin> and <ServiceAccountPassword> values specified is a security risk because you’re storing a password in plain text. Delete these elements as soon as the configuration file is used to install Dynamics 365 Server.
We strongly recommend that you select a low-privilege domain account that is dedicated to running these services and isn’t used for any other purpose. Additionally, the user account that is used to run a Dynamics 365 Customer Engagement (on-premises) service can’t be a Dynamics 365 Customer Engagement (on-premises) user. This domain account must be a member of the Domain Users group. Additionally, if the Asynchronous Service and Sandbox Processing Service roles are installed, such as in a Full Server or a Back End Server installation, the domain account must a member of the Performance Log Users security group.
<SandboxServiceAccount type="DomainUser"/"NetworkService">
<ServiceAccountLogin>Domain\User</ServiceAccountLogin>
<ServiceAccountPassword>password</ServiceAccountPassword>
</SandboxServiceAccount>
Specifies the service account to use for the Sandbox Processing Service.
Accepted values are DomainUser, which will use the specified domain user provided in the <prefixServiceAccount> element or NetworkService, which uses the Network Service system account. By default, Setup will use the DomainUser option. If DomainUser or no type is specified, <ServiceAccountLogin> and <ServiceAccountPassword> are required. When you run Setup by using the /Q or /QR parameter, if this element isn’t specified, the Network Service account will be used.
Warning
Maintaining the configuration file that has <ServiceAccountLogin> and <ServiceAccountPassword> values specified is a security risk because you’re storing a password in plain text. Delete these elements as soon as the configuration file is used to install Dynamics 365 Server.
If you don’t specify this element, Setup will use the account specified in the <CrmServiceAccount> element to run this service. Therefore, we recommend that you specify a different low-privilege user account for each of the service accounts.
<DeploymentServiceAccount type="DomainUser"/"NetworkService">
<ServiceAccountLogin>Domain\User</ServiceAccountLogin>
<ServiceAccountPassword>password</ServiceAccountPassword>
<DeploymentServiceAccount>
Specifies the service account to use for the Deployment Web Service.
Accepted values are DomainUser, which will use the specified domain user provided in the <prefixServiceAccount> element or NetworkService, which uses the Network Service system account. However, using the Network Service system account isn’t recommended because it may limit some database operations such as organization create, import, upgrade, or update. By default, Setup will use the DomainUser option. If DomainUser or no type is specified, <ServiceAccountLogin> and <ServiceAccountPassword> are required. When you run Setup by using the /Q or /QR parameter, if this element is not specified the Network Service account will be used.
Caution
Maintaining the configuration file that has <ServiceAccountLogin> and <ServiceAccountPassword> values specified is a security risk because you’re storing a password in plain text. Delete these elements as soon as the configuration file is used to install Dynamics 365 Server. If you don’t specify this element, Setup will use the account specified in the <CrmServiceAccount> element to run this service. Therefore, we recommend that you specify a different low-privilege user account for each of the service accounts. In addition to the permissions required by the other service accounts, the Deployment Web Service account requires system administrator permission on the SQL Server, and must be a member of the local administrator group where SQL Server is running to be able to create or import organizations.
Important
To perform organization operations through the Deployment Web Service or Windows PowerShell, the Deployment Service account must have system administrator permissions on the computer that is running SQL Server and must be a member of the local administrators group where SQL Server is installed. Additionally, the user that is performing the organization operations should be a Deployment Administrator.
The Deployment Administrator role can be granted in Deployment Manager.
<AsyncServiceAccount type="DomainUser"/"NetworkService">
<ServiceAccountLogin>Domain\User</ServiceAccountLogin>
<ServiceAccountPassword>password</ServiceAccountPassword>
<AsyncServiceAccount>
Specifies the service account to use for the asynchronous processing services.
Accepted values are DomainUser, which will use the specified domain user provided in the <prefixServiceAccount> element or NetworkService, which uses the Network Service system account. However, using the Network Service system account isn’t recommended because it may limit some database operations such as organization create, import, upgrade, or update. By default, Setup will use the DomainUser option. If DomainUser or no type is specified, <ServiceAccountLogin> and <ServiceAccountPassword> are required.
Warning
Maintaining the configuration file that has <ServiceAccountLogin> and <ServiceAccountPassword> values specified is a security risk because you’re storing a password in plain text. Delete these elements as soon as the configuration file is used to install Dynamics 365 Server.
If you don’t specify this element, Setup will use the account specified in the <CrmServiceAccount> element to run this service. Therefore, we recommend that you specify a different low-privilege user account for each of the service accounts.
<VSSWriterServiceAccount type="DomainUser"/"NetworkService">
<ServiceAccountLogin>="DomainUser"/"NetworkService"</ServiceAccountLogin>
<ServiceAccountPassword>password</ServiceAccountPassword>
</VSSWriterServiceAccount>
Specifies the service account to use for the Dynamics 365 Customer Engagement (on-premises) VSS Writer service.
Accepted values are DomainUser, which will use the specified domain user provided in the <prefixServiceAccount> element or NetworkService, which uses the Network Service system account. By default, Setup will use the DomainUser option. If DomainUser or no type is specified, <ServiceAccountLogin> and <ServiceAccountPassword> are required.
Warning
Maintaining the configuration file that has <ServiceAccountLogin> and <ServiceAccountPassword> values specified is a security risk because you’re storing a password in plain text. Delete these elements as soon as the configuration file is used to install Dynamics 365 Server.
We recommend that you specify a different low-privilege user account for each of the service accounts.
<MonitoringServiceAccount type="DomainUser"/"NetworkService">
<ServiceAccountLogin>="DomainUser"/"NetworkService"</ServiceAccountLogin>
<ServiceAccountPassword>password</ServiceAccountPassword>
</MonitoringServiceAccount>
Specifies the service account to use for the Dynamics 365 Customer Engagement (on-premises) Monitoring service.
Accepted values are DomainUser, which will use the specified domain user provided in the <prefixServiceAccount> element or NetworkService, which uses the Network Service system account. By default, Setup will use the DomainUser option. If DomainUser or no type is specified, <ServiceAccountLogin> and <ServiceAccountPassword> are required.
Warning
Maintaining the configuration file that has <ServiceAccountLogin> and <ServiceAccountPassword> values specified is a security risk because you’re storing a password in plain text. Delete these elements as soon as the configuration file is used to install Dynamics 365 Server.
We recommend that you specify a different low-privilege user account for each of the service accounts.
For information about Dynamics 365 Customer Engagement (on-premises) services, see Microsoft Dynamics 365 server roles. For information about the permissions required for Dynamics 365 Customer Engagement (on-premises) services and what type of account to use, see Security considerations for Dynamics 365.
<SQM optin=" true / false"/>
Specifies whether you will participate in the Customer Experience Improvement Program. If you specify true, you’ll participate in the program.
<Reporting URL="https://srsserver1/ReportServer"/>
URL
Specifies the URL of the Report Server.
<Groups autogroupmanagementoff="true/false">
<PrivUserGroup>CN=value,OU=value,DC=value,DC=value,DC=value</PrivUserGroup>
<SQLAccessGroup>CN=value,OU=value,DC=value,DC=value,DC=value</SQLAccessGroup>
<ReportingGroup>CN=value,OU=value,DC=value,DC=value,DC=value</ReportingGroup>
<PrivReportingGroup>CN=value,OU=value,DC=value,DC=value,DC=value</PrivReportingGroup>
</Groups>
When specified, Setup will use the existing groups in Active Directory instead of creating them during installation. If <automanagegroupsoff> is true, Setup will not add or remove any members to those groups. If you specify <automanagegroupsoff> as true, you must manually create and add the appropriate membership to these groups for users to be able to run the application, and you must continue to do so as new members are added or removed from Dynamics 365 Customer Engagement (on-premises).
Important
- You can’t use the <Groups> element with the <OU> element. Setup won’t continue if you specify both elements together.
- Direct user account membership in the Microsoft Dynamics 365 privusergroup security group is required and group membership nesting under privusergroup currently is not supported. Granting membership to privusergroup through another security group can cause system-wide failures in the web application and reporting features. For example, if you add a security group named mycrmprivgroupusers to privusergroup, members of mycrmprivgroupusers will not resolve as privusergroup members. This includes the CRMAppPool or the SQL Server Reporting Services service identities.
This setting is only available when you use a configuration file.
<remoteinstall>"true" / "false" </remoteinstall>
This option is required when you run a remote installation by using Windows PowerShell remoting. The default value is false.
<Reboot>"true" / "false"</Reboot>
If this option is not specified, the default is false. This means that the server won’t automatically restart at the end of Setup. Also, this option applies only to a final install restart, and not previous restarts that may be required for other components.
Note
The installation of Microsoft .NET Framework may require you to restart your computer before you can continue to run Microsoft Dynamics 365 Server Setup.
<Email>
<IncomingExchangeServer name="ServerName"/>
This optional element specifies the Microsoft Exchange Server computer or POP3 that will be used by the Email Router to route incoming email messages. If not specified and later the Email Router is used in the deployment, the computer must be added to the PrivUserGroup security group.
</Email>
Specifies the email server that will be used for email routing.
<configdb>
This is the parent for the following encryption key elements:
Warning
By default, encryption keys aren’t stored in the configuration database in an encrypted format. We strongly recommend that you specify encryption when you run Setup by using the following entries.
<encryptionkeys certificate="CrmEncryptionCertificate" generate="true"/"False" password="SCpassword" keysource="uniqueID">
The <encryptionkeys> element specifies how, and whether, to encrypt the keys that are stored in the Dynamics 365 Customer Engagement (on-premises) system. Use generate="true" to enable the system-generated keys that are encrypted. The keysource may be any value, but must be different from other keysource values. SCpassword is the password that will be used to create the symmetric certificate. This setting is only available when you use a configuration file.
Warning
Maintaining a configuration file that has password and keysource values specified is a security risk because you are storing a password and key information in plain text. We recommend that you save the password in a secure location from where it can be retrieved later for recovery. Then, delete these elements as soon as the configuration file is used to install Dynamics 365 Server.
<encryptionkey physicalname="CrmSymmetricKey" virtualname="CrmKeyEncryptionKey"/>
Each <encryptionkeys> element specifies a mapping between a symmetric key store in the SQL Server database to a virtual key name, hard-coded in Dynamics 365 Customer Engagement (on-premises) for encrypting data in the configuration database. This setting is only available when you use a configuration file.
</encryptionkeys>
</configdb>
<LaunchReportingExtensionsSetup>"false" / "true"</LaunchReportingExtensionsSetup>
Optional element that specifies whether to start Dynamics 365 Reporting Extensions Setup immediately after Dynamics 365 Server Setup completes. By default, the value for this element is false and Dynamics 365 Reporting Extensions Setup won’t start after Dynamics 365 Server Setup completes. Additionally, Dynamics 365 Reporting Extensions Setup will only start when the following conditions are true:
Dynamics 365 Server Setup will be creating or upgrading the first organization in the deployment
The specified Report Server computer is the local computer where Setup is running
See Also
Use the Command Prompt to Install Microsoft Dynamics 365
Sample server XML configuration file
Sample server XML configuration file for installing with pre-created groups