Note
Access to this page requires authorization. You can try signing in or changing directories.
Access to this page requires authorization. You can try changing directories.
Organizations upload 3D models into Dynamics 365 Field Service. Field technicians refer to these models while they work in the field. A 3D model usually relates to a specific product or customer asset and helps field technicians fix equipment and complete other tasks. Instead of recording videos or writing long manuals, field service organizations use existing 3D models as 3D knowledge articles.
You can configure 3D models by using a many-to-many (N:N) relationship between the 3D model and customer asset entities. This relationship enables 3D models to be associated with customer assets.
Prerequisites
Dynamics 365 version 9.0 or later is required.
Field Service version 8.0 or later is required.
Ensure that the 3D Viewer solution is installed. Sign in to Power Apps, select Solutions, and search for 3D Viewer.
Increase storage for large 3D file sizes. In Email settings, set the Maximum file size for attachments field to the maximum value (128 MB).
Ensure that the supported 3D file types aren't blocked for attachments. In System Settings, adjust the Set blocked file extensions for attachments settings as needed.
Note
The 3D viewer supports the following file types: GLB, GLTF, and OBJ.
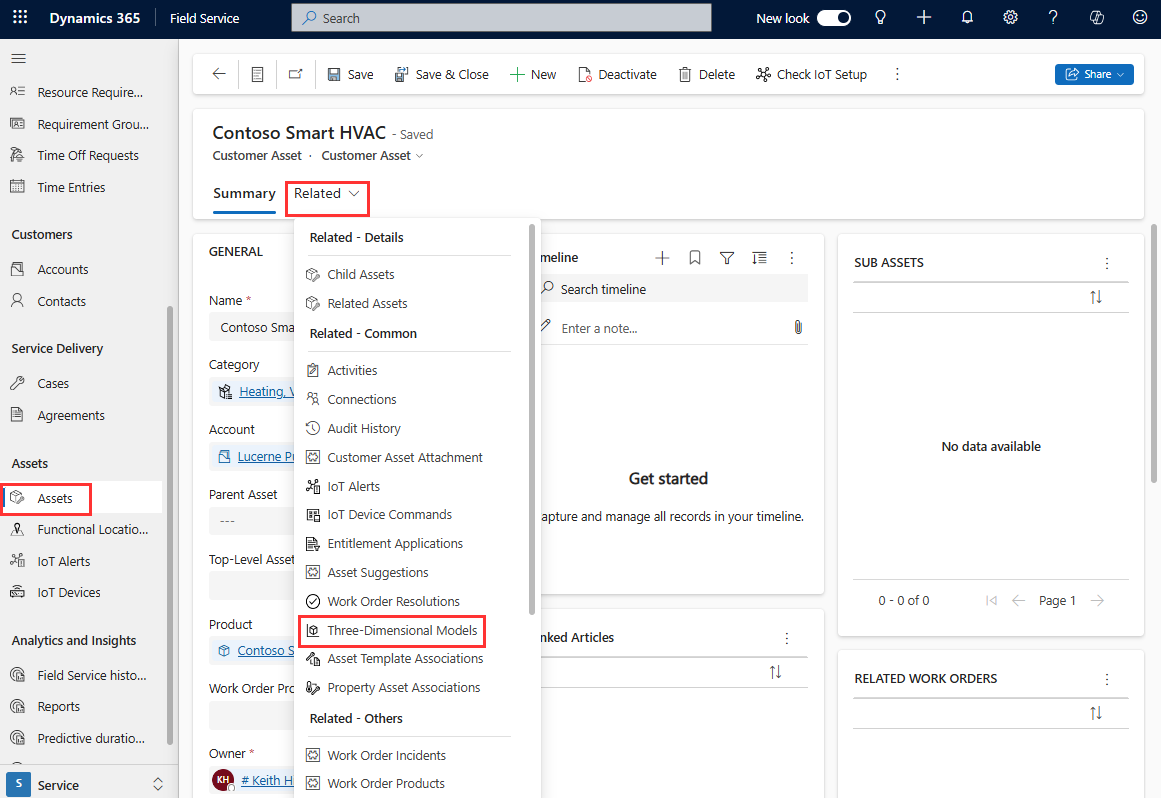
Associate customer assets with 3D models
In Field Service, select the Service area.
Under Assets, select Assets.
Open the customer asset record.
Select Related > Three-Dimensional Models.
Select Add Existing Three-Dimensional Model.
Select New Record > Three-Dimensional Model.
In the Name field, enter a name for the 3D model.
In the Storage Type field, select Note Attachment.
Select Save.

In the Timeline section, select the paperclip icon, browse to your 3D file, and select Open.
In the Title field, enter a title for the note. Then select Add note.
Select Save & Close.
Select Add to associate the 3D model with the customer asset.