Enable self-scheduling service appointments in Dynamics 365 Field Service (preview)
[This article is prerelease documentation and is subject to change.]
This article discusses the main scenarios for users of the self-scheduling portal.
Important
- This is a preview feature.
- Preview features aren't meant for production use and may have restricted functionality. These features are available before an official release so that customers can get early access and provide feedback.
Access and view the home page
The portal requires users to create a portal profile before they can sign in and book services.
Open the link you received in the invite.

Select the Redeem invitation tab and use the code you received in the email.
Create your profile for the portal.
Optionally, select Manage external authentication to sign in with other identity providers.
Save the profile and sign in to the self-service scheduling portal.
Schedule services on the portal. An email is sent confirming your booking.
Book an appointment
- Sign in to the portal. On the home page, select Book a New Appointment.
- Choose the product and service type.
- Choose a date and time. When you select a day, available time slots show automatically.
- Provide optional comments about the appointment or service.
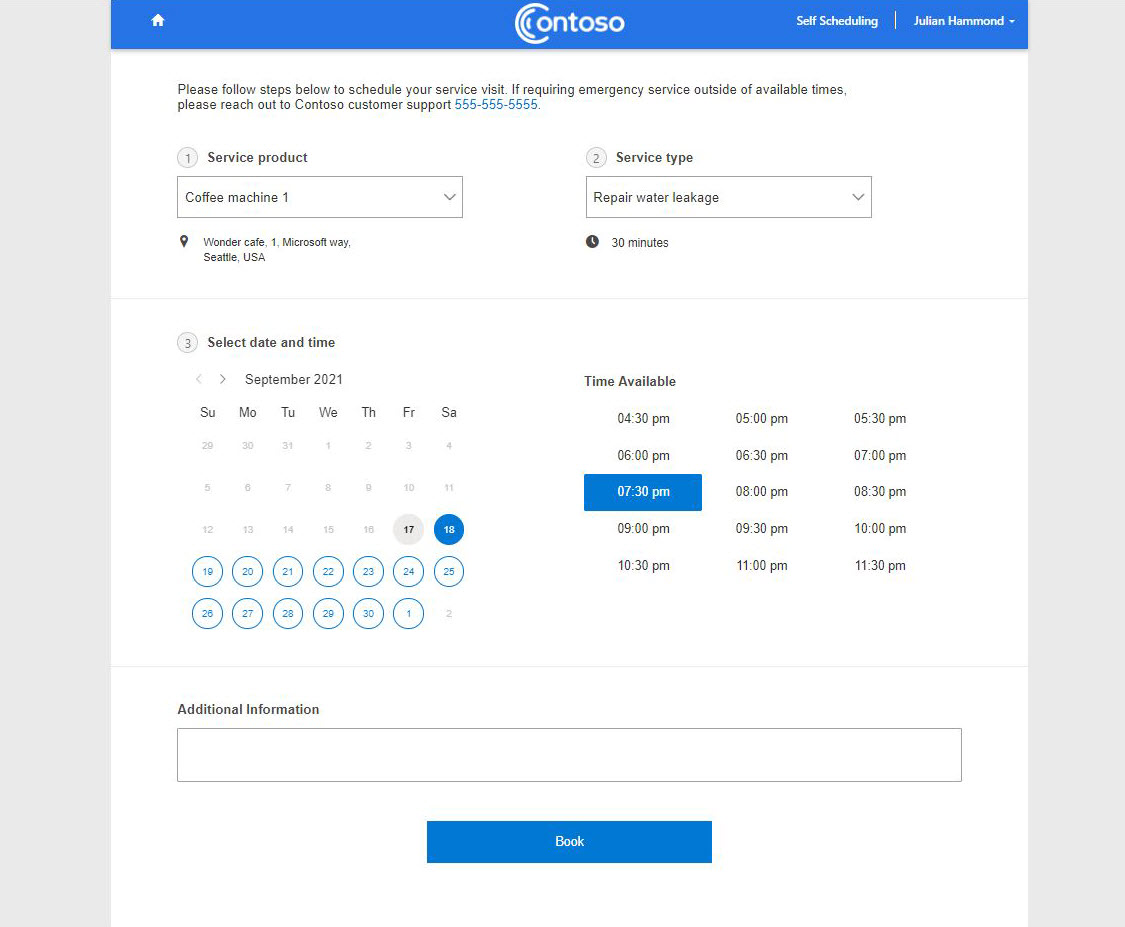
- Select Book to create the appointment.
Modify an appointment
You can change an appointment in the portal by choosing a new date and time or canceling it.
- Sign in to the portal and select Modify on an existing appointment.
- Choose a new date and time, and save your changes.
- To cancel the service visit, select Cancel appointment and provide a note about the reason.
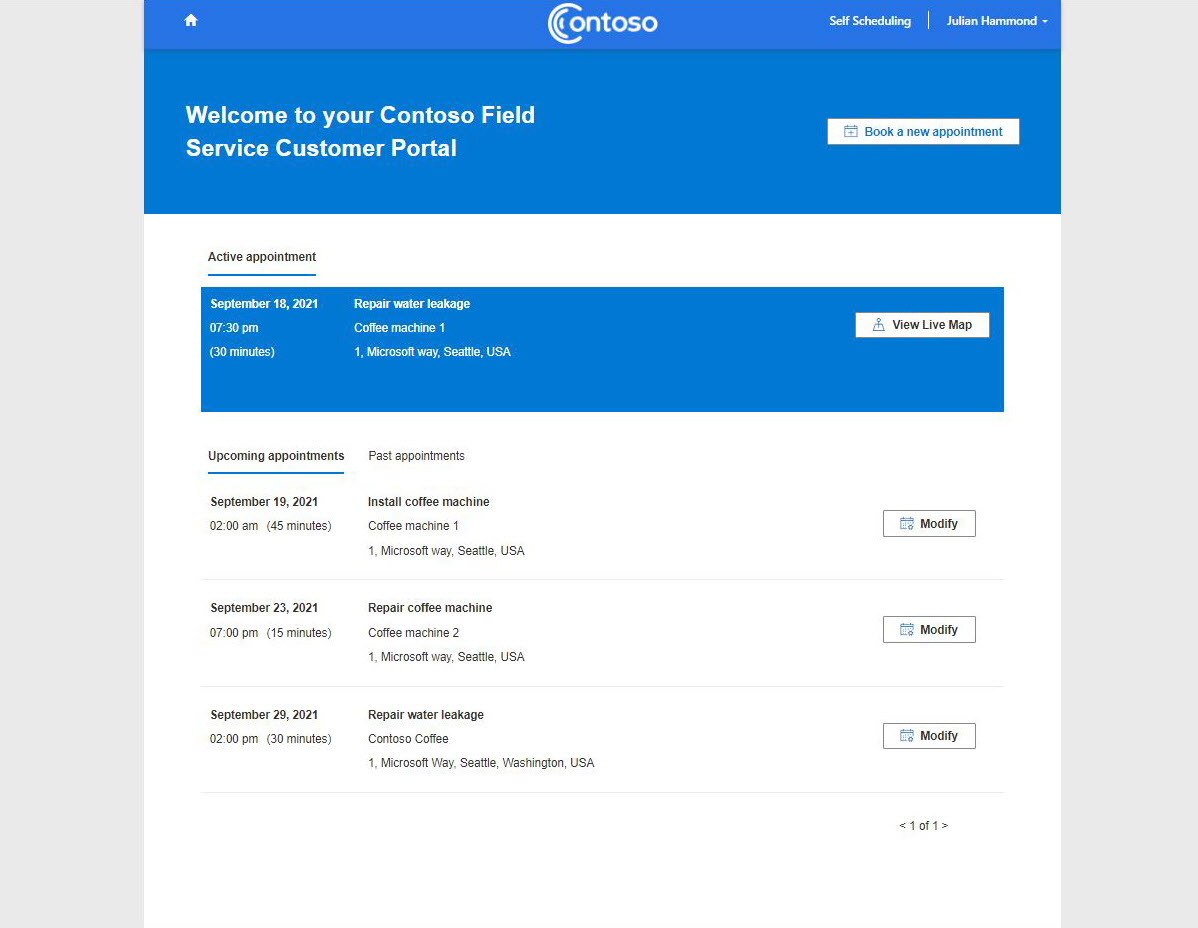
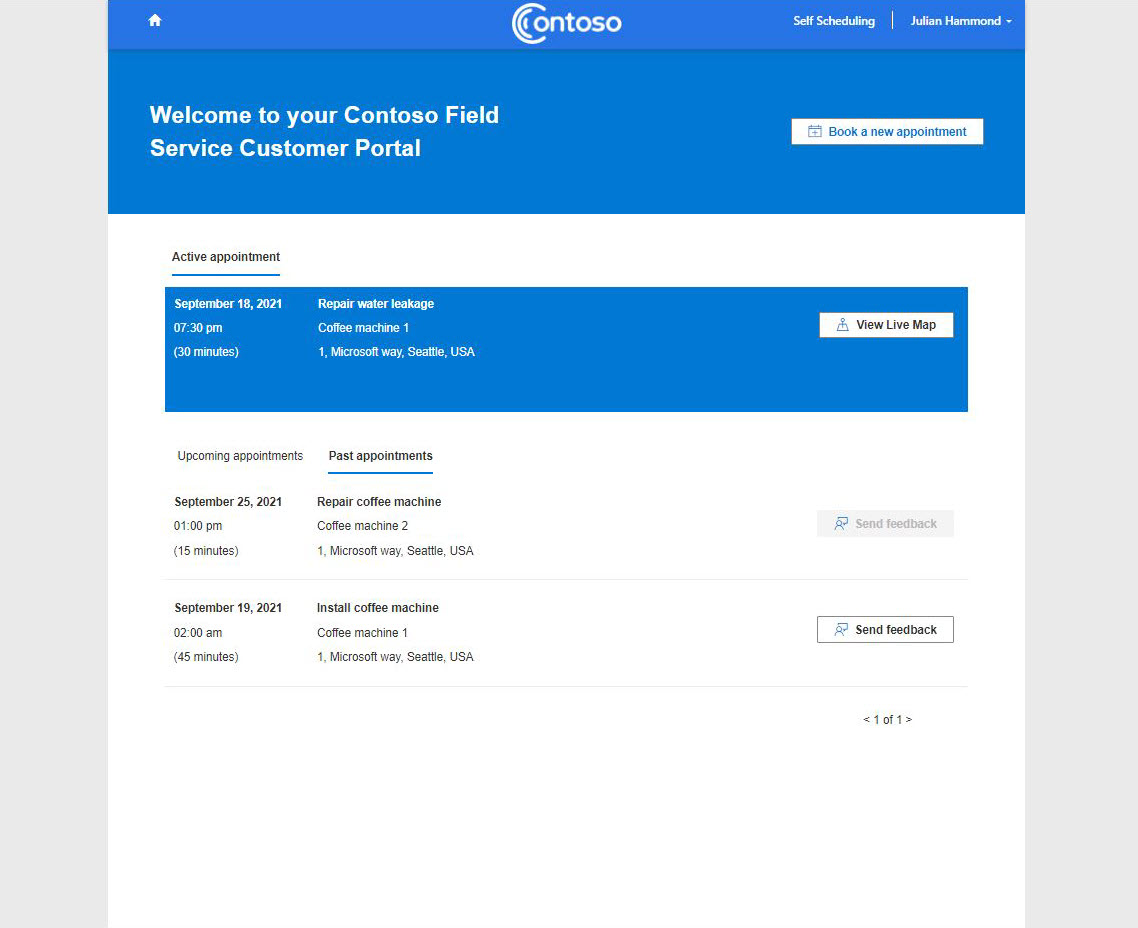
View different states of the booking on the portal
Traveling
Appointments in the Traveling state mean the technician is on their way to a service appointment. Appointments set to Traveling appear in the Active appointment section on the portal home page.
If technician tracking is turned on, the portal shows the technician's location on a map. To see the location, select View Live Map.
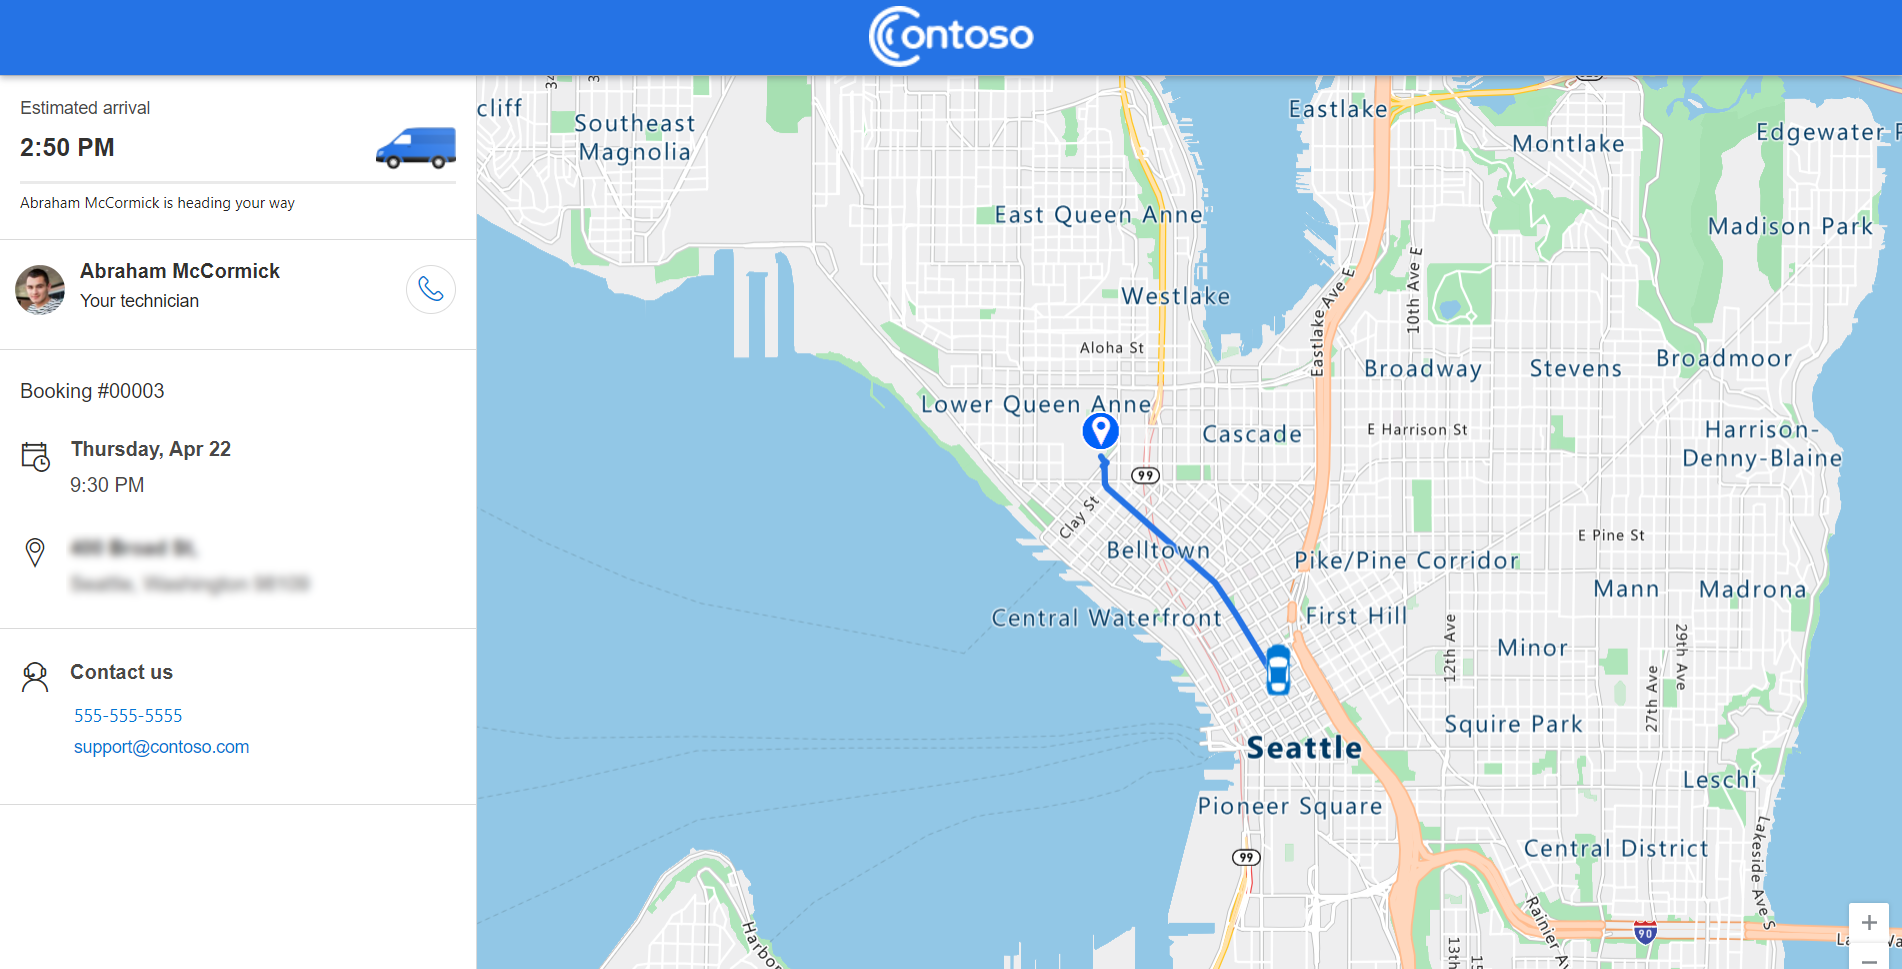
If multiple appointments are set to travel, only one appears in the Active appointment. The other active appointments are listed in the Upcoming appointments section, but you can select View Live Map.
Note
Technicians must share their location from the Field Service mobile app for location tracking and the estimated travel time. There's a small delay between their actual location and the location on the map. The delay can increase with limited network coverage of the technician's mobile device.
In Progress
Appointments set to In Progress appear in the Upcoming appointments section of the portal home page. Appointments in progress can't be changed or canceled.
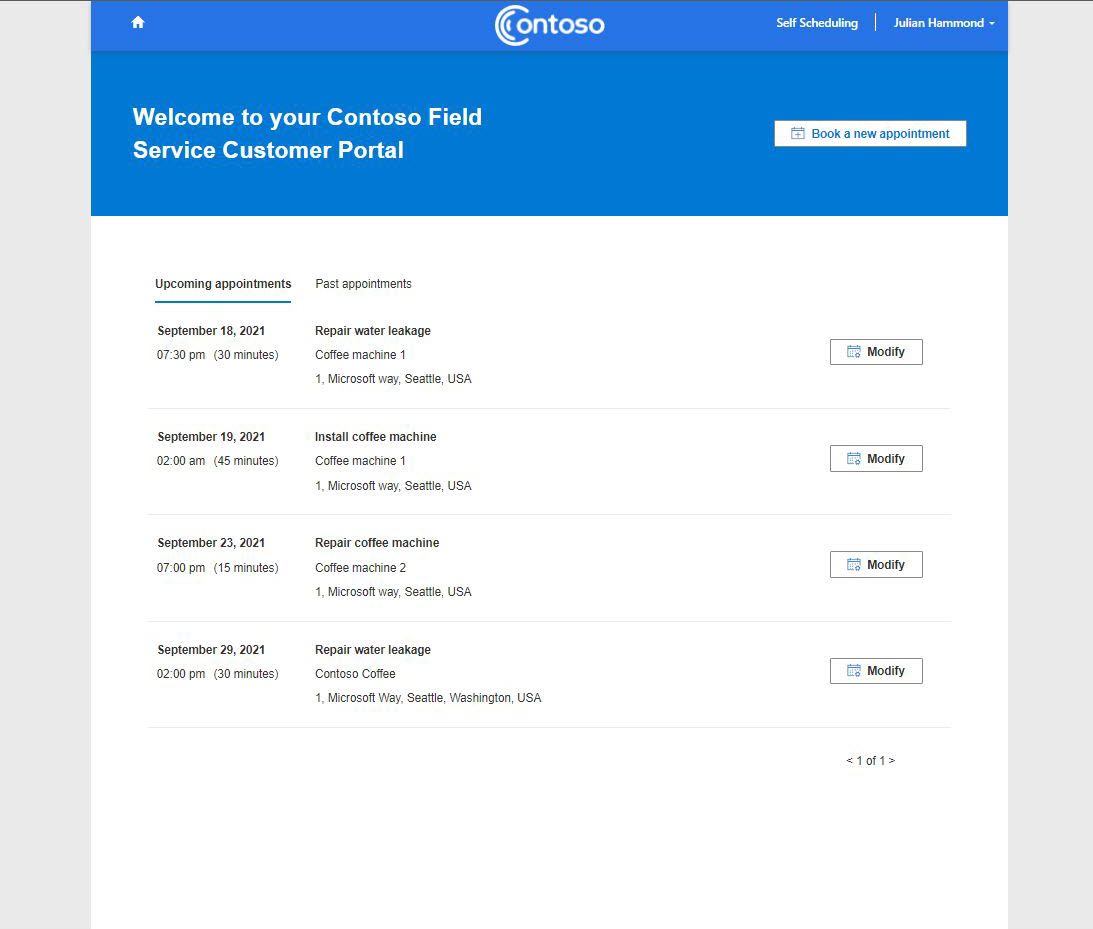
Scheduled
Scheduled appointments are shown in the Upcoming appointments section. You can change or cancel scheduled appointments.
Canceled or completed
Canceled and completed appointments move to the Past appointments tab. Optional surveys to send feedback displays on completed appointments.
Manually send an invite to a contact
Before customers can use the Field Service portal, make sure you configured the portal settings and enabled notifications.
- Sign in to Field Service.
- Open a contact record and select Create Invitation.
- On the contact record, select Related > Web Roles.
- Select Add Existing Web Role and choose the Web API User role.
- Select Add and save the changes.
Advanced user notification scenarios
Receive a new self-scheduling invite for contacts that were deleted and added again
A contact with a matching email only receives the portal invite once, even if the contact is deleted and readded to the system. To resend an invite:
- Sign in to the Power Platform admin center and select your organization's environment.
- Select Power Apps and then select Portal Management.
- Select Contacts and open the newly created contact record.
- On the command bar, select Create Invitation. Fill in any additional information and select Save.
- Select Advanced and copy the Invitation code.
- Select Related > Web Roles and select Add existing web role.
- Select the Web Api Users web role.
- Send the invite code and the portal link to the desired contact.
From the portal side:
- Open your self-scheduling portal and go to the sign-in screen.
- Select Redeem invitation.
- Paste the invite code and create a portal account.
Receive a password reset email
Make sure you have the correct business process flow enabled for this functionality.
- Sign in to Power Apps.
- Select Solutions and your organization's solution.
- Under Objects, select Processes.
- Search for and open Send Password Reset to Contact. Scroll down and select View Properties.
- Edit the From field for a user. Typically the same account you use to send notifications for the scheduling experience. Then, select Save and Close.
- Sign in to the Power Platform admin center and select your organization's environment.
- Select Settings > Email > Mailboxes.
- Select the user you set in step 5, select Approve Email, and then select Test & Enable Mailbox.
