Note
Access to this page requires authorization. You can try signing in or changing directories.
Access to this page requires authorization. You can try changing directories.
Schedule board settings in Universal Resource Scheduling let you define the layout and functions of schedule board tabs and the schedule board in general. By default, every user with out-of-box security roles can access the schedule board. Admins can create custom security roles with the Schedule Board Setting privilege to restrict access to certain roles.
There are two levels of settings for the schedule board.
Board view settings mainly define the layout of a schedule board.
Board settings contain more detailed settings and enable customizations.
Board view settings
The board view settings show in a side pane and apply only to the selected schedule board tab.
Open the Schedule Board, choose the tab to configure, and select Scheduler settings.
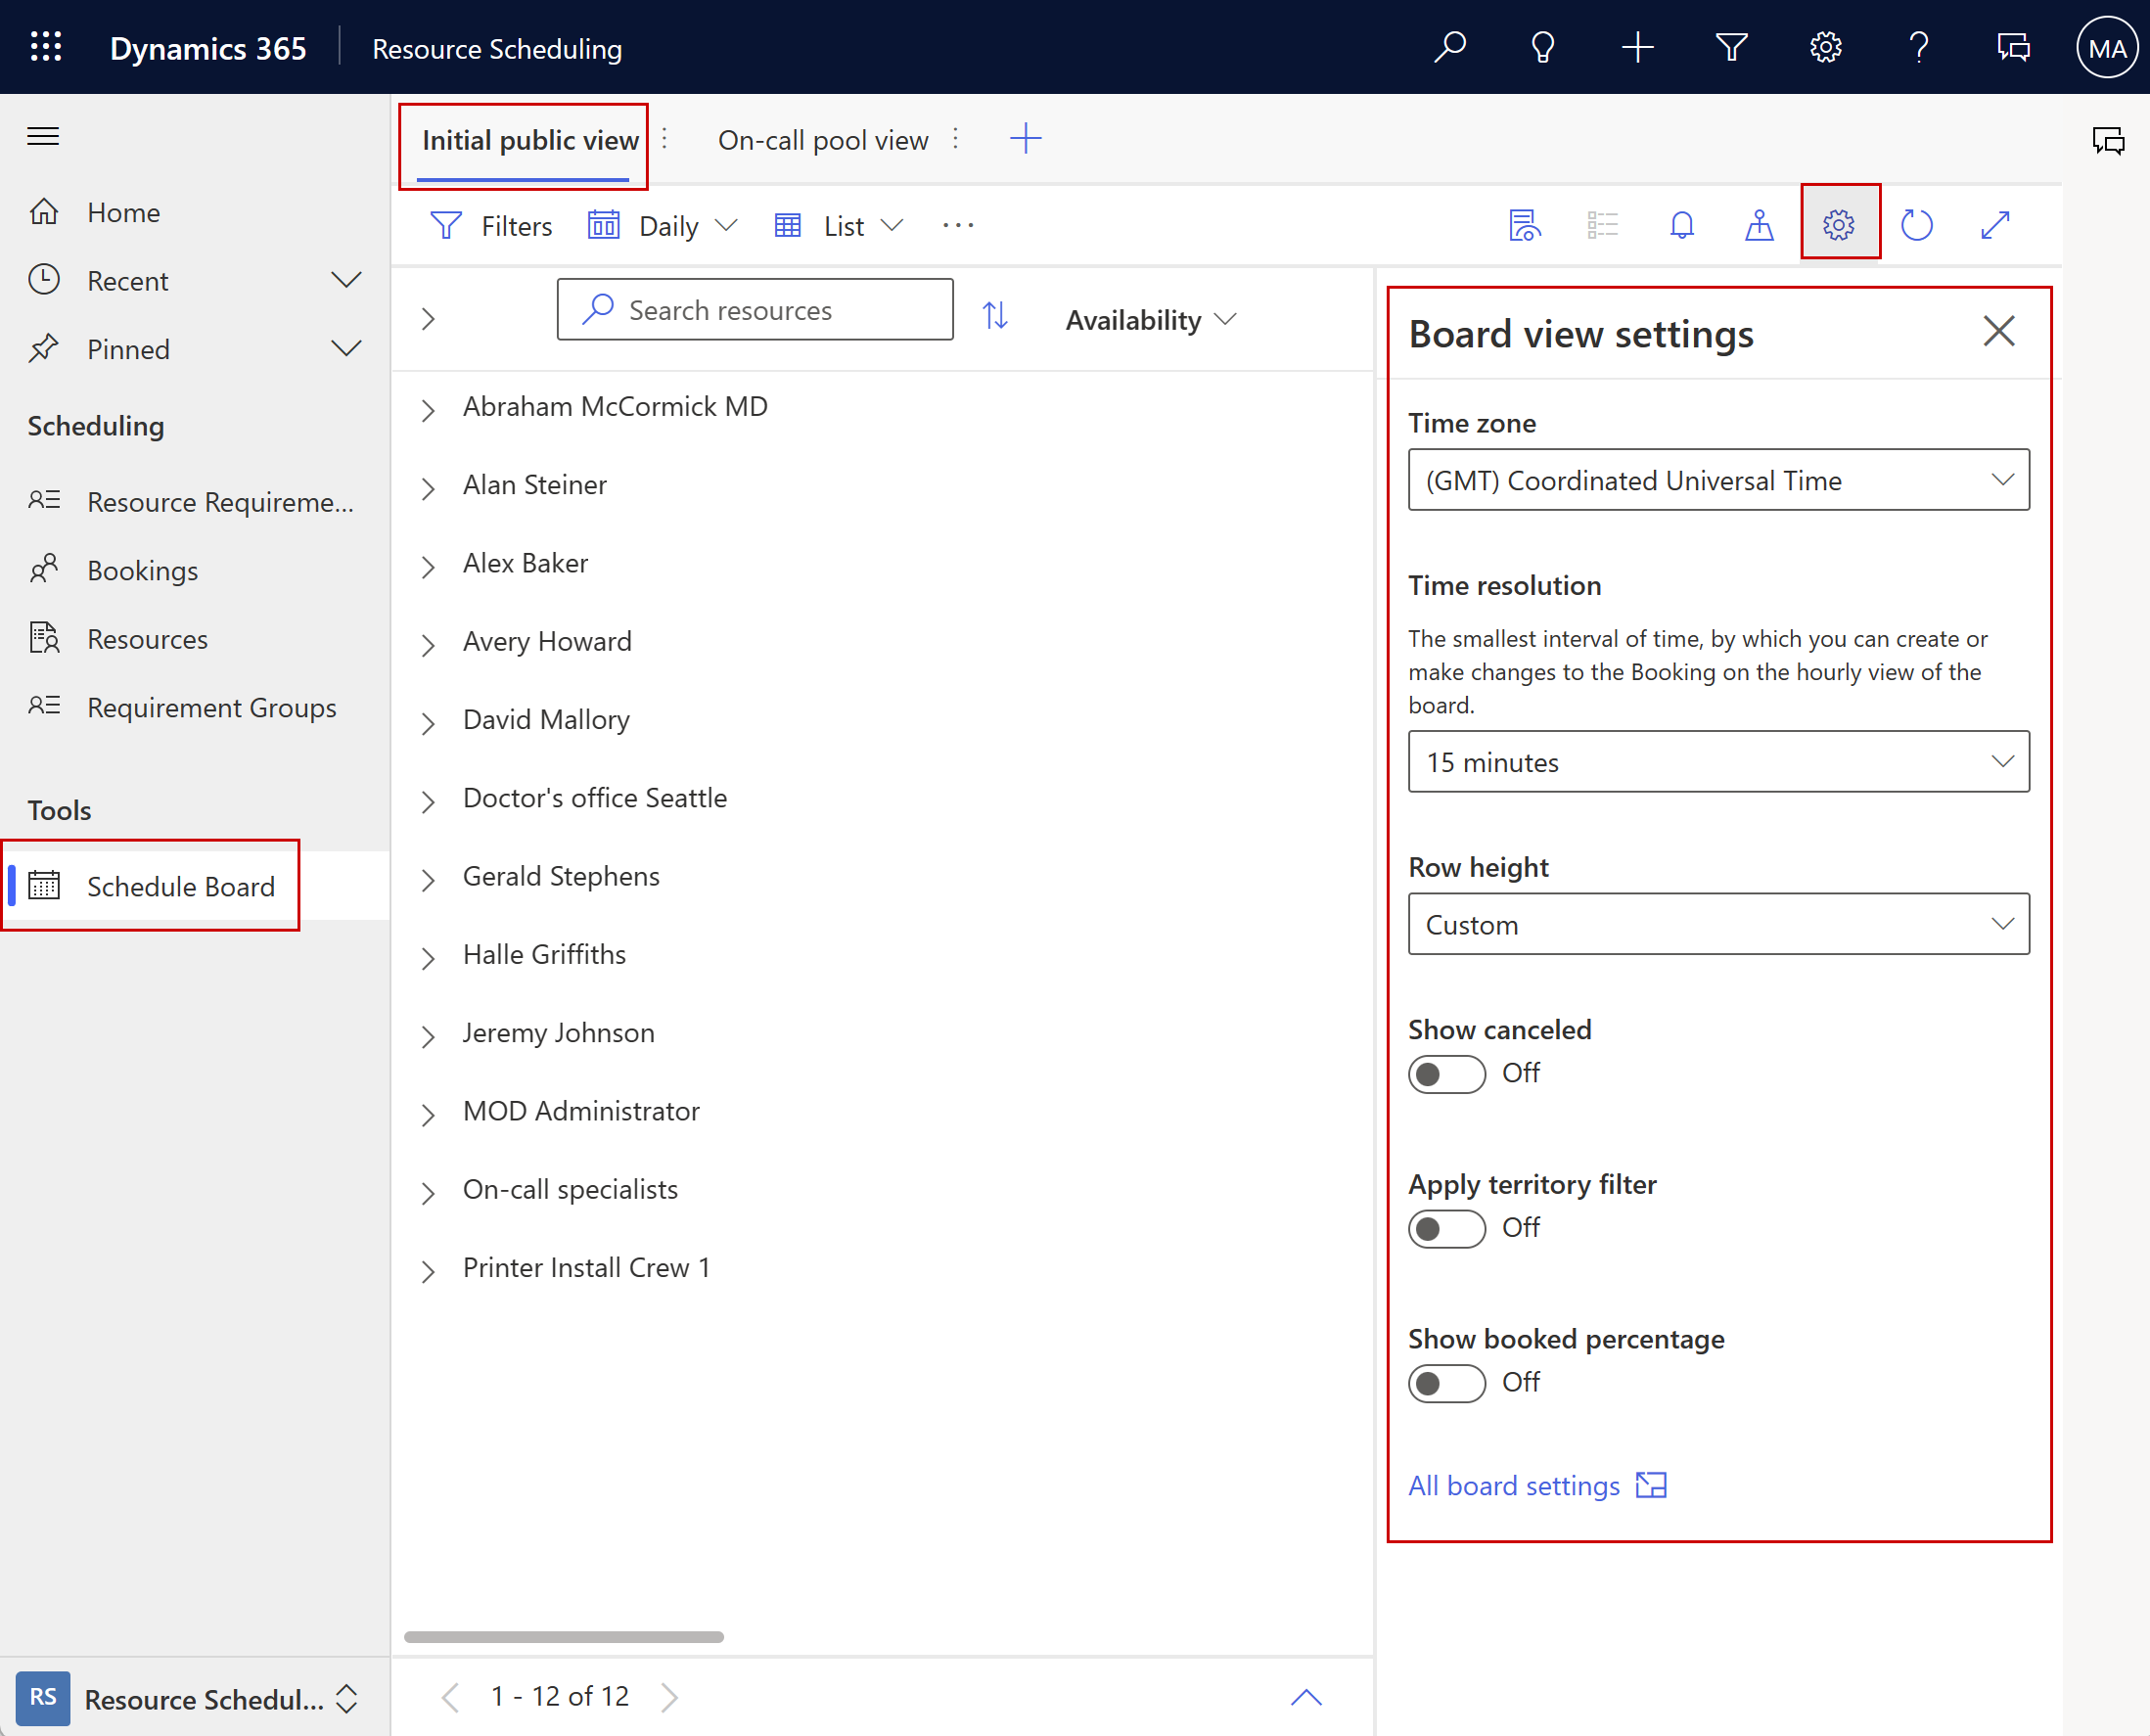
- Time Zone: Sets the time zone that the schedule board uses. The times for bookings in different time zones adapt to the selection.
- Working time: Defines the working hours for the schedule board. The working time is used to determine when resources are available for scheduling. It is only applied to the hourly view of the schedule board.
- Working days: Defines the working days for the schedule board. The working days are used to determine when resources are available for scheduling. It is only applied to the hourly view of the schedule board.
- Time resolution: Time intervals for the hourly view.
- Row height: Defines the height of resource rows.
- Optimization goal: Applicable when using the Resource Scheduling Optimization add-in for Dynamics 365 Field Service. Defines which optimization goal the system uses to recommend resources.
- Show canceled: Shows or hides canceled bookings.
- Apply territory filter to requirements: Defines whether the resource filter for territory also applies to requirements in the bottom pane.
- Show booked percentage: Shows or hides the percentage of total work time booked on the schedule board.
- Show bookings proportional to duration: Bookings on the daily, weekly, and monthly views show proportional to their duration instead of stacked.
- Show travel duration: Shows or hides travel time in the hourly view.
All board settings opens the board settings.
Board settings
Board settings are more detailed and let you define settings for a specific board tab and default settings that apply to all tabs.
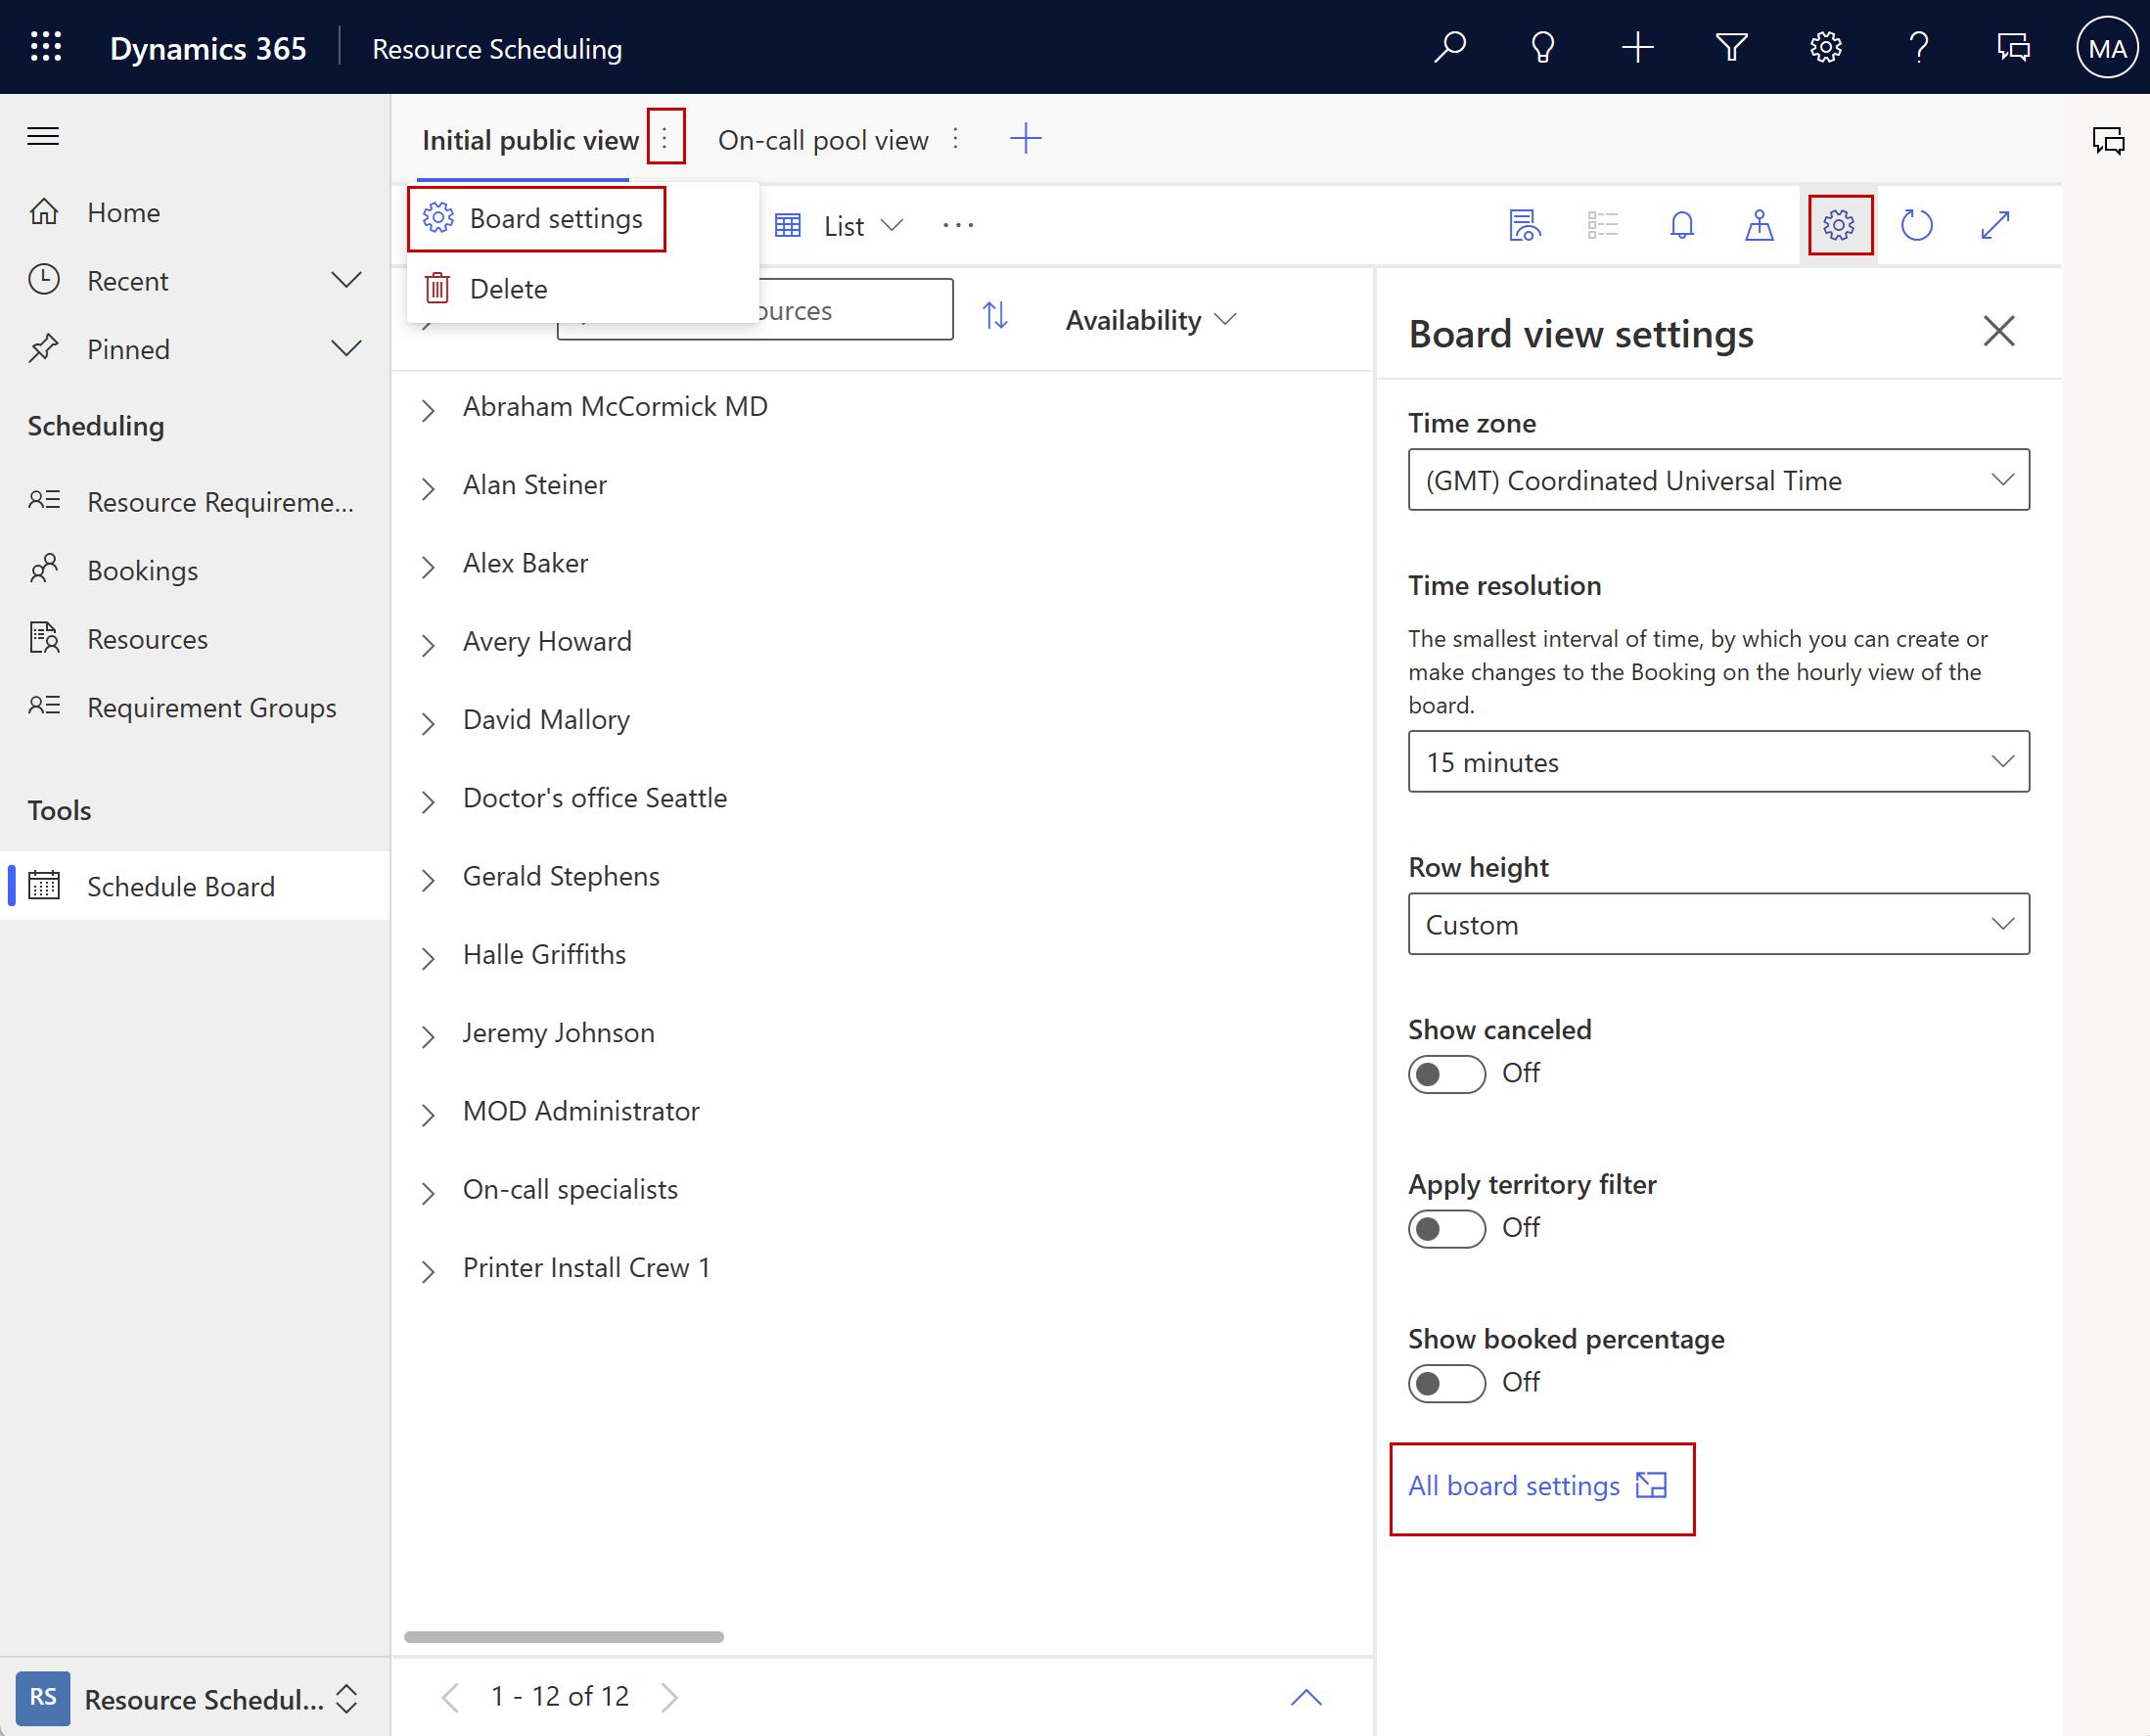
You can open the board settings in two ways:
For a specific board tab, select the vertical ellipsis ⋮ next to the schedule board tab name and choose Board settings.
For all tabs, open the Scheduler settings and select All board settings.
Basic section
Name: The name of the tab that shows on the schedule board.
Shared With: Decides which users can view and edit the schedule board tab.
- Everyone
- Specific People: See Share a schedule board tab with specific people
- Just Me
Edit defaults: Lets you choose the default tab settings when new schedule boards are created. When values in a particular schedule board tab setting show < Default View >, it means the value is coming from the default tab settings.
Reset to Default: Resets the current tab setting values to the values outlined in the default settings.
Share a schedule board tab with specific people
The schedule board saves tabs as records in the Schedule Board Settings table. To share a tab, use the Schedule board settings management control.
Note
Managing schedule board access for teams by creating custom security roles and editing permissions isn't supported.
Map section
The Map section specifies views that pull details from a record when users select an icon on the map. Only public views are available for selection. Even though you can change existing views, it's better to copy the default view and apply changes to the copy. Views related to resources are based on the Bookable Resource entity. Views related to organizational units are based on the Organizational Unit entity.
Resource tooltips view
This view defines the fields displayed in a tooltip that appears when you select a resource pin on the map.
Resource details view
This view defines the fields displayed in the details pane when selecting a resource pin on the map. The details pane opens when you select the Details icon on the schedule board.
Organizational unit tooltips view
This view defines the fields displayed in a tooltip that appears when an organizational unit map pin.
Organizational unit details view
This view defines the fields displayed in the details pane when selecting an organizational unit map pin. The details pane opens when you select the Details icon on the schedule board.
Requirement map filter view
This view defines the resource requirement records displayed on the map. The setting lists public views related to the resource requirement entity for selection. Resource requirements must have a latitude and longitude to display it on the map.
Custom web resource
Web resources are files that extend the Dynamics 365 application, such as HTML or JavaScript files. This section lets you access web resources from the schedule board, which can help dispatchers be more efficient and increase utilization.
Title: the selected web resource shows in the actions area on the schedule board. A new tab with the provided title appears next to the maps icon.
Web Resource: select a web resource from your Dynamics 365 organization.
Schedule assistant
The schedule assistant helps dispatchers assign requirements to ideal resources.
Search for
This setting decides the default value for the Search For field in the schedule assistant filter pane.
Set to All resources to search for all applicable resources in the system that meet the schedule assistant filters for a requirement. For smaller organizations or organizations with less rigid resource and line of business divisions, we recommend the All resources setting that searches across all applicable resources across the entire organization.
Set to Resources visible on board to search for resources that meet the schedule assistant filters for that requirement and meet the current schedule board resource filters. Users can change this value in the schedule assistant. For organizations that use multiple schedule boards to manage subsets fo all resources, we recommend the Resources visible on board setting. It avoids scheduling requirements to resources that aren't part of a defined subset.
Unavailable resources
This setting determines how unavailable resources appear when users launch the schedule assistant from the Find availability button on the schedule board.
Unavailable resources do not appear temporarily hides resources that don't match the schedule assistant filter criteria from the list of available resources.
Unavailable resources appear dimmed (when searching for resources visible on board) ensures all resources that don't match the schedule assistant filter criteria still show on the schedule board, but appear dimmed. Open the schedule assistant and set the Search For filter to Resources visible on board to see the unavailable resources, which appear dimmed. This setting only applies while in Gantt view.
Book based on
This setting changes the schedule assistant visualization of the booking slot to make it easier to understand when travel time starts and when a resource is estimated to arrive.
Set to Start of Travel to visualize the booking start as when travel begins.
Set to Estimated Arrival to visualize the booking start as when the resource is estimated to arrive on site.
Colors
The colors selected in the schedule assistant section represent the resource availability in the schedule assistant. The schedule assistant determines availability by taking into account previously scheduled bookings and other factors including work hours, scheduled time off, vacations, holidays, and work closures. Additionally, a resource shows as unavailable in schedule assistant when the the availability summary cell's dates fall outside of the requirement detail's from/to date ranges.
Icons
The icons show along with the colors to represent resource availability
Turn an icon off to hide it in the schedule assistant.
Makers can customize icons by creating web resources and select Edit in the icon setting to reference them.
Board colors
Board colors represent a resource's utilization on the schedule board. Most colors only apply to daily, weekly, and monthly views and on the currently selected schedule board. The hourly view shows bookings colored by their status. The color for non-working hours applies to the hourly view too.
Other settings
Requirement page count
Controls the maximum number of resource requirement records displayed on a single page in the lower pane of the schedule board.
Resource page count
Controls the maximum number of resource records displayed on a single page of the schedule board.
Number of days displayed in hours view
Number of days displayed on hourly view of the schedule board.
Number of weeks displayed in weeks view
Number of weeks displayed on the weekly view of the schedule board.
Number of days displayed in days view
Number of days displayed on the daily view of the schedule board.
Number of months displayed in months view
Number of days displayed on the monthly view of the schedule board.
Booking alerts template
This HTML snippet defines what shows in a booking alert.
For reference, the default HTML is as follows:
    <b class="bold">Subject: </b>{msdyn_msdyn_bookingalert_msdyn_bookingalertstatus_BookingAlert.subject}<br />
    <b class="bold">Due: </b>{msdyn_nexttimetoshow}<br />
    <b class="bold">Description: </b><br />
    {msdyn_msdyn_bookingalert_msdyn_bookingalertstatus_BookingAlert.description}
Disable default extensions
You can modify the CSS, add your own JavaScript files, and localize the schedule board by changing labels on supported areas of the board. You can always exclude certain boards from inheriting client extensions applied to the default board by disabling default extensions on that board.
For more information about editing filter layouts, resource cell templates, and client extensions, see this blog post and Extend Universal Resource Scheduling.
Filter Layout
Controls the fields displayed in the filter pane on the schedule board. These fields are used to filter which resources are displayed on the board.
Resource cell template
Controls the images, values, fields for resources on the schedule board.
Booking alerts view
Choose system view that can filter which booking alerts records show up in the alerts view of the details pane of the schedule board.
For example, when a business has booking alerts based on events related to work orders, projects, and cases. If a particular schedule board tab only deals with a certain type of requirements, a booking alert system view helps with filtering.
Retrieve resources query
View and edit XML that defines how resource records are fetched, filtered, and sorted when the schedule board loads. Retrieve Resources Query uses filter layout and resource cell templates to perform filtering and sorting in the background.
Schedule types
The following settings are dependent on the entity being scheduled. Though requirement records are always scheduled, the requirement can be related to work orders, cases, custom entities, or no entity at all. Select None to edit default settings that apply to all boards and the settings for when a requirement is scheduled by itself. To override defaults for a schedule board, select a schedulable entity to change its settings.
Booking tooltips view
Select the system view that dictates the fields displayed when hovering your mouse over a booking. This setting only affects the hourly view of the schedule board.
Requirement details view
Select the system view that dictates the fields displayed in the details pane when a requirement is selected in the lower pane of the schedule board.
Booking details view
Select the system view that dictates the fields displayed in the details pane when a booking is selected. This setting only affects the hourly view of the schedule board.
Requirement map pin tooltips view
Select the system view that dictates the fields displayed when hovering your cursor over a requirement map pin.
Schedule assistant requirement view
Select the system view that dictates the fields displayed in the lower pane when the schedule assistant is triggered for an individual requirement from the schedule board.
Custom booking template
HTML and CSS that controls the fields inside a booking time slot on the schedule board. This setting only affects the hourly view of the schedule board.
For more information, see Edit the schedule board booking template.
Requirement Panels
Use this section to configure requirement views at the bottom of the schedule board. You can change the order in which they appear on the schedule board.
There are default requirement views automatically available. Turn off Show default requirement panels to remove them. Use the Apply territory filter to requirements setting to filter requirements in addition to resources with an active a territory filter on the schedule board.