Note
Access to this page requires authorization. You can try signing in or changing directories.
Access to this page requires authorization. You can try changing directories.
Fulfillment preferences customize how the schedule assistant displays results for single-day requirements. By default, the schedule assistant shows results based on resource schedules and the earliest available time. Fulfillment preferences include intervals and time groups, or a combination of them.
Intervals
Intervals determine the duration of each time slot shown in the schedule assistant and the starting point for subsequent bookings. For example, with 30-minute intervals, the schedule assistant displays a resource available at 9:27 AM as available at 9:30 AM and books the start time (arrival time) for 9:30 AM. Travel time is included for onsite requirements and work orders, meaning travel time begins before 9:30 AM, and a field resource would arrive and start work at 9:30 AM.
Time groups
Time groups allow schedulers to view availability in blocks of time within the schedule assistant. They differ from intervals by preserving the original start and arrival times as defined by each resource’s schedule.
For example, a heating and cooling company wants to group air-conditioning installations in two blocks. They create morning (8:00 AM to 12:00 PM) and afternoon (1:00 PM to 5:00 PM) blocks, with a one-hour break for lunch in between. They communicate a morning or afternoon time range to customers for when the installation crew arrives.
Create a fulfillment preference
In Resource Scheduling, open the Settings area. Under Scheduling, select Fulfillment Preferences and select New.
Enter a Name and Save the record.
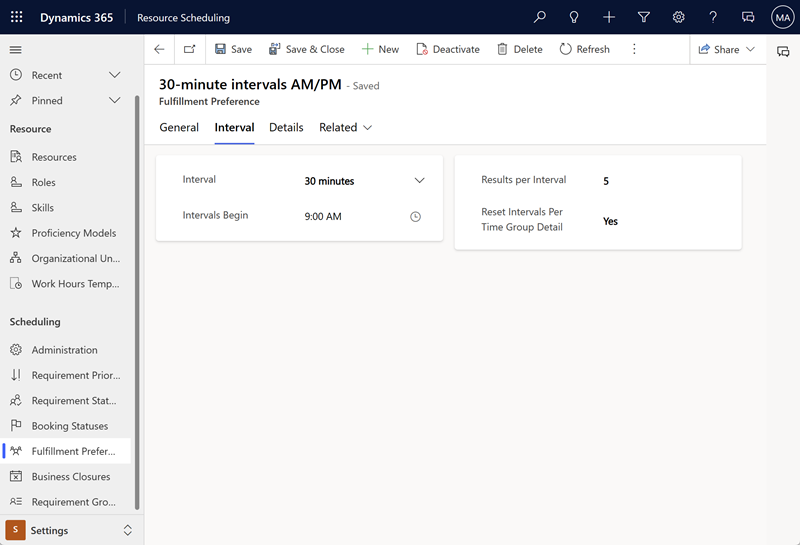
To define an interval, go to the Interval tab and enter the following information:
Interval: The duration between two available time slots.
Intervals Begin: The start time for when options are available, depending on resource availability and working hours. If you're combining an interval and time group, see Use intervals and time groups together.
Results per Interval: The number of results to limit how many options the system presents for a time slot.
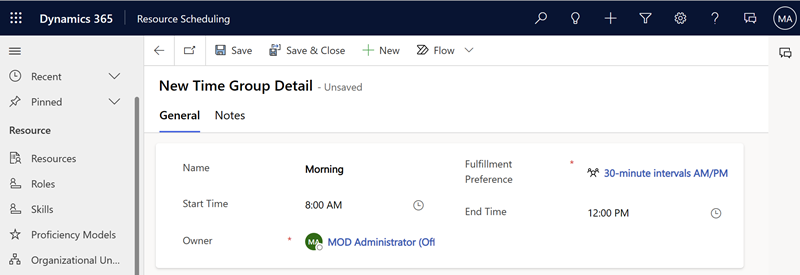
To add a time group, go to the Details tab and select New Time Group Detail.
Enter a Name and choose a Start Time and End Time.
Use intervals and time groups together
To add both an interval and a time group to the same fulfillment preference, keep these important considerations in mind.
Don't add a value for Interval Begins. The interval begins at the time of the earliest time group.
If the Reset Interval per Time Group Detail option is set to Yes, the intervals reset once a new time group detail overlaps with an interval.
For example, a business offers appointments every 90 minutes, so intervals are set to 90 minutes. Additionally, they separate into morning and afternoon time groups of 8:00 AM to 12:00 PM and 1:00PM to 5:00 PM, with a one-hour lunch in between.
If the Reset Interval per Time Group Detail is set to No, the appointments would be:
8:00 AM, 9:30 AM, 11:00 AM (not 12:30 PM because it's blocked for lunch), 2:00 PM, and 3:30 PM.
If the Reset Interval per Time Group Detail is set to Yes, the appointments would be:
8:00 AM, 9:30 AM, 11:00 AM (not 12:30 PM because it's blocked for lunch), 1:00 PM (resetting for the next time group detail), 2:30 PM, and 4:00 PM.
Associate fulfillment preference to a requirement or requirement group
Open a requirement and go to the Scheduling tab to choose the Fulfillment Preference. For a requirement group, you can choose it in the Fulfillment Preference column. However, requirement groups only support intervals. Time groups aren't supported for requirement groups.
Book a requirement
Open a resource requirement and select Book to schedule the requirement. The start and end times match the fulfillment preference you defined for the requirement.