Note
Access to this page requires authorization. You can try signing in or changing directories.
Access to this page requires authorization. You can try changing directories.
This article explains how you can use your Electronic reporting (ER) configuration to arrange the transfer of data from your instance to Power BI services. As an example, this article uses Intrastat transactions as business data that must be transferred. The Power BI map visualization uses this Intrastat transaction data to present a view for analysis of company import/export activities on the Power BI report.
Overview
Microsoft Power BI is a collection of software services, apps, and connectors that work together to turn external sources of data into coherent, visually immersive, and interactive insights. Electronic reporting (ER) lets users easily configure data sources and arrange the transfer of data from the application to Power BI. The data is transferred as files in the OpenXML worksheet (Microsoft Excel workbook file) format. The transferred files are stored on a Microsoft SharePoint Server that has been configured for that purpose. The stored files are used in Power BI to make reports that include visualizations (tables, charts, maps, and so on). Power BI reports are shared with Power BI users, and they are accessed in Power BI dashboards and on the application pages. This article explains the following tasks:
- Configure Microsoft Dynamics 365 Finance.
- Prepare your ER format configuration to get data from the Finance application.
- Configure the ER environment to transfer data to Power BI.
- Use transferred data to create a Power BI report.
- Make the Power BI report accessible in Finance.
Prerequisites
To complete the example in this article, you must have the following access:
Access for one of the following roles:
- Electronic reporting developer
- Electronic reporting functional consultant
- System administrator
Access to the SharePoint Server that is configured for use with the application
Access to the Power BI framework
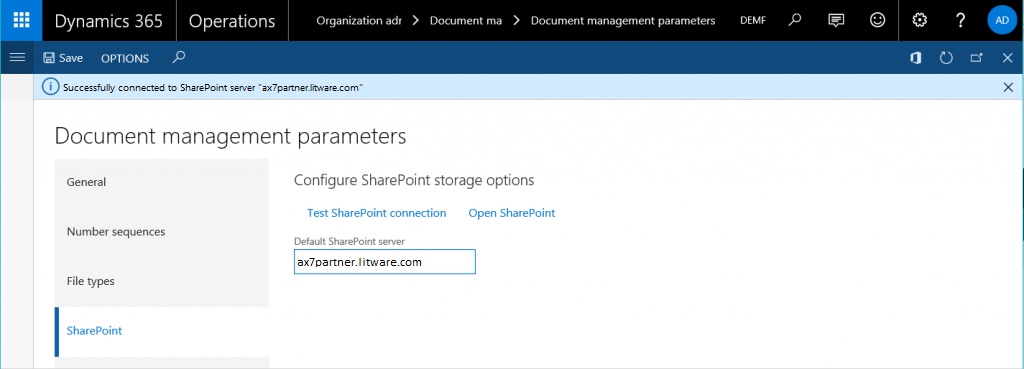
Configure document management parameters
On the Document management parameters page, configure access to the SharePoint Server that will be used in the company that you're signed in to (the DEMF company in this example).
Test the connection to the SharePoint Server to make sure that you've been granted access.

Open the configured SharePoint site. Create a new folder where ER will store Excel files that have the business data that the Power BI reports require as a source of Power BI datasets.
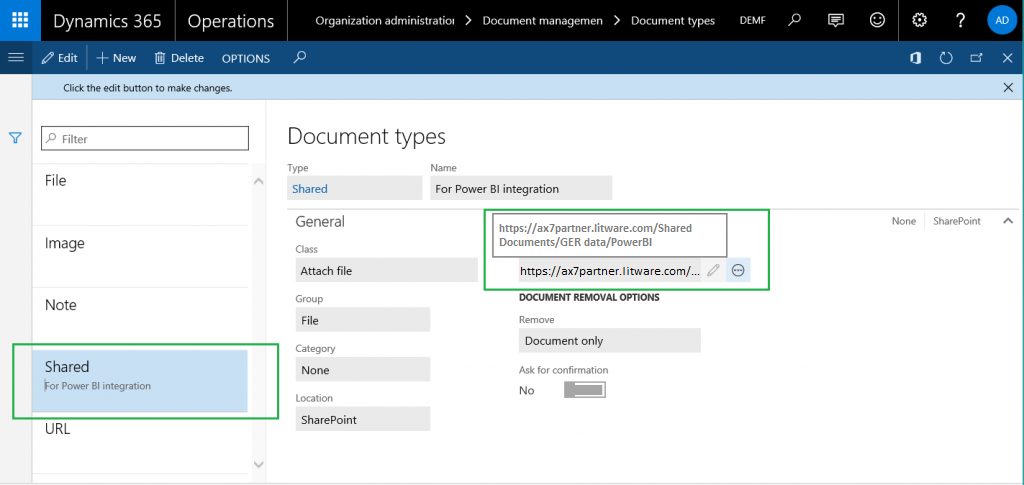
On the Document types page, create a new document type that will be used to access the SharePoint folder that you just created. Enter File in the Group field and SharePoint in the Location field, and then enter the address of the SharePoint folder.

Configure ER parameters
- In the Electronic reporting workspace, click the Electronic reporting parameters link.
- On the Attachments tab, select the File document type for all the fields.
- In the Electronic reporting workspace, make the required provider active by clicking Set active. For more information, play the ER Select service provider task guide.
Use an ER data model as the source of data
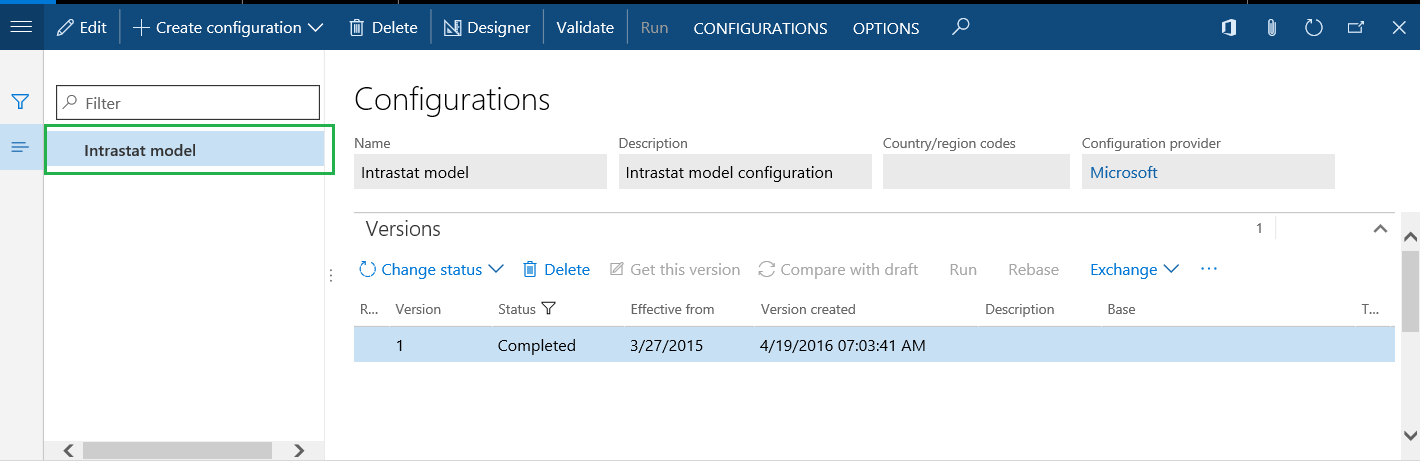
You must have an ER data model as the source of business data that will be used on Power BI reports. This data model is uploaded from the ER configurations repository. For more information, see Download Electronic reporting configurations from Lifecycle Services, or play the ER Import a configuration from Lifecycle Services task guide. Select Intrastat as the data model that will be uploaded from the selected ER configurations repository. (In this example, version 1 of the model is used.) You can then access the Intrastat ER model configuration on the Configurations page.
Design an ER format configuration
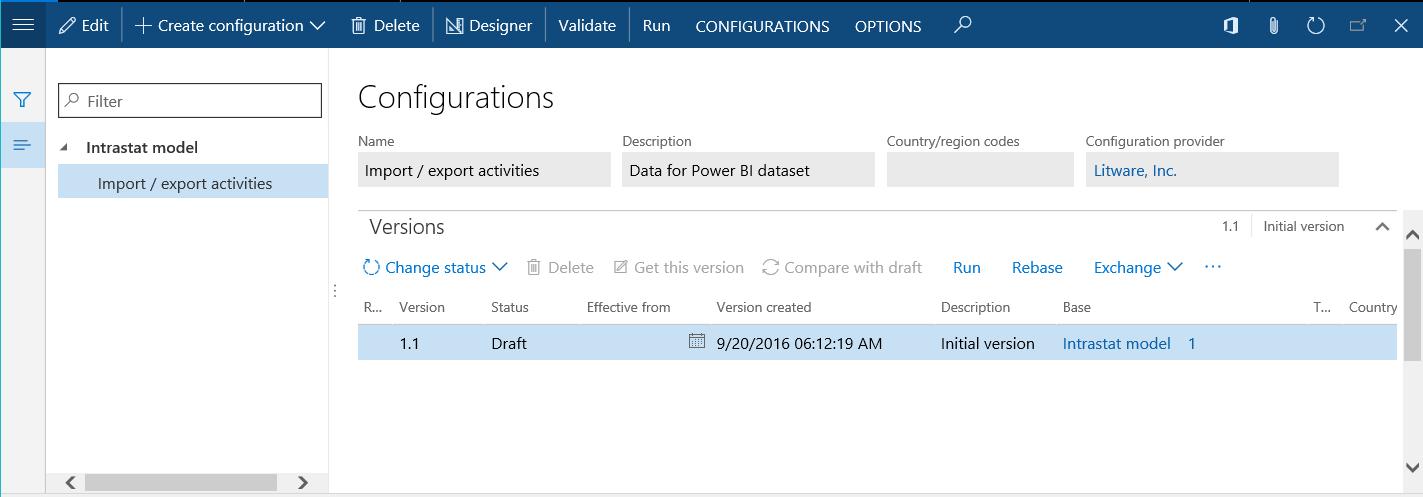
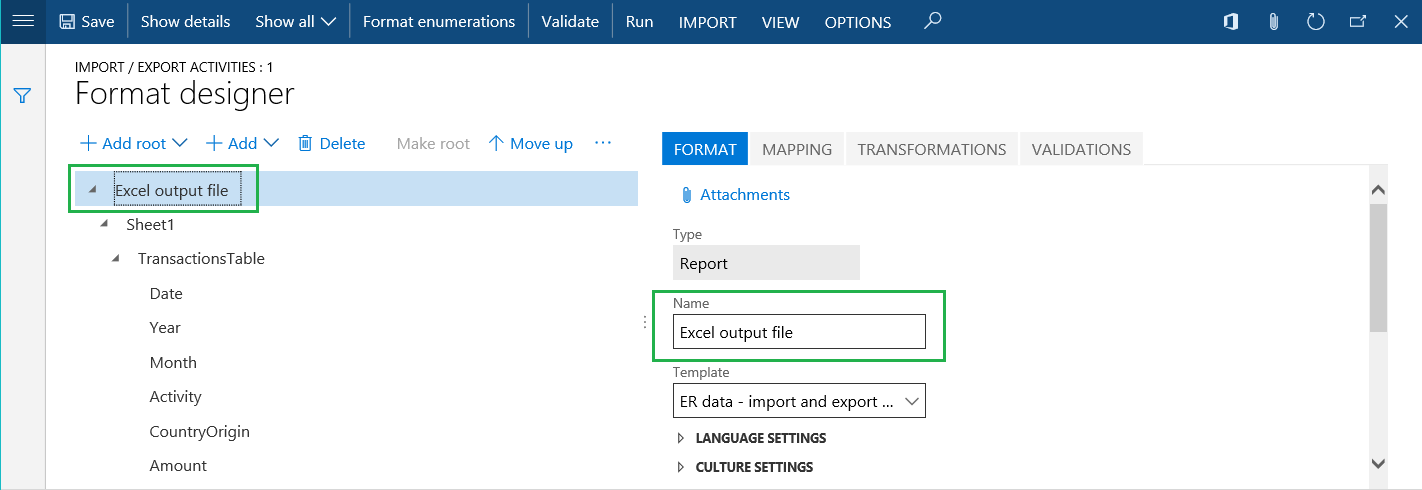
You must create a new ER format configuration that uses the Intrastat data model as the source of business data. This format configuration must generate output results as electronic documents in OpenXML (Excel file) format. For more information, play the ER Create a configuration for reports in OPENXML format task guide. Name the new configuration Import / export activities, as shown in the following illustration. Use the ER data - import and export details Excel file as a template when you design the ER format. (For information about how to import a format template, play the task guide.)
To modify the Import / export activities format configuration, follow these steps.
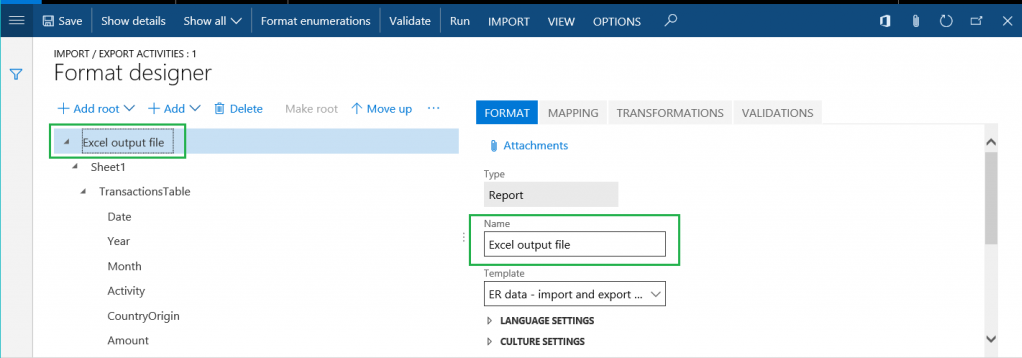
Click Designer.
On the Format tab, name the file element for this format Excel output file.
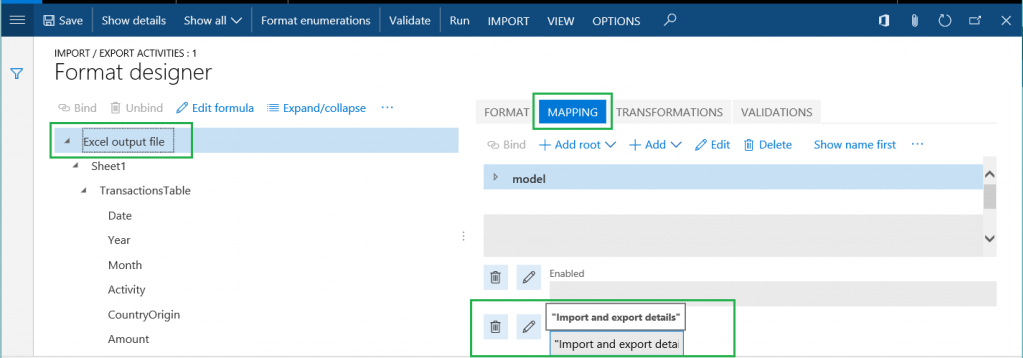
On the Mapping tab, specify the name of the Excel file that will be generated whenever this format is run. Configure the related expression to return the value Import and export details (the .xlsx file name extension will be added automatically).
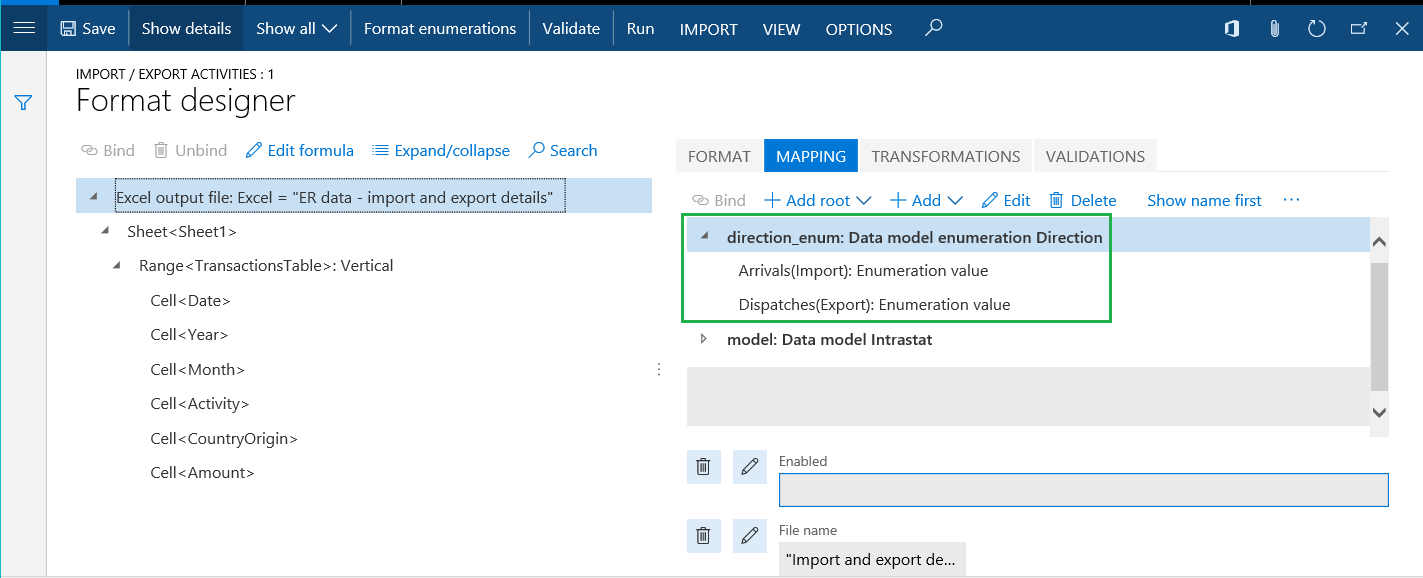
Add a new data source item for this format. (This enumeration will be required for further data binding.)
- Name the data source direction_enum.
- Select Data model enumeration as the data source type.
- Refer to the Direction data model enumeration.
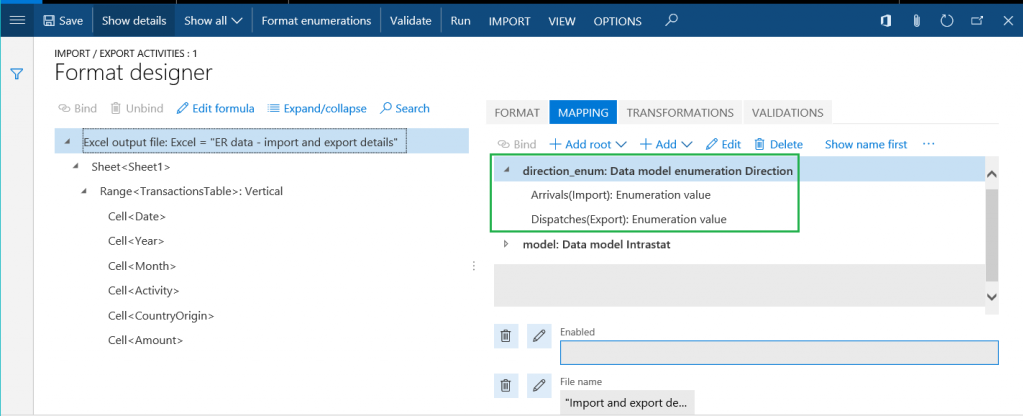
Complete the binding of elements of the Intrastat data model and elements of the designed format, as shown in the following illustration.
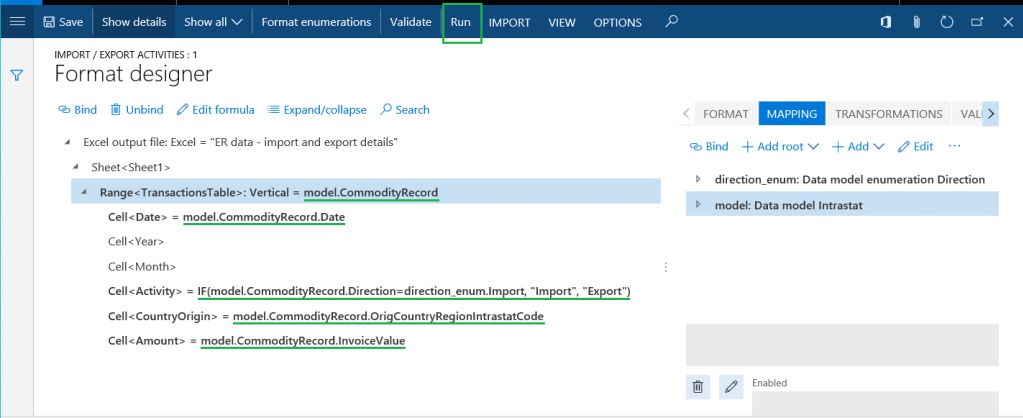


After it's run, the ER format generates the output result in Excel format. It sends the details of the Intrastat transactions to the output result, and separates them as transactions that describe either import activities or export activities. Click Run to test the new ER format for the list of Intrastat transactions on the Intrastat page (Tax > Declarations > Foreign trade > Intrastat).
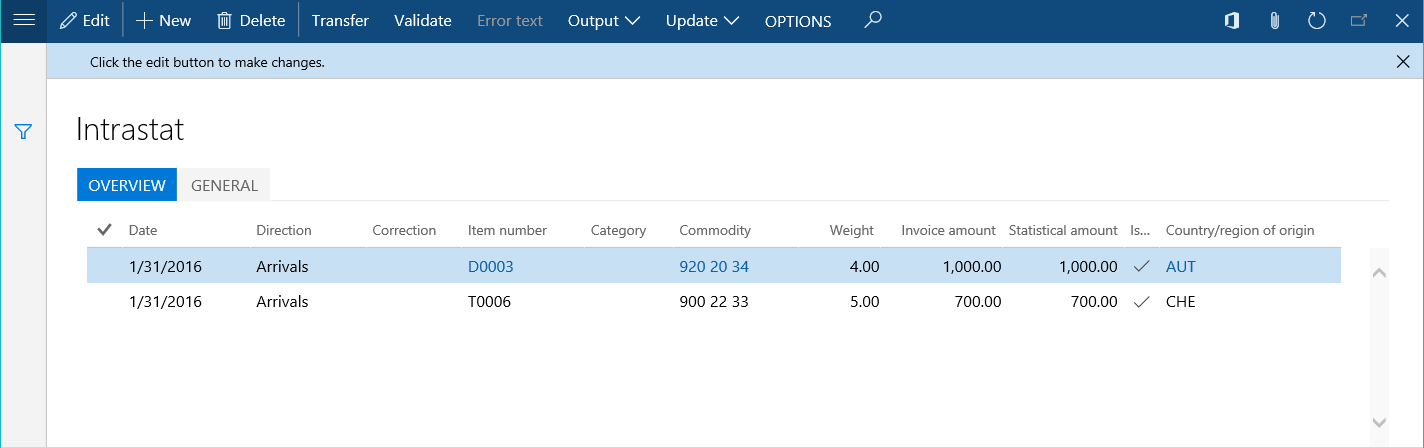
The following output result is generated. The file is named Import and export details.xlsx, as you specified in the format settings.
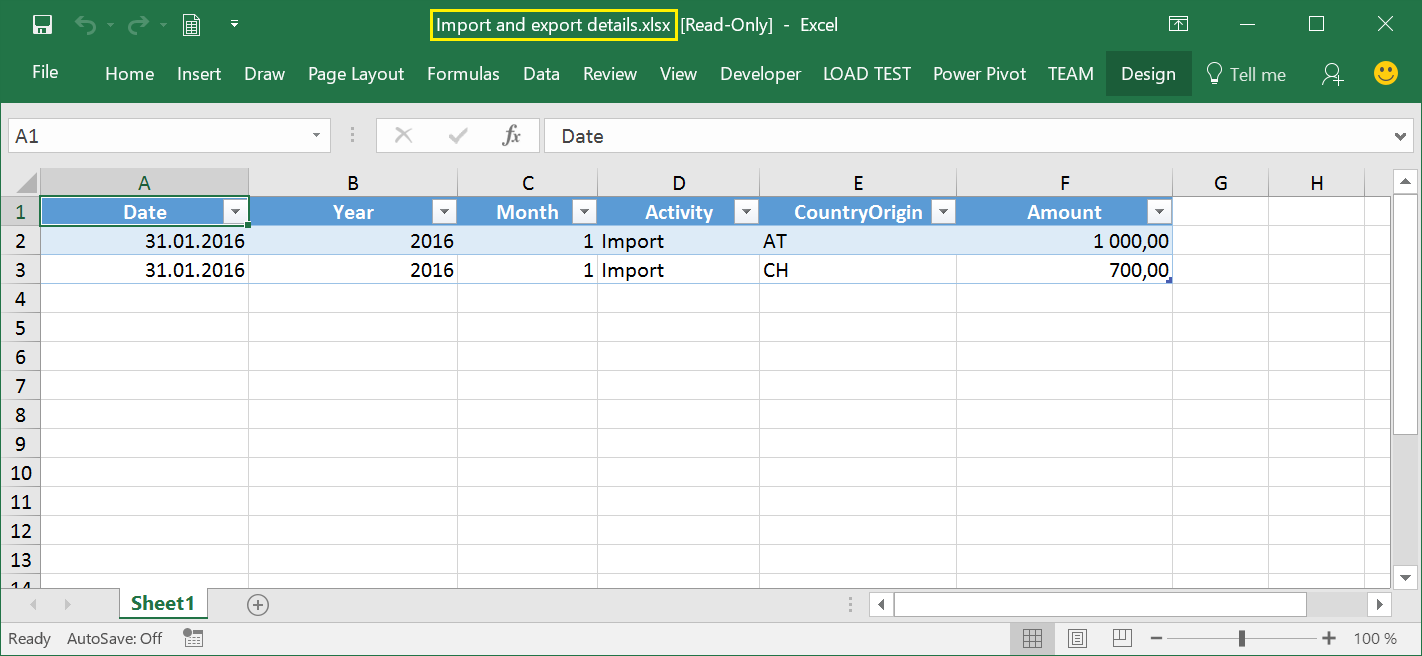
Configure the ER destination
You must configure the ER framework to send the output result of the new ER format configuration in a special way.
- The output result must be sent to the folder of the selected SharePoint Server.
- Each execution of the format configuration must create a new version of same Excel file.
On the Electronic reporting page (Organization administration > Electronic reporting), click the Electronic reporting destination item, and add a new destination. In the Reference field, select the Import / export activities format configuration that you created earlier. Follow these steps to add a new file destination record for the reference.
- In the Name field, enter the title of the file destination.
- In the File name field, select the name Excel output file for the Excel file format component.
Click the Settings button for the new destination record. Then, in the Destination settings dialog box, follow these steps.
- On the Power BI tab, set the Enabled option to Yes.
- In the SharePoint field, select the Shared document type that you created earlier.
Schedule execution of the configured ER format
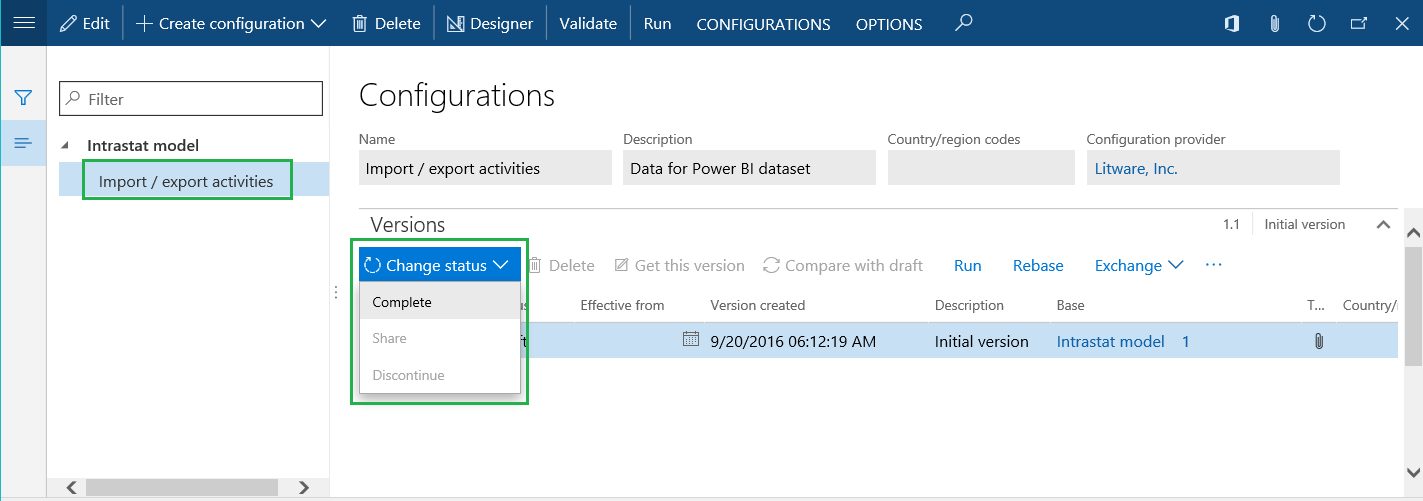
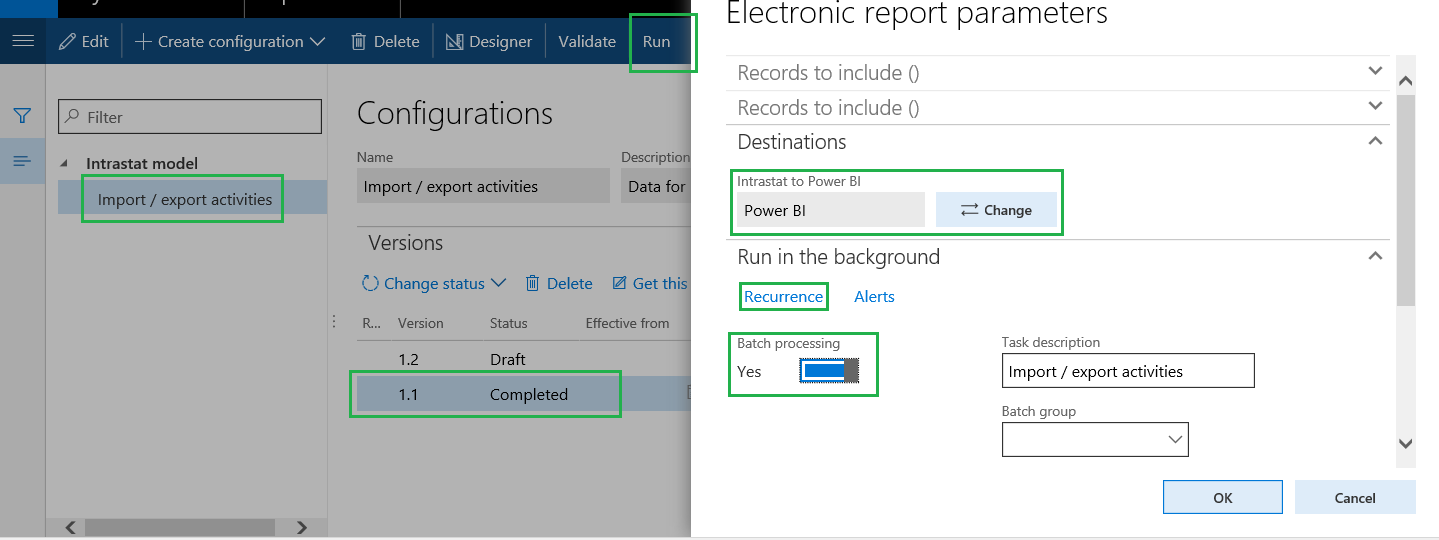
On the Configurations page (Organization administration > Electronic reporting > Configurations), in the configurations tree, select the Import / export activities configuration that you created earlier.
Change the status of version 1.1 from Draft to Complete to make this format available for use.

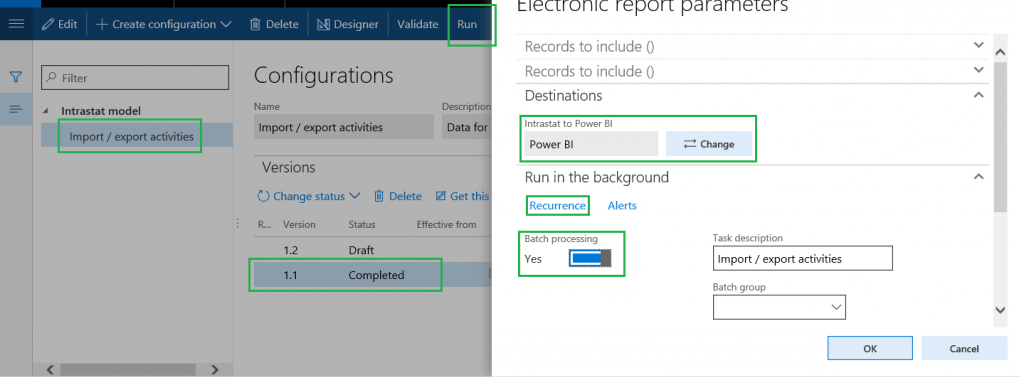
Select the completed version of the Import / export activities configuration, and then click Run. Note that the configured destination is applied to the output result that is generated in Excel format.
Set the Batch processing option to Yes to run this report in unattended mode.
Click Recurrence to schedule the required recurrence of this batch execution. The recurrence defines how often the updated data will be transferred to Power BI.
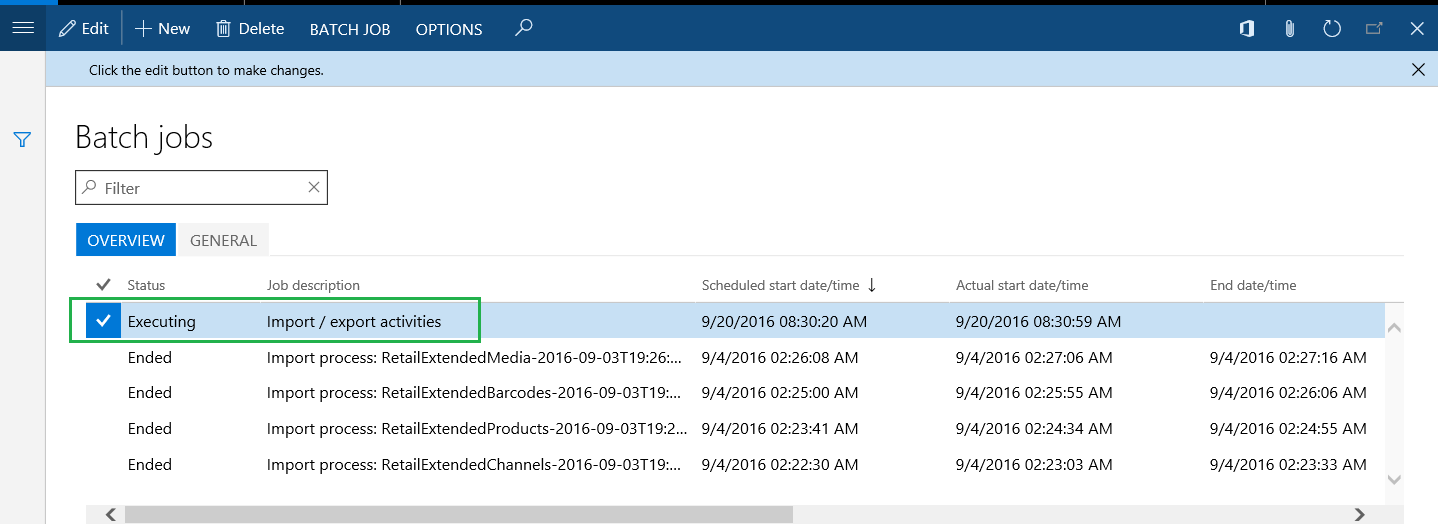
After it's configured, you can find the ER report execution job on the Batch jobs page (System administration > Inquiries > Batch jobs).
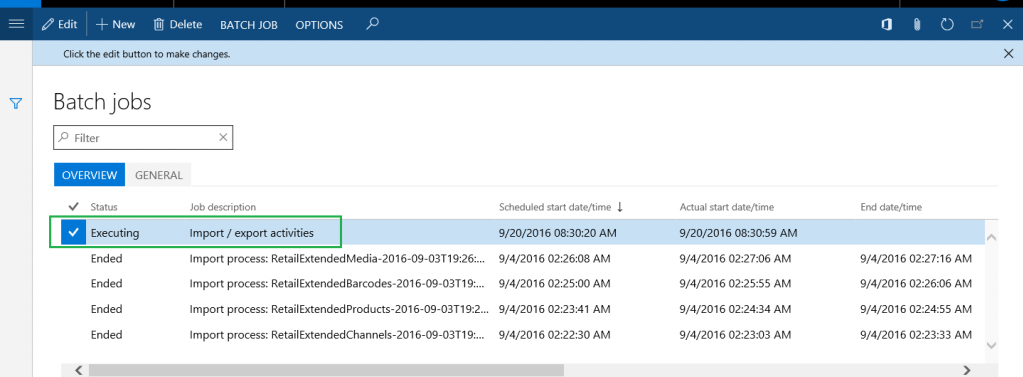
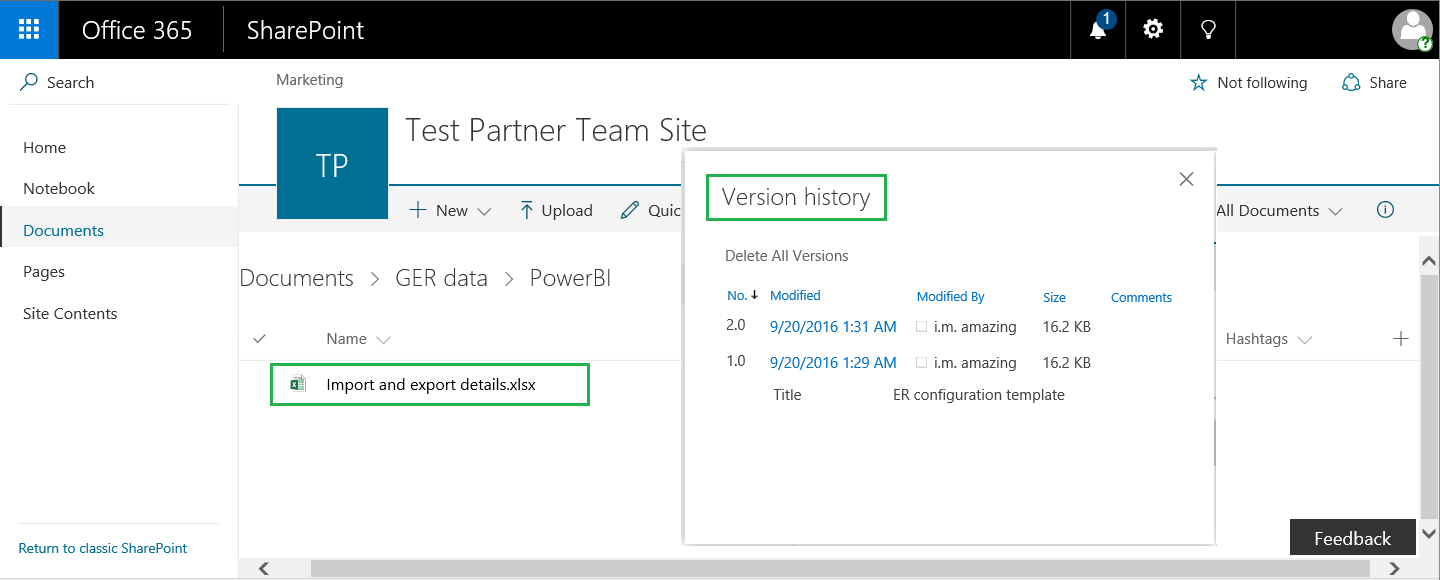
When this job is run for the first time, the destination creates a new Excel file that has the configured name in the selected SharePoint folder. Every subsequent time that the job is run, the destination creates a new version of this Excel file.

Create a Power BI dataset by using the output result of the ER format
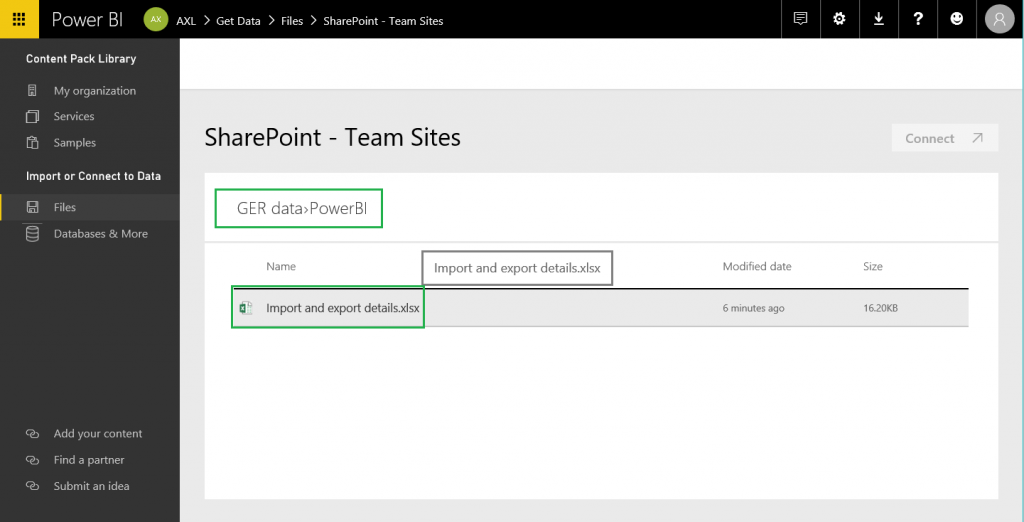
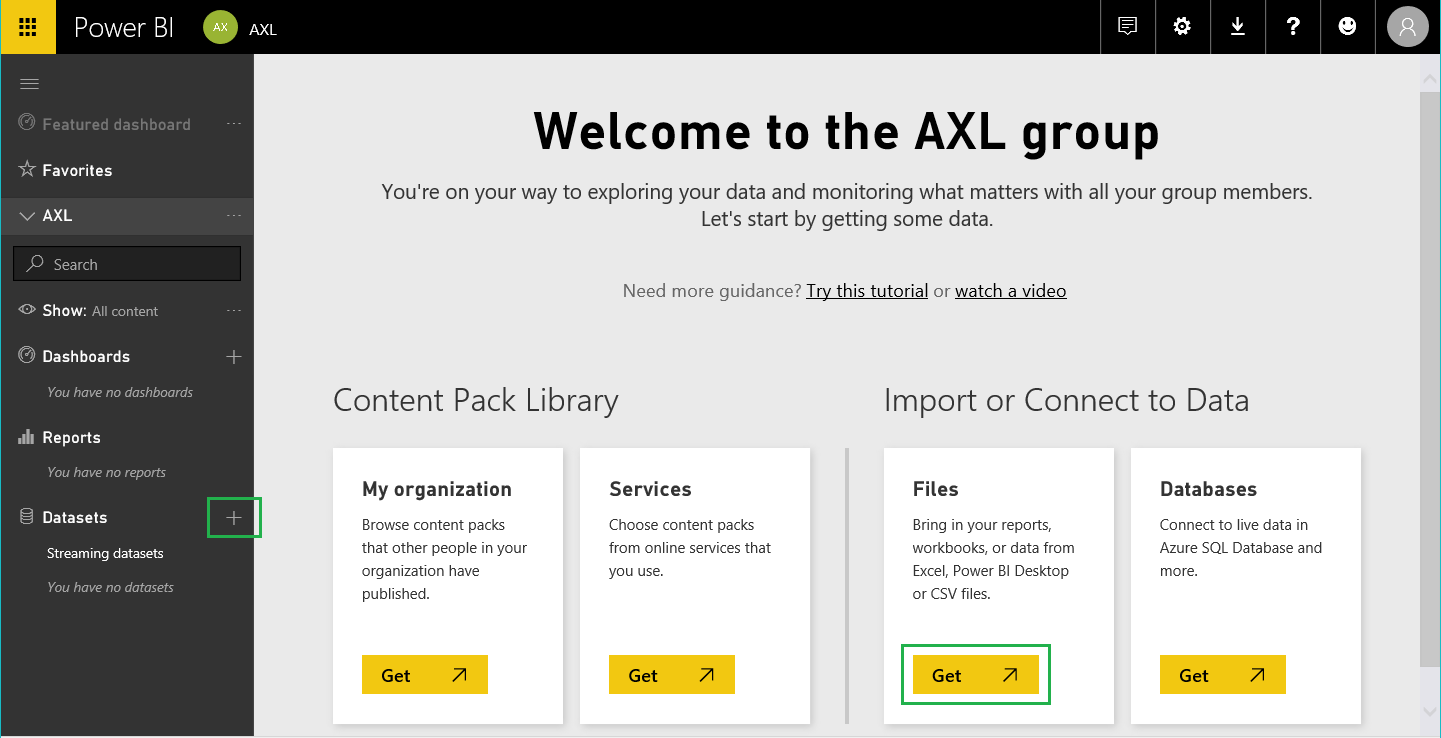
Sign in to Power BI, and either open an existing Power BI group (workspace) or create a new group. Either click Add under Files in the Import or Connect to Data section, or click the plus sign (+) next to Datasets in the left pane.

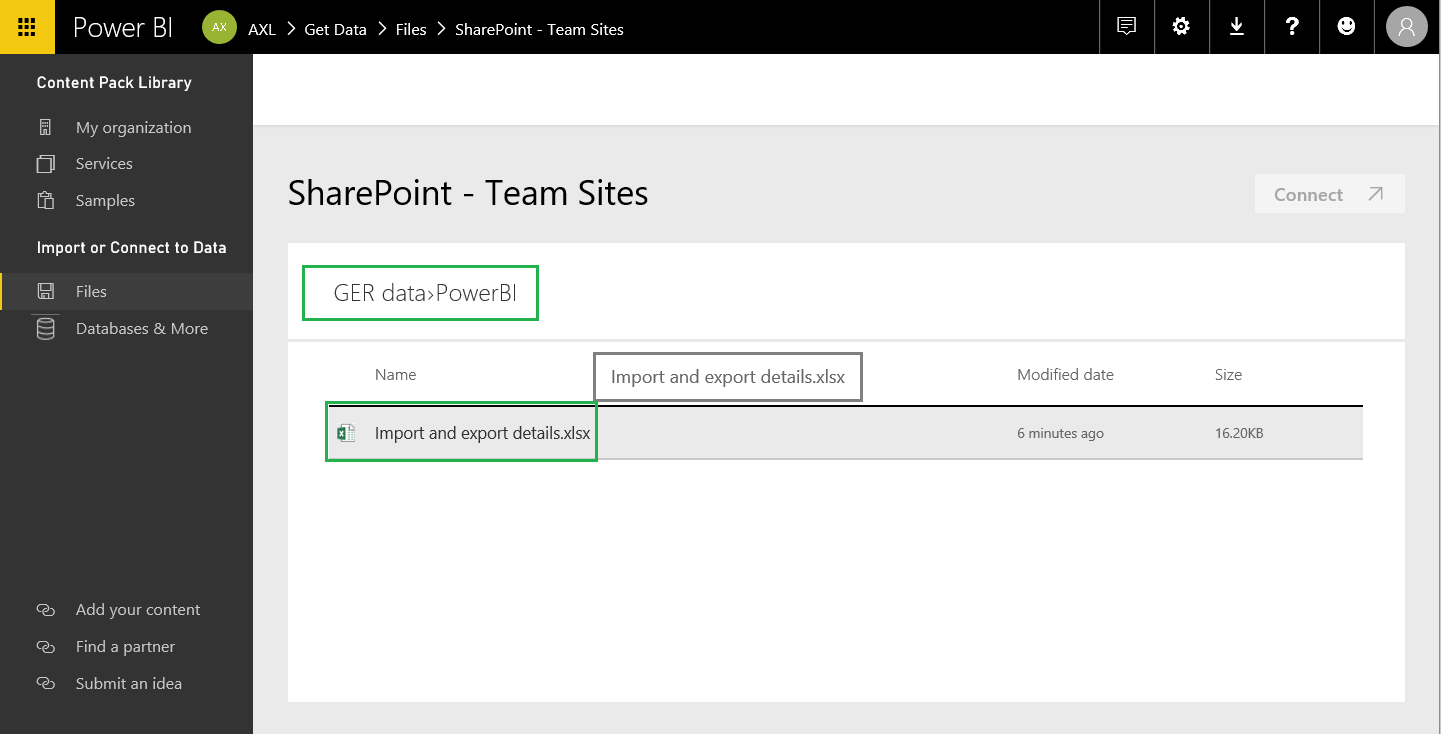
Select the SharePoint – Team sites option, and then enter the path of SharePoint Server that you're using (
https://ax7partner.litware.comin our example).Browse to the /Shared Documents/GER data/PowerBI folder, and select the Excel file that you created as the source of data for the new Power BI dataset.
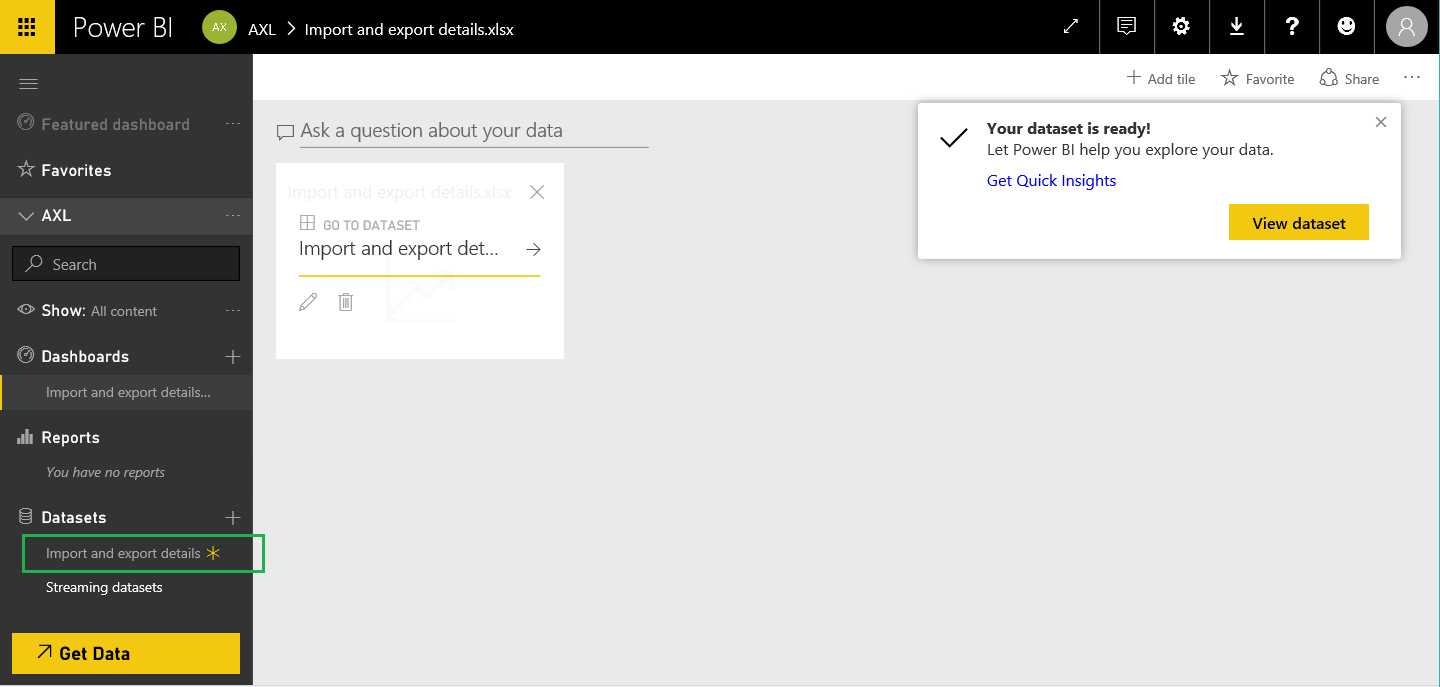
Click Connect, and then click Import. A new dataset is created that is based on the selected Excel file. The dataset can also be added automatically to the newly created dashboard.

Configure the refresh schedule for this dataset to force a periodic update. Periodic updates enable the consumption of new business data that comes via periodic execution of the ER report through new versions of the Excel file that are created on the SharePoint Server.
Create a Power BI report by using the new dataset
Click the Import and export details Power BI dataset that you created.
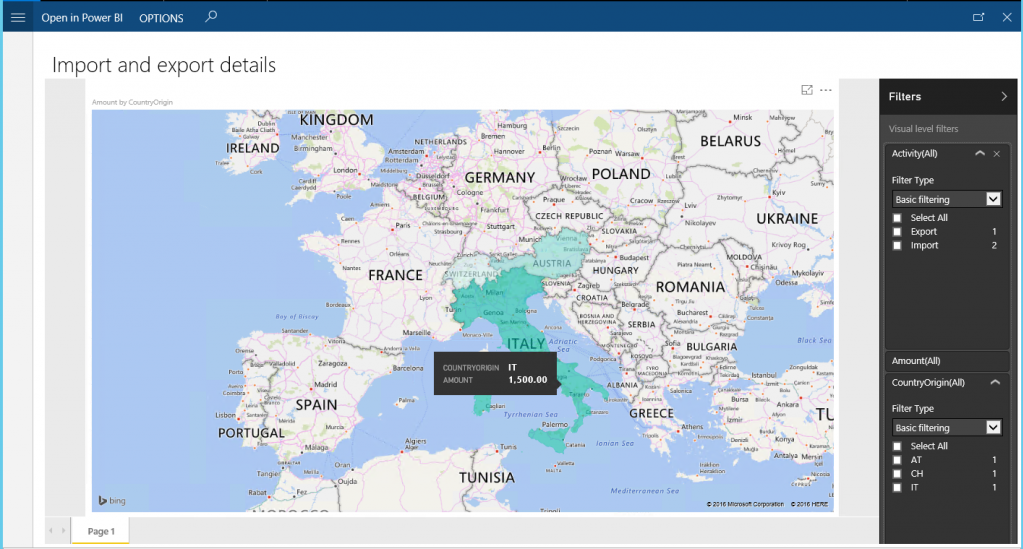
Configure the visualization. For example, select the Filled map visualization, and configure it as follows:
- Assign the CountryOrigin dataset field to the Location field of the map visualization.
- Assign the Amount dataset field to the Color saturation field of the map visualization.
- Add the Activity and Year dataset fields to the Filters fields collection of the map visualization.
Save the Power BI report as Import and export details report.
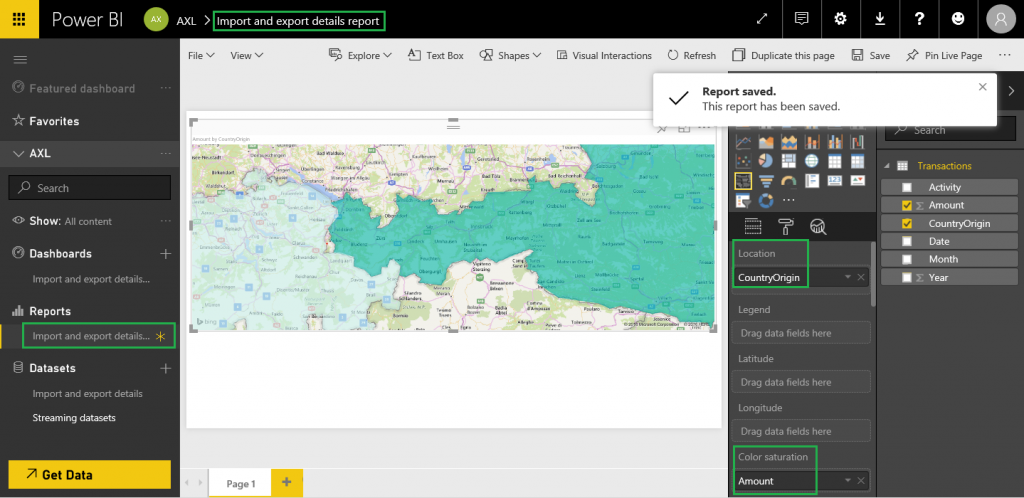
Note that the map shows the countries/regions that are mentioned in the Excel file (Austria and Switzerland in this example). These countries/regions are colored to show the proportion of invoiced amounts for each.
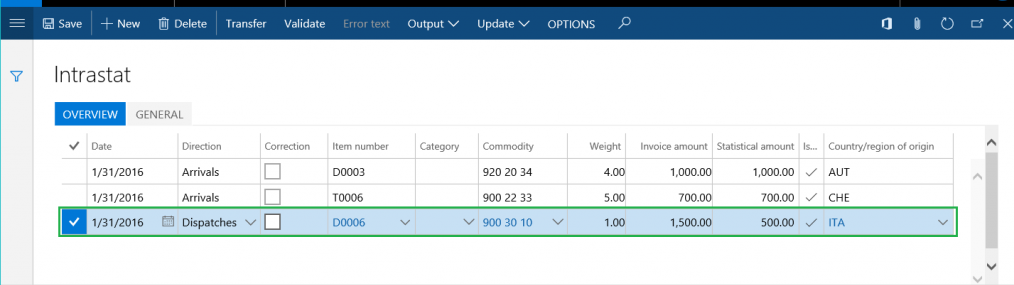
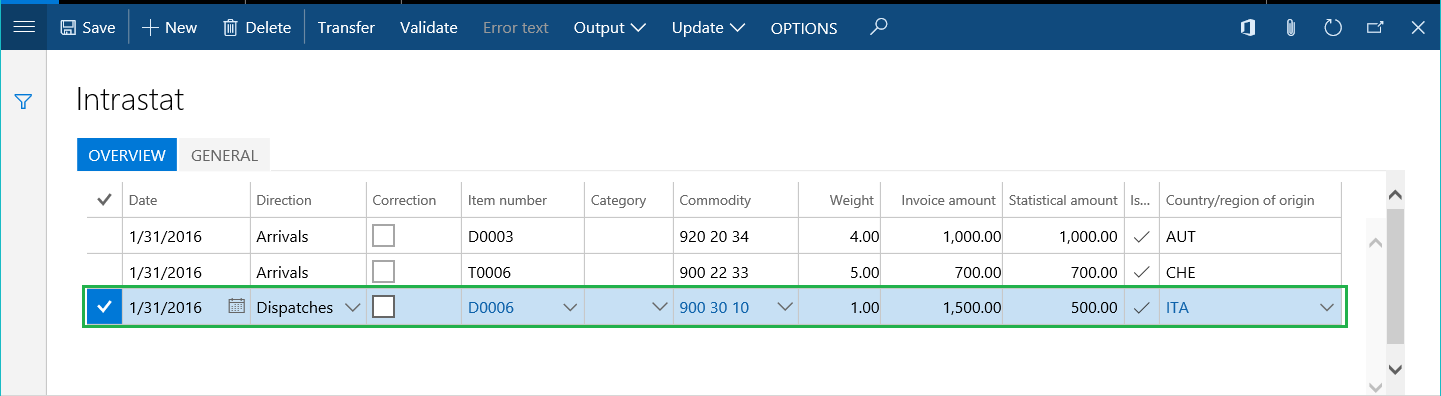
Update the list of Intrastat transactions. The export transaction that originated from Italy is added.
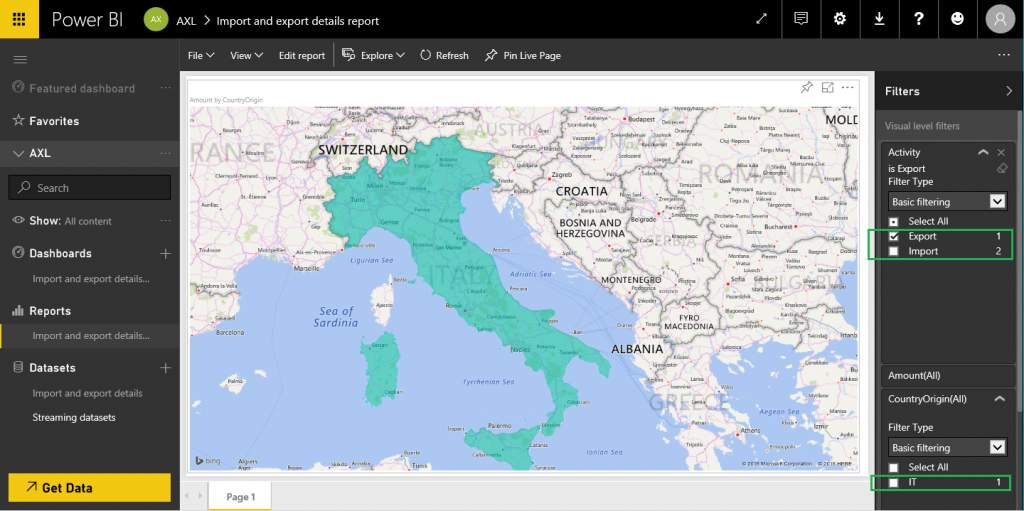
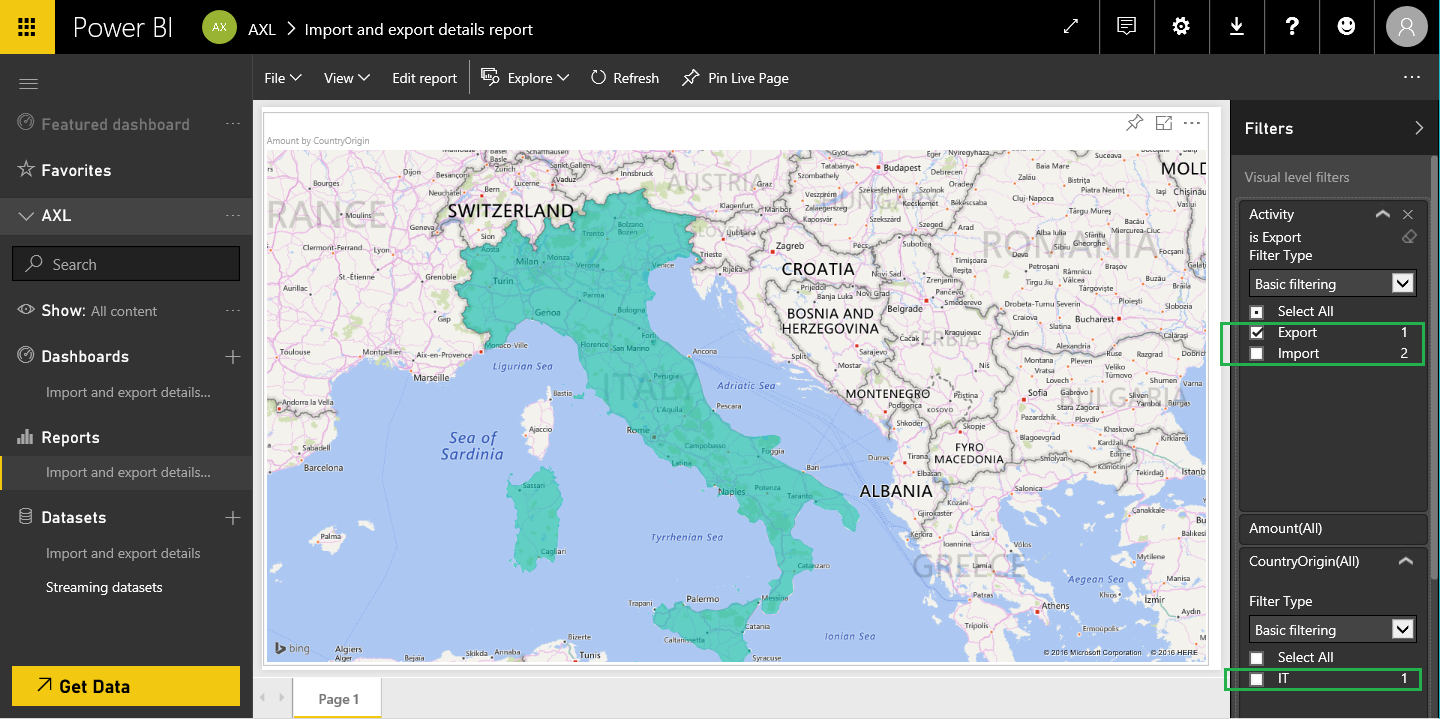
Wait for the next scheduled execution of the ER report and the next scheduled update of the Power BI dataset. Then review the Power BI report (select to show import transactions only). The updated map now shows Italy.

Access Power BI report in Finance
Set up the integration with Power BI. For more information, see Configure Power BI integration for workspaces.
On the Electronic reporting workspace page that supports Power BI integration (Organization administration > Workspaces > Electronic reporting workspace), click Options > Open report catalog.
Select the Import and export details Power BI report that you created, to show that report as an action item on the selected page.
Click the action item to open the page that shows the report that you designed in Power BI.