Note
Access to this page requires authorization. You can try signing in or changing directories.
Access to this page requires authorization. You can try changing directories.
Note
Community interest groups have now moved from Yammer to Microsoft Viva Engage. To join a Viva Engage community and take part in the latest discussions, fill out the Request access to Finance and Operations Viva Engage Community form and choose the community you want to join.
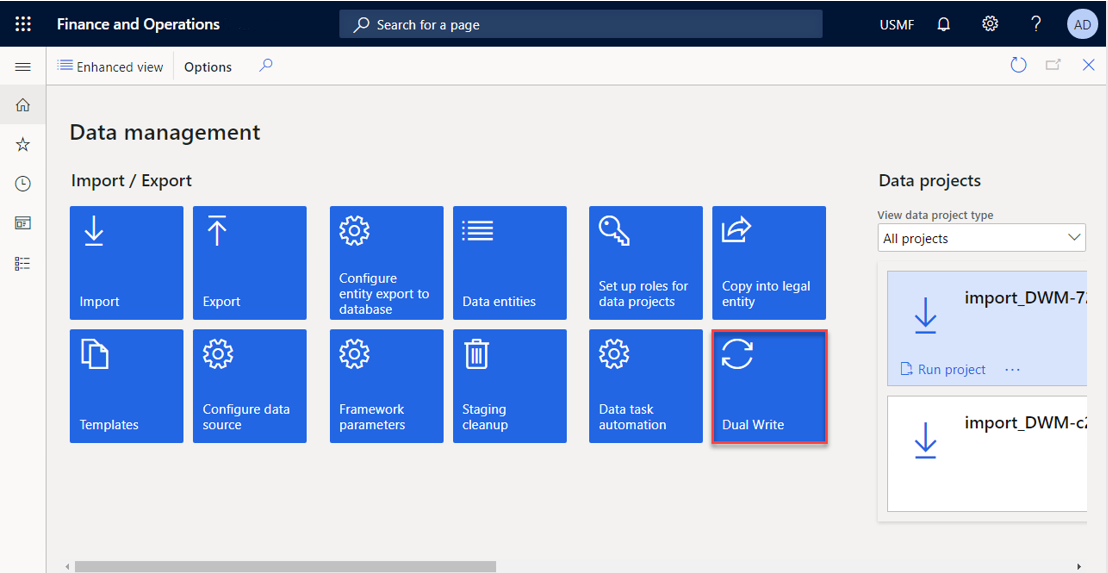
To enable table maps for dual-write, go to Workspaces > Data management, and select the Dual Write tile.
Note
If you don't see your table maps, or if you see a blank page, be sure to Apply the Dual-write application solutions that you installed as part of the initial system setup.
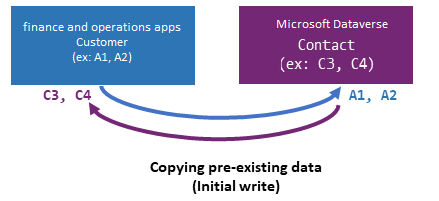
When you enable a table map for dual-write, it starts at the Not running status. The table map then goes through an initialization phase, where it does an initial write by copying pre-existing data on tables on both sides. When the table is completely enabled, it changes the status of the table map to Running.
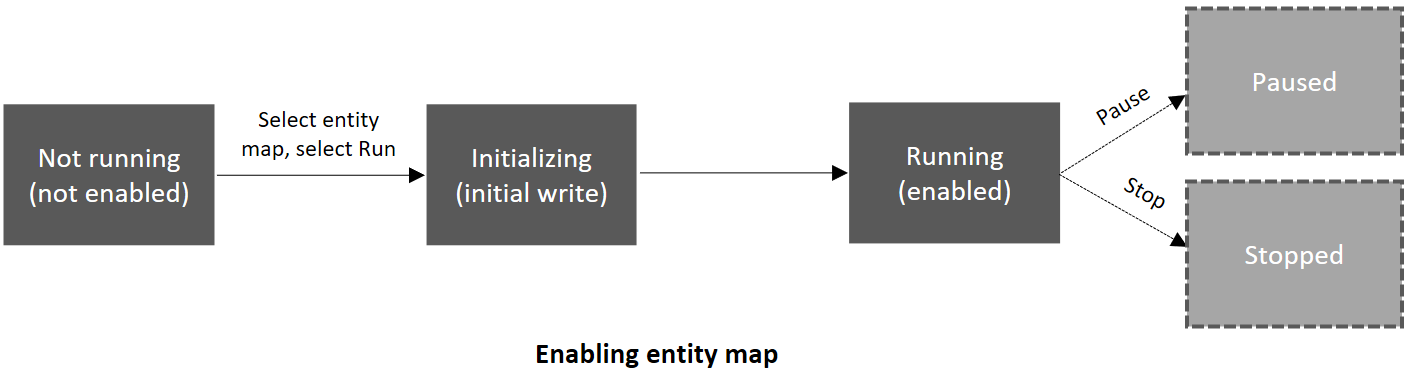
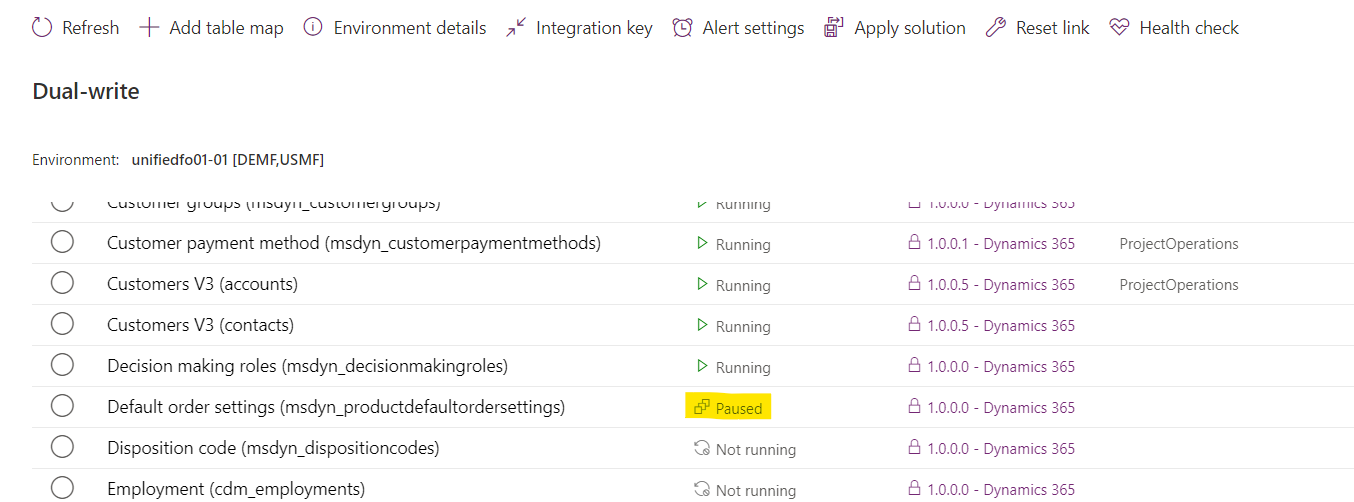
While the status is Running, you can pause a table. All changes are then queued until you resume. When you resume, the table enters "catch-up mode" and plays back all the queued changes.
The following illustration shows an example of a table that is paused.
| Status | Description | Available actions |
|---|---|---|
| Not running | The table isn't yet enabled for dual-write. Every table begins at the Not running status. | Run |
| Initializing | The initial write is occurring. | None |
| Running | The table is enabled for dual-write. | Stop, Pause |
| Paused | The table is in a paused state, and all new requests are queued. | Run |
| Resuming | The table is catching up on rows that were queued while the table was paused. | None |
During the initialization phase, the process copies any pre-existing data as part of the initial write phase.
Entities have several dependent tables. For example, Customer-Contact tables have customer groups and currencies as dependent tables.
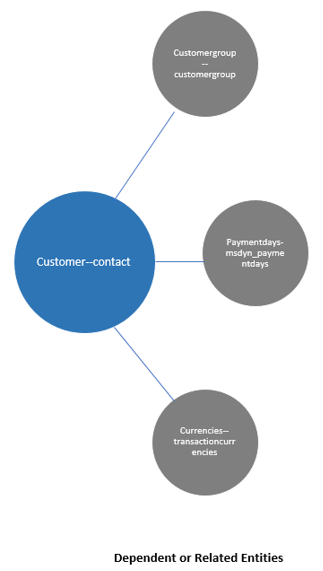
Because these apps have relational data, if you don't enable the dependent tables, you might encounter errors later. To help prevent these errors, before you enable a table map, the system provides a list of the related tables that you should enable.
Example: Enabling the Customers V3—Contacts table map
When you select a table map (for example, Customers V3—Contacts) and select Run, a dialog box appears before the table map is enabled. This dialog box lists all the dependent tables. You can select the Show related table map(s) option to show all the related table maps. To enable the selected table map and all its related tables, select Run in the dialog box.
Note
The behavior is similar when you pause a table. In that case, you have the option to pause all the related tables too.

During data synchronization, if records that have the same keys are found on both sides, and the keys have competing attribute values, a merge conflict occurs. In this case, you must select a Master for initial sync value for every entity map in the list to specify the master data that should be used to resolve conflicts. By default, Dataverse is used.
Note
The Master for initial sync value is used only to resolve conflicts. It doesn't control the direction that data should move in.
If you don't want to copy pre-existing data, skip the initial synchronization by clearing the Initial Sync checkbox. Alternatively, remove one or more of the related tables by canceling the selection of them. You can also drag the table maps to change the order that they'll be synced in.
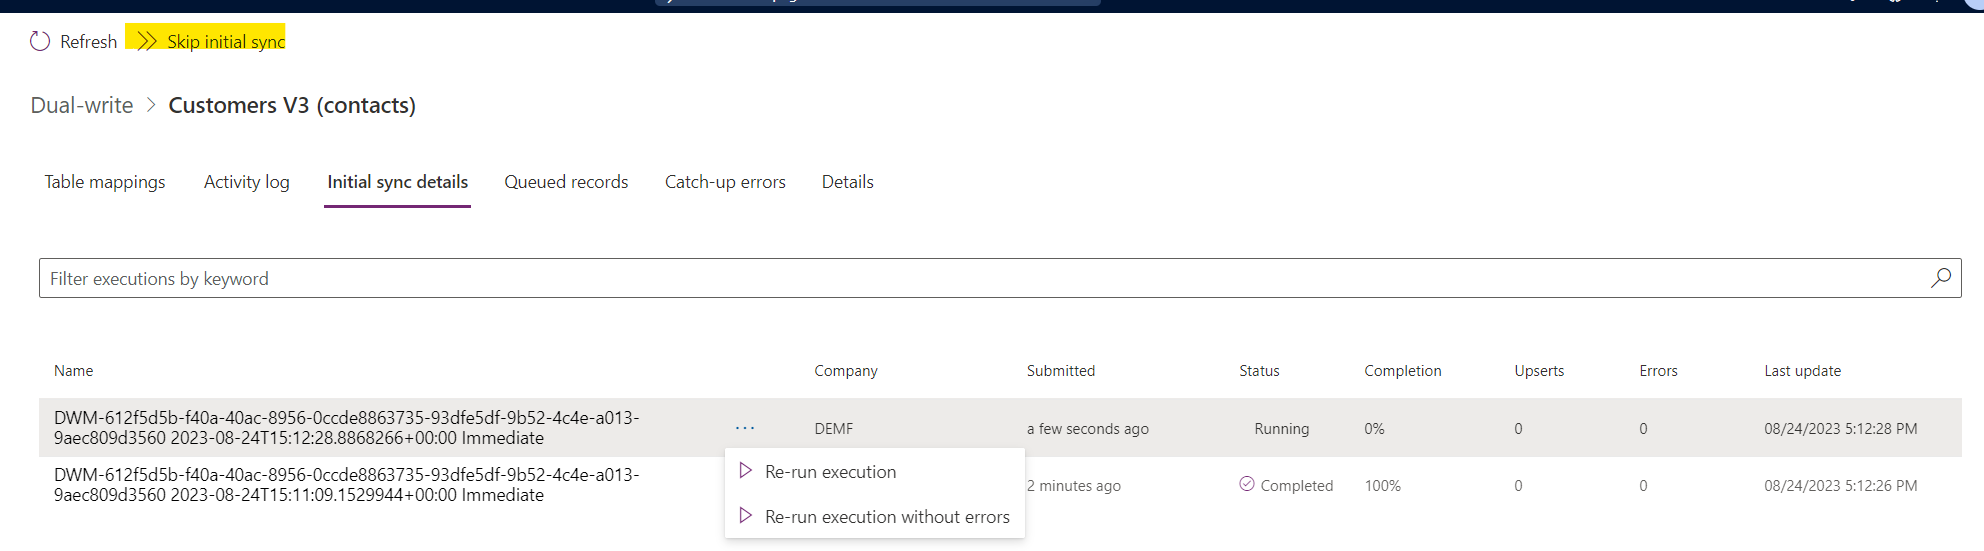
After you finish making your selections in the dialog box and select Run, the table map and all its related tables go through the initial write phase. You're redirected to the table map list page. If any errors occur, you can view the details on the Initial sync details tab. This tab shows details about all the errors that occur while pre-existing data is copied. After you fix the underlying errors, you can rerun the execution and monitor the outcome. Alternatively, if you no longer want to sync the pre-existing data, or if you experience recurring issues because of underlying data, you can skip the initial write phase. Instead, you can turn on live writes by selecting Skip initial sync.
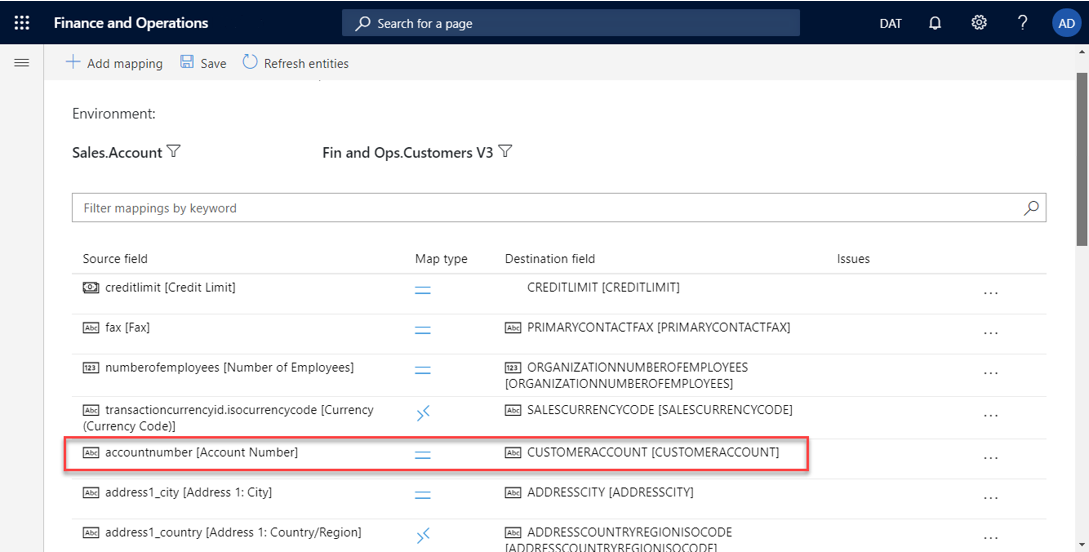
Criteria for linking tables
To enable table maps for dual-write, you must define an alternative key in Dataverse. The key that you define in the finance and operations app must match the value of the alternative key in Dataverse.
For example, in a finance and operations app, CustomerAccount is the key for the Account table.
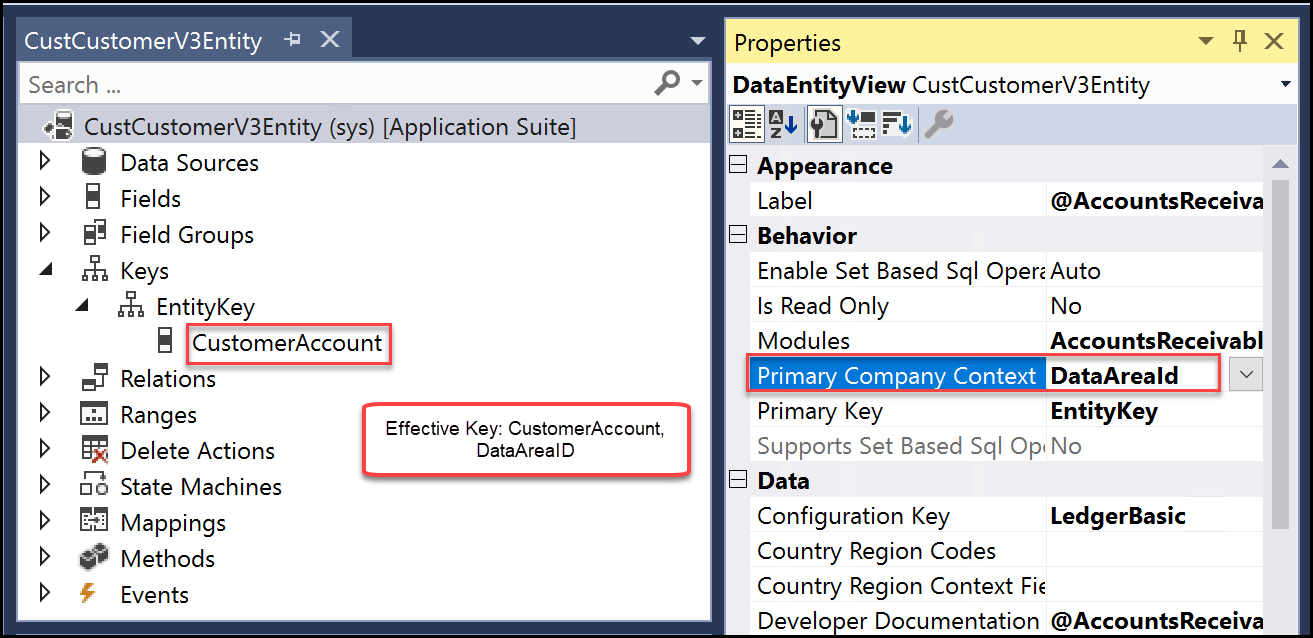
In Dataverse, accountnumber is the key for the Account table.
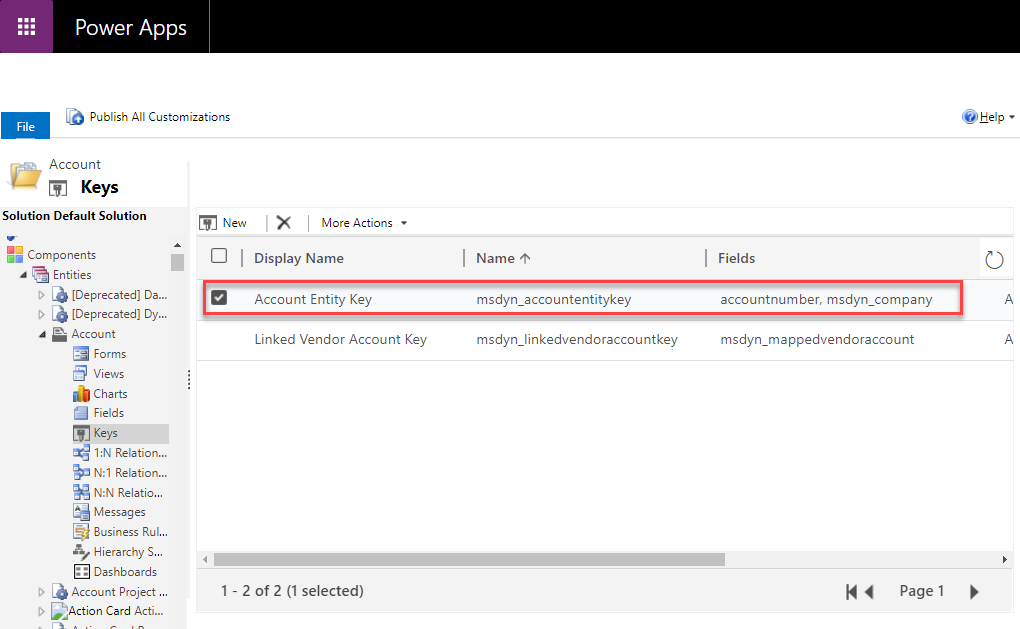
In the Customers V3 table map, CustomerAccount maps to accountnumber.