Note
Access to this page requires authorization. You can try signing in or changing directories.
Access to this page requires authorization. You can try changing directories.
Note
Community interest groups have now moved from Yammer to Microsoft Viva Engage. To join a Viva Engage community and take part in the latest discussions, fill out the Request access to Finance and Operations Viva Engage Community form and choose the community you want to join.
This article explains how to upgrade the Microsoft SQL Server instance or cluster that your environment uses. Complete this process if you want to upgrade from one major version of SQL Server to another but don't want to do an in-place upgrade. If you choose to do an in-place upgrade, you can still follow the guidance in this article although some of the steps don't apply.
Prerequisites for upgrading the SQL Server version
Upgrade from SQL Server 2016 to SQL Server 2019
- The environment must be on application version 10.0.21 or later.
- The local agent must be on version 2.7.0 or later.
Preparation
- Deploy your new SQL Server instance on a virtual machine (VM), or create a new SQL cluster.
- Configure the new instance or cluster as described in Set up SQL Server.
- If you're using self-signed certificates, make sure that you import them into the Application Object Server (AOS), Management Reporter (MR), and Orchestrator nodes in your Azure Service Fabric cluster.
Database operations
- Make sure that users aren't connected, because your downtime begins.
- Back up all your databases from your current SQL Server instance or cluster.
- Restore the database backups into the new SQL Server instance or cluster.
- After you restore your databases, run the scripts in Configure the databases.
Upgrade other SQL Server components
All your SQL Server components across an environment must be on the same version. For example, if you're upgrading to SQL Server 2019, SQL Server Reporting Services (SSRS), SQL Server Integration Services (SSIS), and the database engines must all be on the same version.
- On your AOS nodes, upgrade the SSIS component. When you perform this action, the Data Management Framework (DMF) stops working correctly, because it relies on the older version of SSIS. After you service your environment, DMF continues to work, because it's updated to use the new version of SSIS.
- On your Business Intelligence (BI) nodes, upgrade the SSRS and database engine components. When you upgrade these components, you must rerun the Complete-Prereqs.ps1 script on the node, so that the service permissions are reconfigured. When you upgrade the database engine component on your BI nodes from SQL Server 2016 to SQL Server 2019, the SSRS component is removed. After it's removed, use the SSRS 2019 installer to install the SSRS service.
Important
In SQL Server 2019, SSRS has its own installer.
Update the local agent
Clean up the local agent by running the following command from an Orchestrator node.
LocalAgentCLI.exe Cleanup <path of localagent-config.json>In Microsoft Dynamics Lifecycle Services, update your connector configuration with the new fully qualified domain name (FQDN) of the SQL Server instance or cluster.

Download the new configuration file.
In the configuration file, update the SQL Server version. The version that you specify must match the version of SQL Server that is present in the environment. For more information, see Deployment configurations for the local agent.
"deploymentOptions": {
    ...
    "sqlServerVersion" : {
        "value": "2019"
    },
    ...
}
Install the local agent with the new configuration file.
LocalAgentCLI.exe Install <path of the new localagent-config.json>
Force re-adding the assemblies to the Global Assembly Cache
Note
If your environment is on application version 10.0.31 or later, you can skip this step because the change in the SQL version is detected automatically.
Typically, when you service an environment by using a package deployment, the Service Fabric package version of the AXSFType changes. This change makes the environment carry out additional deployment and servicing operations. When you use the Update Settings action, the version doesn't change. As a result, the appropriate assemblies aren't present in the Global Assembly Cache. To force re-adding the assemblies to the Global Assembly Cache, complete the following steps:
- Go to your aos-storage file share.
- Open the GacAssemblies folder.
- You see a list of folders that correspond with the names of your AOS nodes. Open any of the folders.
- Rename the existing .txt file to 1.0.txt.
- Repeat step 4 for each folder.
Force redeployment of your reports to the SSRS node
If you're replacing your BI node with a new node, or if you deleted your database engine and reinstalled it, you might need to force the deployment of your reports. In this case, run the following command from your business database before you trigger the Update environment action as described in the next section.
UPDATE SF.synclog SET STATE=5, SyncStepName = 'ReportSyncstarted' WHERE CODEPACKAGEVERSION in (SELECT TOP(1) CODEPACKAGEVERSION from SF.SYNCLOG ORDER BY CREATIONDATE DESC)
Update your environment settings
In Lifecycle Services, select the Full Details link for the environment where you want to update the SQL Server.
Select Maintain, and then select Update Settings.
When you update the settings, update the FQDN of the new SQL Server instance or cluster.

Select Prepare.
After the download and preparation are completed, the Update environment button appears.
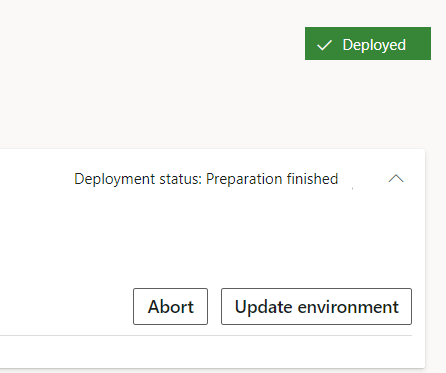
Select Update environment to start updating your environment.
The environment is redeployed and configured to interact with the new version of SQL Server.