Regulatory watch and communication of regulatory updates
As part of the requirements for LCS solutions for localization and translation, localization ISV solution providers must undertake their regulatory watch by taking advantage of localization tools in Microsoft Dynamics Lifecycle Services (LCS).
Set up an alerting project in LCS
Localization independent software vendor (ISV) solution providers must create a new project in Microsoft Dynamics Lifecycle Services (LCS) to record regulatory alerts.
Follow these steps to set up the project.
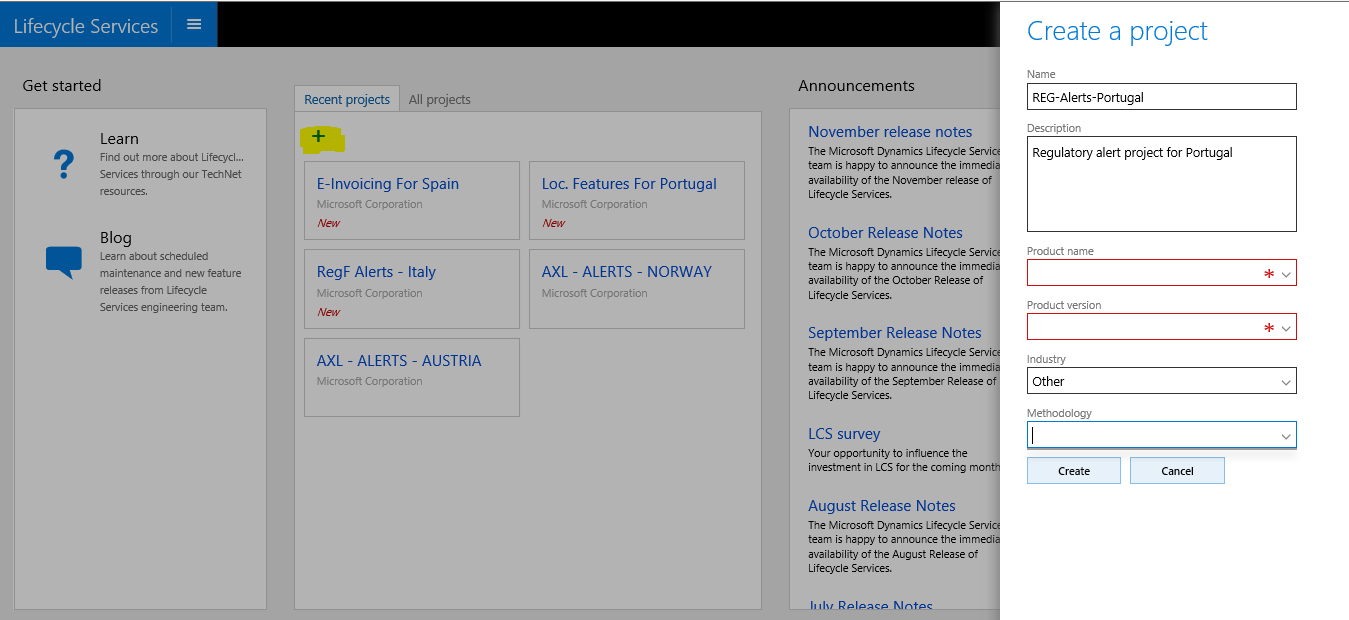
Add a new project by clicking the plus sign (+).
Enter a name that uses the following project naming convention: REG-Alerts-Country/region name
Enter a project description.
For the product name, specify the latest version of your finance and operations app.
For the product version, specify the latest version.
Specify the industry:
- Select Other if the solution is related to all industries.
- Select an appropriate specific industry.
For the methodology, specify Sure step.
Click Create.
Invite participants to the project
Invite participants that should have access to the project, so that they can submit and review regulatory alerts. For information about how to invite users, see Configure Lifecycle Services (LCS) security.
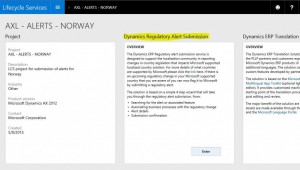
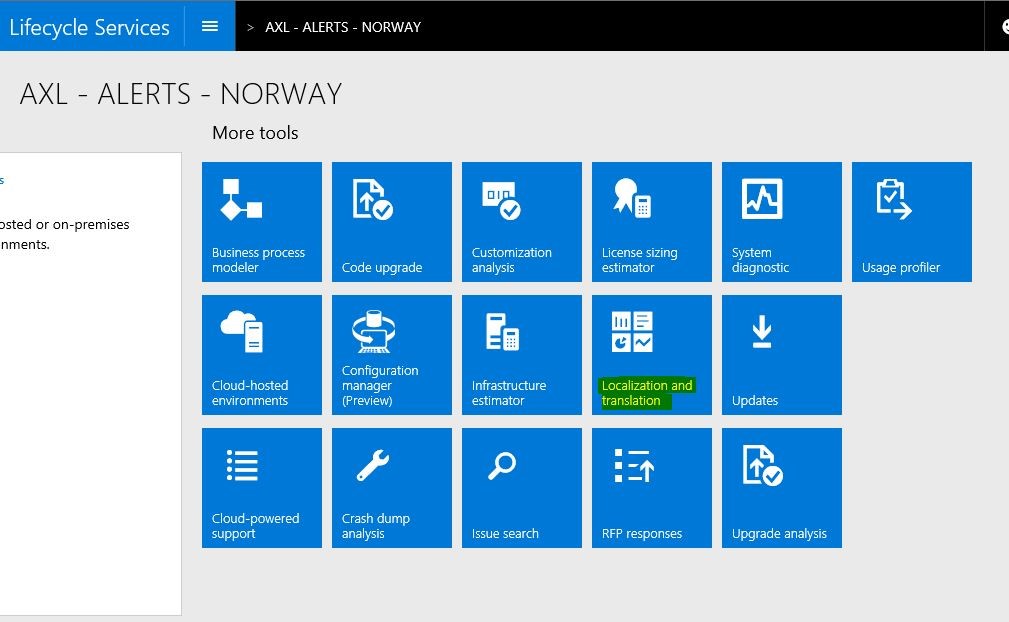
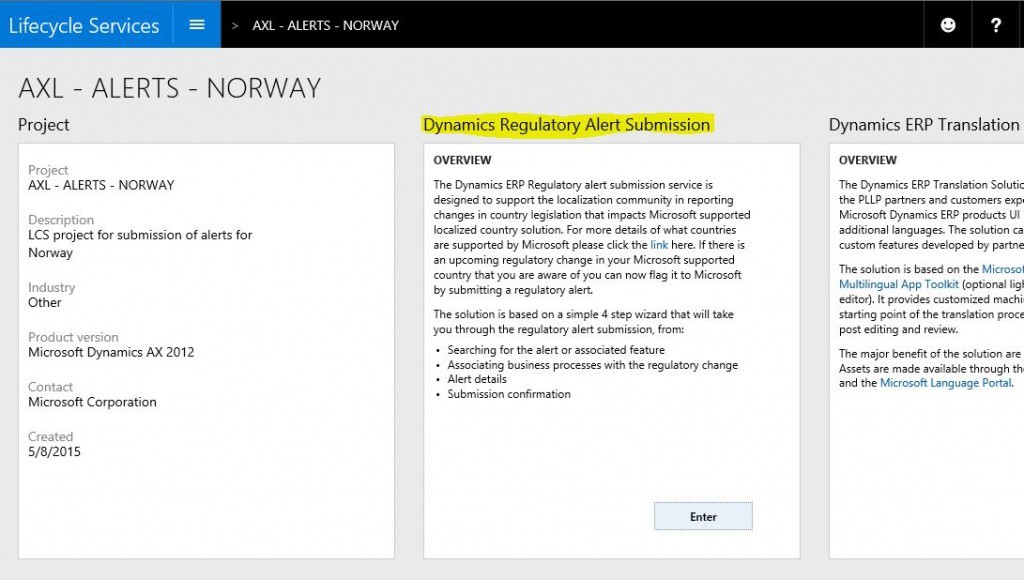
Access the regulatory alert submission service
In your LCS project, scroll to the right side of the page, and then, under More tools, click Localization and translation.

Select Dynamics Regulatory Alert Submission, and then click Enter. The Dynamics Regulatory Alert Submission page opens. Use this page to view any previous alerts that have been submitted by you or your organization.
Submit a regulatory alert
To enter a new regulatory alert, click the plus sign (+) at the top of the form, above the filter. The Submit regulatory alert wizard starts. Follow these steps to complete the wizard.
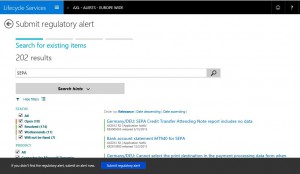
On the Search for existing items page, follow these steps:
- Use Issue search to identify whether a regulatory feature that is related to the alert already exists. Enter search terms to specify criteria such as a keyword, country/region, Microsoft Knowledge Base (KB) number, or Application Object Tree (AOT) object. For example, you can search for the payment term "SEPA" to return related items.
- After you've finished entering the search terms, click the Search button. Search returns all items that meet search criteria as it searches across both product issues and regulatory features.
- You can narrow down the search results by using the filter/criteria that are available.
- If you don't find the regulatory feature that you're searching for, you can submit a regulatory alert by clicking Submit regulatory alert on the bottom ribbon.
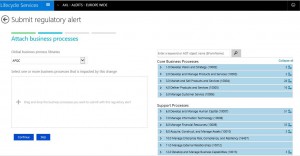
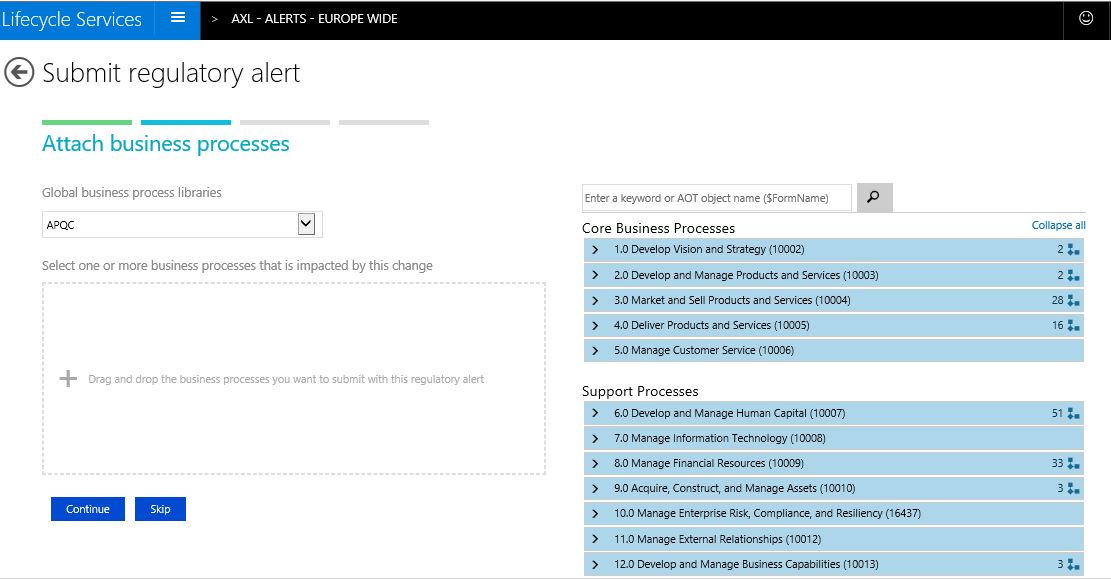
On the Attach business processes page, follow these steps:
- In the Global business process libraries field, you can select business process libraries.
- You can enter search criteria to return business processes that are related to a search term. The tool highlights these business processes in yellow.
- You can drag business processes into the marked area on the left side of the page. You can select one or many related business processes in the process list. After you've dragged business processes to the marked area on the left, you can edit them further. Deselect business processes by clicking the x.
- When you've finished, click Continue to go to the next page in the wizard. When you receive a confirmation message, click Yes. If no relevant business processes are found, you can skip this page in the wizard.
- You receive a message that asks whether you want to add the selected business processes to the alert. You can click either Yes or Cancel.
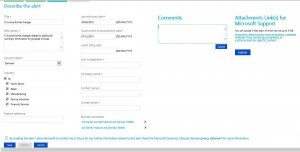
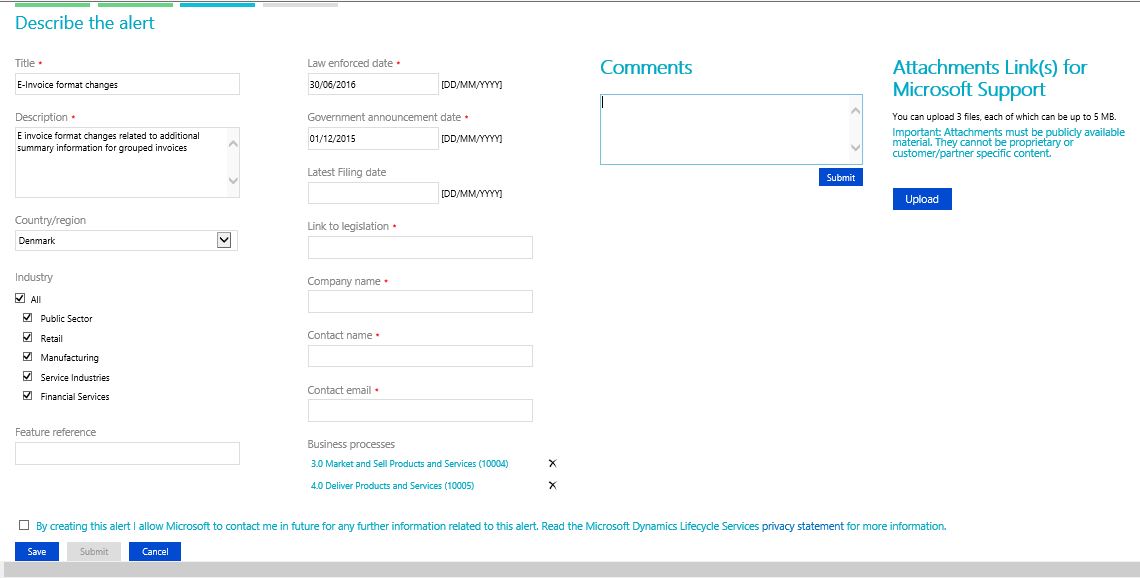
On the Describe the alert page, follow these steps:
- Enter information for the alert in the appropriate fields. Required fields are indicated by a red asterisk (*). The following table provides more information about the submission fields.
Field name Field type Description Title Text A descriptive title to identify the area of impact. For example, you might enter Changes in invoice document per Jan. 1st 2014. Description Text A brief, pragmatic overview of the law. The description should focus on issues that are relevant to enterprise resource planning (ERP). It should have three to ten lines of details, so that users gain a high-level understanding of the requirement without having to read the legislation first. Country Valid values list The country/region that the legislation applies to. Industry Valid values list A list of industries, if the requirement applies only to selected industries (for example, Public sector, Retail, or Communication). Link to legislation Text (URL format) Add links to the published law, interpretation guideline, implementation guidance, or any other documentation that will be useful for understanding and implementing the requirement. Feature reference Text The feature reference ID (if it's known). Law enforcement date Date Date from which impacted customers must comply with the law Government announcement date Date The date when the authority announced the change. Latest filing date Date The deadline for the first submission of the new/changed report. Company name Text The company name for the person who is submitting the alert. Contact name Text The contact name of the person who is submitting the alert. Contact email Email address The contact email address of the person who is submitting the alert. This value must be in a valid email address format. Business processes Default The business processes are selected through the Submit regulatory alert wizard and entered automatically on the submission page. Comments Text Enter any additional information that is related to the alert, and that might be useful for understanding or implementing the requirement. You can add multiple comments. Click Submit to save comments separately to the submission page. Comments are saved in order of date. Attachments Upload Add alert attachments by using the attachment tool. Click the Upload button to open File explorer. After you select and upload a file, the file is appears as a linked file. You can upload up to three files, each of which can be up 5 MB. To delete a file that you've uploaded by mistake, click Remove under the file title. Important: Attachments must be publicly available materials. They can't be propriety or customer/partner specific. Consent check box Check box Give appropriate consent to being contacted. The Submit button doesn't become available until you select this check box. When you've finished adding all the required fields, you must provide appropriate consent by selecting the consent check box: By creating this alert I allow Microsoft to contact me in the future for any further information related to this alert. Read the Microsoft Dynamics Lifecycle Services privacy statement for more information.
After you select the check box, the Submit button becomes available. Click Submit to submit the alert. If you've partially completed an alert, you can save the information that you've already entered for later completion or review. Click Save before you submit the alert.
When you receive a confirmation message that states that the alert has been successfully submitted, click Done to exit the wizard. If you chose to save the alert before you submitted it, an alert ID is generated, and you are notified that the alert has been saved.


Review regulatory alerts that have been entered into the project
To view the regulatory alerts that have been entered into your alerting project, use the alert grid. This grid provides a high-level list view of the alerts that have been submitted, and shows the alert title, country/region, law enforced date, and so on.
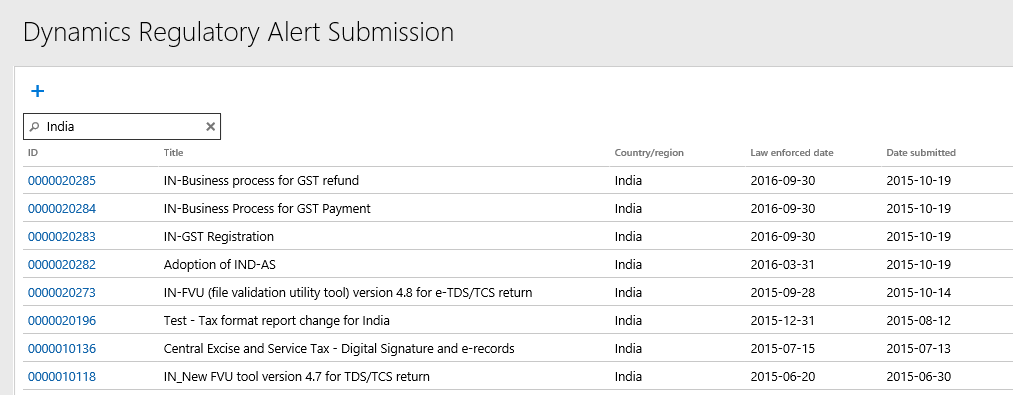
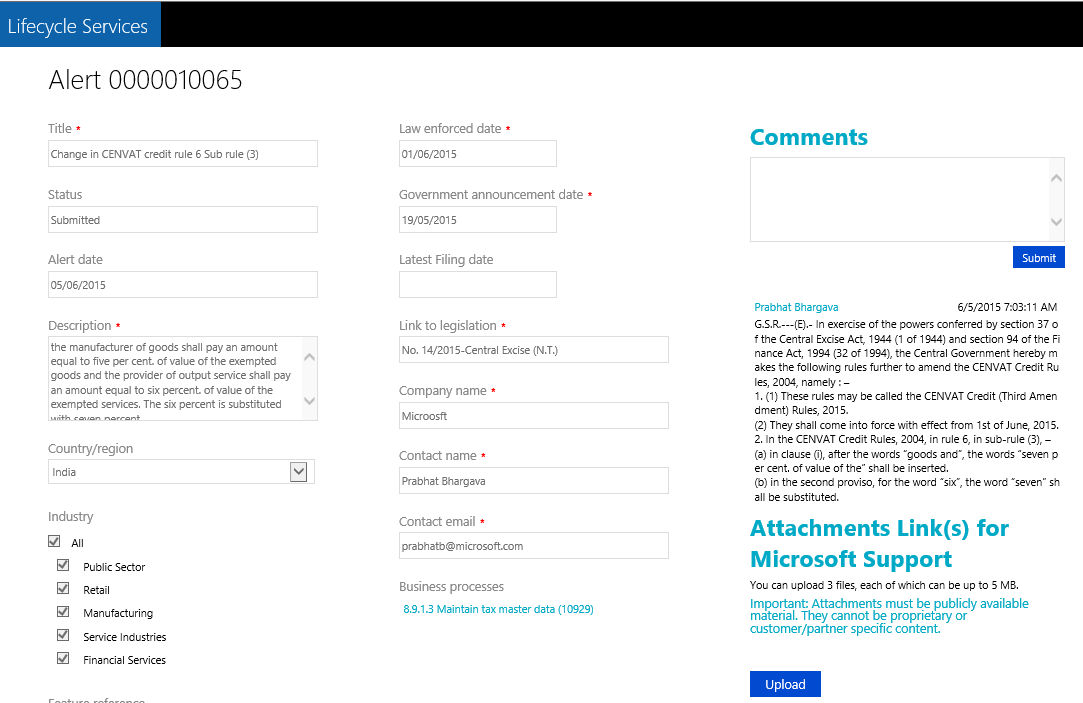
You can search the contents of the grid by using the filter/search field and then selecting from the default search options. You can drill into the detail of an alert by clicking the alert ID, which is a hyperlink. The completed alert submission page opens, where you can review the alert details, and also any comments and attachments.
Process submitted alerts options
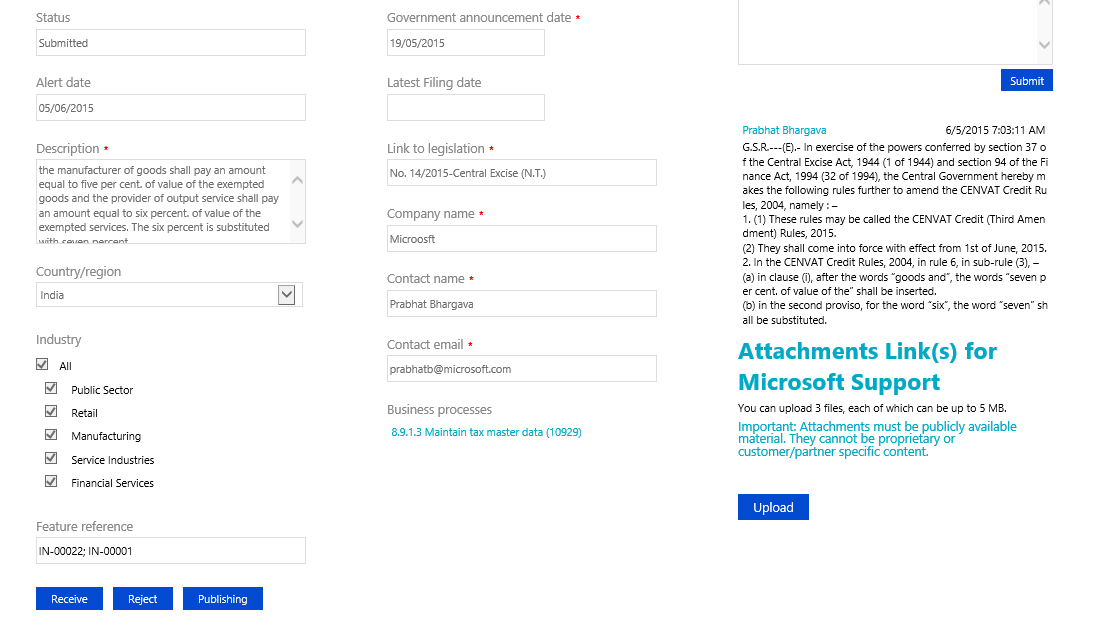
After an alert has been submitted to the LCS alert project, you can process it from the grid view by clicking the alert ID hyperlink. Project owners can then change the status of the alert to notify project members whether action will continue to be taken for the alert. Options appear when you drill into details of the alert.
The following table describes the processing options that are available for alerts.
| Status | State | Actions |
|---|---|---|
| Submitted | The alert has been submitted to (entered into) LCS by a Loc. Community member. | The alert can be either received or rejected. |
| Received | The alert has been reviewed by an internal Sol. Partner resource and has been received for further review. | The alert is marked Received. A comment and feature reference can be added. |
| Rejected | The alert has been reviewed by an internal Sol. Partner resource and has been rejected. | The alert is marked Rejected. A comment must be added to explain why the alert was rejected. |
| Reopened | The alert was rejected but has been reopened by a Loc. Community member, and new/additional information has been entered (a comment is mandatory). | The alert can be reviewed again to assess whether it should be received or rejected. |
Note
Submitted alerts can be rejected for various reasons. Here are some examples:
- The alert is too vague to identify the underlying localization feature.
- The alert is related to an area where no features are localized.
- The alert is related to an area that isn't currently supported by finance and operations functionality.
Alerts can be stored in LCS as references.
Further processing, such as potential engineering of a related feature, will be handled in the ISV solution provider's existing systems.
Feedback
Coming soon: Throughout 2024 we will be phasing out GitHub Issues as the feedback mechanism for content and replacing it with a new feedback system. For more information see: https://aka.ms/ContentUserFeedback.
Submit and view feedback for