Note
Access to this page requires authorization. You can try signing in or changing directories.
Access to this page requires authorization. You can try changing directories.
When you register sales, purchases, or incoming or outgoing payments, you can perform the following operations:
- Specify a reference to the agreement that the operation is performed according to.
- Settle customer and vendor transactions in the context of agreements that are specified during the registration of transactions.
After these operations are completed, you can analyze the turnover and balance of the agreement.
Registering a payment from a customer or a payment to a vendor, and including an indication of the agreement
In the Russian localization, the General journal, Slip journal, Vendor payment journal, and Customer payment journal pages include a section that has information about the agreement. By using the journals that are listed, you can register a payment from a customer or a payment to a vendor, and include a reference to the agreement that the transaction is made according to.
As an example, the following procedure shows how to register a payment to a vendor through the vendor payment journal. However, the reference to the agreement is similar for all the other journals.
Register a payment by using the vendor payment journal
- Go to Accounts payable > Payments > Vendor payment journal.
- On the Action Pane, select Lines.
- On the General tab, in the Account section, in the Agreement ID field, select the number of the agreement that the transaction is registered for.
The Document title field is automatically set to the title of the agreement.
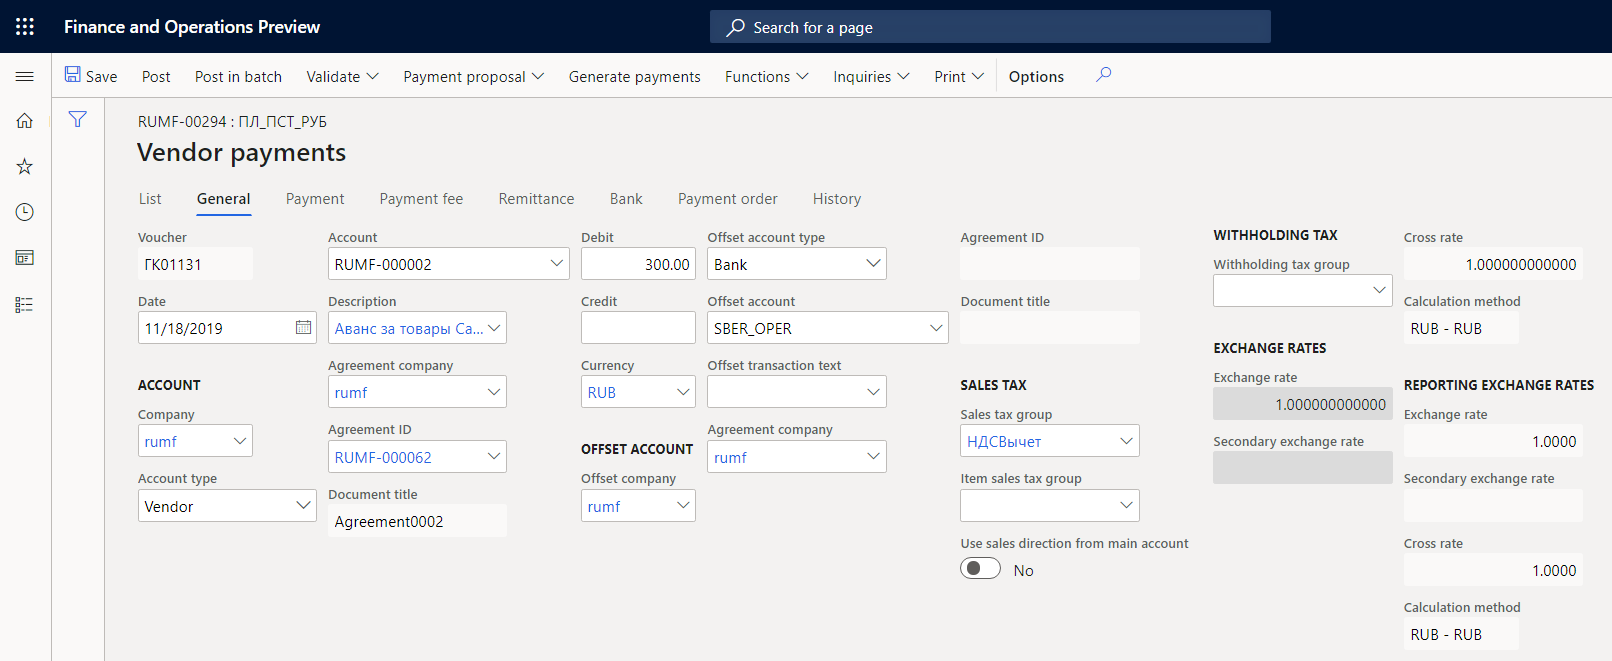
The transaction for the counterparty will have a link to the agreement number.
To view transactions for a counterparty, follow one of these steps.
- On the All vendors page, on the Action Pane, on the Vendor tab, in the Transactions section, select Transactions. On the Financial dimensions tab, the Agreement field shows information about the agreement that the transaction is registered for.
- On the All customers page, on the Action Pane, on the Customer tab, in the Transactions section, select Transactions. Then, in the upper pane, in the Page options section, select Change view > Details view. On the Financial dimensions FastTab, the Agreement field shows information about the agreement that the transaction is registered for.
Registering accounts receivable or accounts payable, and including an indication of the agreement
You can register accounts receivable or accounts payable, and include a reference to the agreement in the sales order or the purchase order. For more information, see Fulfill sales agreements and Create a purchase release order from a purchase agreement.
You can also register accounts receivable or accounts payable on the Free text invoice and General journals pages. In the Russian localization, you can specify a customer or vendor agreement.
Register accounts receivable by using a free text invoice
On the Free text invoice page, create a free text invoice.
On the Free text invoice header FastTab, in the Agreement section, in the Agreement ID field, select the number of the agreement.
The Document title field is automatically set to the title of the agreement.
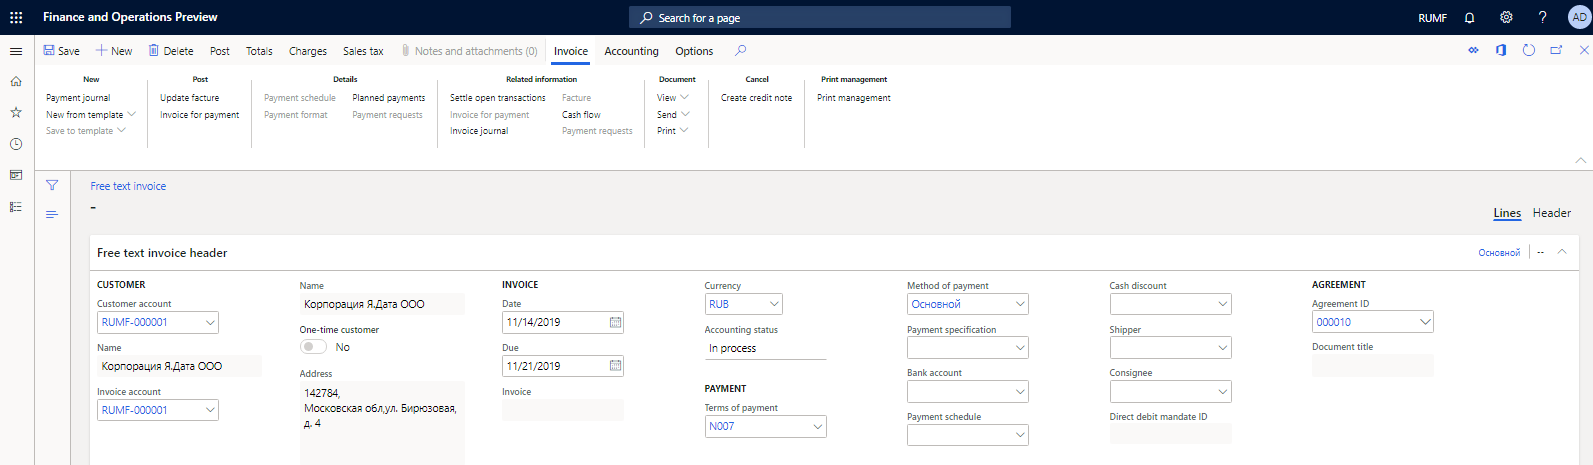
Specify other details, and post the invoice.
Register accounts receivable and accounts payable from general journals
Go to General ledger > Journal entries > General journals.
On the Action Pane, select Lines.
Create a line, and then, on the General tab, in the Agreements section, in the Agreement ID field, select the number of the agreement that the transaction is registered for.
The Document title field is automatically set to the title of the agreement.
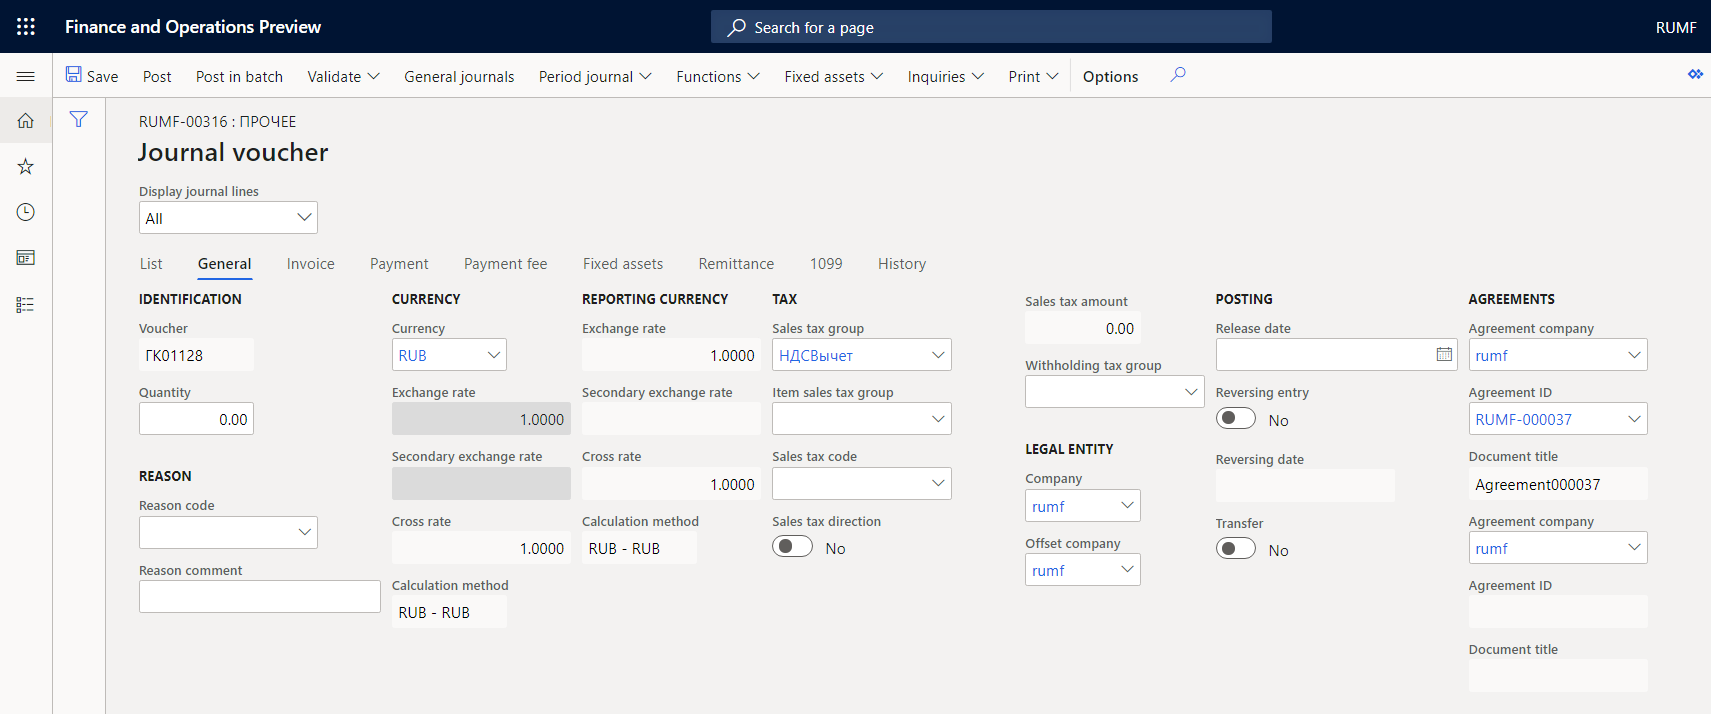
Specify other details, and then, on the Action Pane, select Post to post the transaction.
Settling factures on a counterparty in the context of agreements
For more information about dimension control for settlements, see Set up dimension control for settlements (Russia).
Settle factures on a customer in the context of agreements
Go to Accounts receivable > Customers > All customers.
On the Collect tab, in the Settle section, select Facture and payment settlement.
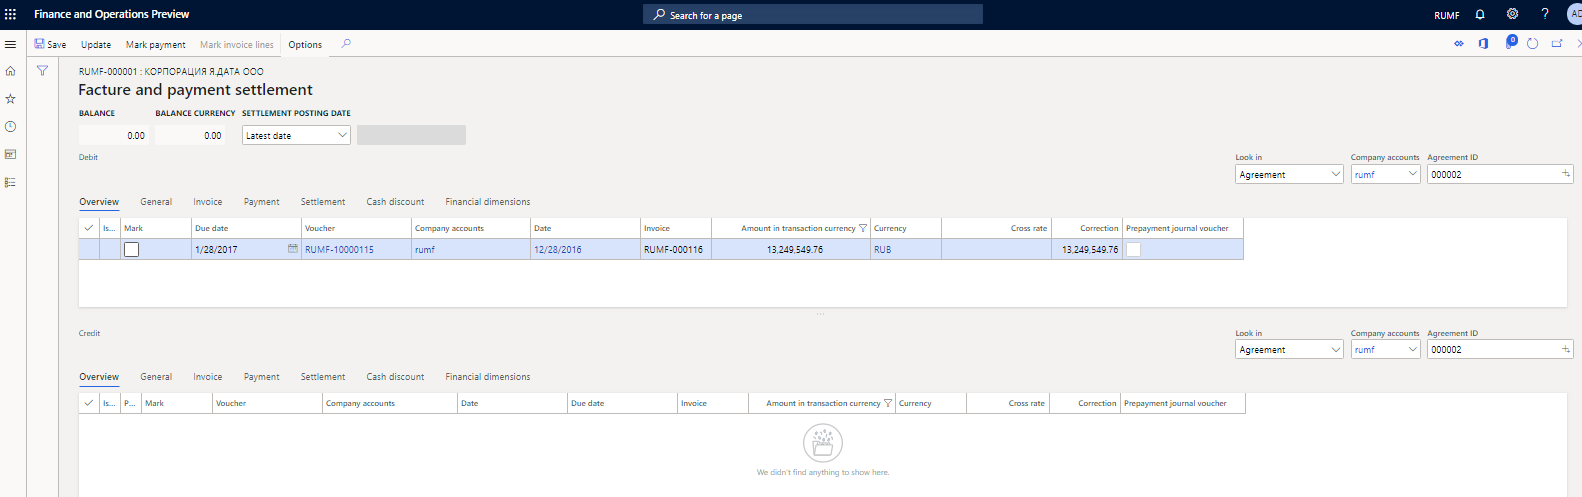
In the upper and lower panes, set the following options to select transactions:
- In the Look in field, select Agreement.
- In the Agreement ID field, select an agreement that you want to settle transactions for.
The transactions that include the selected agreement are shown.
Use the Mark check boxes to select the reimbursement transaction for settlement in the upper pane and the disbursement transaction in the lower pane.
On the Action Pane, select Update to settle the counteragent transaction.
Settle factures on a vendor in the context of agreements
- Go to Accounts payable > Vendors > All vendors.
- On the Invoice tab, in the Settle section, select Facture and payment settlement.
- Settle transactions in the context of agreements as described in the previous section of this article, Settle factures on a customer in the context of agreements.
Periodically settle sales or purchase transactions
You can do periodic settlement of counteragent transactions by using the Periodic settlement page if the Allow automatic settlement option is set to Yes. You can reverse the settlement on the Periodic reverse page.
As an example, this procedure shows how to do periodic settlement of sales transactions.
- Go to Accounts receivable > Setup > Customer posting profiles.
- Select a customer posting profile, and then, on the Table restrictions FastTab, set the Allow automatic settlement option to Yes to allow for automatic settlement of sales transactions.
- Go to Accounts receivable > Periodic tasks > Settlement > Periodic settlements.
- On the Periodic settlements page, specify the details, and then select OK to do the settlement.
To reverse the settlement, go to Accounts receivable > Periodic tasks > Settlement > Periodic reverse. On the Periodic reverse page, specify the details, and then select OK.
Find more details in the following topics: