Note
Access to this page requires authorization. You can try signing in or changing directories.
Access to this page requires authorization. You can try changing directories.
After you've installed Dynamics 365 media and entertainment accelerator, you'll need to configure it. First, activate the cloud flows for each of the solutions installed with the accelerator. Then integrate Microsoft Teams and allow automated Teams meetings and scheduled live events.
Check Power Automate flows
The first task when configuring the accelerator is to activate the cloud flows for each solution with Microsoft Power Automate.
Review the flows for each of the following solutions:
- Media Registration Portal
- Media Event Product Sales
- Media Events and Venues
- Media Apps Teams Integration: Before turning on the flow in this solution, complete the steps in Configure Microsoft Teams Integration for Virtual Events.
Note
When reviewing the listed solutions, you might find that some flows are already turned On. If so, move onto the next flow that is in the off state to activate it.
Do the following steps for each flow in the individual solutions:
- Sign in to Power Automate.
- Select Solutions from the left navigation pane.
- Go to each Solution listed above from the solution explorer and select the solution to view the solution components.
- In the upper-right filter, select Cloud flow.
- On each flow that is set to Off, select the flow, and then select Edit.
- Select Add or Sign-in to add any missing connections or just select Continue if the connections are already there and have a green check mark when you select the ellipsis.
- Select Save.
- Select the Back button from the flow editor to go back to the solution explorer, and then activate the flow by selecting Turn on.
- Repeat these steps for each solution.
Configure Microsoft Teams Integration for Virtual Events
Follow these steps to integrate Microsoft Teams and allow automated Teams meetings and scheduled live events.
Required permissions
Important
You need Global Admin access to create and grant admin content for Microsoft Entra ID app registration.
Licenses
Important
The following licenses are required for users to work with Media Teams Integration for Virtual Events:
- Microsoft 365
- Microsoft Teams
Microsoft Entra ID app registration
Before doing the registration process in these steps, be sure you have Global Admin access.
Register for a new app in the app registration portal. The step-by-step registration process is available here: Create Microsoft Entra ID application registration.
During the registration process, be sure to note down the Application/Client ID and secret. You'll need it later. The client secret displays only once, so be sure to store it in a secure place for future updates.
Copy your Tenant ID.
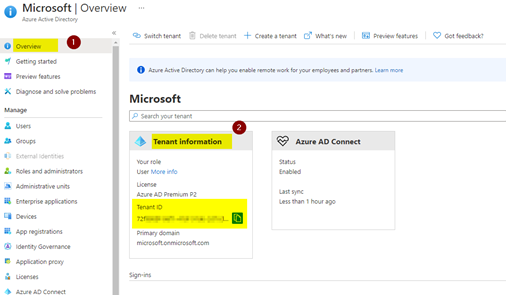
Copy your Application/Client ID and secret.
You must configure the Tenant ID, Application/Client ID, and client secret in later steps. Be sure to copy and paste them in a secure place.
Copy the Microsoft Graph API endpoint as shown in the following image and paste it for future reference.

You need to set the redirect uniform resource identifier (URI) for this application. Select Authentication in the left navigation pane and select Add a platform.
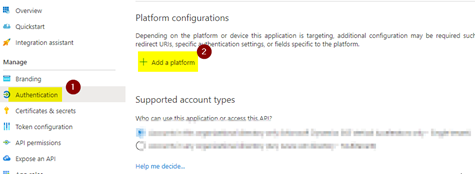
A panel on the right side opens. Select Web.

Now copy this URL
https://global.consent.azure-apim.net/redirectand paste it in the field under Redirect URIs.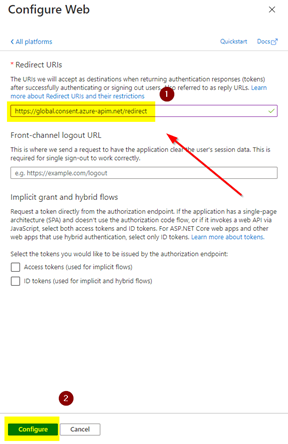
Select Configure. The redirect URI is added to the application.

Once the above steps are completed, you must provide some API permissions on the same app.
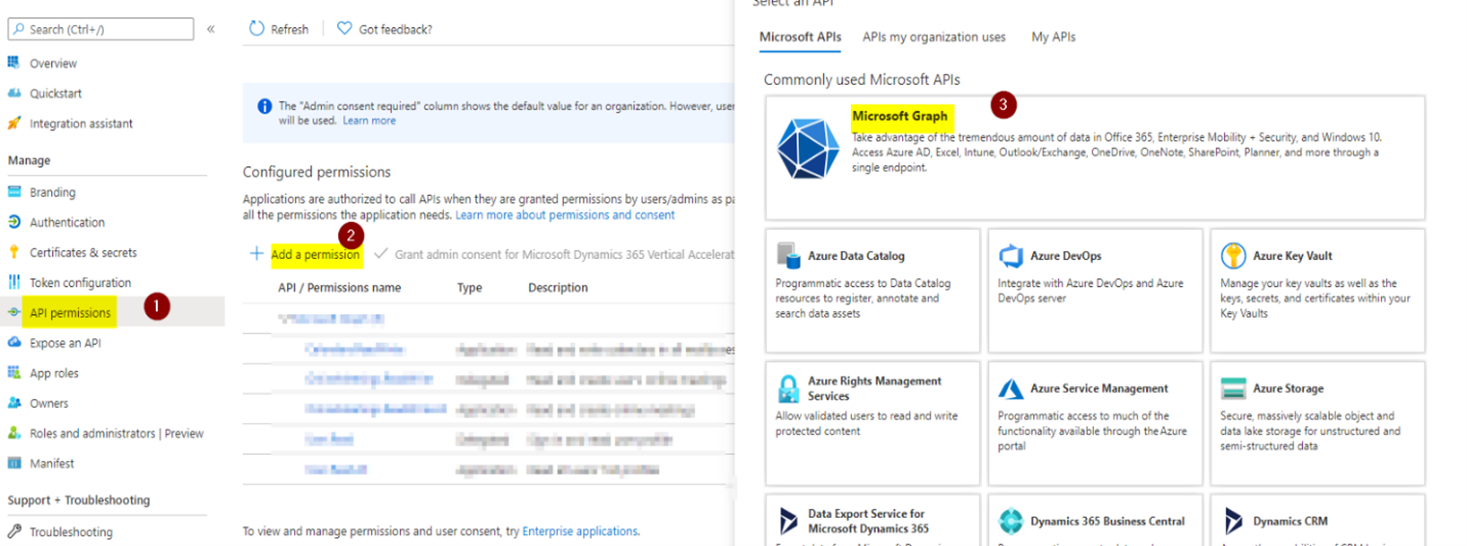
You need to give the following permissions:
| Permission type | Permissions |
|---|---|
| Delegated | OnlineMeetings.ReadWrite |
| Delegated | Calendars.ReadWrite |
| Delegated | User.Read.All |
| Delegated | UserAuthenticationMethod.ReadWrite.All |
Select Application permission or Delegated permission based on the type of permission in the above table.
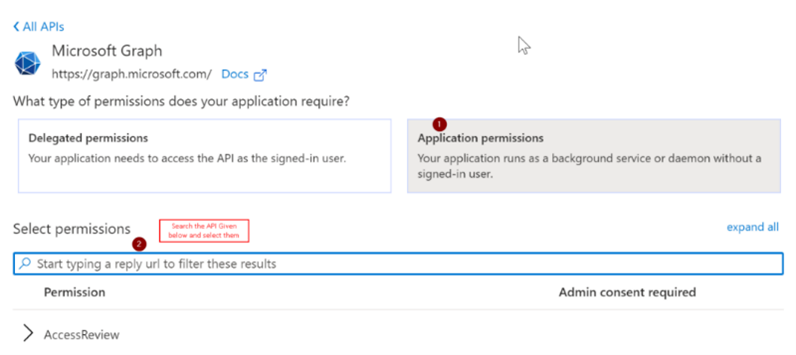
Once all the permissions are given, select Grant admin content as shown in the following image. This step requires Global Admin access.

Update custom connector credentials
To perform the actions in this section, you need system admin access.
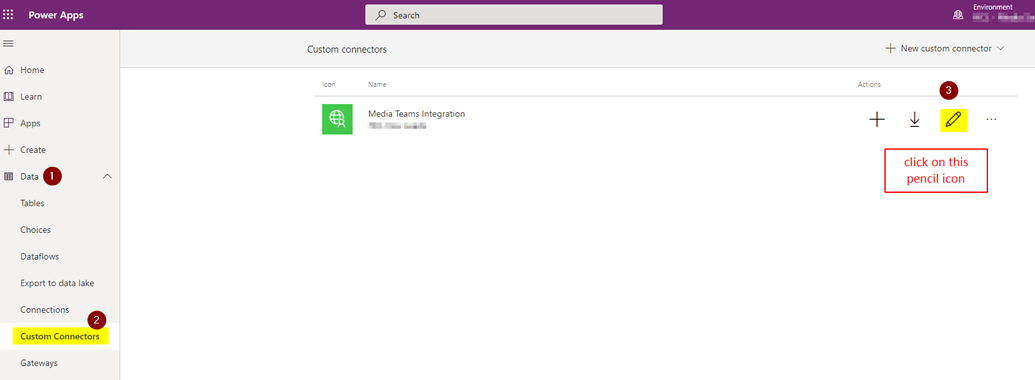
Once the solution is imported successfully, select Data in the left navigation pane.
From the Data section, select Custom Connectors.
In the Media Teams Integration custom connector, select Edit (pencil icon).
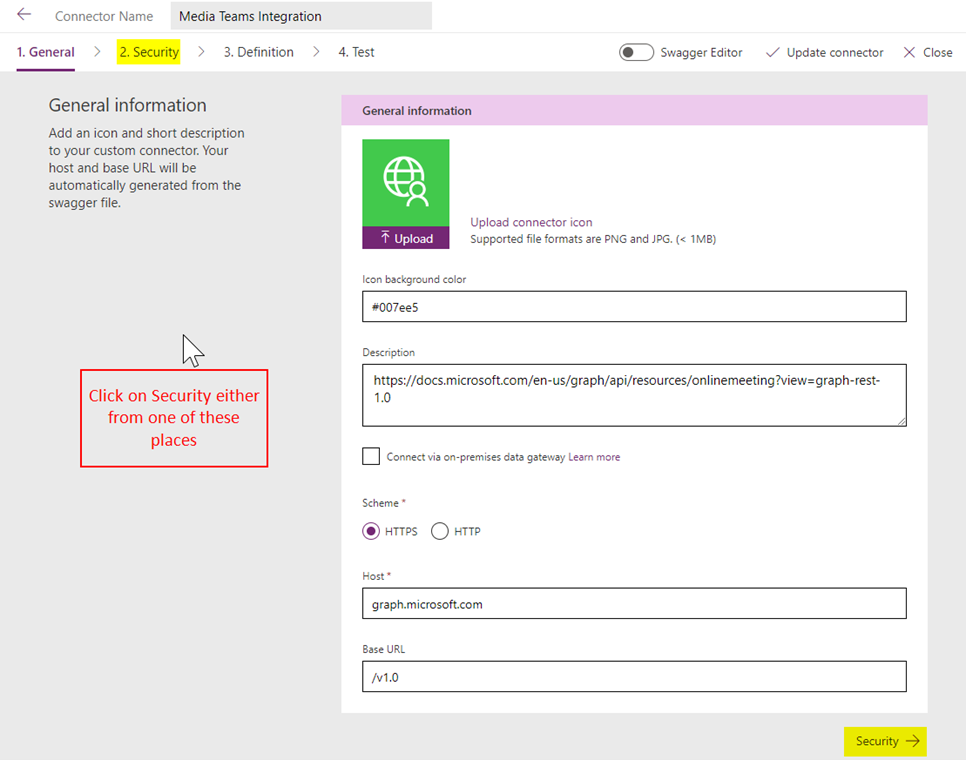
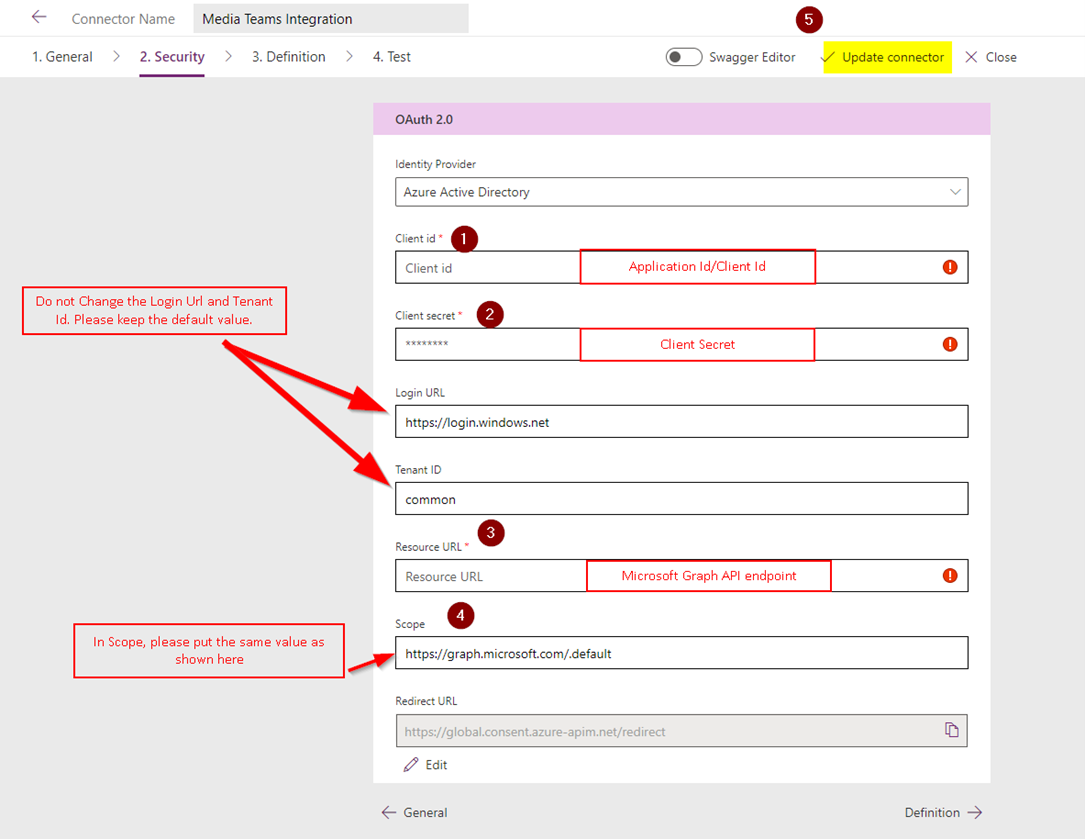
The connector will be opened in edit mode. You need to make some changes in the security section. Select Security from either location.
Select Edit.

This step will unlock the fields in the below section.
During the Microsoft Entra ID app registration, you securely copied the Tenant ID, Application/Client ID, client secret, and a few URL tokens. Now it's time to paste them here.
Copy and paste the information in each location as shown in the following image, and then select Update Connector.
Now, select Solutions from the left navigation pane, and then select Publish all customizations.
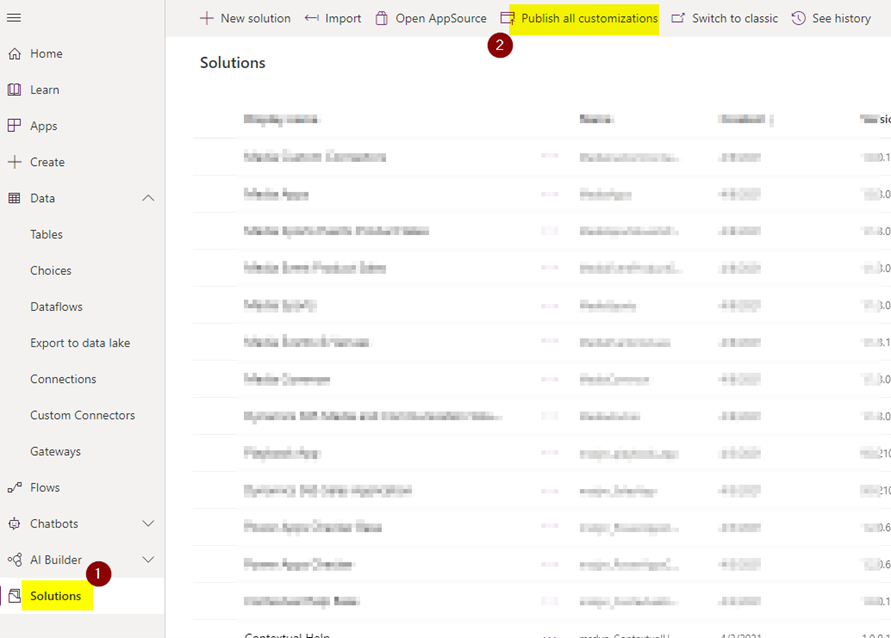
You've successfully updated the connections in your custom connector.
Testing the custom connector
Once you've updated the connections, you need to test that these custom connectors are working as expected.
To test these custom connectors, select Data in the left navigation pane, and then select Custom Connectors.
In the Media Teams Integration connector, select the plus (+) icon.
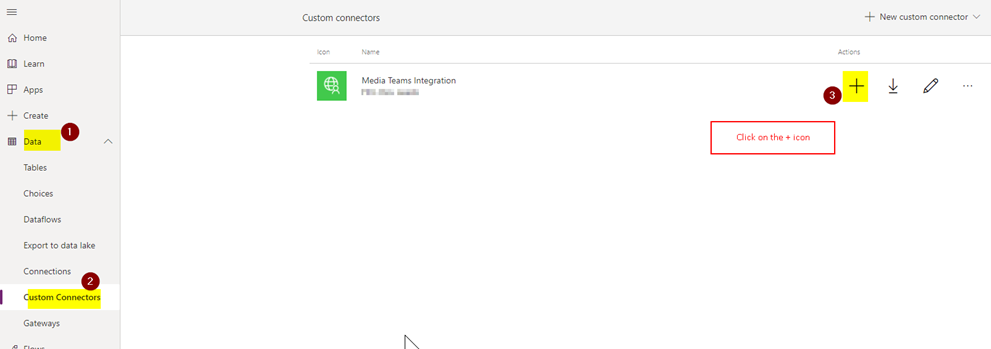
This step opens a dialog box to create a connection.
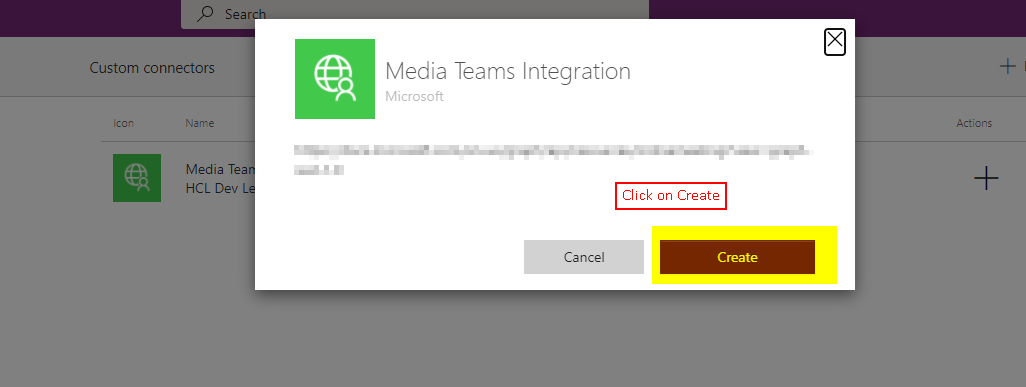
Select Create. If the connection is made successfully, it will take you to the connections screens.
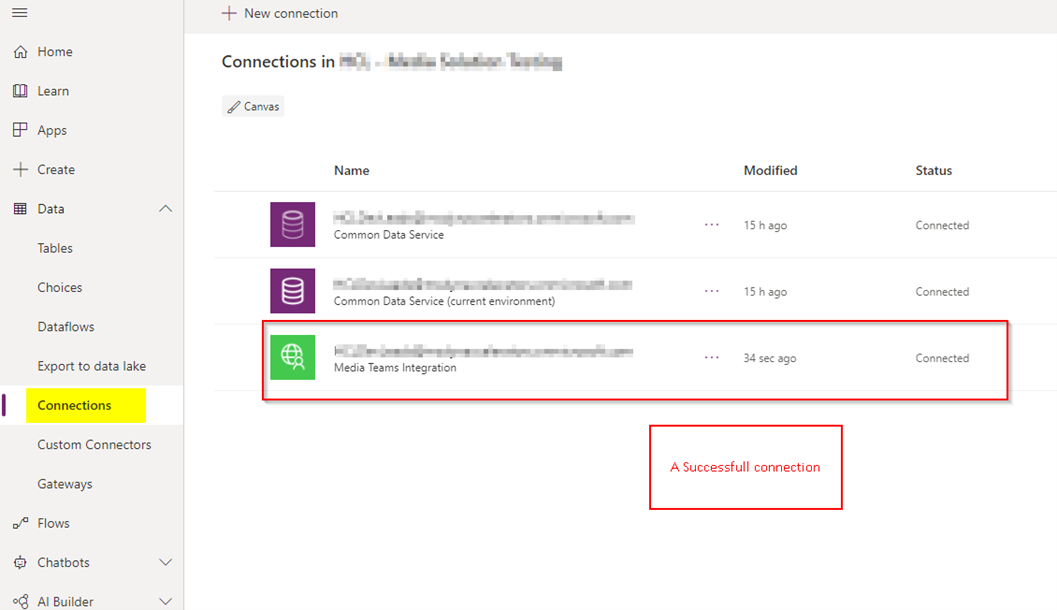
Update Create Teams Meeting flow connections
To perform the steps in this section, you need system admin access.
This procedure is required only if you've installed the media solutions for the first time.
Open Default Solution, search for "Create Teams Meeting", and then select it.

Power Automate is opened in the other tab.
Update the connections for Power Automate. To do so, select Edit in the command bar.

Power Automate opens in edit mode and shows the following connections screen.

Now, select the plus (+) icon to create connections for these three connectors.
Once connections are created, it will look like the following screenshot with the check mark next to them. The check marks indicate that they're validated connections.
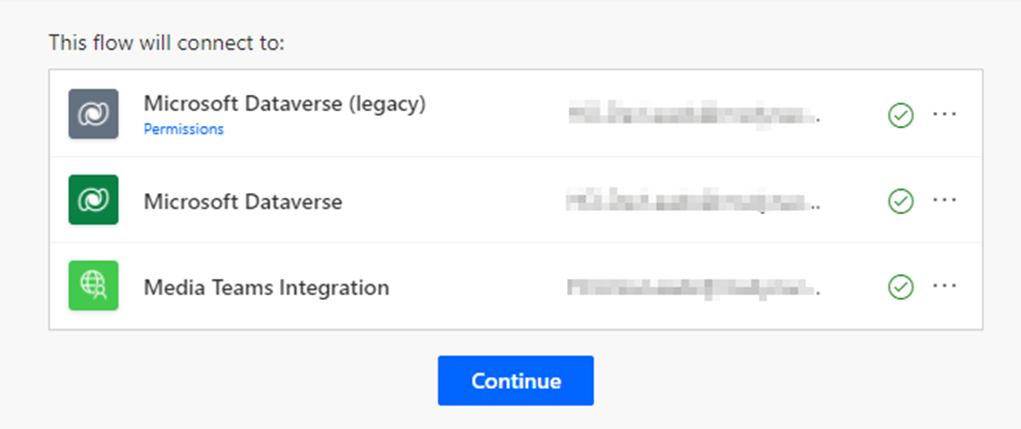
Once the connections are added and validated, select Continue, and then select Save. Saving is important because, if you don't save it, your flow won't work.

Once Power Automate is saved with all the right connections, turn on Power Automate. Select Turn on in the command bar.

The status in Power Automate updates to On.
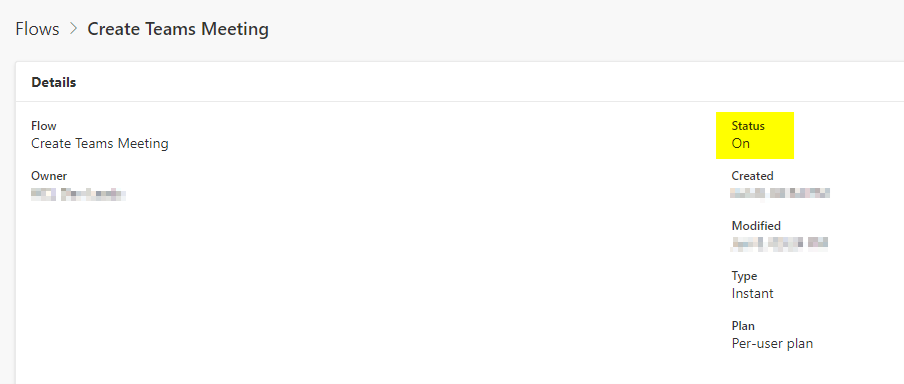
Power Automate is ready.
Configure media event registration
The media event registration portal brings in your event data and helps users learn about upcoming events. Users can register to attend the events either in person or virtually. Built-in integration with Microsoft Teams allows attendees to link directly to the live event broadcast without loading any client applications or copying links.
The following steps will ensure that the media portal is properly configured.
Pre-deployment: Set up a new blank portal
Before you can deploy the media registration portal, you need to set up a new blank portal.
Sign in to Microsoft Power Apps.
Select Create in the left navigation pane, and then select Portal from blank.
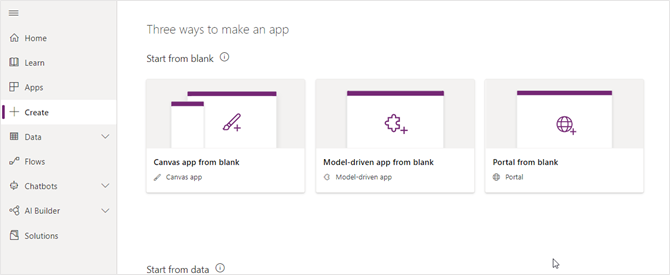
Note
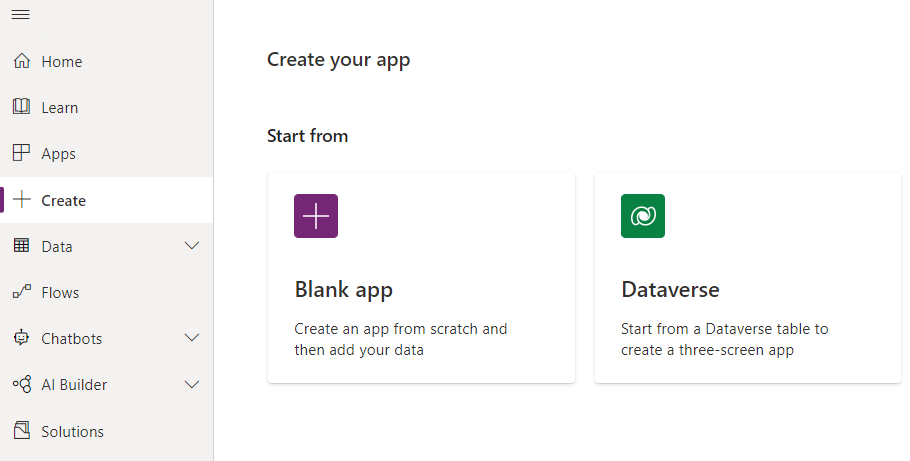
If the creation experience UI changed for you after you select the Create button, you can follow these optional steps to create the portal in the new interface.
Select Blank App.
Select Blank Website.
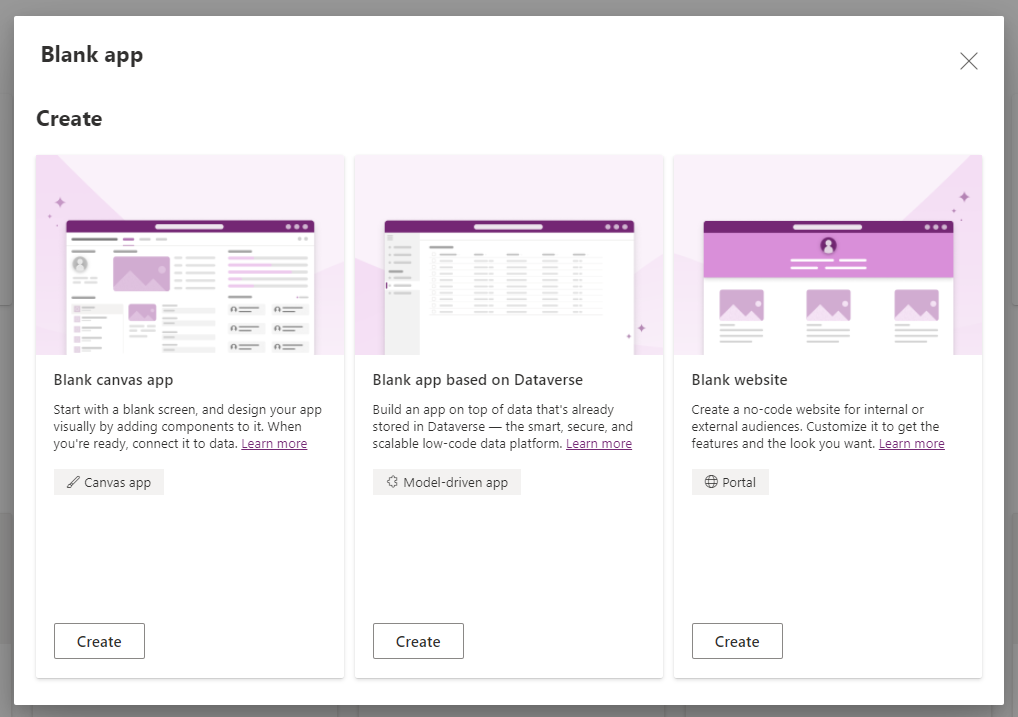
In the Portal from blank window, enter a name for the portal and an address for the website, and then select a language from the dropdown list. When you're done, select Create. For more information, see Create a Dataverse starter portal.
Update the system settings to allow JavaScript (.js) and cascading style sheet (.css) files needed for the media solution.
Select Settings (sprocket icon) in the upper-right corner, and then select Advanced settings.
Within Settings, select Administration in the System area group.
Select System Settings.
On the General tab, proceed to the Set blocked file extensions for attachments section and remove the .js and .css file extensions.

Post-deployment: Configure your portal
After you've installed the media and entertainment accelerator, configure the portal.
Follow these steps to update the portal binding:
Select Apps in the left navigation pane, locate the newly created portal, and then select the ellipses (...) to select Settings.
Within Portal Settings, under Advanced settings, select the Administration link, which opens in a new window or tab.
Within Portal Details, find Update Portal Binding.
Change Select Website Record to Media Registration Portal.
Select Update.
After this change, it might take up to 5 minutes for the website binding data to sync. Wait a few minutes before attempting to open the portal URL.
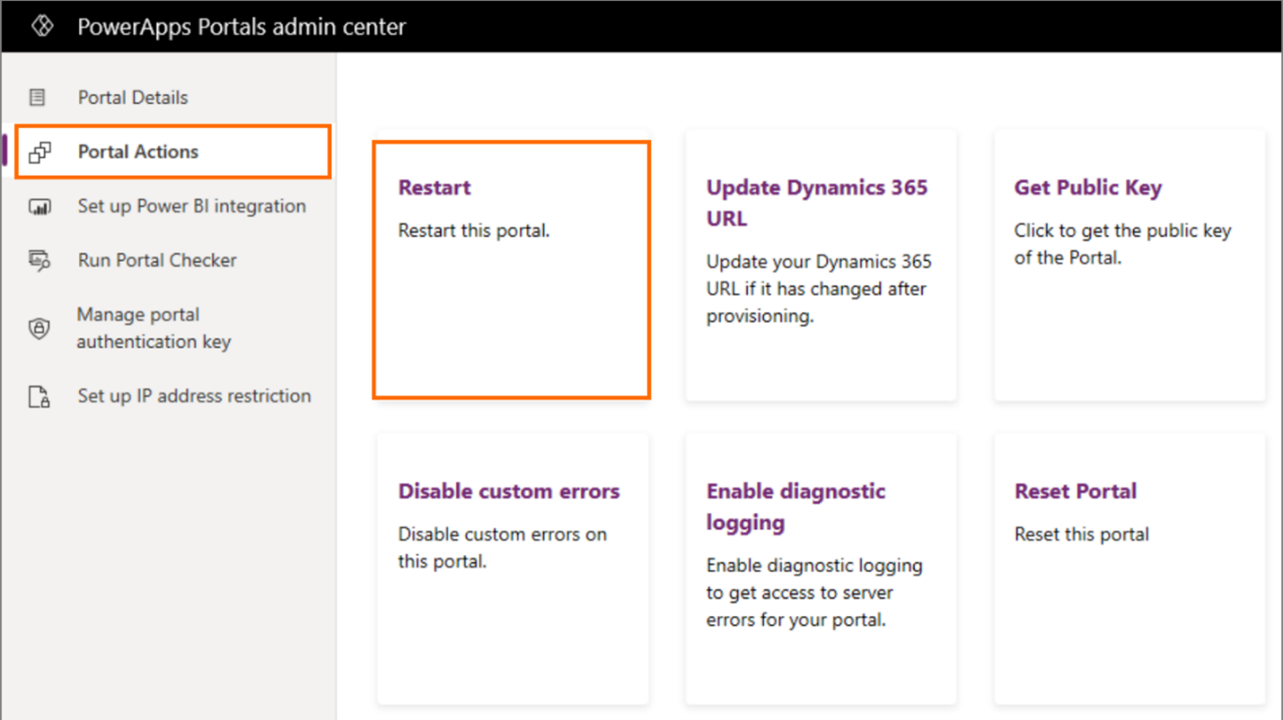
Remember to restart your portal for your customizations to take effect immediately. To restart a portal:
Open the Power Platform admin center.
Select Portal Actions > Restart.
You can use Power Apps portals Studio to create and customize your website. More information: Power Apps portals Studio anatomy
To learn more about how to make your portal align to your theme, go to: Overview of themes in Power Apps portals.
Configure Power BI settings for Events Dashboard
Important
To access some of these Power BI settings, you'll need the required user role. For roles required for access, go to Administering Power BI in the admin portal.
Connect dashboard to your environment data
To see your data properly visualized in the dashboard, you'll need to update the environment URL parameter. First, complete the install process for your template app. Then connect your data by following the connect to data doc. Alternatively, you can follow these steps:
After you install the template app, you'll see a banner with a link to select and connect your data.
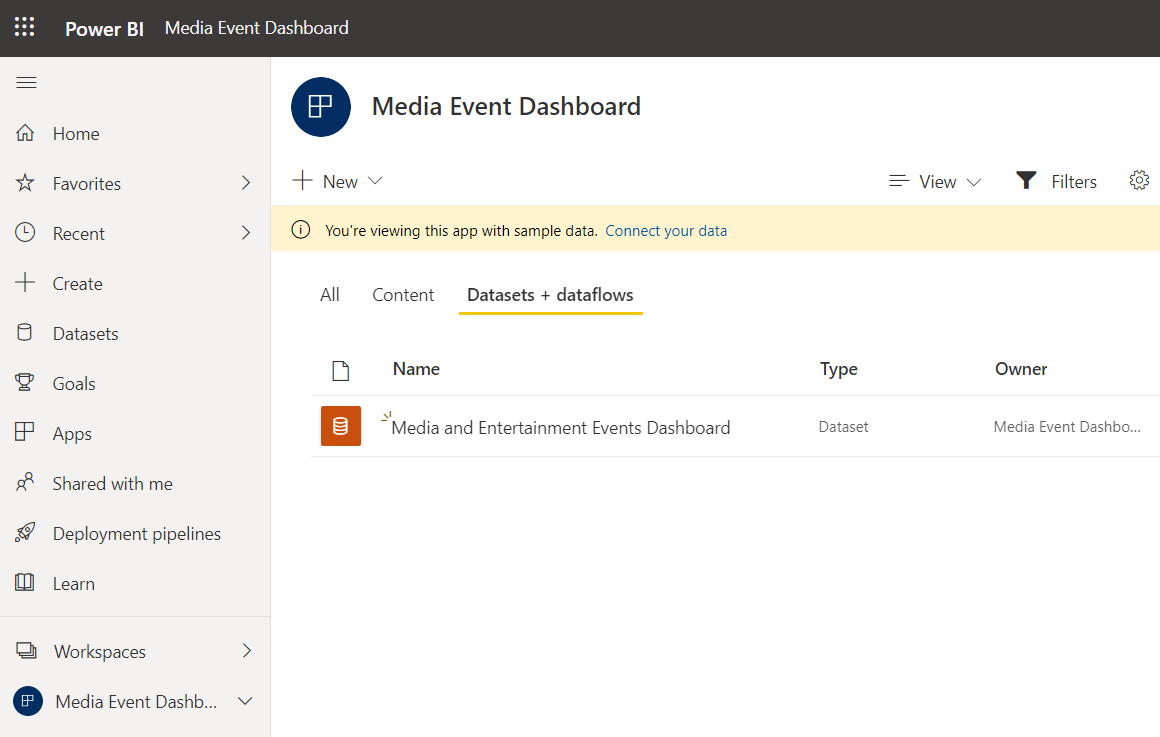
Once you select the link, enter your environment URL.
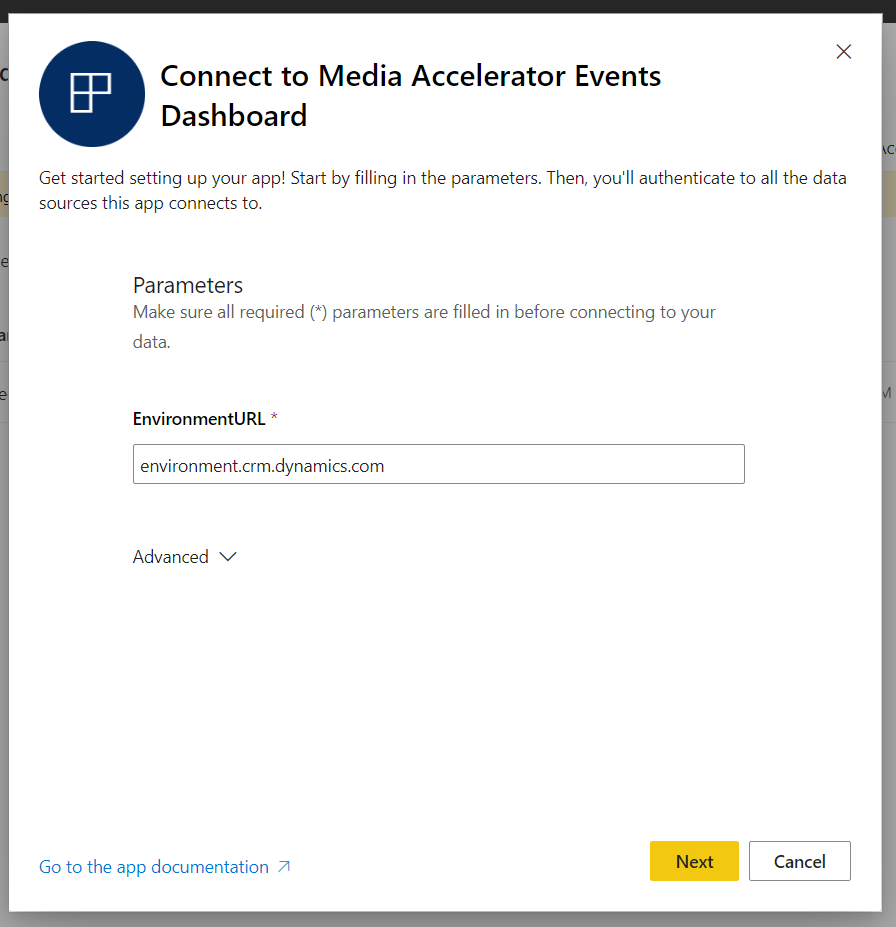
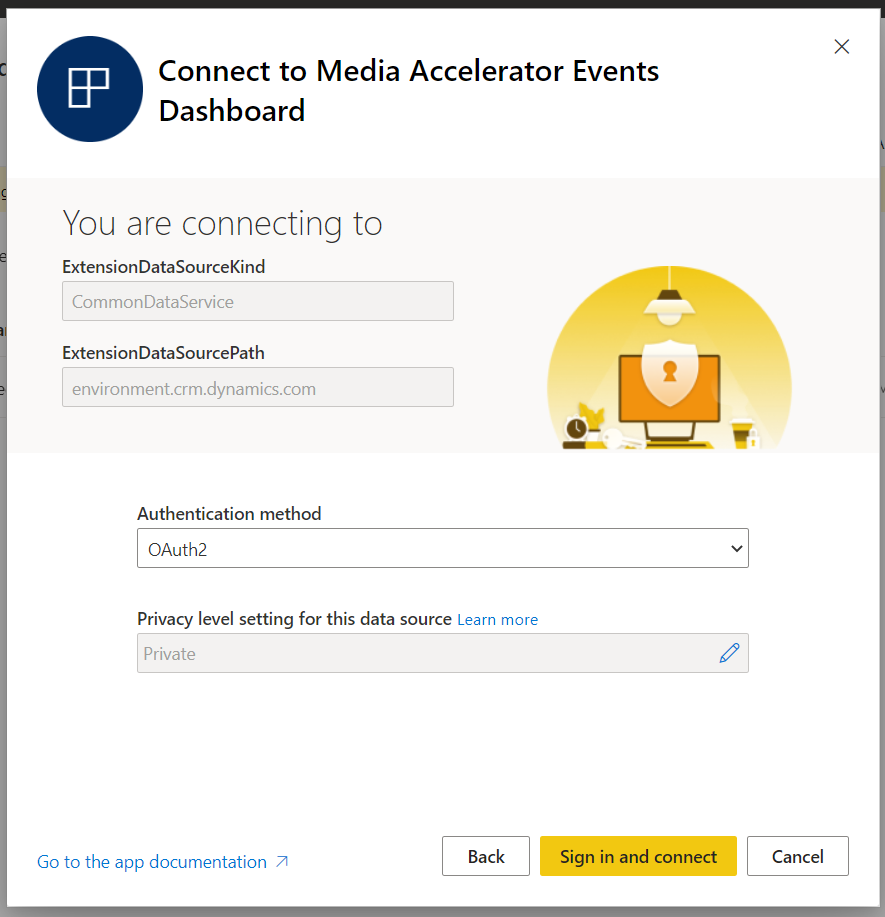
Before you sign in, follow this doc to select the appropriate privacy level for your team. Then sign in and connect to the environment by following the prompts.
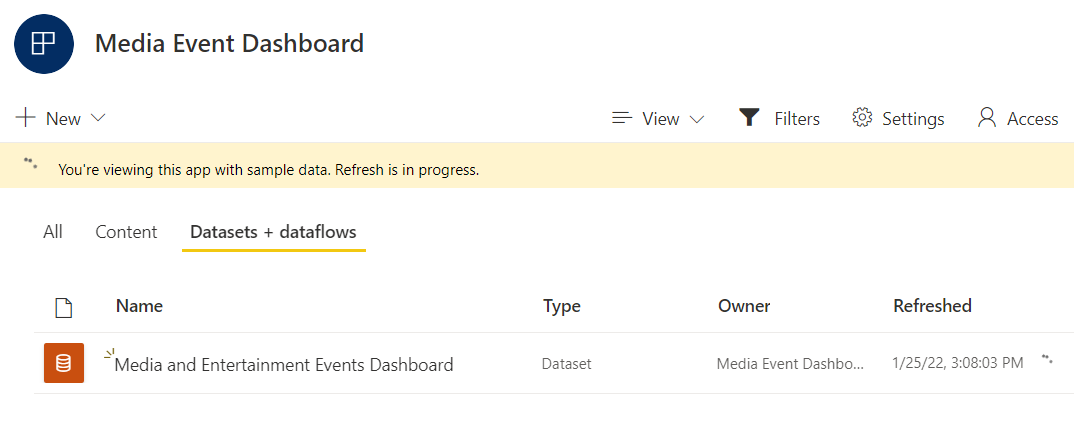
After you sign in and connect, the connection process will start an environment refresh that will take a few minutes. You may need to refresh the page if the refresh takes more time than expected.
Enable Map and filled map visuals
To use the map features included with our dashboard, you'll first need to enable these settings.
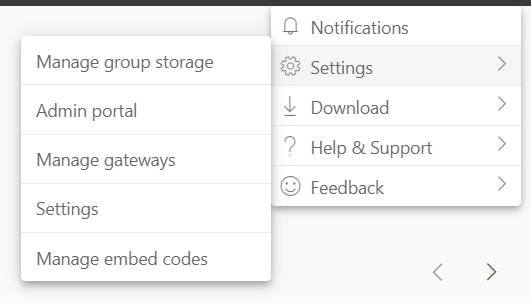
In the Power BI portal visit tenant settings, select the settings gear at the top right of the page and go to Settings > Admin portal.
Note
You may just see a menu option for the Admin portal once you select the gear. If you do, you can select it right away.
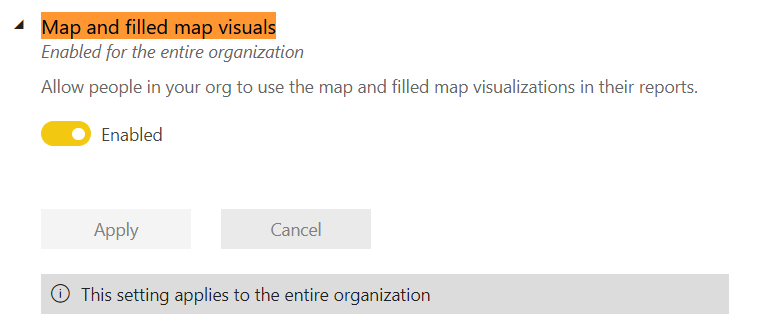
Scroll down the tenant settings until you reach the setting for Map and filled maps visuals.
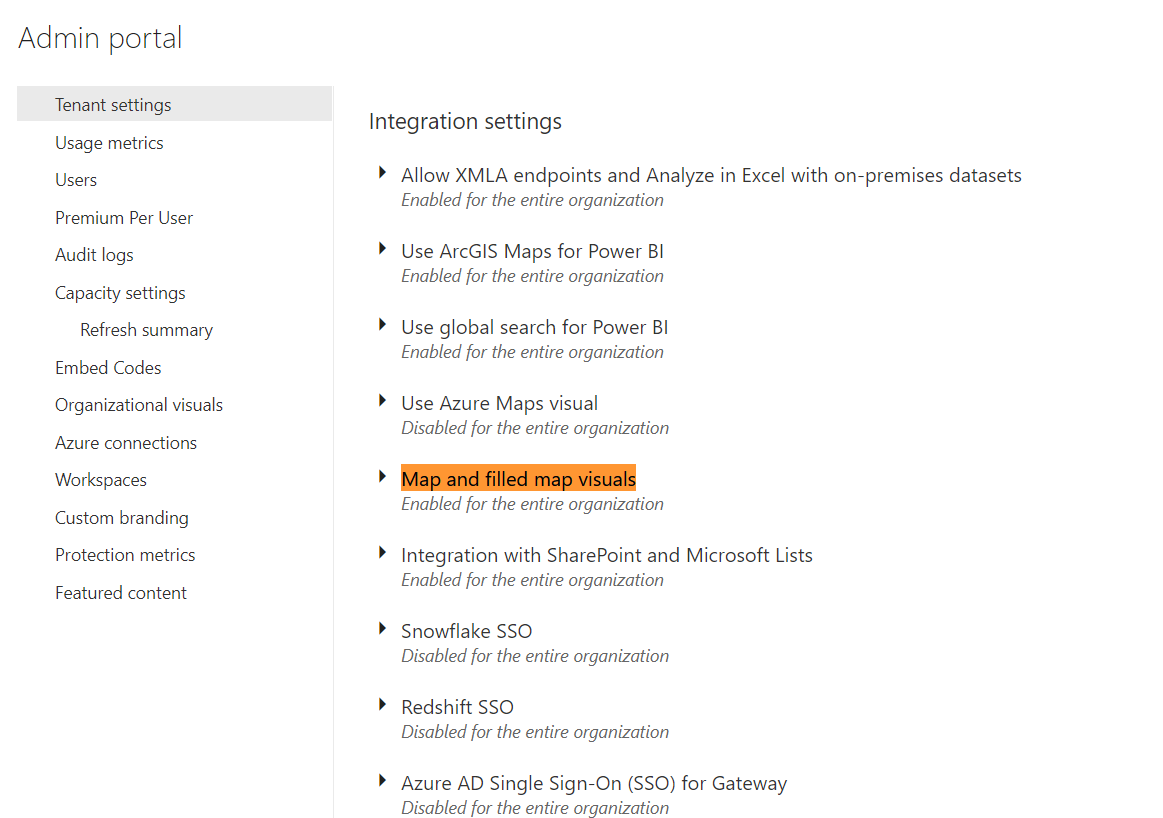
Select the enable switch for the Map and filled maps visuals, and then select Apply.
