Sample 3: Combine methods for displaying FHIR data
This example follows Sample 2: Bind FHIR data in your canvas app using FHIRlink connector. It uses the same FHIRlink Sample app with the ListResources method, which we previously used to bind the resulting values to a canvas app gallery control.
In this example, we show you how to use the bound Patient results to retrieve a single FHIR resource and records related to the selected resource. You can also download and import the final solution as an implementation sample. For more information, go to Download sample. Before you begin the example or use the sample, see Assumptions for sample usage.
Note
FHIR® (owned by Health Level Seven International), Google™ (owned by Google LLC), and EPIC® (owned by Epic Systems Corporation) are registered trademarks. The usage of these trademarks on this page doesn't constitute endorsement by Health Level Seven International, Google, or Epic Systems.
Select values
When you invoke the the FHIRlink ListResources method, it returns a list of Patient FHIR resources. But, the _elements parameter limits the details of each resource. This behavior is a default design choice, aiming to optimize the speed of round-trip calls to FHIR services while minimizing unnecessary data on the client.
In this example, you can learn how to selectively retrieve complete details of a record when required. For instance, you can retrieve and display complete details of the Patient record when you select an item in the gallery.
First, you need to capture the selection in the gallery and the id of the selected Patient. We know that the item template context provides access to an item in the entry list. So, let's use this context to capture details on the selected Patient in the gallery.
Select the PatientList gallery.
In the formula bar dropdown, select OnSelect. Alternatively, you can also select the Advanced tab in the properties pane and search for OnSelect.
In the formula editor, change the value from
falsetoUpdateContext({_selectedPatientId: ThisItem.Value.resource.id});Add the following value to a new line in the editor:
Reset(TextPatientID);The formula should now look like the following expression:
UpdateContext({_selectedPatientId: ThisItem.Value.resource.id});
Reset(TextPatientID);
After capturing the selected Patient identifier in a variable, you can display it on the main screen. Add the following controls to the form to display the identifier:
Add a new Text Label to the form:
- Name it LabelPatientID.
- Set the Text value to Patient Id.
Add a new Text Input to the form:
- Name it TextPatientID.
- Set the default value to
_selectedPatientId - Set the Hint text value to Patient Id.
As an extra step, let's add the Clear function to clear the current list of patients. This step helps ensure that the gallery clears out with each request.
Select the ListResources button. In the formula bar dropdown, select OnSelect.
Insert the following lines of code at the beginning of the formula:
Set(_patientList, Blank());
Clear(_patientListTable);
Now, you can test the formula updates.
Run the app in preview mode and select the List Resources button.
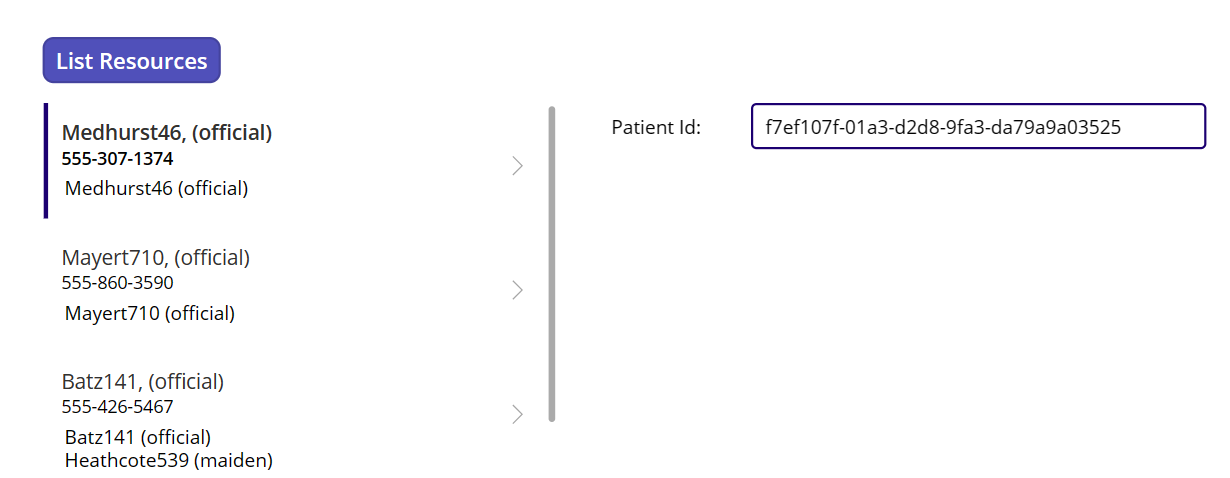
Select the items in the list of patients. You can see that the TextPatientID displays the
idvalue of the patient.
The code for the OnSelect method captures the selected Patient record's id value into the variable _selectedPatientId. The UpdateContext and Reset methods assign the variable (local to the context of the screen) and then update the TextPatientID value.
Note
Another option for capturing the variable is to use the Set method. You can use this method if you want _selectedPatientId available as a global variable. Currently, the value is scoped to the canvas app's main screen only.
Use the GetResource method
After selecting the Patient id, you can now use the FHIRlink GetResource method to retrieve the complete resource. This connector method retrieves a single FHIR resource for a given id value. Update the OnSelect method to perform this action.
Select the PatientList gallery.
In the formula bar dropdown, select OnSelect.
Update the formula to include the following code on a new line:
UpdateContext({_selectedPatient: FHIRlink.GetResource("Patient", _selectedPatientId)});With the new
UpdateContextcall, you can make a request to the FHIR connector to retrieve the entire patient resource for the_selectedPatientIdvalue. The updated formula should now look like the following expression:UpdateContext({_selectedPatientId: ThisItem.Value.resource.id}); Reset(TextPatientID); UpdateContext({_selectedPatient: FHIRlink.GetResource("Patient", _selectedPatientId)});
Bind patient details
In Sample 2, we bound a Patient record to controls within a gallery item template. Now, we have a full Patient record and we can bind this information in different ways.
Simple data types such as strings or dates can be bound to standard controls, while child arrays such as name, identifiers, or telecom can be displayed in their own individual galleries. Or, you can also access child items by position using functions such as First.
For this example, let's bind them directly to a Text Input as we did for the Patient identifier. Since the GetResource method response is an untyped object in the format of a single FHIR resource, you can access many properties directly. With the child array items bound to galleries, you need to convert these items to tables, as we did with the entry value of the FHIR bundle.
Add Text Labels to the screen with the following names and text values:
Name Text LabelMaritalStatus Marital Status:LabelBirthdate Birth Date:LabelGender Gender:TextMaritalStatus First(_selectedPatient.maritalStatus.coding).displayTextBirthdate _selectedPatient.birthDateTextGender _selectedPatient.genderAdd a vertical gallery to the form and name it GalleryIdentifiers.
- Change the Layout to Title, Subtitle, and Body.
- Change the Items property to
Table(_selectedPatient.identifier)
In the gallery item template, replace the existing Text Labels controls with the following label and value pairs. You can also make sure the controls render clean in the item template by adjusting their size, position, and alignment.
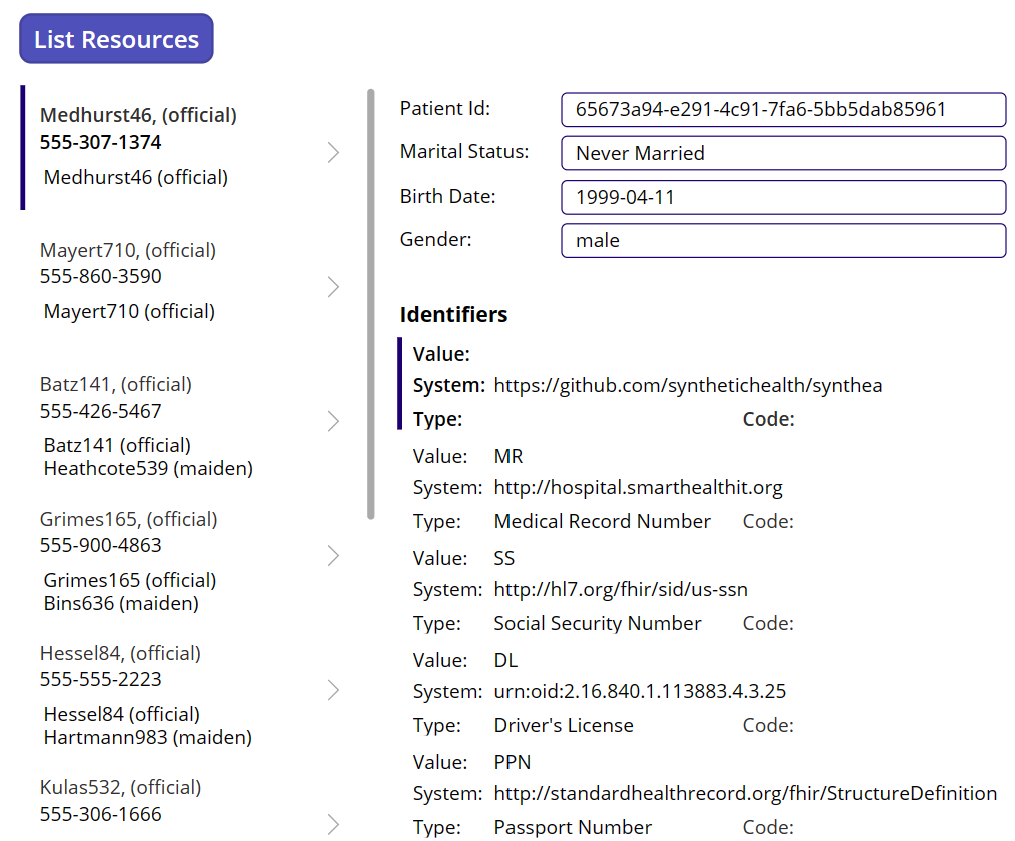
Name Text LabelCode Code:LabelValue Value:LabelType Type:LabelSystem System:TextCode ThisItem.Value.codeTextValue First(ThisItem.Value.type.coding).codeTextType ThisItem.Value.type.textTextSystem ThisItem.Value.systemNow, you can test the updates. Retrieve the full Patient record using the GetResource method and bind the controls to Text Labels and a child array property to a new gallery control.
Run the app in preview mode and select the List Resources button.
Select the items in the list of patients. As you change the selection, you can see all the related fields and the gallery update.
Get related records
You now have the full Patient record persisted in the _selectedPatient context variable, and some of the patient details are being displayed. Using the same connector, you can also retrieve FHIR resource records related to the selected Patient, such as Encounters.
Tip
For more information on the FHIR Encounter resource type, see HL7 FHIR - Encounter.
Let's use the familiar ListResources method, but change the requested resource type to Encounter and update the list of requested _elements. You need to add some extra parameters to filter by the current _selectedPatientId. For Encounters, you need to filter on the subject property using the patient ID.
Select the PatientList gallery.
In the formula bar dropdown, select OnSelect.
To update the formula, add the following code to a new line in the formula editor. The formula directly converts the
entryarray into a table, and the ClearCollect method clears out the current value of_encounterListand loads the results from the table conversion:ClearCollect(_encounterList, Table(FHIRlink.ListResources("Encounter", {_elements:"id,identifier,status,class,period,type", additionalParameters:"subject=" & _selectedPatientId}).entry));The updated formula should now look like the following expression:
UpdateContext({_selectedPatientId: ThisItem.resource.id});
Reset(TextPatientID);
UpdateContext({_selectedPatient: FHIRlink.GetResource("Patient", _selectedPatientId)});
ClearCollect(_encounterList, Table(FHIRlink.ListResources("Encounter", {_elements:"id,identifier,status,class,period,type", additionalParameters:"subject=" & _selectedPatientId}).entry));
Add a Vertical Gallery to the form and name it GalleryEncounters:
- Change the Layout to Title, Subtitle, and Body.
- Set the Items property to
_encounterList.entry
In the gallery item template, replace the existing Text Labels controls with the following label and value pairs. You can also make sure the controls render clean in the item template by adjusting their size, position, and alignment.
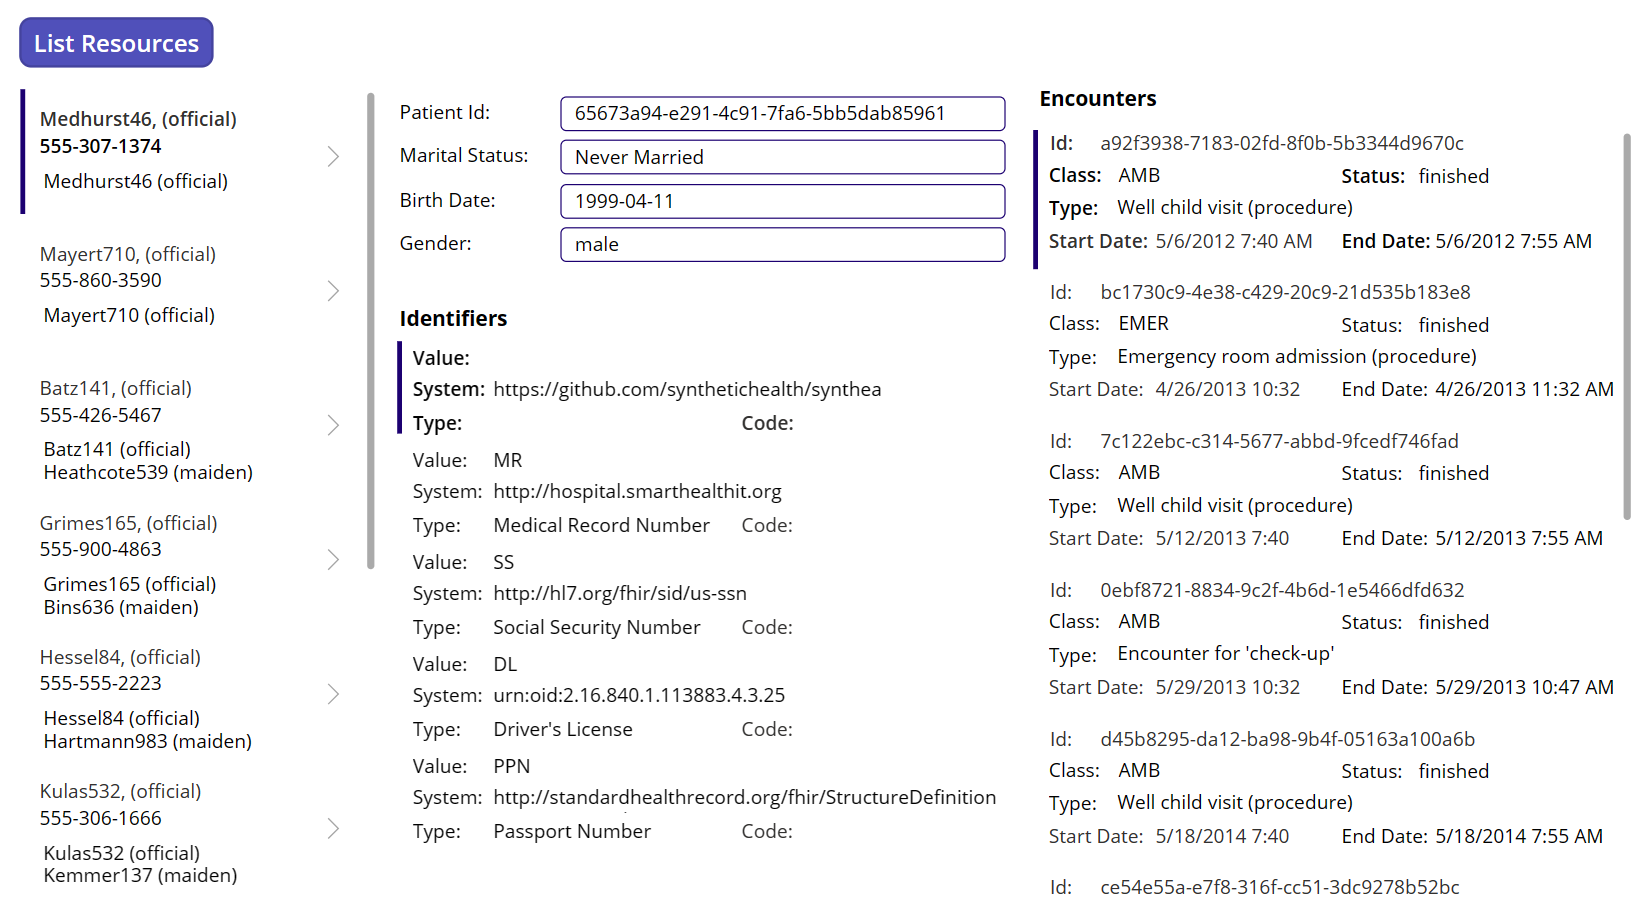
Name Text LabelEncId Id:LabelEncClass Class:LabelEncStatus Status:LabelEncType Type:LabelEncStartDate Start Date:LabelEncEndDate End Date:TextEncId ThisItem.resource.idTextEncClass ThisItem.Value.resource.class.codeTextEncStatus ThisItem.Value.resource.statusTextEncType Concat(Filter(Table(ThisItem.Value.resource.type), Value.text), Value.text, ", ")TextEncStartDate Text(DateTimeValue(Text(ThisItem.Value.resource.period.start)), DateTimeFormat.ShortDateTime)TextEncEndDate Text(DateTimeValue(Text(ThisItem.Value.resource.period.end)), DateTimeFormat.ShortDateTime)Run the app in preview mode and select the List Resources button.
Select the items in the list of patients. For patients with related Encounters, you can see that the GalleryEncounters values are also updated.
Now, we added another call to retrieve any related Encounter records for a selected patient. These records are displayed similar to the Patient and related name values, with date and time value formatting and some visual formatting to highlight the field labels. If necessary, you can add more fields to this list. With the new Encounter fields, you can also explore adding further navigation options and more detailed data to the application.
Download sample
You can download and import the completed canvas app solution from this example as an implementation sample. The sample is available for download in the following three formats:
- Zip package: FHIRlink Sample3.zip
- MSAPP archive: FHIRlink Sample3.msapp
- Power Platform solution (contains all samples): FHIRlinkSamples.zip
For instructions on how to import and export canvas apps, see Export and import canvas app packages.
Learn more
To delve into more canvas app details related to this sample, see:


