Unified patient view: Interact with patient information
Unified patient view displays patient data in Dynamics model-driven apps, including demographic information and clinical data. It also includes the clinical timeline and care team controls.
There are two forms. One form that displays clinical data and the other that only displays nonclinical data. The security roles Healthcare User and Healthcare Non-Clinical User determine the access.
Summary tab
Card view control
The card view control is only in the clinical form. It highlights important information about the patient.

Select New to create a new record.

Select a record to view its details or edit.

Multiple medical identifiers
You can use multiple medical identifiers like medical record number (MRN) and driver's license number.

Patient snapshot (preview)
Important
- This is a preview feature.
- Preview features aren't meant for production use and may have restricted functionality. These features are available before an official release so that customers can get early access and provide feedback.
The patient snapshot displays a customizable bird's eye view of the patient information.
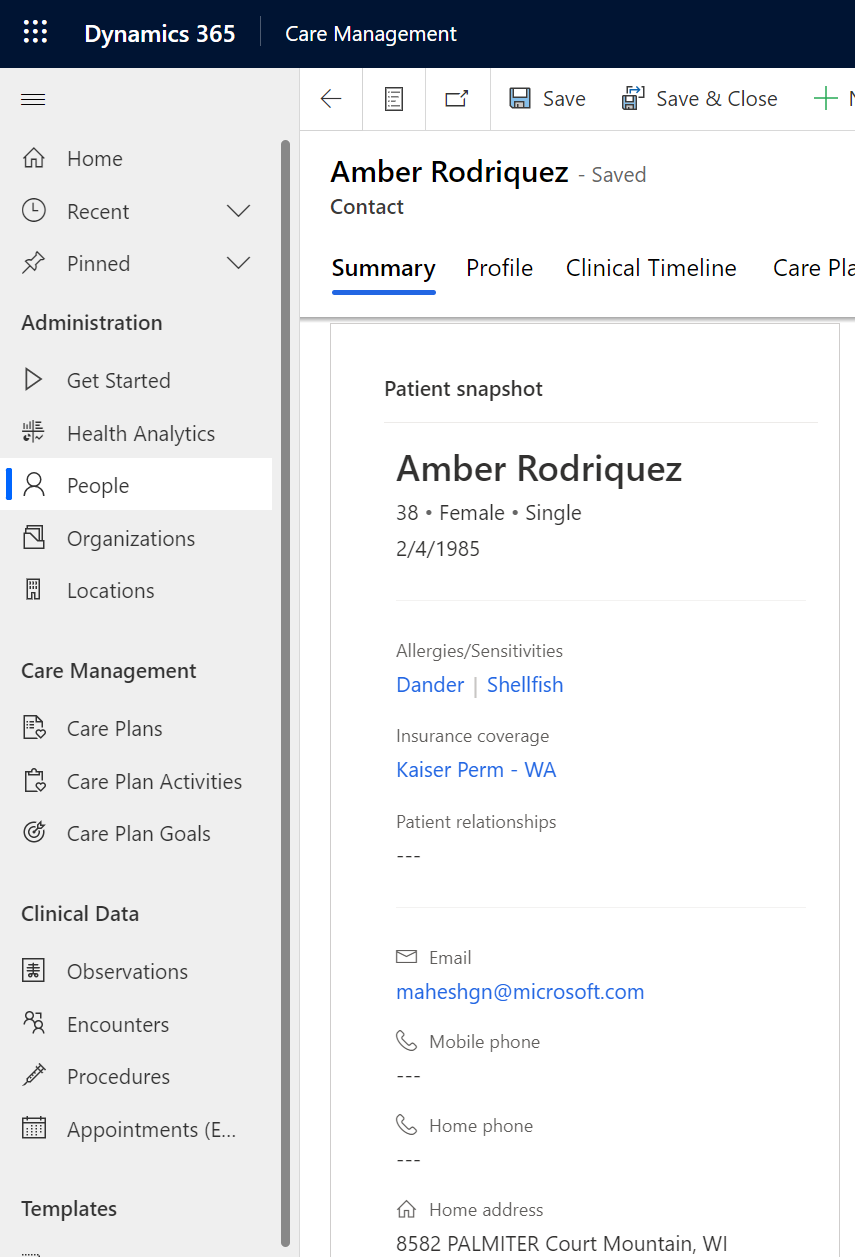
Select a linked entity to display the details of the record on the right panel of the form.

Profile tab
The profile tab, only in the clinical form, contains additional and nonclinical information about the patient.

Clinical timeline
Select the Clinical Timeline tab on the patient form to view patient care events. The timeline has two panes:
The calendar pane that displays events for the selected week.
The agenda pane that displays either previous events or upcoming events.

Select the filter dropdown list in the calendar pane to filter events on the calendar.

To create events directly from the timeline, select New, and then select an option from the dropdown list.

After you select New and an option from the dropdown list, a quick-create form opens in the right pane. Fill in the information for the event, and then select Save & Close.

Selecting a tile in either the calendar view or the agenda view also opens a form where you can edit the event details. Update the information for the event, and then select Save & Close.

In the agenda pane, you can view either previous events or upcoming events.
Note
The current day's events are shown in Upcoming events, not Previous events.

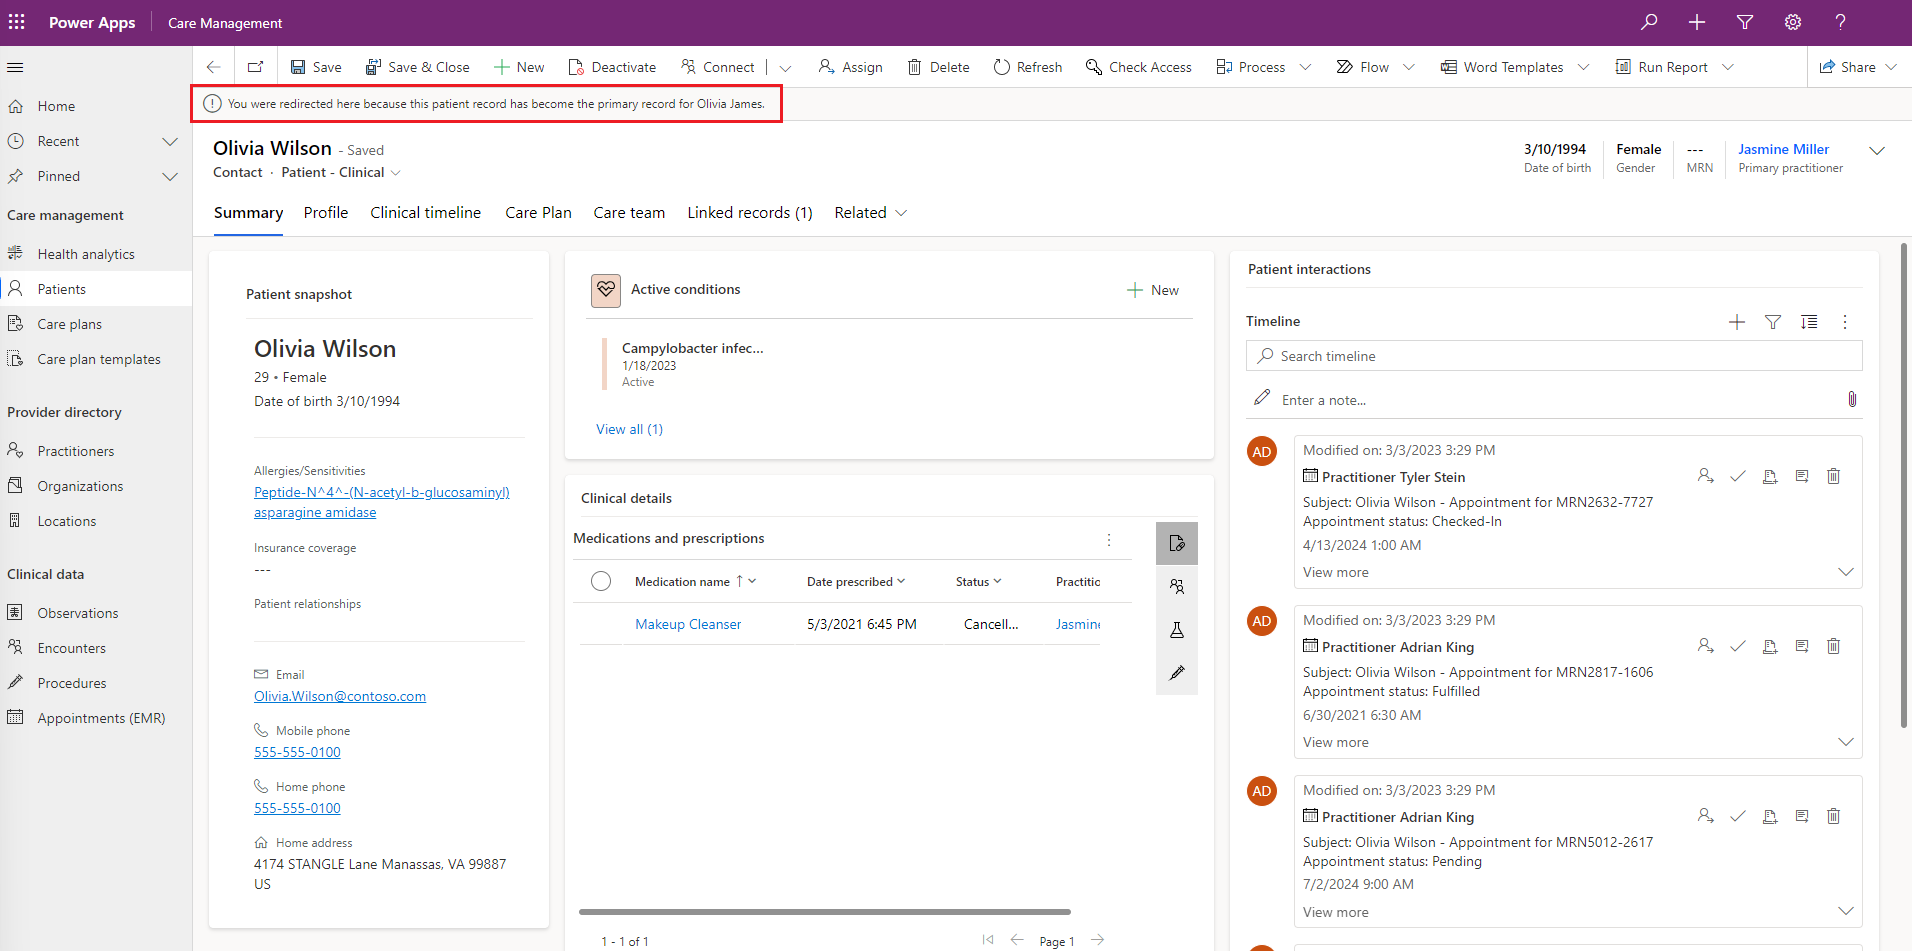
Patient links
According to the FHIR standard, the Patient.link element links to another patient resource that concerns the same actual patient. In the unified patient view, a record's links are displayed in the Linked records tab on the patient form.
There are four link types in the FHIR standard:
| Link type | Description |
|---|---|
| See also and Refer to | Links to a valid patient record that contains additional information about the patient. |
| Primary (Replaced By in FHIR) | Links to the primary active record for this patient. |
| Inactive (Replaces in FHIR) | Links to an inactive patient record that shouldn’t be used. |
Note
If a record has any Primary link, or there is another patient with an Inactive link to the record, the record will be deactivated and made read-only.
The latest update for patient links provides an enhanced usage experience and offers the following improved capabilities:
When you remove links of the type Primary (Replaced By in FHIR) or Inactive (Replaces in FHIR), the inactive Patient record is now automatically reactivated in Dataverse. If the links are updated, deleted, or deactivated, the patient is reactivated in case there are no other links that make this patient inactive.
The patient summary tab displays a banner notification if a user selects a linked record in the links table and is redirected to the primary record.
For example, consider a scenario where Olivia Wilson is the primary record and Olivia James is a linked record for this primary record. When a user selects the linked record Olivia James and is redirected to the primary record Olivia Wilson, the following message is displayed to the user - "You were redirected here because this patient record has become the primary record for Olivia James."

Configuration
Your administrator can select one of the following two modes for how the links and the associated data of linked patient records are visualized:
No roll-up: Data associated with linked records is presented on separate pages, and won't be rolled into the primary record. Redirection from inactive records to the primary record is turned off.
Roll up data from inactive patient records: Selected data from inactive patient records appear in the patient's primary record. For example, consider three records A, B and C for a single patient. Assume that there's a link of the type Inactive from A to B and another from B to C. On A's record, you can view data like appointments or encounters from A, B and C. Redirection from inactive records to the primary record is turned on.
Your administrator can also use the Maximum link depth, Visible links, and Linked record notification configuration options to
- Select the maximum number of links to follow from the primary record when rolling up data.
- Configure the types of links that you can see in the Linked records tab. Administrators can select between the options All links, Refer and See also, and None for this configuration.
- Determine whether notifications appear for linked records, and what should be the message in the notification.
For more information on the configuration options, go to Configure patient links.
Linked records tab
The information displayed in the Linked records tab is based on the link visibility settings configured by your administrator.
A number displays in the tab header that indicates how many links are in the included tables.

Note
The Linked records tab isn't displayed if there are no links in the included tables.
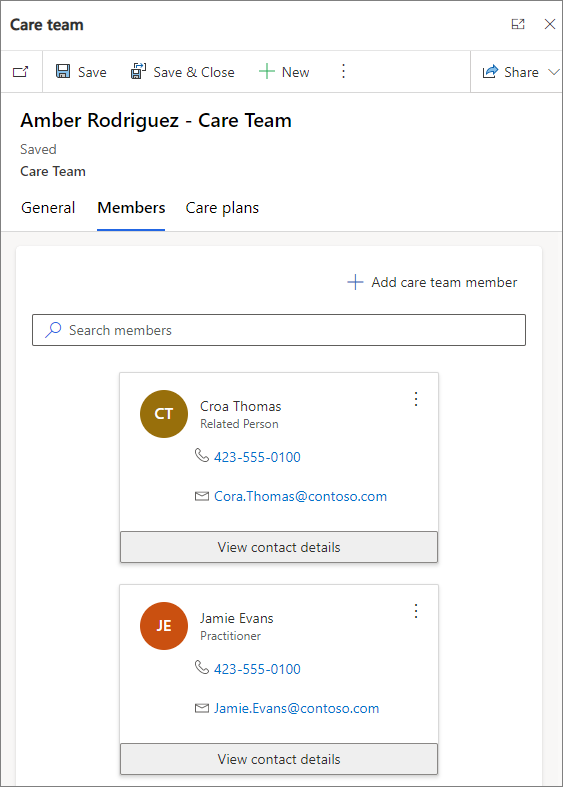
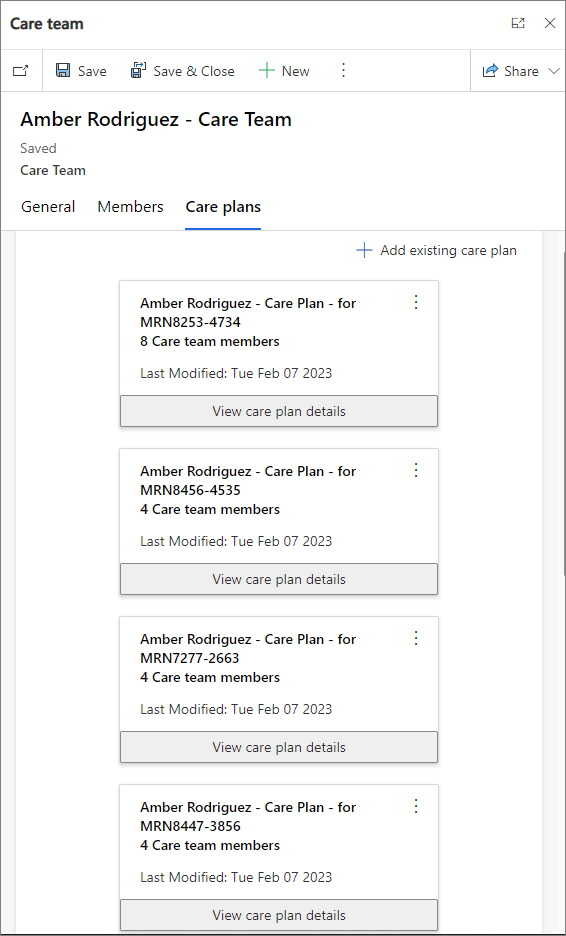
Care team
Select the Care Team tab for a view of the medical professionals, family members, and other authorized people involved in the patient's care, including their names, role on the care team, and the associated care plan and condition.
You can quickly view member information on a tooltip for each care team member, add new care team members, and interact with care team members using the Send email and Start chat options.

Filter care teams
You can filter patients' care teams based on the care team statuses, indicated by the msemr_careteamstatus field.
The following table lists the different care team filters:
| Filter | Description |
|---|---|
| Active care teams | Displays care teams that are in "active" status. Active care teams are the care teams that are currently participating in the coordination and delivery of care. Active care teams is the default filter value when the patient has at least one active care team. |
| Proposed care teams | Displays care teams that are in "proposed" status. Proposed care teams are the care teams that are drafted and proposed, but aren't yet participating in the coordination and delivery of care. The care team tab provides this filter option only if the patient has at least one proposed care team. |
| Suspended care teams | Displays care teams that are in "suspended" status. Suspended care teams are the care teams that are temporarily on hold or suspended, and aren't participating in the coordination and delivery of care. The care team tab provides this filter option only if the patient has at least one suspended care team. |
| Inactive care teams | Displays care teams that are in "inactive" status. Inactive care teams are the care teams that were, but are no longer, participating in the coordination and delivery of care. The care team tab provides this filter option only if the patient has at least one inactive care team. |
| All care teams | Displays all the active care teams, proposed care teams, suspended care teams, inactive care teams, and other care teams that don’t have statuses. All care teams is the default filter value if there are no statuses for the current care teams. |
Note
The care team tab doesn't provide a filter option for care teams with "entered in-error" status.
Create care teams
The Care Team Creation Wizard simplifies the care team creation experience. To add a new care team for the patient, select + Add care team from the upper-right corner of the care team pane. Fill in the fields to add the appropriate care team information and members.

View care team information
To view and interact with the members of the care team, select the required care team. For each care team, you can see the following details:
General information: Care team name, care team status, patient name and details, context type (encounter or episode of care), list of encounters or episodes of care, care team period start and end time.

Member information: Care team member name, role and contact details for each member, and the option to add or remove members from the same pane.
Care plan information: Details of each care plan associated with the patient and links to the respective care plans. You can also add or remove existing care plans from the same pane.


See also
What is Microsoft Cloud for Healthcare?
Configure unified patient view