Note
Access to this page requires authorization. You can try signing in or changing directories.
Access to this page requires authorization. You can try changing directories.
This topic describes the steps required to create policies in Microsoft Dynamics 365 Intelligent Order Management.
Create new header validation policy
To create a new header validation policy, follow these steps.
- Go to Orchestration > Policies and select New.
- For Policy Name, enter "Order header validation policy".
- For Policy Type, enter "Execution Policy".
- For Policy Criticality, enter "Critical".
- For Status, enter "Unpublished".
- For Associated Entity, enter "Order".
- Select Save.
Create new order header validation policy rule
To create new order header validation policy rule, follow these steps.
- On the order header validation policy form, select New Rule.
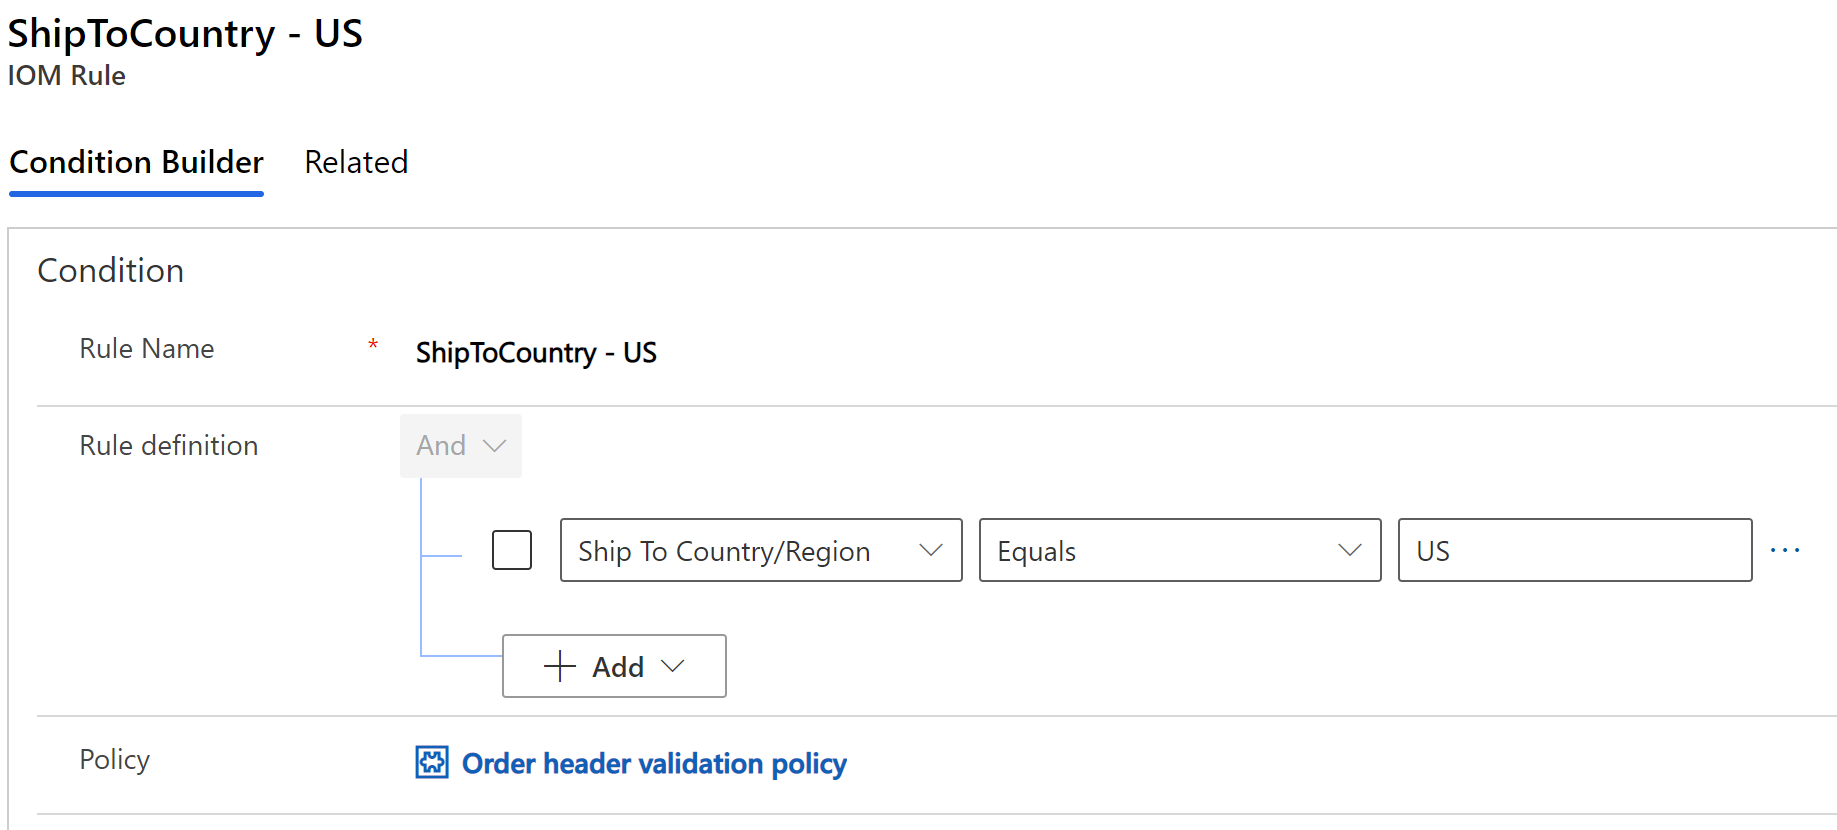
- For Rule Name, enter "ShipToCountry - US".
- For Rule definition:
- In the first field, select Ship to Country/Region.
- In the second field, select Equals.
- In the third field, select US.
- For Policy, enter or select "Order header validation policy".
- Select Save & close.
Publish the header validation policy
To publish the header validation policy, follow these steps.
- Go to the order header validation policy you created. You should be on this screen already if you followed the above steps.
- Select Publish.
Create new line validation policy
To create a new line validation policy, follow these steps.
- Go to Orchestration > Policies and select New.
- For Policy Name, enter "Order line validation policy".
- For Policy Type, enter "Execution Policy".
- For Policy Criticality, enter "Critical".
- For Status, enter "Unpublished".
- For Associated Entity, enter "Order Product".
- Select Save.
Create new order line validation policy rule
To create a new order line validation policy rule, follow these steps.
- On the order line validation policy form, select New Rule.
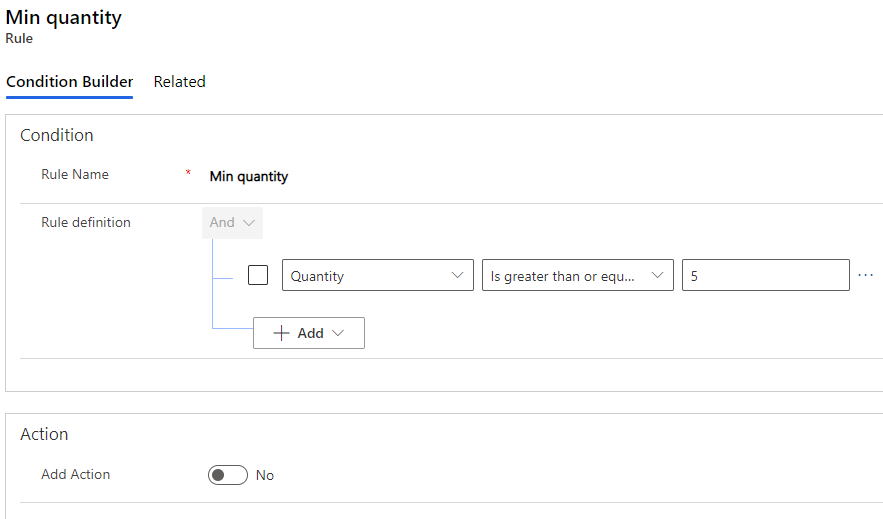
- Under Condition, for Rule Name, enter "Min quantity".
- For Rule definition:
- In the first field, select Quantity.
- In the second field, select Is greater than or equal to.
- In the third field, enter or select 5.
- Under Action, set the Add Action value to No.
- Select Save and close.
Publish the line validation policy
To publish the line validation policy, follow these steps.
- Go to the order line validation policy you created. You should be on this screen already if you followed the above steps.
- Select Publish.
Create simple fulfillment assignment policy
To create a simple fulfillment assignment policy, follow these steps.
- Go to Orchestration > Policies and select New.
- For Policy Name, enter "Simple fulfillment assignment policy".
- For Policy Type, enter "Execution Policy".
- For Policy Criticality, enter "Information".
- For Status, enter "Unpublished".
- For Associated Entity, enter "Order Product".
- Select Save.
Create new simple fulfillment assignment policy rule for Seattle store
To create a new simple fulfillment assignment policy rule for the Seattle store, follow these steps.
- On the simple fulfillment assignment policy form, select New Rule.
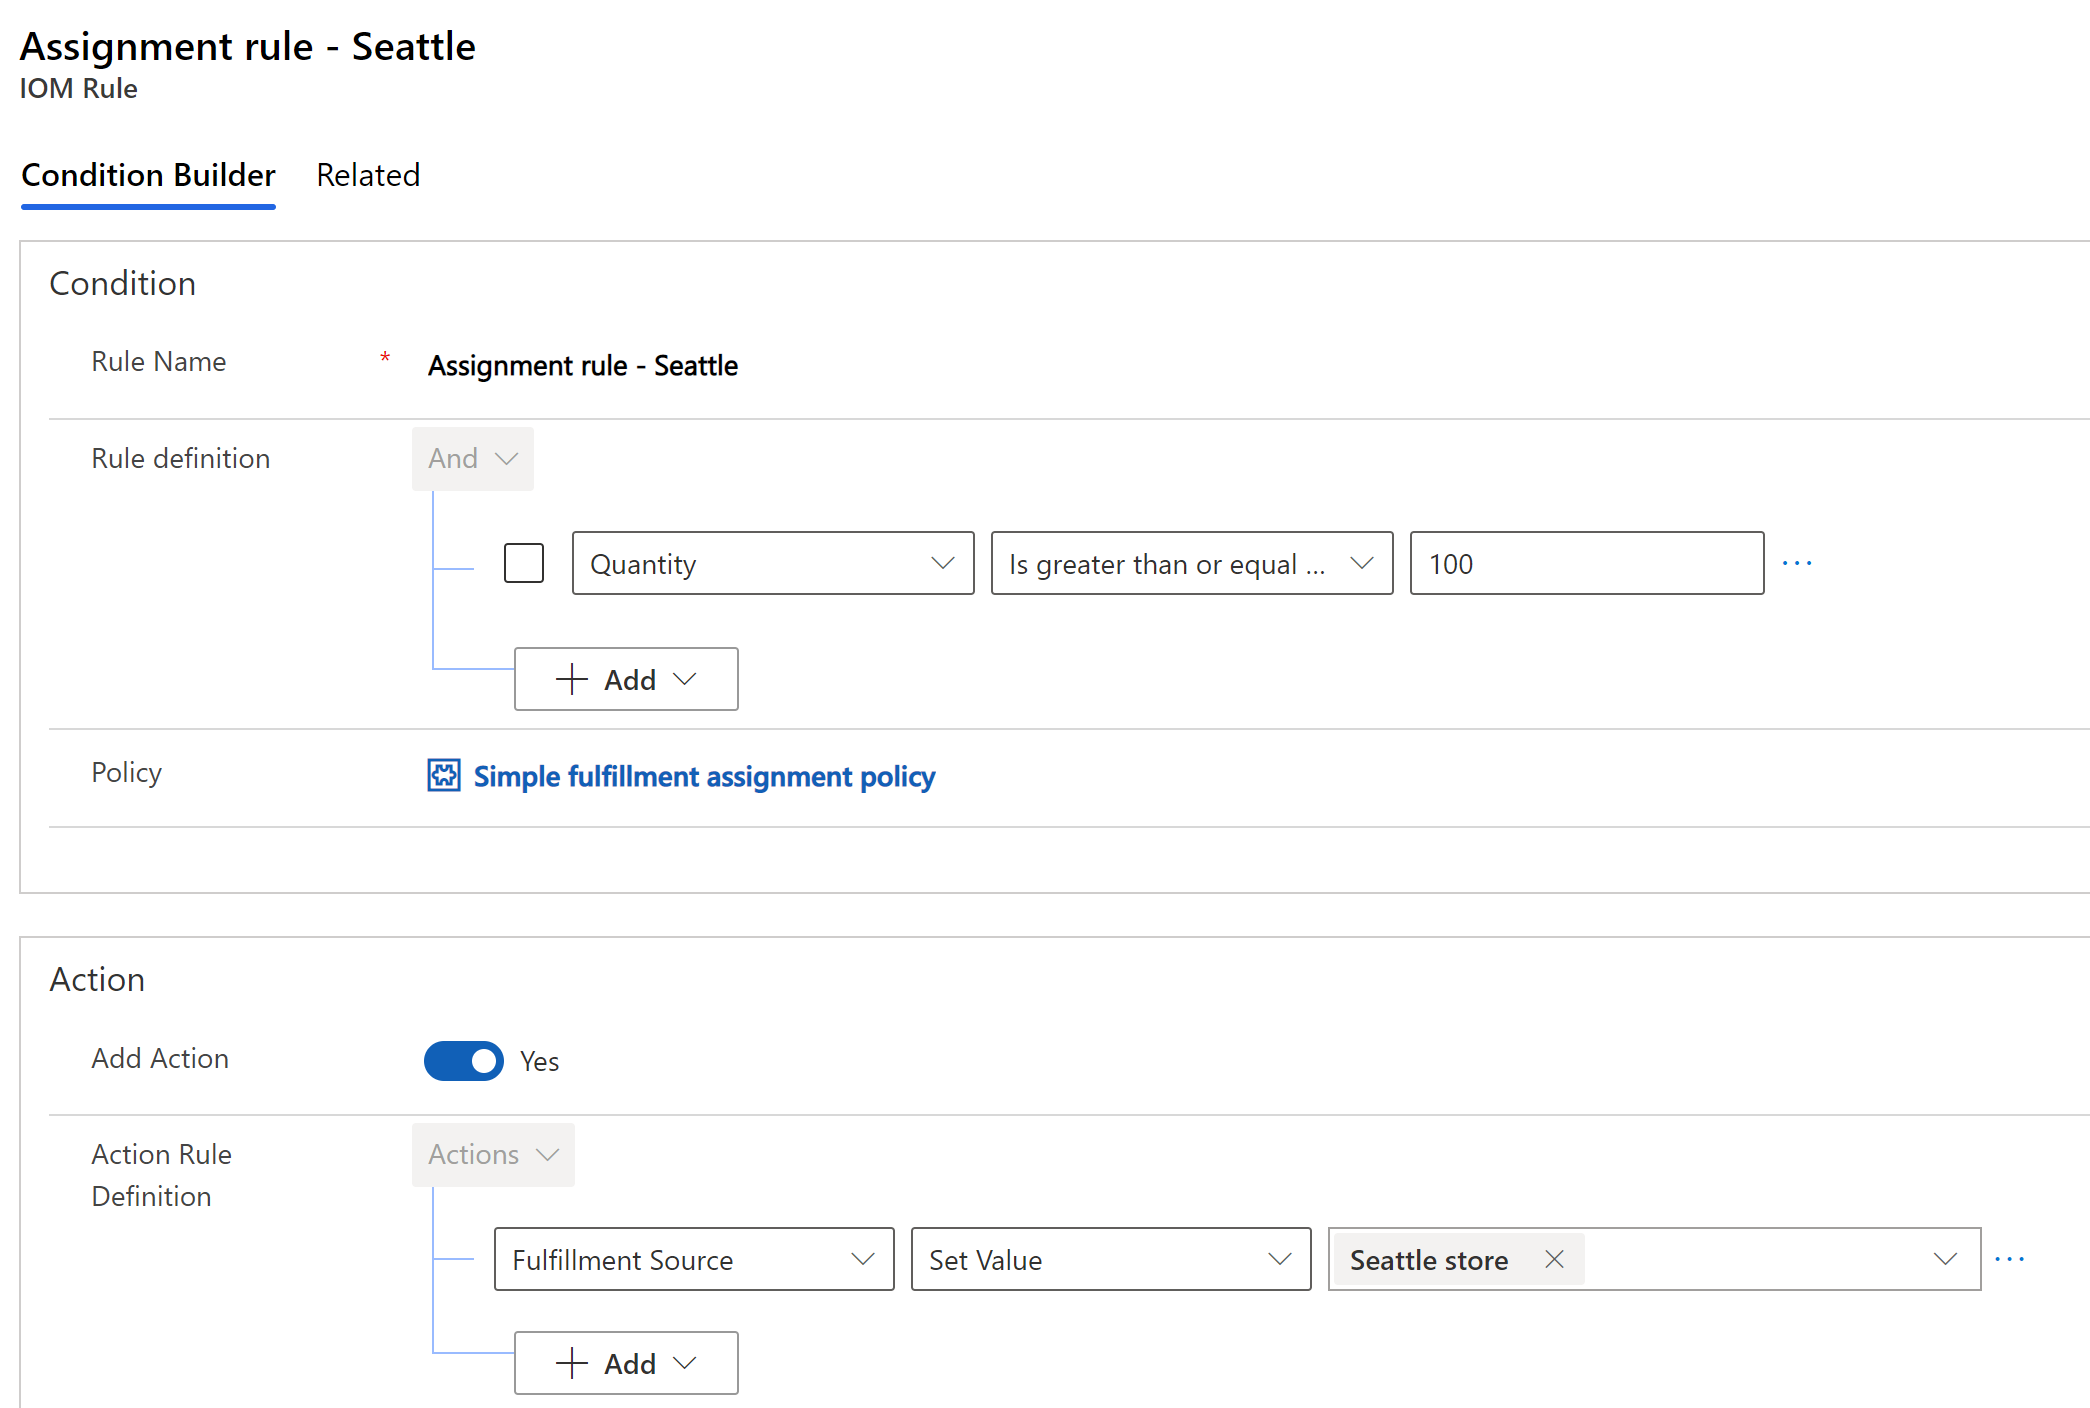
- Under Condition, for Rule Name, enter "Assignment rule- Seattle".
- For Rule definition:
- In the first field, select Quantity.
- In the second field, select Is greater than or equal to.
- In the third field, enter or select 100.
- Under Action, set the Add Action value to Yes.
- In the first field, select Fulfillment Source.
- In the second field, select Set Value.
- In the third field, enter or select Seattle store.
- Select Save and close.
Create new simple fulfillment assignment policy rule for Chicago store
To create a new simple fulfillment assignment policy rule for the Chicago store, follow these steps.
On the simple fulfillment assignment policy form, select New Rule.
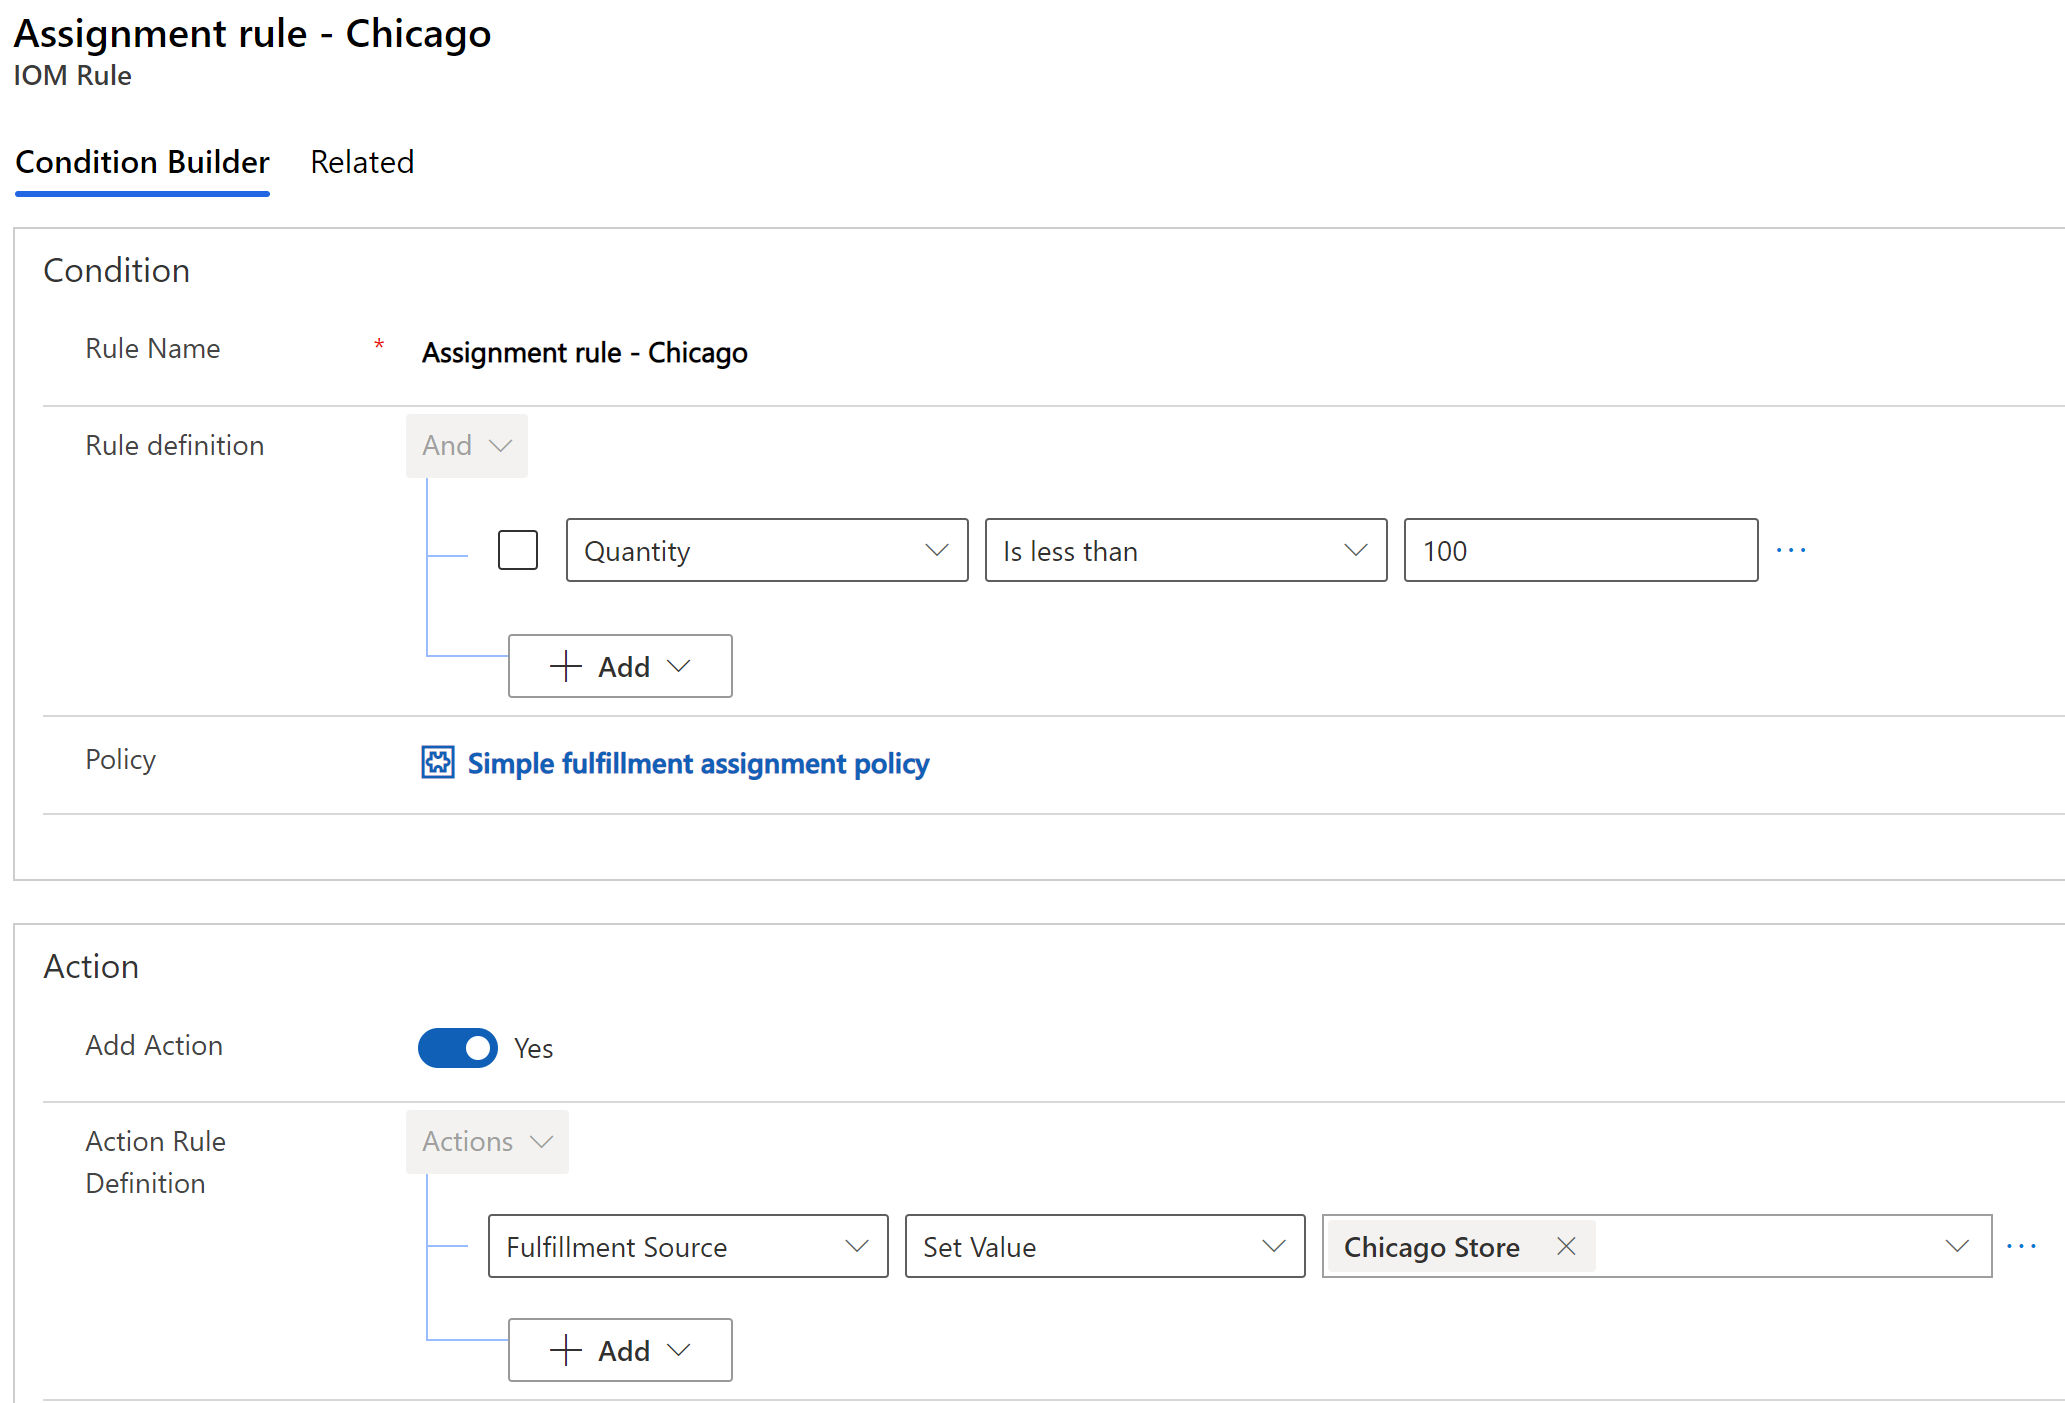
Under Condition, for Rule Name, enter "Assignment rule- Chicago".
For Rule definition:
- In the first field, select Quantity.
- In the second field, select Is less than.
- In the third field, enter or select 100.
Under Action, set the Add Action value to Yes.
- In the first field, select Fulfillment Source.
- In the second field, select Set Value.
- In the third field, enter or select Chicago store.
Select Save and close.
Publish simple fulfillment assignment policy
To publish the simple fulfillment assignment policy, follow these steps.
- Go to the simple fulfillment assignment policy you created. You should be on this screen already if you followed the above steps.
- Select Publish.
Create filter policy for Seattle store
To create a filter policy for the Seattle store, follow these steps.
- Go to Orchestration > Policies and select New.
- For Policy Name, enter "Fulfillment filter policy - Seattle".
- For Policy Type, enter "Filter Policy".
- For Policy Criticality, enter "Information".
- For Status, enter "Unpublished".
- For Associated Entity, enter "Fulfillment Order".
- Select Save.
Create new filter rule for Seattle store
To create a new filter rule for the Seattle store, follow these steps.
- On the Fulfillment filter policy - Seattle form, select New Rule.
- Under Condition, for Rule Name, enter "Min quantity".
- For Rule definition:
- In the first field, select Fulfillment Source.
- In the second field, select Equals.
- In the third field, enter or select Seattle store.
- Under Action, set the Add Action value to No.

- Select Save and close.
Publish filter policy for Seattle store
To publish the filter policy for the Seattle store, follow these steps.
- Go to the Seattle filter policy you created. You should be on this screen already if you followed the above steps.
- Select Publish.
Create filter policy for Chicago store
To create a filter policy for the Chicago store, follow these steps.
- Go to Orchestration > Policies and select New.
- For Policy Name, enter "Fulfillment filter policy - Chicago".
- For Policy Type, enter "Filter Policy".
- For Policy Criticality, enter "Information".
- For Status, enter "Unpublished".
- For Associated Entity, enter "Fulfillment Order".
- Select Save.
Create new filter rule for Chicago store
To create a new filter rule for the Chicago store, follow these steps.
- On the Fulfillment filter policy - Chicago form, select New Rule.
- Under Condition, for Rule Name, enter "Min quantity".
- For Rule definition:
- In the first field, select Fulfillment Source.
- In the second field, select Equals.
- In the third field, enter or select Chicago store.
- Under Action, set the Add Action value to No.

- Select Save and close.
Publish filter policy for Chicago store
To publish the filter policy for the Chicago store, follow these steps.
- Go to the Chicago filter policy you created. You should be on this screen already if you followed the above steps.
- Select Publish.
If you've followed along, you should now see the transpiled Power Automate cloud flows as shown in the following illustration.

Add input event to action type
To add an input event to an action type, follow these steps.
- Go to Providers > Action Types.
- Select Policy Based Fulfillment Determination.
- Select + New IOM Action Type Input Business Event.
- For Name, enter "Validation of Order Lines has Succeeded".
- For Action Type, enter "Policy Based Fulfillment Determination".
- For Business Event Definition, enter "Validation of Order Lines has Succeeded".
- Select Save.
Next quick start lab step: Create order orchestration