Note
Access to this page requires authorization. You can try signing in or changing directories.
Access to this page requires authorization. You can try changing directories.
This article describes how to set up the Fulfillment and Returns Optimization provider in Microsoft Dynamics 365 Intelligent Order Management. For more information and prerequisities, see Fulfillment and Returns Optimization provider.
Add the Fulfillment and Returns Optimization provider
To add the Fulfillment and Returns Optimization provider, follow these steps.
- In Intelligent Order Management, go to Providers > Library.
- Select the tile, and then select Activate Provider in the upper-right corner of the page.
- In the dialog box that appears on the left, accept the terms and conditions.
- Leave the mapping group set to Default mapping group.
- For Transformations, select Next.
- Select Edit to add Dataverse connection for IOM.
- Sign in to Dataverse by using your credentials. You should have previously created a Dataverse connection in Power Automate by following the instructions in Create connections.
- Go to the Power Automate portal, and copy the URL by following the instructions in Set up platform connection references.
- Select Save, and then select Next.
- Select Activate.
Configure a provider action
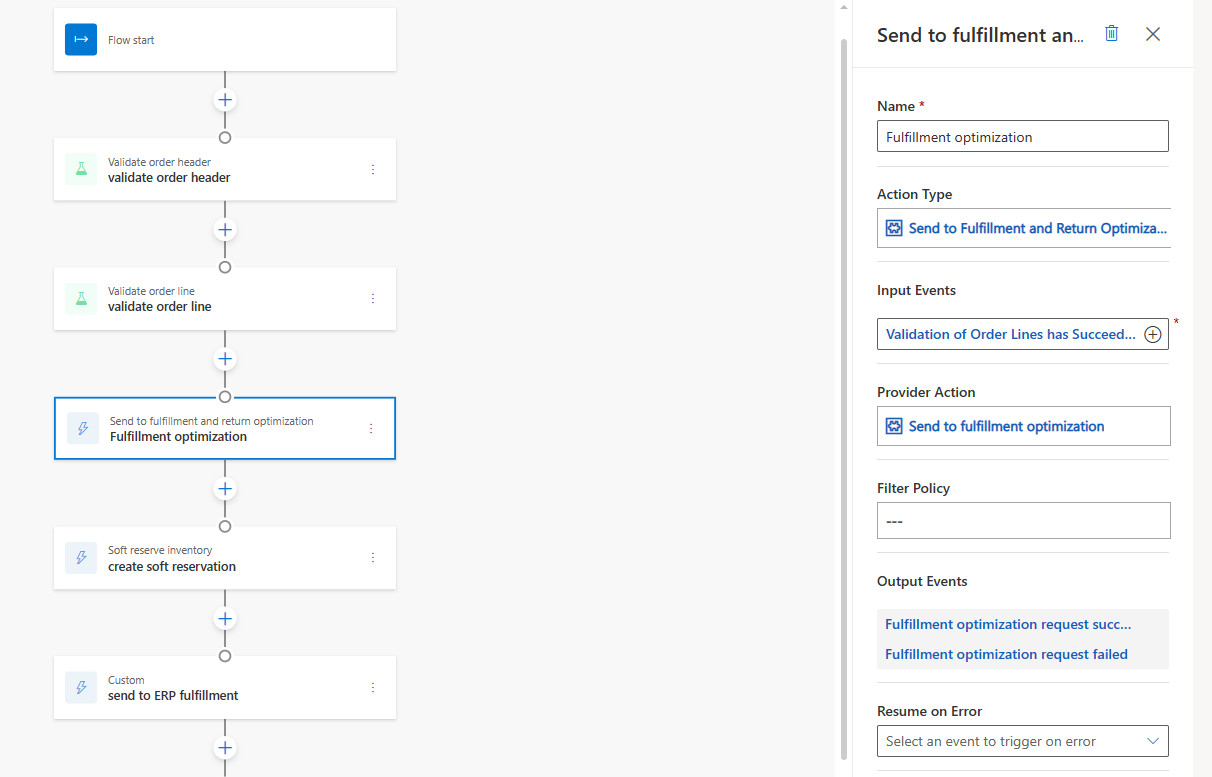
Customers typically add the Send to Fulfillment and Returns Optimization provider action after an order is validated. When it has been added to an orchestration flow, the properties on the Send to Fulfillment and Returns Optimization tile should have the following values:
- Name: Send to fulfillment and returns optimization
- Input Events: Validation of Order Lines has Succeeded
- Provider Action: Send to fulfillment optimization
- Output Event: Fulfillment optimization request succeeded, Fulfillment optimization request failed
- Action Description: This provider action sends the order through fulfillment optimization and outputs a fulfillment plan and creates fulfillment order
Sample orchestration flow with the provider

Additional resources
Intelligent Fulfillment Optimization