Note
Access to this page requires authorization. You can try signing in or changing directories.
Access to this page requires authorization. You can try changing directories.
This article describes how to set up the Inventory Visibility provider in Microsoft Dynamics 365 Intelligent Order Management.
The Inventory Visibility provider add-in is a first-party, out-of-box service that's available as part of Intelligent Order Management. It's also known as the Inventory Visibility service. The Inventory Visibility provider enables real-time, on-hand inventory change postings and visibility tracking across all your data sources and channels.
For more information about the Inventory Visibility service, see Inventory Visibility Add In.
Prerequisites
To use the Inventory Visibility provider in orchestration, you must first install the add-in, and then validate and update the following configurations.
Note
If you're a Dynamics 365 Supply Chain Management customer and want to use the Inventory Visibility add-in, see Inventory Visibility tips.
To validate and update the Inventory Visibility add-in configurations, follow these steps.
Go to Inventory Visibility > Index And Reservations in the site map.
Confirm that the following tabs appear on the page:
- Product Index Hierarchy
- Data Source
- Calculated Measure
- Soft Reservation
- Soft Reservation Hierarchy
- Intelligent Order Management Mappings
- ATP Setting
- Allocation
- Feature Management
On the Product Index Hierarchy tab, confirm that the following elements appear:
A grid that has the title Set Product Index Hierarchy
A New Index Set button
A grid that has the following columns:
- Set Number
- Dimension
- Hierarchy
- Settings Button Image
On the Data Source tab, confirm that the following elements appear:
- Set Data Source title
- New Data Source button
Confirm that the following controls appear:
- Datasource - IV
- Datasource - FNO
- Datasource - IOM
- Datasource - SAP
- Datasource - POS
Expand the DataSource - IOM control, and confirm that the following elements appear:
Under Dimension Mappings:
- Add button
Under Physical Measures:
- Measure Name
- Modified On
- Sample Data
On the Calculated Measure tab, confirm that the following elements appear:
- Set Calculated Measures tab
- New Calculated Measure button
Go to Feature Management, and enable the OnHandReservation feature.
Go to Soft Reservation Hierarchy, and confirm that the grid has the following elements:
- Dimensions column
- Hierarchy column
- Settings button
Go to Soft Reservation Mapping, and confirm that the grid has the following elements:
- Physical Measure Data Source column
- Physical Measure column
- Available For Reservation Data Source column
- Available For Reservation Calculated Measure column
- Settings button
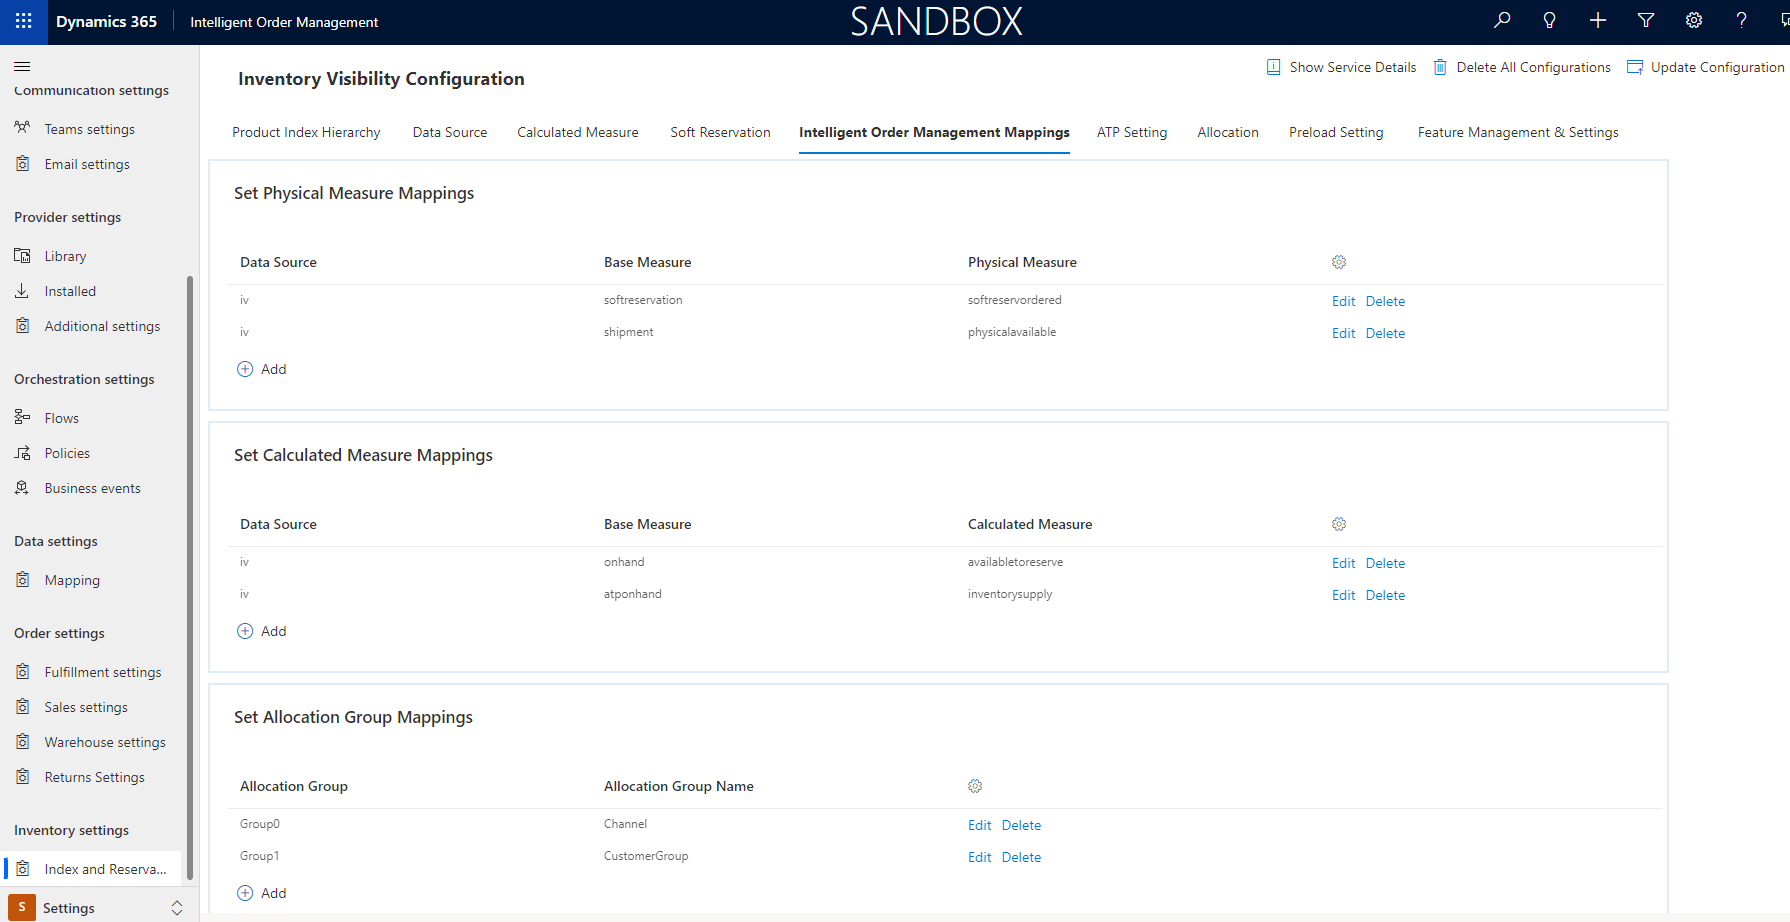
Go to Intelligent Order Management Mappings, and confirm the grid has the following elements:
Set Physical Measure Mapping – This section includes the following columns. You can use it to map any of the physical measure mappings of your data source to a standard physical measure. This becomes essential if you are updating inventory using Intelligent Order Management.
- Data Source – This column refers to the source system.
- Base Measure – This column refers to the Intelligent Order Management standard measure.
- Physical measure – This column refers to the physical measure that's used in the source system.
Set Calculated measure Mappings – This section includes the following columns. You can use it to map any of the calculated measure mappings of your data source to a standard calculated measure. This setup becomes critical when using fulfillment and returns optimization within Intelligent Order Management for fulfillment source determination and finance and operations apps for fulfillment.
- Data Source – This column refers to the source system.
- Base Measure – This column refers to the Intelligent Order Management standard measure.
- Calculated measure – This column refers to the calculated measure that's used in the source system.
Set Allocation Group Mappings – This section includes the following columns. You can use it to map your defined allocation groups to a standard set of allocation groups.
- Allocation Group – This column refers to a defined allocation group. The value can range from group 0 through group 7.
- Allocation Group Name – This column refers to the standard allocation group that your defined allocation group maps to.
![NOTE] Currently, Intelligent Order Management supports allocation groups of up to two groups.
After you've completed the preceding validations and configuration updates, Intelligent Order Management configures or reuses the physical and calculated measures across all your data sources.
Set up the provider
Note
- The Inventory Visibility provider can be used to connect both to the inventory service that's available as part of Intelligent Order Management and to a Dynamics 365 Finance Inventory Visibility instance to soft reserve or update inventory upon shipment or receipt at returns.
- The upload capability that uses Azure Blob Storage is exclusive to Intelligent Order Management and can only be used to upload an instance of the Intelligent Order Management Inventory service.
To set up the provider, follow these steps.
In Intelligent Order Management, go to Providers > Library.
On the Dynamics 365 Inventory Visibility tile, select Select.
In the upper right, select Activate Providers.
On the Terms and Conditions page, select the checkbox, and then select Accept.
In the Connections section, you must set up two connections:
- Inventory Visibility Blob Storage connection
- Inventory Visibility Dataverse (current environment) connection
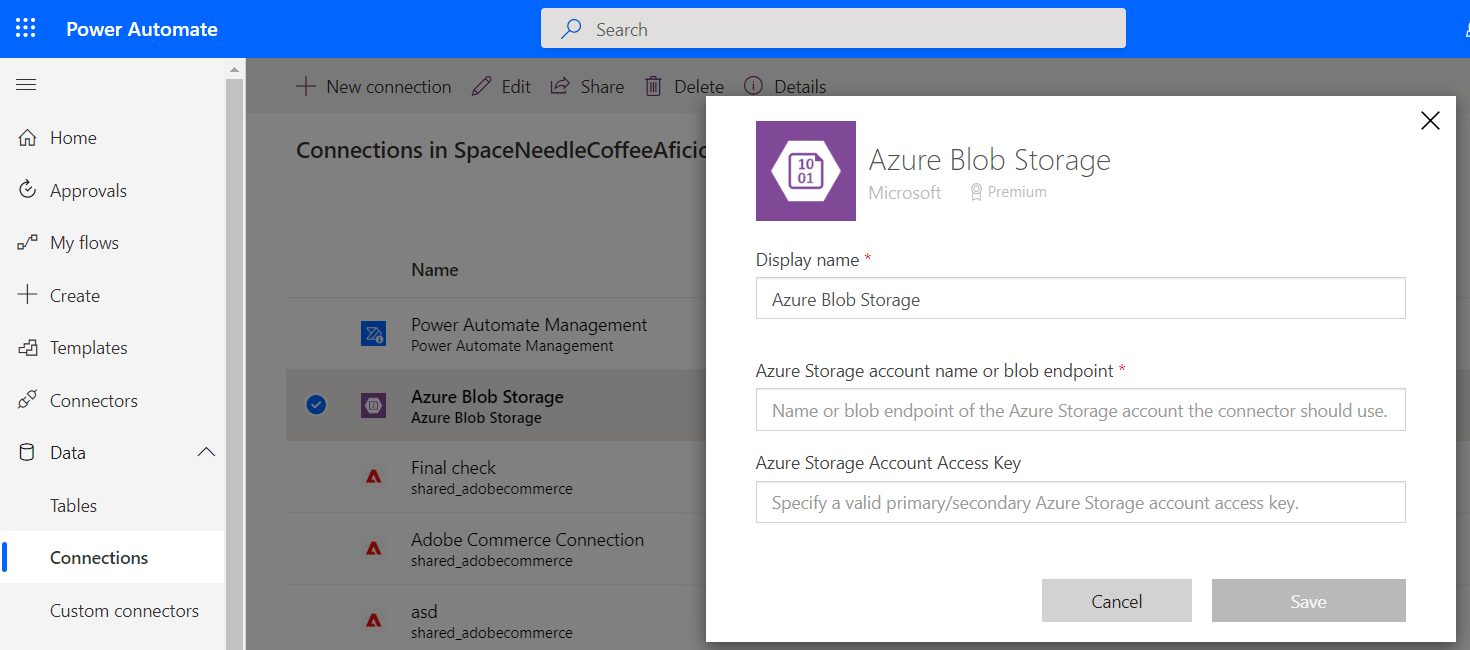
To set up the Inventory Visibility Blob Storage connection, follow these steps:
- Select the Inventory Visibility Blob Storage connection.
- Select Create. The Power Automate Connections page appears.
- Select Add New Connection.
- Search for Azure Blob Storage, and then select it.
- Select Create.
- Enter values for the Display name and Azure Storage account name or blob endpoint fields.
- Select Save.
To set up the Inventory Visibility Dataverse (current environment) connection, select Create.
Select Next.
In the Parameters section, set the following mandatory parameters:
- Inventory Visibility Error File Drop Location – Specify the path of the location where the inventory error log should be saved if you're using inventory upload through Blob Storage.
- Inventory Visibility File Drop Location – Specify the path in Blob Storage where the Inventory Visibility file should be saved so that it can be read by and uploaded to the Inventory Visibility service.
- Inventory Visibility Organization ID – Specify the Intelligent Order Management organization ID.
Review the transformations, and then select Next.
Review the connections, and then select Activate.
Select Next, and then select Review and Finish.
Inventory Visibility JSON file example
The following JavaScript Object Notation (JSON) example shows what the contents of an uploaded Inventory Visibility JSON file look like. In this example, the feedtype value is set to overwrite for a one-time update. The value can also be set to incremental to add quantities to existing Inventory Visibility data.
{
    "messagetype": "inventoryonhand",
    "feedtype": "overwrite",
    "source": "Flexe warehouse system",
    "customdimensions": false,
    "onhand": [
        {
            "productid": "prod301",
            "quantities": {
                "pos": {
                    "inbound": 25
                }
            }
        },
        "dimensions": {
            "locationid": "414"
        }
        {
            "productid": "prod302",
            "quantities": {
                "pos": {
                    "inbound": 50
                }
            }
        },
        "dimensions": {
            "locationid": "414"
        }
    ]
}
Out-of-box capabilities
Provider actions are associated with a provider and determine the actions that are available to you when you create an orchestration flow. Transformations are essential for any provider that retrieves or sends data from Intelligent Order Management to an external service.
| Capability | Details |
|---|---|
| Provider action | Bulk or Delta Inventory Upload: Part of inventory orchestration |
| Provider action | Inventory Update on Receipt: Part of order orchestration |
| Provider action | Inventory Update on Shipment: Part of order orchestration |
| Provider action | Soft Reserve Inventory: Part of order orchestration |
| Transformation | Dataverse Inventory Onhand Data to Inventory Visibility Onhand Changes |