Manage images for landing pages and email messages
Important
This article only applies to outbound marketing.
In Create a marketing email and go live, you saw how to upload an image while adding it to an email message, and you can use similar techniques to add images to your marketing page designs. Another way to make images (and other files) available in Dynamics 365 Customer Insights - Journeys is to upload them directly to the file library, which is shared by all users. Your library will typically include brand-identity graphics such as logos, product images, and clip art.
Here are some best practices for working with images for your marketing materials:
- Sketch out your email messages and marketing pages in an image-editing program before you start trying to design them in Customer Insights - Journeys. This will make it easier to experiment, enable you to get your image sizes right, and should speed your work in Customer Insights - Journeys.
- Always crop and size your images before you upload them.
- When sizing your images, use the dimensions that will apply when viewed on the largest expected customer display.
- Choose your keywords carefully, and remember to apply them to images. As your library grows, this will become increasingly important.
Manage keywords
To help you organize your images, and to help other users find them, Customer Insights - Journeys also supports a system of keywords that you can use to tag each image. You manage the keywords centrally to ensure that the number of keywords remains manageable and the spelling consistent. When uploading an image, users can choose a keyword, but they can't create new one on the fly.
To manage keywords:
Go to Outbound marketing > Marketing content > Keywords. You now see a list of all existing keywords.
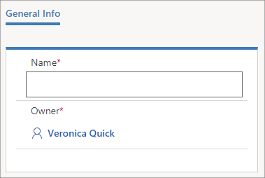
On the command bar, select New to create a new keyword. Its only setting is Name.

Select Save to save your keyword.
View, edit, and add images to your library
To view and edit your image library:
Go to Outbound marketing > Marketing content > Library. You now see a list of all existing images and files. Choose any row in the table here to view information about the file and edit its settings (including keywords).
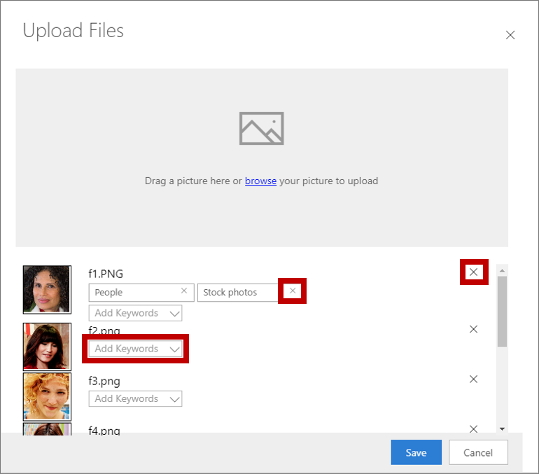
On the command bar, select New to upload a new file. The Upload Files dialog box opens.
Either drag a file from File Explorer to this dialog box or choose browse to locate and choose an image by using a file browser window.

While working here, you can:
- Drag several images to add more than one image at a time.
- Apply keywords to each image by using the Add Keywords drop-down list.
- Remove a keyword from an image by selecting the close button (X) for the keyword.
- Remove an image by selecting its close button (X) on the right (also an X).
Select Save to upload your images to Customer Insights - Journeys.
If you want to edit the display name for an image, go back to Outbound marketing > Marketing content > Library.