Deploy and install Dynamics 365 App for Outlook
This topic covers how to set up and deploy Dynamics 365 App for Outlook.
Dynamics 365 App for Outlook works with customer engagement apps (such as Dynamics 365 Sales, Dynamics 365 Customer Service, Dynamics 365 Marketing, Dynamics 365 Field Service, Dynamics 365 Project Service Automation, and Dynamics 365 Customer Engagement (on-premises), version 9), and model-driven Power Apps that run on Microsoft Dataverse.
Note
Multiplexing setup doesn't reduce the number of licenses required to access Dynamics 365 apps. For more information, see Multiplexing Licensing Brief.
Prerequisites
The following prerequisites are required before you begin set up.
Set up synchronization of incoming email through server-side synchronization: Set up server-side synchronization of email, appointments, contacts, and tasks
Dynamics 365 App for Outlook is an Outlook add-in that uses Exchange Web Services (EWS) to interact with Microsoft Exchange. This requires OAuth be enabled on Microsoft Exchange. For more information: Authentication and permission considerations for the makeEwsRequestAsync method.
On Windows clients, Internet Explorer 11 should be installed and enabled but doesn't necessarily need to be the default browser. For more information: Requirements for running Office Add-ins.
Verify what's supported: System requirements, limits, and configuration values for App for Outlook
Step 1: Set the default synchronization method
To use Dynamics 365 App for Outlook, you need to set server-side synchronization for your email processing. For more information on email synchronization, see Set incoming and outgoing email synchronization
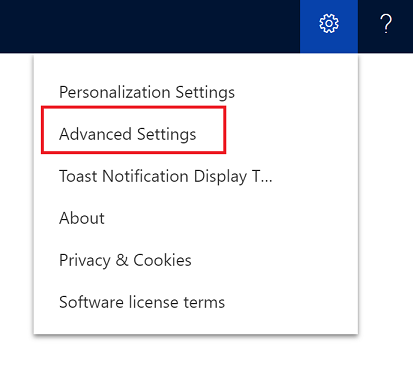
From your app, go to Settings > Advanced Settings.
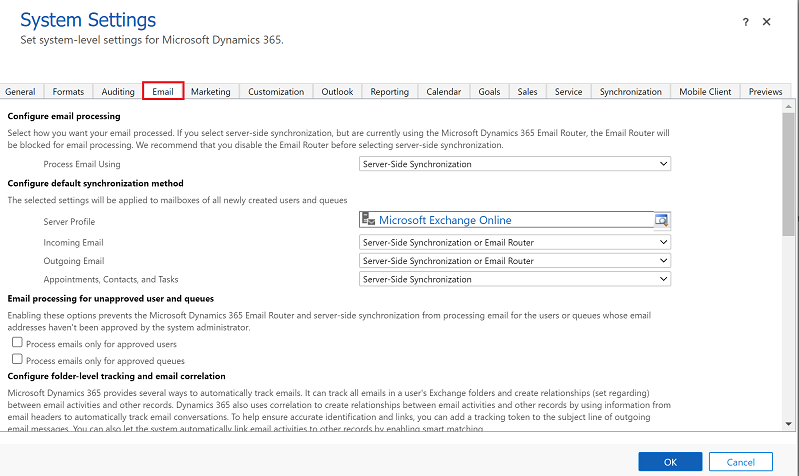
Go Settings > Administration and then select System Settings.

Select the Email tab, and set Process Email Using to Server-Side Synchronization.
Step 2: Test email configuration and enable mailboxes
Enable and test your user mailboxes so they can use Dynamics 365 App for Outlook.
From your app, go to Settings > Advanced Settings.

Go Settings > Email Configuration and then select Mailboxes.

Select the Active Mailboxes view, and then select the mailboxes that you want to test and enable.

On the command bar, select APPROVE EMAIL and then select OK.

Once approved, select TEST & ENABLE MAILBOX.

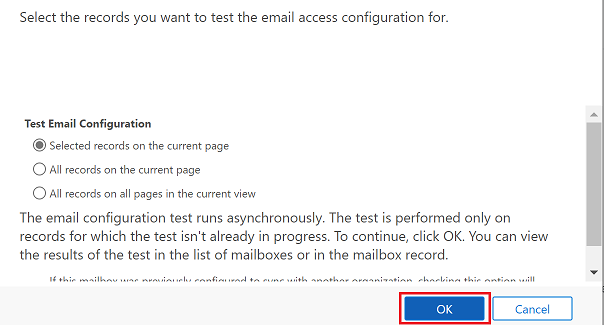
On the confirmation dialog box, select OK.
You may need to wait for the system to process the updates. The more mailboxes you enable, the longer it may take.
Step 2.1: Verify configuration
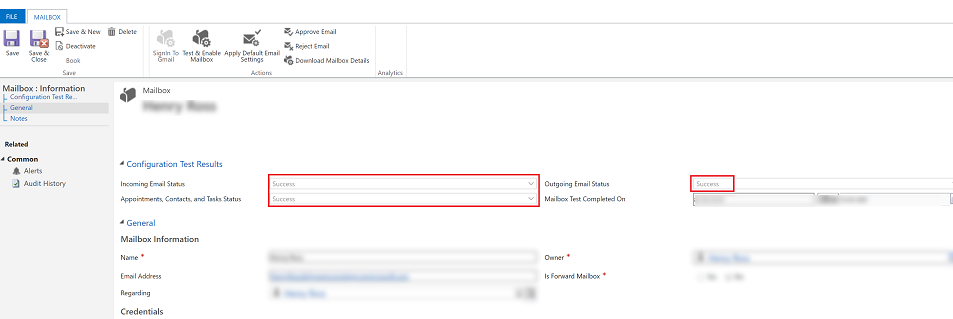
To verify mailbox is set up correctly, open the mailbox that you tested in the previous step.
If the set up is successful, the configuration Test Results section will change from Not Run to Success.
Step 3: Provide security role access
The security role Dynamics 365 App for Outlook User is available from build 9.1.0.4206 or later. If a user doesn’t have this security role or its underlying privileges, they’ll receive the following error: You haven't been authorized to use this app. Check with your system administrator to update your settings. You must add users to this role so they can use Dynamics 365 App for Outlook. This will ensure that the users have the basic privileges needed to access App for Outlook.
Other security privileges on top of the basic privileges, related to the user's role, will light up more features. For example, if a user has create privilege on Lead table, in addition to Dynamics 365 App for Outlook User security role, they would see an email resolve to a Lead table where applicable.
App for Outlook also requires server-side synchronization to be properly configured with the minimum security roles required by the service. These roles are outlined in the table below.
| Privilege name | Table | Location (tab) within security role |
|---|---|---|
| prvReadEmailServerProfile | EmailServerProfile | Business Management |
| prvWriteMailbox | Mailbox | Business Management |
| prvReadMailbox | Mailbox | Business Management |
| prvReadOrganization | Organization | Business Management |
| prvSyncToOutlook (exchangesyncidmapping | Outlook | Business Management > Privacy-related privileges |
| prvReadActionCard | ActionCard | Core Records |
| prvDeleteActivity | Activity | Core Records |
| prvAppendActivity | Activity | Core Records |
| prvWriteActivity | Activity | Core Records |
| prvCreateActivity | Activity | Core Records |
| prvReadActivity | Activity | Core Records |
| prvAppendToActivity | Activity | Core Records |
| prvReadConnection | Connection | Core Records |
| prvAssignContact | Contact | Core Records |
| prvReadContact | Contact | Core Records |
| prvWriteContact | Contact | Core Records |
| prvCreateContact | Contact | Core Records |
| prvDeleteContact | Contact | Core Records |
| prvReadUserQuery | Saved View | Core Records |
| prvReadQueue | Queue | Core Records |
| prvReadQuery | View | Customization |
| prvReadIncident | Case | Service |
| prvSearchAvailability | Service Management > Miscellaneous Privileges | |
| prvOverrideCreatedOnCreatedBy | Business Management > Miscellaneous Privileges |
Note
If you create a team and add the team to the Dynamics 365 App for Outlook User security role, this doesn't automatically propogate the privileges to the users within that team. This applies to custom roles with the Use Dynamics 365 Appf for Outlook privilege, as well.
To add users to the App for Outlook security role, from your app, go to Settings > Advanced Settings.

Go Settings > Security and then select Users.
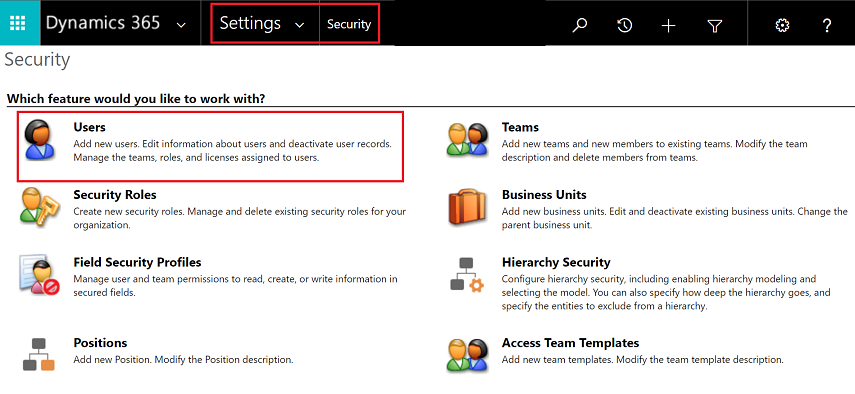
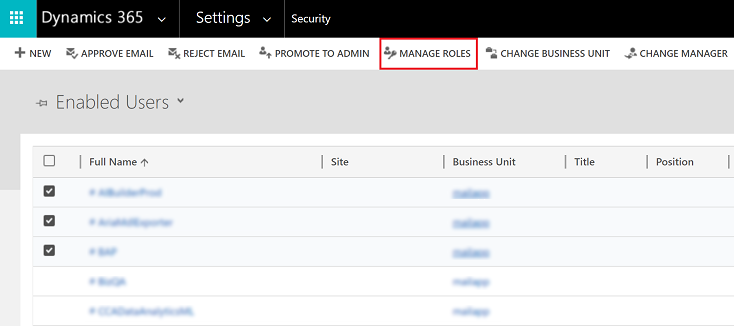
Select the users from the list and then select Manage Roles.
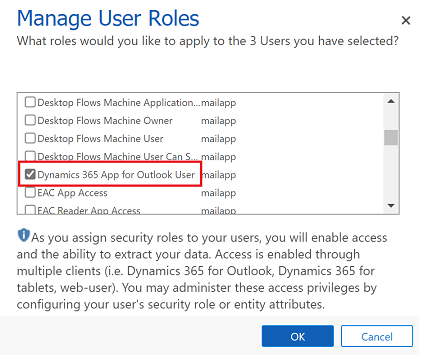
In the Manage User Roles dialog, select the Dynamics 365 App for Outlook User security role to the users and then select OK.
Step 4: Install App for Outlook
Follow these steps to push Dynamics 365 App for Outlook to selected users, all users, or have users install it themselves as needed.
Important
For environments in Microsoft Dataverse an administrator can get the App for Outlook solution from Microsoft AppSource. After signing in to AppSource, choose the the environment that you want to install App for Outlook. For more information, see Microsoft Dynamics 365 App for Outlook.
Your Dataverse organization must have a Dataverse store for the AppSource install to succeed.
To push the app to your users, from your app, go to Settings > Advanced Settings.

Go Settings > Dynamics 365 App for Outlook.
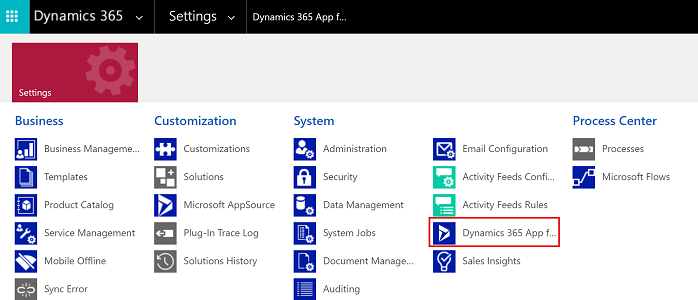
The Getting Started with Microsoft Dynamics 365 App for Outlook page lists all eligible users that can use App for Outlook. You have several different options on how you can deploy the app to your users:
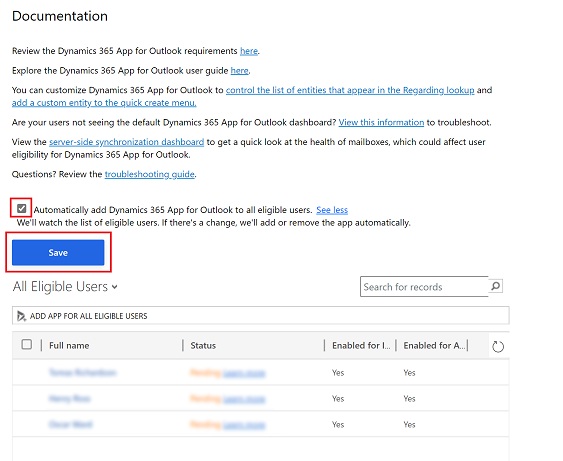
Option 1: Select the checkbox to automatically add App for Outlook to all eligible users. If a user's email is synchronized through server-side synchronization, you won’t have to do anything more to push the app to them.
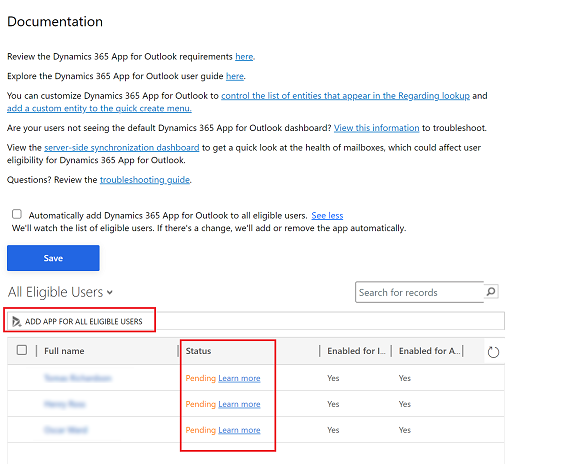
Option 2: Select ADD APP FOR EIGIBILE USERS to deploy the app to all users that are set up correctly. The Status will change to Pending.
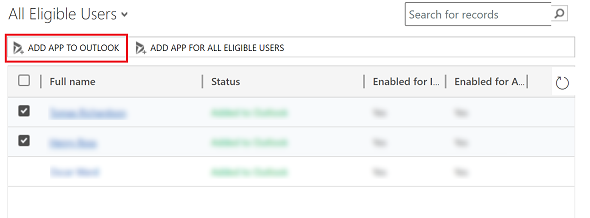
Option 3: Push the app to certain users, select those users in the list, and then select Add App to Outlook.
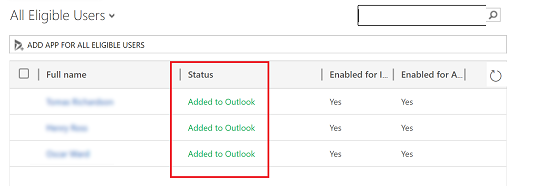
The status will change to Added to Outlook and the app will be available for your users.
The app will appear in the Outlook ribbon for the added users.

Have users install App for Outlook themselves
From your app, go to Settings > Advanced Settings.

Select the Settings button
 , again and then select Apps for Dynamics 365 apps.
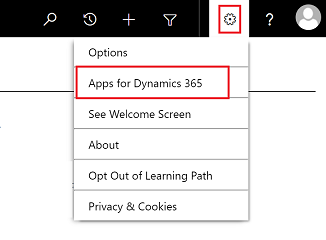
In the Apps for Dynamics 365 apps screen, under Dynamics 365 App for Outlook, users select Add app to Outlook.
To deploy to Dynamics 365 apps (on-premises) users
Follow these steps if you're using Dynamics 365 apps (on-premises).
Configure your Dynamics 365 apps server for Internet-facing deployment. See Configure IFD for Microsoft Dynamics 365 apps.
If you're connecting to Exchange on-premises, configure the OAuth provider and register client apps. See Configure Windows Server 2012 R2 for Dynamics 365 apps that use OAuth.
Troubleshooting installation problems
If you don't see Dynamics 365 App for Outlook when you click the Settings button
 , check that you've enabled the feature.
If you or your users have trouble installing Dynamics 365 App for Outlook, it may be because their Exchange mailbox is currently linked to another Microsoft Dataverse environment or Customer Engagement (on-premises) organization. An Exchange mailbox (email address) can only synchronize appointments, contacts, and tasks with one organization, and a user that belongs to that organization can only synchronize appointments, contacts, and tasks with one Exchange mailbox. You can overwrite the setting stored in Exchange if you want to change the primary synchronizing organization. For more information, see this KB article.