Note
Access to this page requires authorization. You can try signing in or changing directories.
Access to this page requires authorization. You can try changing directories.
The work list in sales accelerator helps sellers prioritize their time and effort. Customize work items to display the most relevant and important information in the work list. You can customize work items for each entity type that you or your sellers work with. Want to know how the work items appear by default? See the Default work item appearance section.
Note
The card customizations made through the focused view will also affect the card display in the work list. More information: Customize the work list card in focused view
Turn on customizations
As an administrator, you must turn on the ability to customize work items. Unless you turn on, nobody (including you) can customize the work item in your organization.
Sign in to the Dynamics 365 Sales Hub app, and go to Change area > Sales.
In the left pane, under My Work, select Sales accelerator.
On the work list page, select More options > Settings.
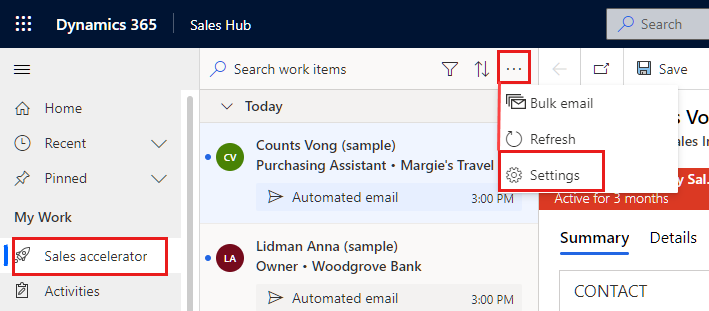
On the Settings page, select Work item appearance.
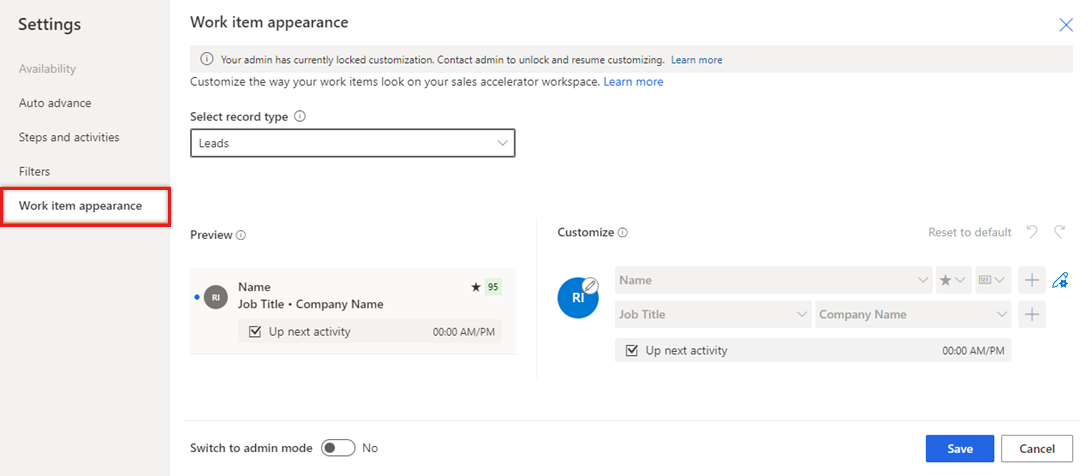
If you don't see Work item appearance in the Settings list, it means your admin hasn't turned on work item customization. Follow these steps again when that's been done.
Turn on Switch to admin mode to allow work items to be customized. With this setting off, work items can't be changed by anyone, not even an administrator.
Turning on admin mode reveals another setting, Lock customization. To prevent sellers from overriding your customizations, select this setting. To allow sellers to make their own changes to work items, clear it.
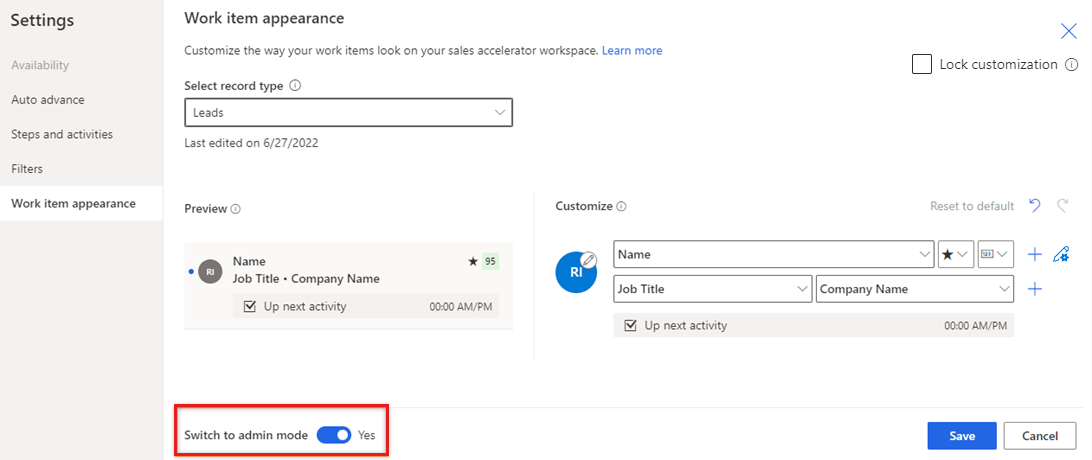
The administrator mode is turned on. Now, you can customize the work item for your organization and also, let other user roles in your organization to customize the work item.
Lock or unlock customization for other user roles
As an administrator, you can let other user roles to override the customizations you made to the work items according to their requirements.
Turn on the admin mode and the Lock customization settings is revealed. More information: Turn on customizations
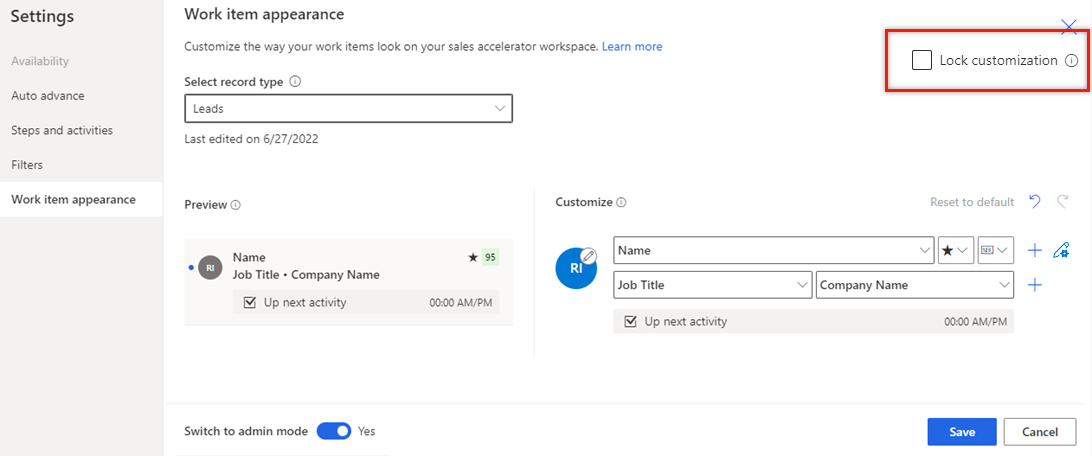
For the Lock customization settings, choose one of the following options to configure:
- To allow sellers to make their own changes to work items, clear it.
- To prevent sellers from overriding your customizations, select this setting.
Customize work items
If you aren't an admin, you'll need to ask your admin to let you customize work item. More information: Lock or unlock customization for other user roles
The procedure to customize work items is the same for both administrators and other primary sales roles.
Sign in to the Dynamics 365 Sales Hub app, and go to Change area > Sales.
In the left pane, under My Work, select Sales accelerator.
On the work list page, select More options > Settings.
On the Settings page, select Work item appearance.
Note
- The Switch to admin mode and Lock customization options are available only for administrators.
- If you're not an administrator, you must ask your administrator to turn on admin mode before you can customize work items.
In the Select record type list, select the record type you're customizing work items for.
Under the Customize section, use the following options to customize:
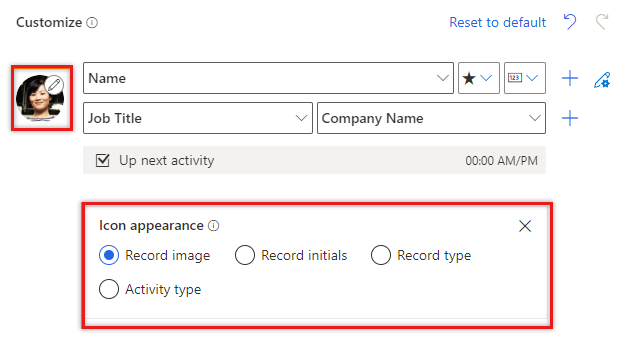
To change the icon that appears on a work item, select the pencil icon, and then choose one of the following options:
- Record image: A photo of the contact, if one is available
- Record initials: The contact’s first and last initials
- Record type: The icon associated with the record type
- Activity type: The icon associated with the current activity on the record
To change the content of work items, select the fields or attributes to display:
- To change an existing attribute, select a different one in its place.
- To add an attribute in the same row, hover over an existing attribute and select More options > Add a field. You can show up to three fields in a row.
- To add an icon in the same row, hover over an existing attribute and select More options > Add an icon. You can show up to three icons in a row.
- To add a row, select the add icon (+). You can show up to four rows of information in a work item.
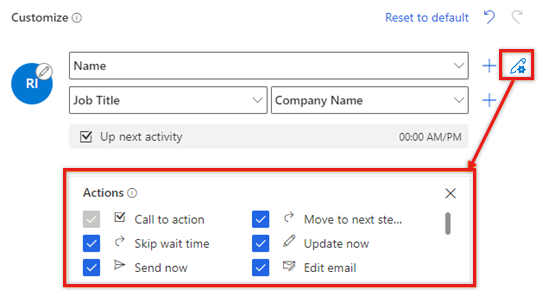
- To change the action that's displayed when the work item's More options icon is selected, select the pencil-and-gear icon and then choose one or more actions.
- To delete a field or an icon, hover over it and select More options > Remove.
To remove all customizations and restore work items to their original appearance, select Reset to default.
Select Save.
Default work item appearance
Note
When you select the Reset to default option, the card customizations are reset to the configurations defined in admin mode. To know about admin mode, see step 5 in Turn on customizations.
By default, the work item appearance is set to the following values:
| Entity type | Default values |
|---|---|
| Accounts | Row 1: Account name and follow indicator Row 2: Primary contact full name and job title Row 3: Up next activity |
| Contacts | Row 1: Full name and follow indicator Row 2: Job title and company name Row 3: Up next activity |
| Custom entity | Row 1: Name and follow indicator |
| Leads | Row 1: Name, follow indicator, and predictive score Row 2: Job title and company name Row 3: Up next activity |
| Opportunities | Row 1: Contact full name, follow indicator, and predictive score Row 2: Contact Job title and company name Row 3: Topic and estimated revenue Row 4: Up next activity |
Can't find the feature in your app?
There are a few possibilities:
- You don't have the necessary license to use this feature. Check out the comparison table and the licensing guide to see which features are available with your license.
- You don't have the necessary security role to use this feature.
- To configure or setup a feature, you need to have the Administration and customization roles
- To use sales-related features, you need to have the Primary sales roles
- Some tasks require specific Functional roles.
- Your administrator hasn't turned on the feature.
- Your organization is using a custom app. Check with your administrator for exact steps. The steps described in this article are specific to the out-of-the-box Sales Hub and Sales Professional apps.