Note
Access to this page requires authorization. You can try signing in or changing directories.
Access to this page requires authorization. You can try changing directories.
When you try to export data from the ZoomInfo app to your Dynamics 365 Sales organization, certain corresponding fields may not match and won't display updated values. To avoid these mismatches, you can map the corresponding fields between Dynamics 365 and ZoomInfo for accounts, contacts, and leads.
Prerequisites
Before you start, be sure you've met the following prerequisites:
- The ZoomInfo app is installed on your Dynamics 365 Sales organization. More information: Install ZoomInfo app.
- You have a license to use the ZoomInfo app.
Map the fields
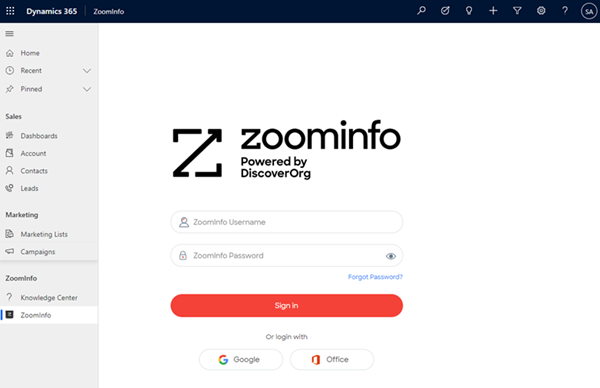
Open your Dynamics 365 Apps page and then open the ZoomInfo app.
On the left navigation pane, select ZoomInfo > ZoomInfo.
Note
The app might prompt you to enter credentials. Select either Google, Office, or enter your ZoomInfo credentials if you have an account with ZoomInfo.
On the top-right corner of the page, select More > Admin Portal.
On the Admin Portal page, select Dynamics Settings.
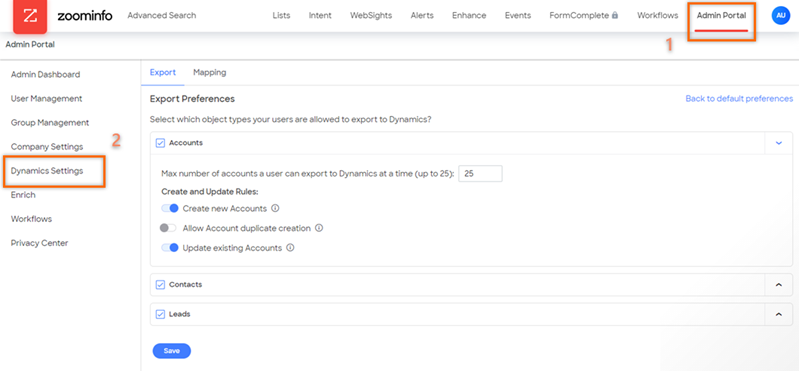
Select the Mapping tab and then choose the Accounts, Contacts, or Leads tab to map the fields.
Note
In this example, we're using Accounts.
You can view the default or configured corresponding field between the ZoomInfo app and Dynamics 365.
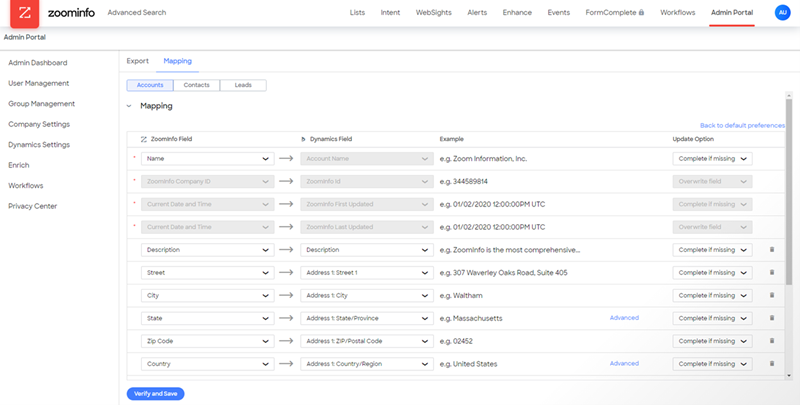
Map the fields as required. Each column is described with its functionality in the following table:
Column name Description ZoomInfo Field Displays a list of ZoomInfo fields that are available for you to map with Dynamics 365 fields. Dynamics Field Displays a list of Dynamics 365 fields that are available for you to map. The list also includes your custom fields. Example Displays an example of value for the selected ZoomInfo field. Update Option Select one of the following options for the field: - Complete if missing: Choose this option to only complete with ZoomInfo data if nothing exists in Dynamics 365. By default, this option is selected.
- Overwrite field: Choose this option to overwrite existing data in Dynamics 365 with ZoomInfo data.
Note
- Select Add Rows to add more fields to the mapping table.
- To set the mapped values to default, select Back to default preferences.
Select Verify and Save.
The ZoomInfo app validates the corresponding mapped values and saves the mappings. If there are any mismatches in the mapping, an error is displayed to resolve the issue.
Can't find the feature in your app?
There are a few possibilities:
- You don't have the necessary license to use this feature. Check out the comparison table and the licensing guide to see which features are available with your license.
- You don't have the necessary security role to use this feature.
- To configure or setup a feature, you need to have the Administration and customization roles
- To use sales-related features, you need to have the Primary sales roles
- Some tasks require specific Functional roles.
- Your administrator hasn't turned on the feature.
- Your organization is using a custom app. Check with your administrator for exact steps. The steps described in this article are specific to the out-of-the-box Sales Hub and Sales Professional apps.