Note
Access to this page requires authorization. You can try signing in or changing directories.
Access to this page requires authorization. You can try changing directories.
The small parcel shipping (SPS) feature enables Microsoft Dynamics 365 Supply Chain Management to interact directly with shipping carriers by providing a framework for communication through carrier APIs. This functionality is useful when you're shipping individual sales orders via commercial shipping carriers instead of using container shipping or less-than-truckload (LTL) shipping.
The SPS feature interacts with your shipping carrier through a dedicated rate engine. Your organization must develop this rate engine in collaboration with your carrier or carrier hub service. The rate engine enables Supply Chain Management to submit details about a packed container to your carrier, and then receive a shipping label, shipping rate, and tracking number back from that carrier.
The shipping rate that is returned is added to the associated sales order as a miscellaneous charge. The shipping label that is returned can then automatically be printed by using a Zebra Programming Language (ZPL) printer and applied to the shipment. The carrier will scan this shipping label when it picks up the packages at your warehouse.
Prepare your system to support SPS
Before you can start to use SPS functionality, you must turn on the SPS feature in Feature management, add your rate engine, and set up the Transportation management and Warehouse management modules to support it.
Deploy and set up rate engines
Supply Chain Management doesn't include any rate engines. You must obtain or create any rate engines that you require, and then add them to your system. However, Microsoft provides a demo rate engine that you can use for testing.
Download and deploy the demo rate engine
Follow these steps to download and deploy the demo rate engine.
On GitHub, download the dynamic-link library (DLL) for the demo rate engine.
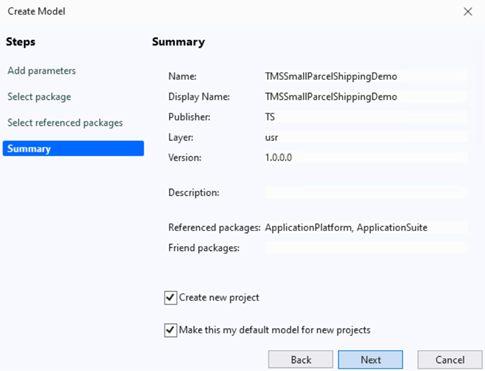
In Visual Studio, go to Extensions > Dynamics 365 > Model Management > Create Model.
Create a new model called TMSSmallParcelShippingDemo and make it reference the ApplicationSuite and ApplicationPlatform models in the select referenced packages step.
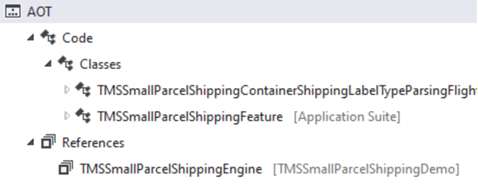
Create a project in the new model and add the downloaded
TMSSmallParcelShippingEngine.dllfile to the references for the new project.
On the Solution Explorer pane, right-click and select Build Solution to compile the project and make sure the reference is added to the AOT node.
Go to Extensions > Dynamics 365 > Deploy > Create Deployment Package and create a deployment package for the new model.
In Dynamics Lifecycle Services, go to Asset Library > Software deployable package. Select Add to add the deployment package you created to LCS.
After the validation completes, go to Environments > {Your Environment ID} > Maintain > Apply updates, select the deployable package, and apply.
Note
If the system warns you that you don't have permission to deploy packages on Lifecycle Services, contact your LCS administrator for support.
Create and deploy functional rate engines
For information about how to create and deploy functional rate engines so that they can be used in a production or test environment, see the following articles:
Set up a rate engine in Supply Chain Management
After you've created and deployed a rate engine for SPS, follow these steps to set it up.
Go to Transportation management > Setup > Engines > Rate engine.
On the Action Pane, select New to add a row to the grid.
In the new row, set the following fields:
- Rating engine – Enter a unique name for the rate engine. If you're using the demo rate engine, enter Demo rate engine.
- Name – Enter a short description of the rate engine. If you're using the demo rate engine, enter Demo rate engine.
- Rating metadata ID – Select the basis that should be used to calculate your rate. For example, your rate might be calculated based on distance. If you're using the demo rate engine, you can leave this field blank.
- Engine assembly – Enter the file name of the DLL package that you deployed. If you're using the demo rate engine, enter TMSSmallParcelShippingEngine.dll.
- Engine class – Enter the class name that was established for your rate engine. If you're using the demo rate engine, enter TMSSmallParcelShippingEngine.SmallParcelShippingRateEngine.
Example scenario
This example scenario shows how to set up and use SPS after you've prepared your system as described earlier in this article. This scenario uses the previously mentioned demo rate engine.
Make demo data available
To work through this scenario by using the demo records and values that are specified here, you must be on a system where the standard demo data is installed. Additionally, you must select the USMF legal entity before you begin.
Set up the scenario
For this example scenario, you must have a demo carrier, carrier group, packing policy, and packing profile. The following subsections explain how to prepare the records that are required for the scenario. In a production scenario, the setup process typically resembles the process that is described here. However, you'll set different values.
Set up carriers
Follow these steps to set up a carrier.
Go to Transportation management > Setup > Carriers > Shipping carriers.
On the Action Pane, select New to add a carrier.
On the header, set the following values:
- Shipping carrier: Demo Carrier
- Name: Demo Carrier
- Mode: Ground
On the Overview FastTab, set the following values:
- Activate shipping carrier: Yes
- Activate carrier rating: Yes
On the Services FastTab, select New to add a service to the grid.
Set the following values for the new service:
- Carrier service: Demo carrier service
- Name: Demo carrier service
- Transportation method: Ground
Enter arbitrary values for all the other fields, as required. (When you save the new shipping carrier record, a new mode of delivery will be created, and the Mode of delivery field will be set automatically.)
On the Rating profiles FastTab, select New to add a rating profile to the grid.
Set the following values for the new profile:
- Rating profile: Demo carrier service
- Name: Demo carrier service
- Rate engine: Demo rate engine
Enter arbitrary values for all the other fields, as required.
On the Action Pane, select Save.
For more information about how to set up carriers, see Set up shipping carriers.
Set up carrier service accounts
Follow these steps to set up a carrier service account.
Go to Transportation management > Setup > Rating > Carrier service account.
On the Action Pane, select New to add a carrier service account.
Set the following values for the new account:
- Shipping Carrier: Demo Carrier
- Carrier service: Demo carrier service
- Carrier customer account number: The carrier customer account number that is used to verify and authenticate the connection to the shipping carrier. Your carrier will provide this value. If you're using the demo service, you can enter an arbitrary value.
- Site: 6
- Warehouse: 62
Note
Often, the Carrier customer account number value is the only value that is required to authenticate the connection. However, if your carrier requires additional authentication parameters, your organization should customize this page to add extra fields as appropriate.
Set up a container packing policy
Follow these steps to set up a container packing policy.
If you haven't already set up a ZPL printer definition, use the Document Routing Agent application to set it up. Learn more in Document printing overview and related articles.
Go to Warehouse Management > Setup > Containers > Container packing policies.
On the Action Pane, select New to add a container packing policy.
On the header of the new policy, set the following values:
- Container packing policy: Demo packing policy
- Description: A description of the policy
On the Overview FastTab, set the following values:
- Warehouse: 62
- Default location for final shipment: Baydoor
- Weight unit: KG
- Container closing policy: Automatic release
- Container release policy: Make available at final shipping location
On the Container manifest FastTab, set the following values:
- Automatic manifest at container close: Yes
- Manifest requirements for container: Transportation management
- Print container contents: No
On the Carrier label printing FastTab, set the following values:
- Print container shipping label: Always
- Printer name: The name of the ZPL printer that should print shipping labels
Set up a packing profile
Follow these steps to set up a packing profile.
Go to Warehouse Management > Setup > Packing > Packing profiles.
On the Action Pane, select New to add a packing profile to the grid.
Set the following values for the new profile:
- Packing profile ID: Demo packing profile
- Description: A description of the profile
- Container packing policy: Demo packing policy
- Container ID mode: Auto
- Container type: SmallBox
Set up a customer to use the SPS carrier
Follow these steps to set up a customer so that it can use the carrier that you created.
Go to Accounts receivable > customers > All customers.
In the grid, find and select customer US-027.
On the Action Pane, on the General tab, in the Set up group, select Carrier customer accounts.
On the Carrier customer accounts page, on the Action Pane, select New to add an account to the grid.
Set the following values for the new account:
- Shipping carrier: Demo Carrier
- Carrier customer account number: 12345 (The value isn't important for this scenario, but it will be referred to in the next section.)
Go through the example scenario
After you've set up all the sample data as described in the previous section, you're ready to go through the example scenario.
Create a sales order and process the work
Follow these steps to create a sales order.
Go to Sales and marketing > Sales orders > All sales orders.
Select New to create a sales order.
In the Create sales order dialog box, set the Customer account field to US-027.
Select OK to create the sales order and close the dialog box.
The new sales order is opened. On the Sales order header FastTab, set the Carrier customer account number field to the value that you selected for this customer earlier (12345).
In the Sales order lines section, add a sales line, and set the following values for it:
- Item number: A0002
- Quantity: 1
- Site: 6
- Warehouse: 62
Switch to the Header view.
On the Delivery FastTab, set the following values:
- Shipping carrier: Demo Carrier
- Carrier service: Demo carrier service
Switch back to the Lines view. If you're prompted to update the mode of delivery for the sales lines, select Yes.
In the Sales order lines section, select the order line that you set up earlier, and then select Inventory > Reservation.
On the Reservation page, select Reserve lot to reserve the selected line's full quantity in the warehouse.
Close the Reservation page to return to the sales order.
On the Action Pane, on the Warehouse tab, select Release to warehouse.
Work is created to move items from the picking location to the packing station.
In the Sales order lines section, select Warehouse > Shipment details.
On the Shipment details page, make a note of the shipment ID. You'll need it when you pack the pack the shipment at the packing station.
Close the Shipment details page to return to the sales order.
Make a note of the sales order number, and then go to Warehouse management > Work > All work.
Use the sales order number to find and select the work that was created for the order.
On the Action Pane, on the Work tab, select Complete work.
On the Work completion page, in the User ID field, select a user ID. Then, on the Action Pane, select Validate work.
If the work passes validation, select Complete work on the Action Pane.
The work is marked as completed to simulate the movement of items to the packing station.
Pack the shipment
Follow these steps to pack the shipment.
Go to Warehouse management > Setup > Worker, and make sure that your user account is associated with a worker account for warehouse management.
Go to Warehouse management > Picking and containerization > Pack.
In the Select packing station dialog box, set the following values:
- Site: 6
- Warehouse: 62
- Location: Pack
- Packing profile ID: Demo packing profile
Select OK.
The Pack page appears. In a production scenario, a worker will scan a license plate or shipment ID. However, for this scenario, open the All shipments page, and look up the shipment number for the shipment that you just created. Then enter this value in the License plate or shipment field on the Pack page. Alternatively, enter the shipment ID that you made a note of earlier.
On the Action Pane, select New container.
The dialog box that appears shows details about the new container. Leave the default values, and then select OK.
On the Pack page, on the Item packing FastTab, in the Identifier field, select A0002 to pack that item. The item is added to the container.
On the Action Pane, select Containers for shipment.
The Containers for shipment page that appears has a row for the container that you just created. However, the Container manifest ID field in that row is currently blank, because you haven't yet received the shipping label and tracking number from the carrier.
On the Action Pane, select Close container.
In the Close container dialog box, set the Gross weight field to 1 kg, and then select OK.
The shipping label should now be printed on the ZPL printer that you selected earlier. It should resemble the following example.

Notice that the Container manifest ID and Total freight values have been added as received from the carrier.