Note
Access to this page requires authorization. You can try signing in or changing directories.
Access to this page requires authorization. You can try changing directories.
Automatic Migrations allows you to use Code First Migrations without having a code file in your project for each change you make. Not all changes can be applied automatically - for example column renames require the use of a code-based migration.
Note
This article assumes you know how to use Code First Migrations in basic scenarios. If you don’t, then you’ll need to read Code First Migrations before continuing.
Recommendation for Team Environments
You can intersperse automatic and code-based migrations but this is not recommended in team development scenarios. If you are part of a team of developers that use source control you should either use purely automatic migrations or purely code-based migrations. Given the limitations of automatic migrations we recommend using code-based migrations in team environments.
Building an Initial Model & Database
Before we start using migrations we need a project and a Code First model to work with. For this walkthrough we are going to use the canonical Blog and Post model.
- Create a new MigrationsAutomaticDemo Console application
- Add the latest version of the EntityFramework NuGet package to the project
- Tools –> Library Package Manager –> Package Manager Console
- Run the Install-Package EntityFramework command
- Add a Model.cs file with the code shown below. This code defines a single Blog class that makes up our domain model and a BlogContext class that is our EF Code First context
    using System.Data.Entity;
    using System.Collections.Generic;
    using System.ComponentModel.DataAnnotations;
    using System.Data.Entity.Infrastructure;

    namespace MigrationsAutomaticDemo
    {
        public class BlogContext : DbContext
        {
            public DbSet<Blog> Blogs { get; set; }
        }

        public class Blog
        {
            public int BlogId { get; set; }
            public string Name { get; set; }
        }
    }
- Now that we have a model it’s time to use it to perform data access. Update the Program.cs file with the code shown below.
    using System;
    using System.Collections.Generic;
    using System.Linq;
    using System.Text;

    namespace MigrationsAutomaticDemo
    {
        class Program
        {
            static void Main(string[] args)
            {
                using (var db = new BlogContext())
                {
                    db.Blogs.Add(new Blog { Name = "Another Blog " });
                    db.SaveChanges();

                    foreach (var blog in db.Blogs)
                    {
                        Console.WriteLine(blog.Name);
                    }
                }

                Console.WriteLine("Press any key to exit...");
                Console.ReadKey();
            }
        }
    }
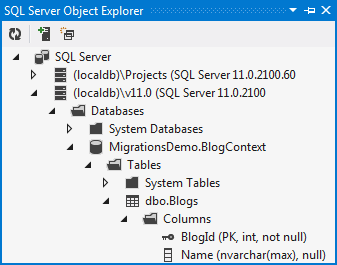
Run your application and you will see that a MigrationsAutomaticCodeDemo.BlogContext database is created for you.
Enabling Migrations
It’s time to make some more changes to our model.
- Let’s introduce a Url property to the Blog class.
public string Url { get; set; }
If you were to run the application again you would get an InvalidOperationException stating The model backing the 'BlogContext' context has changed since the database was created. Consider using Code First Migrations to update the database ( http://go.microsoft.com/fwlink/?LinkId=238269).
As the exception suggests, it’s time to start using Code First Migrations. Because we want to use automatic migrations we’re going to specify the –EnableAutomaticMigrations switch.
Run the Enable-Migrations –EnableAutomaticMigrations command in Package Manager Console This command has added a Migrations folder to our project. This new folder contains one file:
The Configuration class. This class allows you to configure how Migrations behaves for your context. For this walkthrough we will just use the default configuration. Because there is just a single Code First context in your project, Enable-Migrations has automatically filled in the context type this configuration applies to.
Your First Automatic Migration
Code First Migrations has two primary commands that you are going to become familiar with.
- Add-Migration will scaffold the next migration based on changes you have made to your model since the last migration was created
- Update-Database will apply any pending migrations to the database
We are going to avoid using Add-Migration (unless we really need to) and focus on letting Code First Migrations automatically calculate and apply the changes. Let’s use Update-Database to get Code First Migrations to push the changes to our model (the new Blog.Url property) to the database.
- Run the Update-Database command in Package Manager Console.
The MigrationsAutomaticDemo.BlogContext database is now updated to include the Url column in the Blogs table.
Your Second Automatic Migration
Let’s make another change and let Code First Migrations automatically push the changes to the database for us.
- Let's also add a new Post class
    public class Post
    {
        public int PostId { get; set; }
        [MaxLength(200)]
        public string Title { get; set; }
        public string Content { get; set; }

        public int BlogId { get; set; }
        public Blog Blog { get; set; }
    }
- We'll also add a Posts collection to the Blog class to form the other end of the relationship between Blog and Post
public virtual List<Post> Posts { get; set; }
Now use Update-Database to bring the database up-to-date. This time let’s specify the –Verbose flag so that you can see the SQL that Code First Migrations is running.
- Run the Update-Database –Verbose command in Package Manager Console.
Adding a Code Based Migration
Now let’s look at something we might want to use a code-based migration for.
- Let’s add a Rating property to the Blog class
public int Rating { get; set; }
We could just run Update-Database to push these changes to the database. However, we're adding a non-nullable Blogs.Rating column, if there is any existing data in the table it will get assigned the CLR default of the data type for new column (Rating is integer, so that would be 0). But we want to specify a default value of 3 so that existing rows in the Blogs table will start with a decent rating. Let’s use the Add-Migration command to write this change out to a code-based migration so that we can edit it. The Add-Migration command allows us to give these migrations a name, let’s just call ours AddBlogRating.
- Run the Add-Migration AddBlogRating command in Package Manager Console.
- In the Migrations folder we now have a new AddBlogRating migration. The migration filename is pre-fixed with a timestamp to help with ordering. Let’s edit the generated code to specify a default value of 3 for Blog.Rating (Line 10 in the code below)
The migration also has a code-behind file that captures some metadata. This metadata will allow Code First Migrations to replicate the automatic migrations we performed before this code-based migration. This is important if another developer wants to run our migrations or when it’s time to deploy our application.
    namespace MigrationsAutomaticDemo.Migrations
    {
        using System;
        using System.Data.Entity.Migrations;

        public partial class AddBlogRating : DbMigration
        {
            public override void Up()
            {
                AddColumn("Blogs", "Rating", c => c.Int(nullable: false, defaultValue: 3));
            }

            public override void Down()
            {
                DropColumn("Blogs", "Rating");
            }
        }
    }
Our edited migration is looking good, so let’s use Update-Database to bring the database up-to-date.
- Run the Update-Database command in Package Manager Console.
Back to Automatic Migrations
We are now free to switch back to automatic migrations for our simpler changes. Code First Migrations will take care of performing the automatic and code-based migrations in the correct order based on the metadata it is storing in the code-behind file for each code-based migration.
- Let’s add a Post.Abstract property to our model
public string Abstract { get; set; }
Now we can use Update-Database to get Code First Migrations to push this change to the database using an automatic migration.
- Run the Update-Database command in Package Manager Console.
Summary
In this walkthrough you saw how to use automatic migrations to push model changes to the database. You also saw how to scaffold and run code-based migrations in between automatic migrations when you need more control.
Collaborate with us on GitHub
The source for this content can be found on GitHub, where you can also create and review issues and pull requests. For more information, see our contributor guide.