Note
Access to this page requires authorization. You can try signing in or changing directories.
Access to this page requires authorization. You can try changing directories.
Applies to:  External tenants (learn more)
Self-service password reset (SSPR) in Microsoft Entra External ID gives customers the ability to change or reset their password, with no administrator or help desk involvement. If a customer's account is locked or they forget their password, they can follow prompts to unblock themselves and get back to work.
How does the password reset process work?
The self-service password uses the email one-time passcode (Email OTP) authentication. When enabled, customer users who forgot their passwords use Email OTP authentication. With one-time passcode authentication, users verify their identity by entering the one-time passcode sent to their email address, and are then prompted to change their password.
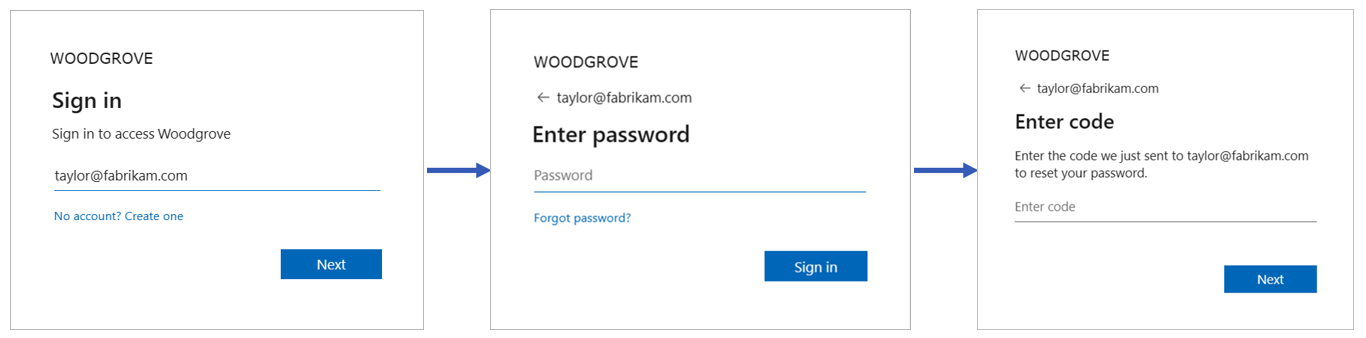
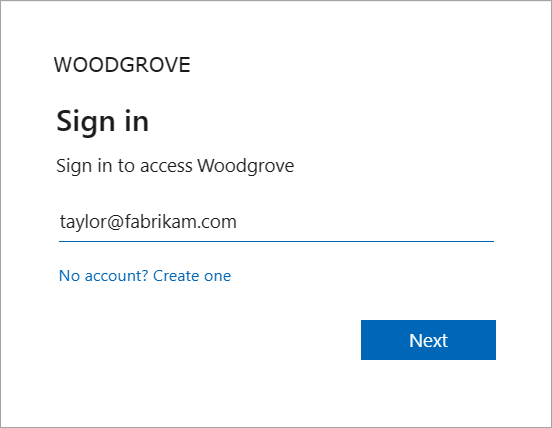
The following screenshots show the self-service password rest flow. From the app, the customer chooses to sign-in. On the sign-in page, the user types their email and selects Next. If users forgot their password, they choose the Forgot password? option. Microsoft Entra ID sends the passcode to email address provided on the first page. The customer needs to type the passcode to continue.
Prerequisites
- If you haven't already created your own external tenant, create one now.
- If you haven't already created a User flow, create one now.
Enable self-service password reset for customers
Sign in to the Microsoft Entra admin center.
If you have access to multiple tenants, use the Settings icon
 in the top menu to switch to the external tenant you created earlier from the Directories + subscriptions menu.
Browse to Entra ID > External Identities > User flows.
From the list of User flows, select the user flow you want to enable SSPR.
Make sure that the sign-up user flow registers Email with password as an authentication method under Identity providers.

Enable email one-time passcode
To enable self-service password reset, you need to enable the email one-time passcode (Email OTP) authentication method for all users in your tenant. To ensure that the Email OTP feature is enabled follow the steps below:
Sign in to the Microsoft Entra admin center.
Browse to Entra ID > Authentication methods.
Under Policies > Method select Email OTP.
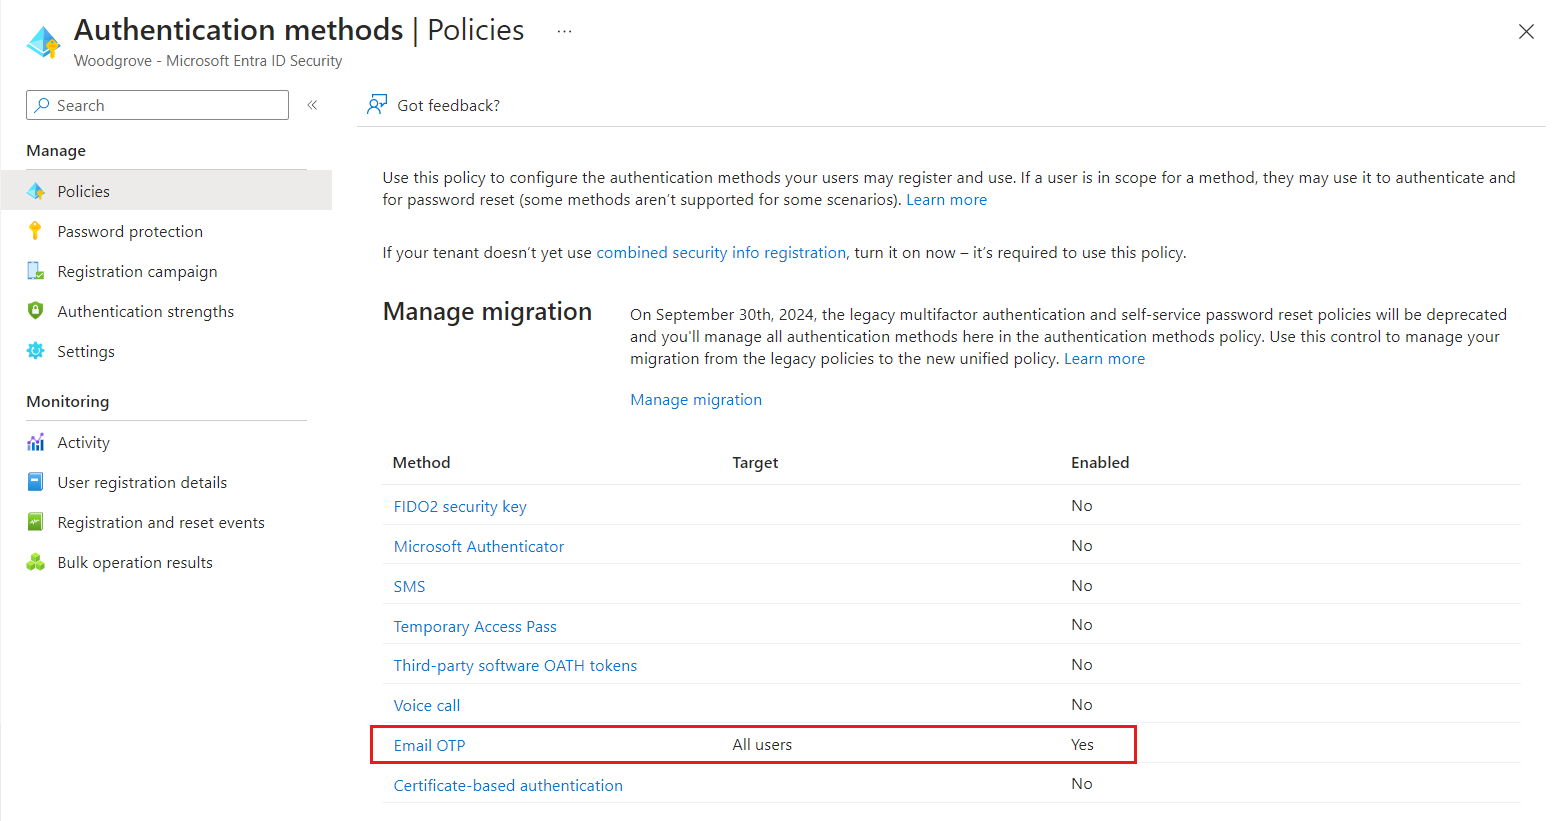
Under Enable and Target enable Email OTP and select All users under Include.
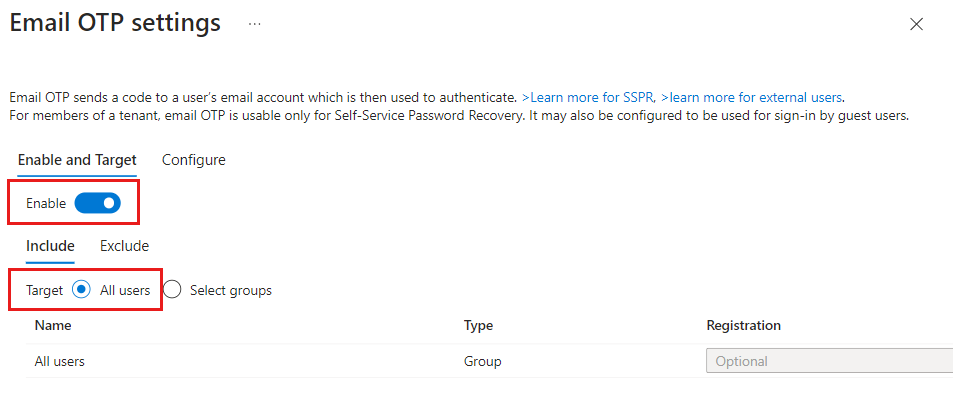
Select Save.
Enable the password reset link (optional)
You can hide, show or customize the self-service password reset link on the sign-in page.
In the search bar, type and select Company Branding.
Under Default sign-in select Edit.
On the Sign-in form tab, scroll to the Self-service password reset section and select Show self-service password reset.
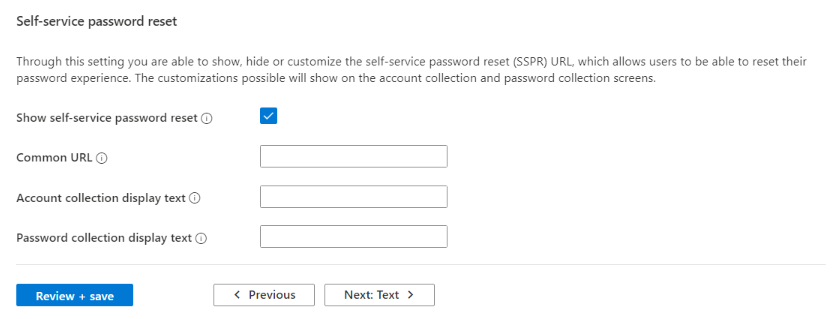
Select Review + save and Save on the Review tab.
For more details, check out the Customize the neutral branding in your external tenant article.
Test self-service password reset
To go through the self-service password reset flow:
Open your application, and select Sign-in.
In the sign-in page, enter your Email address and select Next.
Select the Forgot password? link.

Enter the one-time passcode sent to your email address.

Once you're authenticated, you're prompted to enter a new password. Provide a New password, and Confirm password, then select Reset password to sign in to your application.

Related content
- Add Google, Facebook, Apple or a custom OIDC federation federation.