Note
Access to this page requires authorization. You can try signing in or changing directories.
Access to this page requires authorization. You can try changing directories.
Applies to:  Workforce tenants External tenants (learn more)
This tutorial series demonstrates how to protect an ASP.NET Core web API with the Microsoft identity platform to limit it's access to only authorized users and client apps. The web API you build uses both delegated permissions (scopes) and application permissions (app roles).
In this tutorial, you:
- Build an ASP.NET Core web API
- Configure the web API to use it's Microsoft Entra app registration details
- Protect your web API endpoints
- Run the web API to ensure it's listening to HTTP requests
Prerequisites
- If you haven't already, complete the steps in Quickstart: Call a web API that is protected by the Microsoft identity platform. You don't have to clone and run the code sample, but ensure you have the following:
- The web API's app registration details from the Microsoft Entra admin center, including the client ID and tenant ID.
- ToDoList.Read and ToDoList.ReadWrite as the delegated permissions (scopes) exposed by the Web API
- ToDoList.Read.All and ToDoList.ReadWrite.All as the application permissions (app roles) exposed by the Web API
- .NET 8.0 SDK or later.
- Visual Studio Code or another code editor.
Create a new ASP.NET Core web API project
To create a minimal ASP.NET Core web API project, follow these steps:
Open your terminal on Visual Studio Code or any other code editor and navigate to the directory where you want to create your project.
Run the following commands on the .NET CLI or any other command line tool.
dotnet new web -o TodoListApi
cd TodoListApi
Select Yes when a dialog box asks if you want to trust the authors.
Select Yes When a dialog box asks if you want to add required assets to the project.
Install required packages
To build, protect, and test the ASP.NET Core web API, you need to install the following packages:
Microsoft.EntityFrameworkCore.InMemory- A package that allows you to use the Entity Framework Core with an in-memory database. It's useful for testing purposes but isn't designed for production use.Microsoft.Identity.Web- a set of ASP.NET Core libraries that simplify adding authentication and authorization support to web apps and web APIs that integrate with the Microsoft identity platform.
To install the package, use:
dotnet add package Microsoft.EntityFrameworkCore.InMemory
dotnet add package Microsoft.Identity.Web
Configure app registration details
Open the appsettings.json file in your app folder and add the app registration details you recorded after registering the web API.
{
    "AzureAd": {
        "Instance": "Enter_the_Authority_URL_Here",
        "TenantId": "Enter_the_Tenant_Id_Here",
        "ClientId": "Enter_the_Application_Id_Here"
    },
    "Logging": {...},
  "AllowedHosts": "*"
}
Replace the following placeholders as shown:
- Replace
Enter_the_Application_Id_Herewith your application (client) ID. - Replace
Enter_the_Tenant_Id_Herewith your Directory (tenant) ID. - Replace
Enter_the_Authority_URL_Herewith your Authority URL, as explained in the next section.
Authority URL for your app
The authority URL specifies the directory from which Microsoft Authentication Library (MSAL) can request tokens from. You build it differently in both workforce and external tenants, as shown:
//Instance for workforce tenant
Instance: "https://login.microsoftonline.com/"
Use custom URL domain (Optional)
Custom URL domains aren't supported in workforce tenants.
Add permissions
All APIs must publish a minimum of one scope, also called delegated permission, for the client apps to obtain an access token for a user successfully. APIs should also publish a minimum of one app role, also called application permissions, for the client apps to obtain an access token as themselves, that is, when they aren't signing-in a user.
We specify these permissions in the appsettings.json file. In this tutorial, you registered the following delegated and application permissions:
- Delegated permissions: ToDoList.Read and ToDoList.ReadWrite.
- Applications permissions: ToDoList.Read.All and ToDoList.ReadWrite.All.
When a user or client application calls the web API, only clients with these scopes or permissions get authorized to access the protected endpoint.
{
  "AzureAd": {
    "Instance": "Enter_the_Authority_URL_Here",
    "TenantId": "Enter_the_Tenant_Id_Here",
    "ClientId": "Enter_the_Application_Id_Here",
    "Scopes": {
      "Read": ["ToDoList.Read", "ToDoList.ReadWrite"],
      "Write": ["ToDoList.ReadWrite"]
    },
    "AppPermissions": {
      "Read": ["ToDoList.Read.All", "ToDoList.ReadWrite.All"],
      "Write": ["ToDoList.ReadWrite.All"]
    }
  },
  "Logging": {...},
  "AllowedHosts": "*"
}
Implement authentication and authorization in the API
To configure authentication and authorization, open the program.cs file and replace its contents the following code snippets:
Add an authentication scheme
In this API, we use the JSON Web Token (JWT) Bearer scheme as the default authentication mechanism. Use the AddAuthentication method to register the JWT bearer scheme.
// Add required packages to your imports
using Microsoft.AspNetCore.Authentication.JwtBearer;
using Microsoft.Identity.Web;

var builder = WebApplication.CreateBuilder(args);

// Add an authentication scheme
builder.Services.AddAuthentication(JwtBearerDefaults.AuthenticationScheme)
    .AddMicrosoftIdentityWebApi(builder.Configuration);
Create your app's model
In the project's root folder, create a folder called Models. Navigate to the Models folder and create a file named ToDo.cs then add the following code.
using System;

namespace ToDoListAPI.Models;

public class ToDo
{
    public int Id { get; set; }
    public Guid Owner { get; set; }
    public string Description { get; set; } = string.Empty;
}
The preceding code creates a model called ToDo. This model represents data that the app manages.
Add a database context
Next, we define a database context class, which coordinates the Entity Framework functionality for a data model. This class inherits from the Microsoft.EntityFrameworkCore.DbContext class that manages interactions between the application and the database. To add the database context, follow these steps:
Create a folder called DbContext in the root folder of your project.
Navigate into the DbContext folder and create a file named
ToDoContext.csthen add the following code:using Microsoft.EntityFrameworkCore; using ToDoListAPI.Models; namespace ToDoListAPI.Context; public class ToDoContext : DbContext { public ToDoContext(DbContextOptions<ToDoContext> options) : base(options) { } public DbSet<ToDo> ToDos { get; set; } }Open the Program.cs file in your project's root folder and update it with the following code:
// Add the following to your imports
using ToDoListAPI.Context;
using Microsoft.EntityFrameworkCore;

//Register ToDoContext as a service in the application
builder.Services.AddDbContext<ToDoContext>(opt =>
    opt.UseInMemoryDatabase("ToDos"));
In the preceding code snippet, we register DB Context as a scoped service in the ASP.NET Core application service provider (also known as, the dependency injection container). You also configure the ToDoContext class to use an in-memory database for the ToDo List API.
Set up a controller
Controllers typically implement Create, Read, Update, and Delete (CRUD) actions to manage resources. Since this tutorial focuses more on protecting the API endpoints, we only implement two action items in the controller. A Read all action to retrieve all To-Do items and a Create action to add a new To-Do item. Follow these steps to add a controller to your project:
Navigate to the root folder of your project and create a folder named Controllers.
Create a file named
ToDoListController.csinside the Controllers folder and add the following boiler plate code:
using Microsoft.AspNetCore.Authorization;
using Microsoft.AspNetCore.Mvc;
using Microsoft.EntityFrameworkCore;
using Microsoft.Identity.Web;
using Microsoft.Identity.Web.Resource;
using ToDoListAPI.Models;
using ToDoListAPI.Context;

namespace ToDoListAPI.Controllers;

[Authorize]
[Route("api/[controller]")]
[ApiController]
public class ToDoListController : ControllerBase
{
    private readonly ToDoContext _toDoContext;

    public ToDoListController(ToDoContext toDoContext)
    {
        _toDoContext = toDoContext;
    }

    [HttpGet()]
    [RequiredScopeOrAppPermission()]
    public async Task<IActionResult> GetAsync(){...}

    [HttpPost]
    [RequiredScopeOrAppPermission()]
    public async Task<IActionResult> PostAsync([FromBody] ToDo toDo){...}

    private bool RequestCanAccessToDo(Guid userId){...}

    private Guid GetUserId(){...}

    private bool IsAppMakingRequest(){...}
}
Add code to the controller
This section explains how to add code to the controller scaffolded in the previous section. The focus here is on protecting the API, not building it.
Import the necessary packages: The
Microsoft.Identity.Webpackage is a wrapper around MSAL.NET that helps us easily handle authentication logic such as handling token validation. To ensure that our endpoints require authorization, we use the inbuiltMicrosoft.AspNetCore.Authorizationpackage.Since we granted permissions for this API to be called either using delegated permissions on behalf of the user or application permissions where the client calls as itself and not on the user's behalf, it's important to know whether the call is being made by the app on its own behalf. The easiest way to do this is to find whether the access token contains the
idtypoptional claim. Thisidtypclaim is the easiest way for the API to determine whether a token is an app token or an app + user token. We recommend enabling theidtypoptional claim.If the
idtypclaim isn't enabled, you can use therolesandscpclaims to determine whether the access token is an app token or an app + user token. An access token issued by Microsoft Entra ID has at least one of the two claims. Access tokens issued to a user have thescpclaim. Access tokens issued to an application have therolesclaim. Access tokens that contain both claims are issued only to users, where thescpclaim designates the delegated permissions, while therolesclaim designates the user's role. Access tokens that have neither aren't to be honored.private bool IsAppMakingRequest() { if (HttpContext.User.Claims.Any(c => c.Type == "idtyp")) { return HttpContext.User.Claims.Any(c => c.Type == "idtyp" && c.Value == "app"); } else { return HttpContext.User.Claims.Any(c => c.Type == "roles") && !HttpContext.User.Claims.Any(c => c.Type == "scp"); } }Add a helper function that determines whether the request being made contains enough permissions to carry out the intended action. Check whether it's the app making the request on its own behalf or whether the app is making the call on behalf of a user who owns the given resource by validating the user ID.
private bool RequestCanAccessToDo(Guid userId)
    {
        return IsAppMakingRequest() || (userId == GetUserId());
    }

private Guid GetUserId()
    {
        Guid userId;
        if (!Guid.TryParse(HttpContext.User.GetObjectId(), out userId))
        {
            throw new Exception("User ID is not valid.");
        }
        return userId;
    }
Plug in your permission definitions to protect routes. Protect your API by adding the
[Authorize]attribute to the controller class. This ensures the controller actions can be called only if the API is called with an authorized identity. The permission definitions define what kinds of permissions are needed to perform these actions.[Authorize] [Route("api/[controller]")] [ApiController] public class ToDoListController: ControllerBase{...}Add permissions to the GET and POST endpoints. Do this using the RequiredScopeOrAppPermission method that is part of the Microsoft.Identity.Web.Resource namespace. You then pass scopes and permissions to this method via the RequiredScopesConfigurationKey and RequiredAppPermissionsConfigurationKey attributes.
[HttpGet]
[RequiredScopeOrAppPermission(
    RequiredScopesConfigurationKey = "AzureAD:Scopes:Read",
    RequiredAppPermissionsConfigurationKey = "AzureAD:AppPermissions:Read"
)]
public async Task<IActionResult> GetAsync()
{
    var toDos = await _toDoContext.ToDos!
        .Where(td => RequestCanAccessToDo(td.Owner))
        .ToListAsync();

    return Ok(toDos);
}

[HttpPost]
[RequiredScopeOrAppPermission(
    RequiredScopesConfigurationKey = "AzureAD:Scopes:Write",
    RequiredAppPermissionsConfigurationKey = "AzureAD:AppPermissions:Write"
)]
public async Task<IActionResult> PostAsync([FromBody] ToDo toDo)
{
    // Only let applications with global to-do access set the user ID or to-do's
    var ownerIdOfTodo = IsAppMakingRequest() ? toDo.Owner : GetUserId();

    var newToDo = new ToDo()
    {
        Owner = ownerIdOfTodo,
        Description = toDo.Description
    };

    await _toDoContext.ToDos!.AddAsync(newToDo);
    await _toDoContext.SaveChangesAsync();

    return Created($"/todo/{newToDo!.Id}", newToDo);
}
Configure the API middleware to use the controller
Next, we configure the application to recognize and use controllers for handling HTTP requests. Open the program.cs file and add the following code to register the controller services in the dependency injection container.
builder.Services.AddControllers();

var app = builder.Build();
app.MapControllers();

app.Run();
In the preceding code snippet, the AddControllers() method prepares the application to use controllers by registering the necessary services while MapControllers() maps the controller routes to handle incoming HTTP requests.
Run your API
Run your API to ensure that it's running without any errors using the command dotnet run. If you intend to use HTTPS protocol even during testing, you need to trust .NET's development certificate.
Start the application by typing the following in the terminal:
dotnet runAn output similar to the following should be displayed in the terminal, which confirms that the application is running on
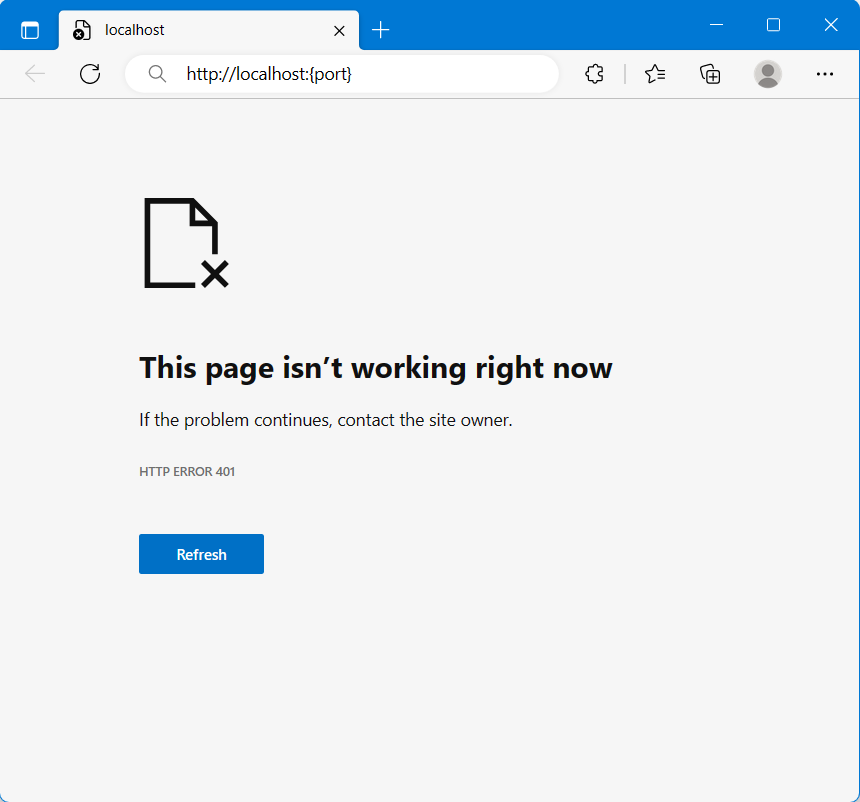
http://localhost:{port}and listening for requests.Building... info: Microsoft.Hosting.Lifetime[0] Now listening on: http://localhost:{port} info: Microsoft.Hosting.Lifetime[0] Application started. Press Ctrl+C to shut down. ...
The web page http://localhost:{host} displays an output similar to the following image. This is because the API is being called without authentication. In order to make an authorized call, refer to Next steps for guidance on how to access a protected web API.
For a full example of this API code, see the samples file.