Note
Access to this page requires authorization. You can try signing in or changing directories.
Access to this page requires authorization. You can try changing directories.
This tutorial walks you through the steps to set up password hash sync as a backup and failover for Azure Directory Federation Services (AD FS) in Microsoft Entra Connect. The tutorial also demonstrates how to set password hash sync as the primary authentication method if AD FS fails or becomes unavailable.
Note
Although these steps usually are taken in an emergency or outage situation, we recommend that you test these steps and verify your procedures before an outage occurs.
Prerequisites
This tutorial builds on Tutorial: Use federation for hybrid identity in a single Active Directory forest. Completing the tutorial is a prerequisite to completing the steps in this tutorial.
Note
If you don't have access to a Microsoft Entra Connect server or the server doesn't have internet access, you can contact Microsoft Support to assist with the changes to Microsoft Entra ID.
Enable password hash sync in Microsoft Entra Connect
In Tutorial: Use federation for hybrid identity in a single Active Directory forest, you created a Microsoft Entra Connect environment that's using federation.
Your first step in setting up your backup for federation is to turn on password hash sync and set Microsoft Entra Connect to sync the hashes:
Double-click the Microsoft Entra Connect icon that was created on the desktop during installation.
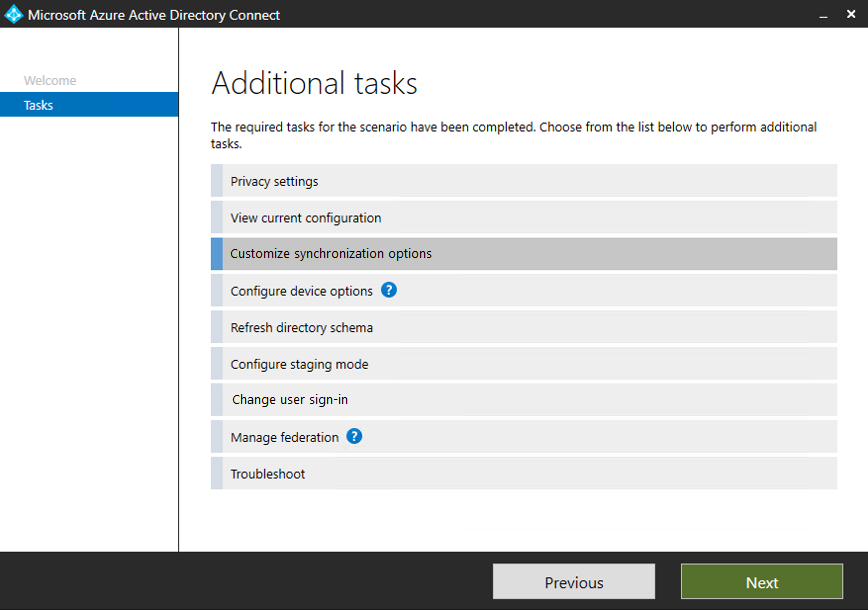
Select Configure.
In Additional tasks, select Customize synchronization options, and then select Next.
Enter the username and password for the Hybrid Identity Administrator account you created in the tutorial to set up federation.
In Connect your directories, select Next.
In Domain and OU filtering, select Next.
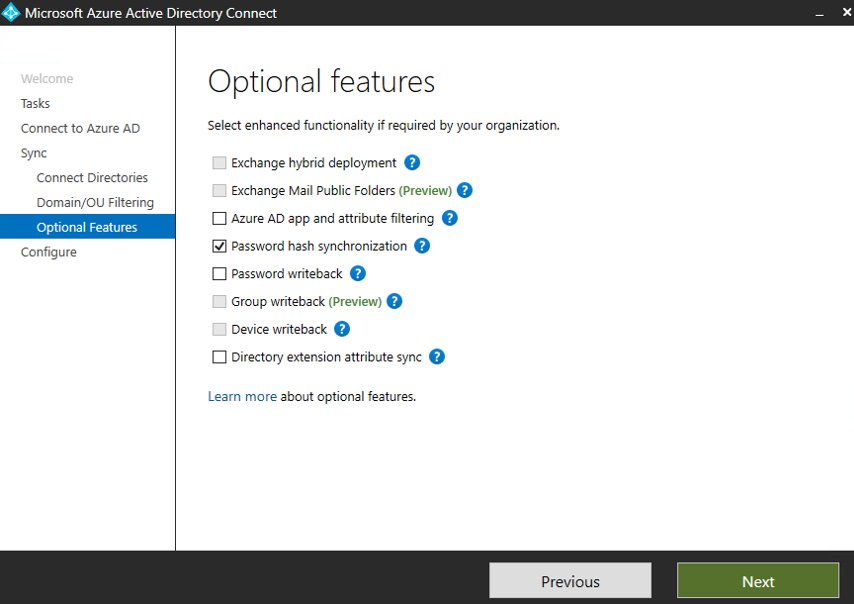
In Optional features, select Password hash synchronization, and then select Next.
In Ready to configure, select Configure.
When configuration is finished, select Exit.
That's it! You're done. Password hash sync will now occur, and it can be used as a backup if AD FS becomes unavailable.
Switch to password hash sync
Important
Before you switch to password hash sync, create a backup of your AD FS environment. You can create a backup by using the AD FS Rapid Restore Tool.
It takes some time for the password hashes to sync to Microsoft Entra ID. It might be up to three hours before the sync finishes and you can start authenticating by using the password hashes.
Next, switch over to password hash synchronization. Before you start, consider in which conditions you should make the switch. Don't make the switch for temporary reasons, like a network outage, a minor AD FS problem, or a problem that affects a subset of your users.
If you decide to make the switch because fixing the problem will take too long, complete these steps:
- In Microsoft Entra Connect, select Configure.
- Select Change user sign-in, and then select Next.
- Enter the username and password for the Hybrid Identity Administrator account you created in the tutorial to set up federation.
- In User sign-in, select Password hash synchronization, and then select the Do not convert user accounts checkbox.
- Leave the default Enable single sign-on selected and select Next.
- In Enable single sign-on, select Next.
- In Ready to configure, select Configure.
- When configuration is finished, select Exit.
Users can now use their passwords to sign in to Azure and Azure services.
Sign in with a user account to test sync
In a new web browser window, go to https://myapps.microsoft.com.
Sign in with a user account that was created in your new tenant.
For the username, use the format
user@domain.onmicrosoft.com. Use the same password the user uses to sign in to on-premises Active Directory.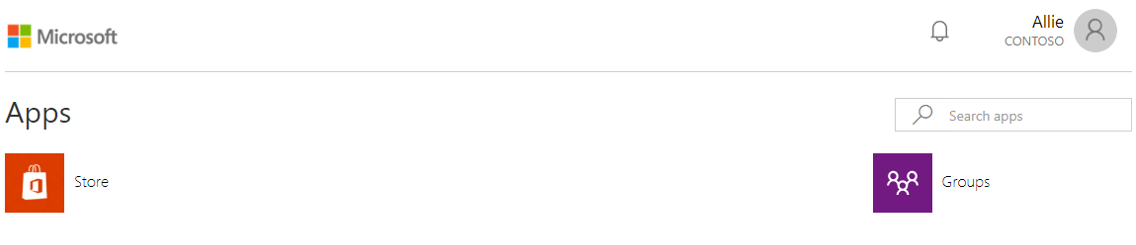
Switch back to federation
Now, switch back to federation:
In Microsoft Entra Connect, select Configure.
Select Change user sign-in, and then select Next.
Enter the username and password for your Hybrid Identity Administrator account.
In User sign-in, select Federation with AD FS, and then select Next.
In Domain Administrator credentials, enter the contoso\Administrator username and password, and then select Next.
In AD FS farm, select Next.
In Microsoft Entra domain, select the domain and select Next.
In Ready to configure, select Configure.
When configuration is finished, select Next.
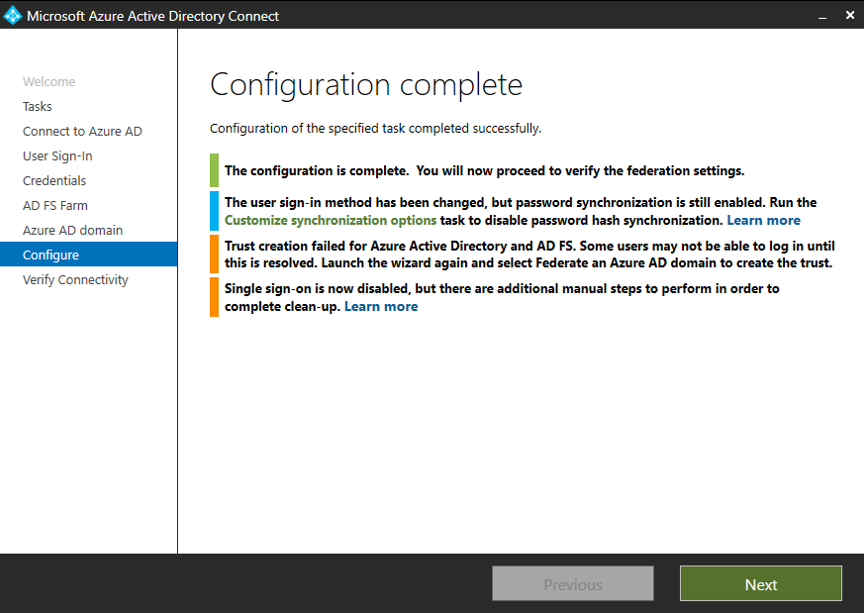
In Verify federation connectivity, select Verify. You might need to configure DNS records (add A and AAAA records) for verification to finish successfully.
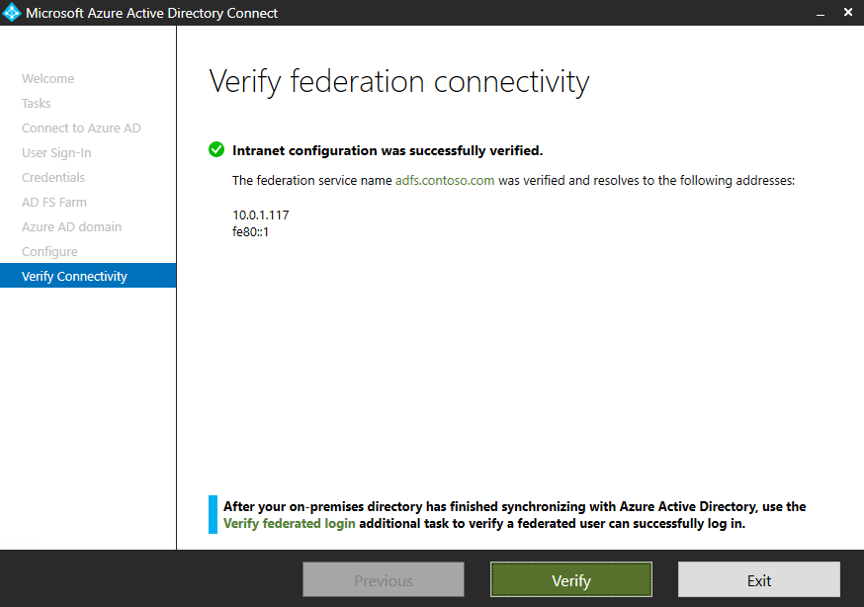
Select Exit.
Reset the AD FS and Azure trust
The final task is to reset the trust between AD FS and Azure:
In Microsoft Entra Connect, select Configure.
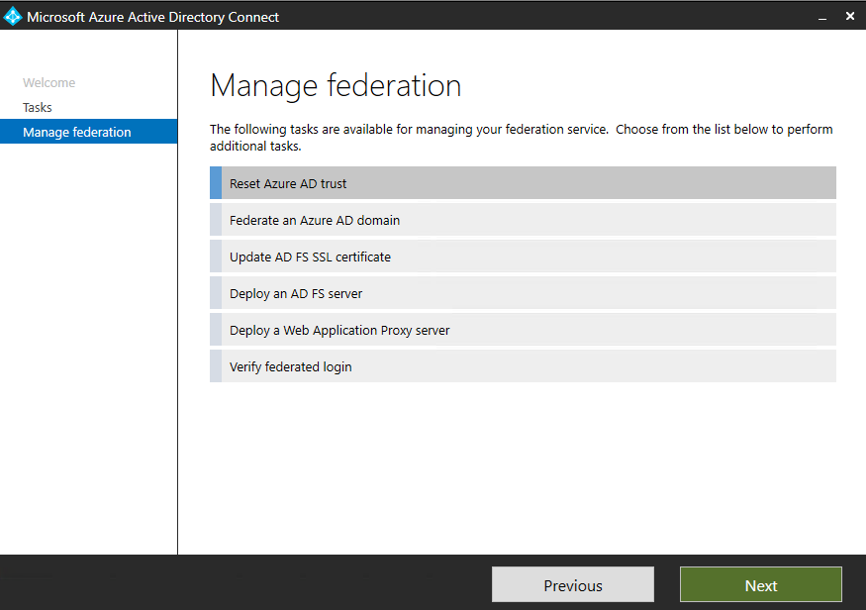
Select Manage federation, and then select Next.
Select Reset Microsoft Entra ID trust, and then select Next.
In Connect to Microsoft Entra ID, enter the username and password for your Hybrid Identity Administrator account.
In Connect to AD FS, enter the contoso\Administrator username and password, and then select Next.
In Certificates, select Next.
Repeat the steps in Sign in with a user account to test sync.
You've successfully set up a hybrid identity environment that you can use to test and to get familiar with what Azure has to offer.
Next steps
- Review Microsoft Entra Connect hardware and prerequisites.
- Learn how to use Express settings in Microsoft Entra Connect.
- Learn more about password hash sync with Microsoft Entra Connect.