Create a Public Folder calendar in Exchange Online
A public folder calendar is a good solution for people looking for only a shared calendar without having to maintain an additional mailbox along with it. This article explains how to set up and access public folder calendars in Microsoft Exchange Online.
Important
You must use the Microsoft Outlook desktop client to create the public folder calendar.
Note
The Calendar type of public folder can be accessed from Outlook Web App and the Outlook desktop client. Public folders, including calendar, can't be accessed from mobile devices.
Prerequisites
Before you create your public folder calendar, fulfill the following prerequisites.
Ensure public folders are deployed in Exchange Online.
Use the following command to see a list of any public folder mailboxes present in the organization:
Get-Mailbox -PublicFolder
Get-PublicFolder \
If you don't see a list of the public folder mailboxes, then follow the steps to create a public folder mailbox.
Verify that you have the necessary access rights to create the public folder.
If you want the user to be able to create a public folder on the root of the public folder hierarchy, along with all other access rights, run the following command:
Add-PublicFolderClientPermission -Identity "\" -AccessRights Owner -User User1If you want the user to be able to create a public folder under the existing public folder, such as a folder named Marketing, then run the following command:
Add-PublicFolderClientPermission -Identity "\Marketing" -AccessRights Editor -User User1
Sign in to the Outlook desktop client and ensure you're able to access the public folder deployment.
Create a public folder calendar
Once you have ensured that the prerequisites have been met, then you're ready to get started creating a public folder calendar.
Sign in to the Outlook desktop client with a user account that has the necessary access rights to create a public folder.
Expand the folders.
Create a new public folder of "calendar" type by performing either of the following sub-steps:
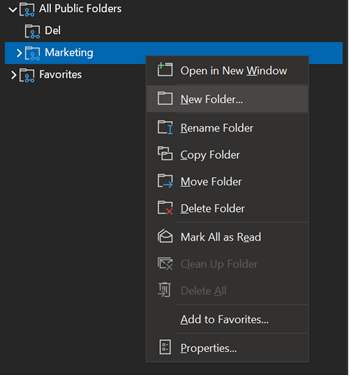
Right-click All Public Folders and select New Folder, if you want to create a public folder calendar at the top level of the directories.
Right-click a folder and select New Folder, if you want to create a public folder calendar under an existing public folder.
Name the new public folder and select Calendar Items from the Folder contains drop-down list.
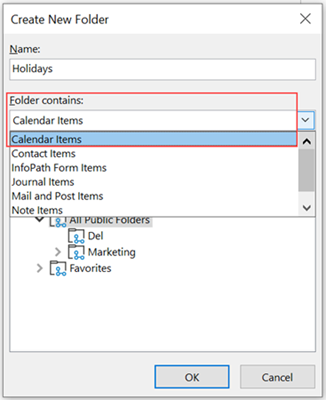
Click OK.
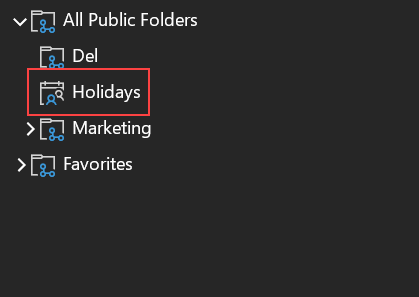
The calendar type folder shows up with a different icon.
For faster access to the new public folder calendar, right-click the folder and select Add to Favorites.... After doing so, you will find the calendar under Calendars > Other Calendars.
Share a public folder calendar
By default, everyone in the organization can access the public folder and create items in it. If you want to delegate additional access rights, add other users, and provide a required set of permissions, then follow the instructions in public folder permissions.
Access a public folder calendar in the Outlook Web App
Sign in to the Outlook Web App.
Right-click Folders and select Add public folder to Favorites.
Browse the directory and select the desired public folder.
Click Add Public Folders.

Close the Add Public Folder menu.
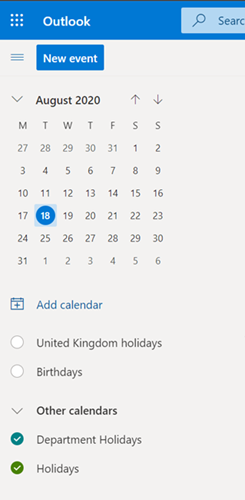
The calendar public folder shows up in Calendar area of the Outlook Web App.
Click the Calendar icon.
You'll see the public folder calendar under Other Calendars.
Receive emails to a public folder calendar
Follow the steps in mail enable public folder calendar to allow users to email:
- Calendar invites
- Appointments to the calendar.