Configure moderated recipients in Exchange Online
In your Exchange Online organization, messages that are sent to moderated recipients require the approval of a moderator before they're actually delivered. For more information, see Moderated recipients in Exchange Online.
This article described how to configure moderated groups in the Exchange admin center (EAC) and all recipient types in Exchange Online Powershell.
What do you need to know before you begin?
Estimated time to complete: 5 minutes
For more granular control over messages that need approval, you can use mail flow rules (transport rules). For details, see Use mail flow rules for message approval scenarios in Exchange Online.
The moderation parameters are available to modify the following types of recipients using the corresponding cmdlets:
You need to be assigned permissions before you can perform this procedure or procedures. To see what permissions you need, see the "Moderated Transport" entry in the Feature permissions in Exchange Online topic.
You can use the EAC or PowerShell to configure groups for moderation. All other recipient types can only be configured for moderation using PowerShell. To open the EAC, see Exchange admin center in Exchange Online. To connect to Exchange Online PowerShell, see Connect to Exchange Online PowerShell.
For information about keyboard shortcuts that may apply to the procedures in this topic, see Keyboard shortcuts for the Exchange admin center.
Use the EAC to configure a moderated distribution group
Note
You can configure moderation for Microsoft 365 Groups using EAC and Exchange Online PowerShell using the Set-UnifiedGroup command.
Messages that the owner of the group sends to the distribution group do not need to be approved by a moderator
The following steps are basically the same for all other group types: distribution groups, dynamic distribution groups and mail-enabled security groups.
In the EAC, click Recipients > Groups > Distribution list.
In this example, we'll configure moderation for a distribution list called All employees. In the result pane, select All employees by clicking anywhere in the row other than the button option that appears in the blank area next to the Group name column.
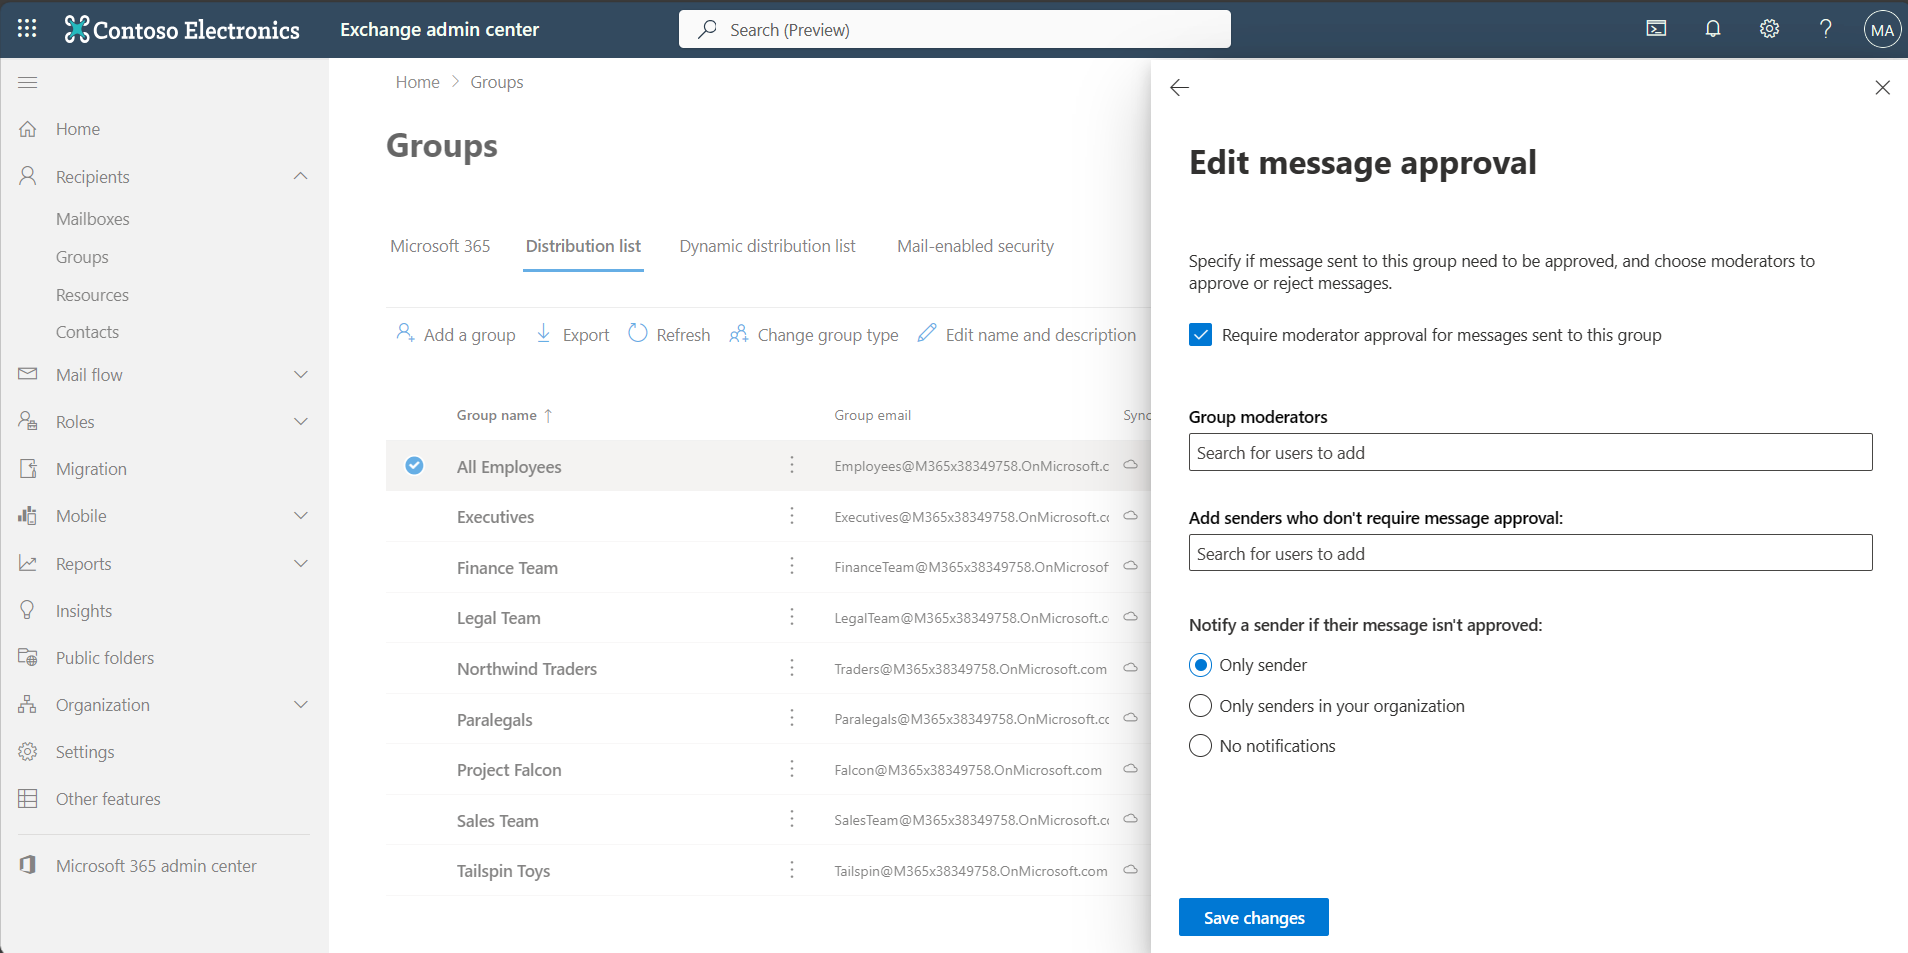
On the All Employees details page, click Settings > Edit Message approval and configure the following settings:
- Click Require moderator approval for messages sent to this group check box. You need to do this to make the remaining settings available.
- In the Group moderators list, search for users to add.
- In the Add senders who don't require message approval list, search for users to add.
- In the Notify a sender if their messages isn't approved, select as required.
When you're finished, click Save changes.

Use Exchange Online PowerShell to configure a moderated recipient
Run the following command:
Set-<RecipientType> -Identity <Identity> -ModerationEnabled $true -ModeratedBy <recipient1,recipient2...> -ByPassModerationFromSendersOrMembers <recipient1,recipient2...> -SendModerationNotifications <Never | Always | Internal>
This example configures the following moderation settings for the distribution group named All Employees:
- Enable moderation for the distribution group.
- Designate David Hamilton and Yossi Ran as moderators.
- Allow the members of the distribution group named HR to bypass moderation.
- Notify internal senders if their message to the distribution group is rejected, but do not send any notifications to external senders.
To accomplish the tasks in this example scenario, run the following command:
Set-DistributionGroup -Identity "All Employees" -ModerationEnabled $true -ModeratedBy "David Hamilton","Yossi Ran" -ByPassModerationFromSendersOrMembers HR -SendModerationNotifications Internal
To add or remove users from the list of moderators or recipients who bypass moderation without affecting other entries, use the following syntax:
Set-<RecipientType> -Identity <Identity> -ModeratedBy @{Add="<recipient1>","<recipient2>"...; Remove="<recipient1>","<recipient2>"...} -ByPassModerationFromSendersOrMembers @{Add="<recipient1>","<recipient2>"...; Remove="<recipient1>","<recipient2>"...}
This example configures the following moderation settings for the distribution group named All Employees:
- Add the user chris@contoso.com to the list of existing moderators.
- Remove the user michelle@contoso.com from the list of existing senders who bypass moderation.
Set-DistributionGroup -Identity "All Employees" -ModeratedBy @{Add="chris@contoso.com"} -ByPassModerationFromSendersOrMembers @{Remove="michelle@contoso.com}"
How do you know this worked?
To verify that you have successfully configured a recipient for moderation, do the following steps:
- Send a test message to the moderated recipient.
- Verify the designated moderators receive notification.
- Verify the recipients who bypass moderation receive the message directly.