Note
Access to this page requires authorization. You can try signing in or changing directories.
Access to this page requires authorization. You can try changing directories.
Use the Microsoft Fabric extension for Visual Studio Code (VS Code) to create a Fabric app in your workspace and open its Getting Started page. The page provides a command tailored to your app so you can set up the local project with Rayfin, the framework for Fabric apps.
In this quickstart, you create an app named demoapp12, set up its source code locally, and run and deploy the app.
Prerequisites
- Visual Studio Code.
- The Microsoft Fabric extension for Visual Studio Code with the Apps and Get Started features shown in this quickstart.
- Node.js 20 or later and npm.
- A Microsoft account with access to Fabric.
- A Fabric workspace with Fabric capacity assigned, where you have Contributor, Member, or Admin permissions. See Fabric Apps prerequisites.
Sign in and select a workspace
- Open VS Code. If you didn't install the Microsoft Fabric extension, open Extensions, search for Microsoft Fabric, and install the extension linked in the prerequisites.
- Press F1, enter
Fabric: Sign in, and select the command. - Complete the sign-in prompts with the account you use to access your Fabric workspace.
- Select Microsoft Fabric in the activity bar.
- In Fabric Workspaces, expand the workspace where you want to create the app. Select your workspace.
Create the app item
Create the app in your selected workspace before you set up its local project.
Press F1, enter
Fabric: Create item, and select the workspace.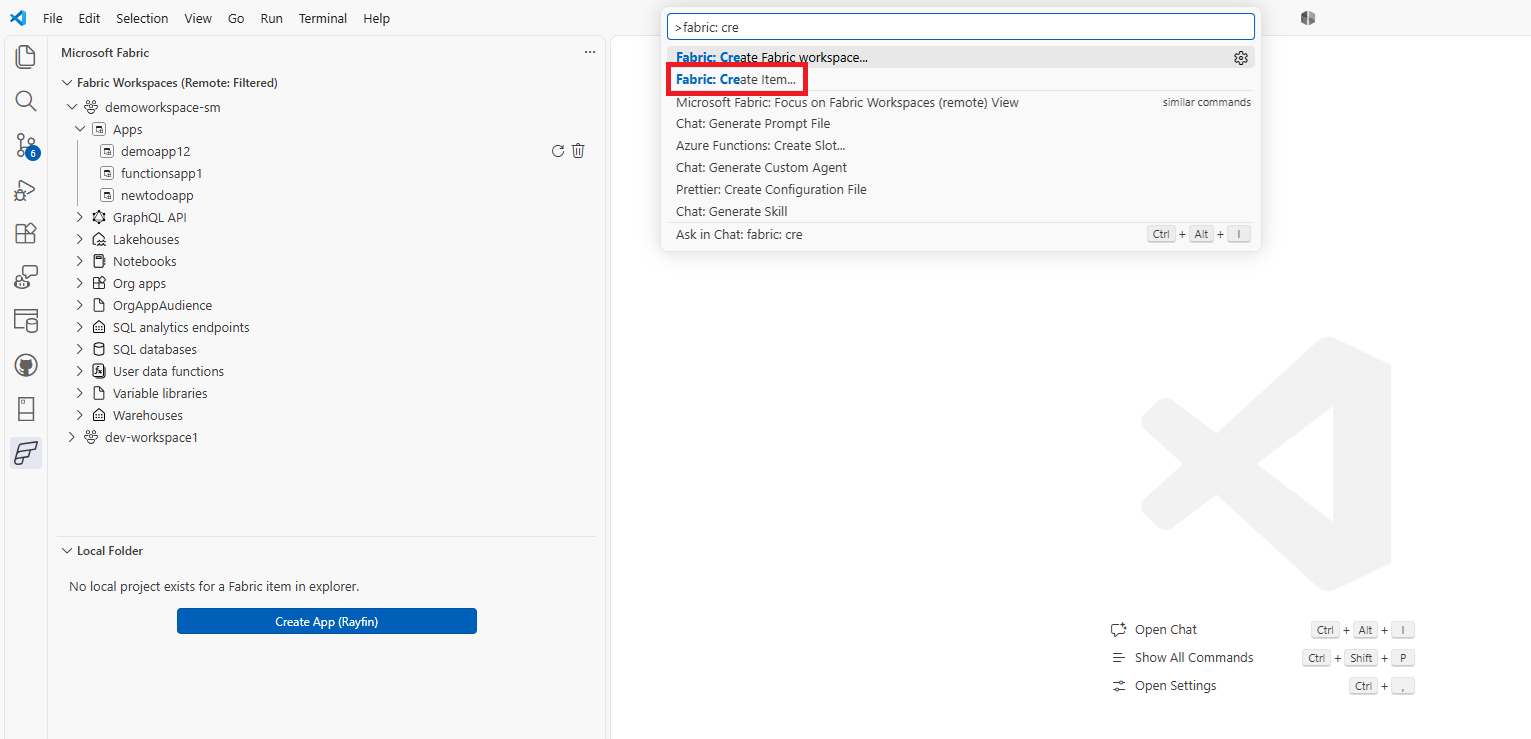
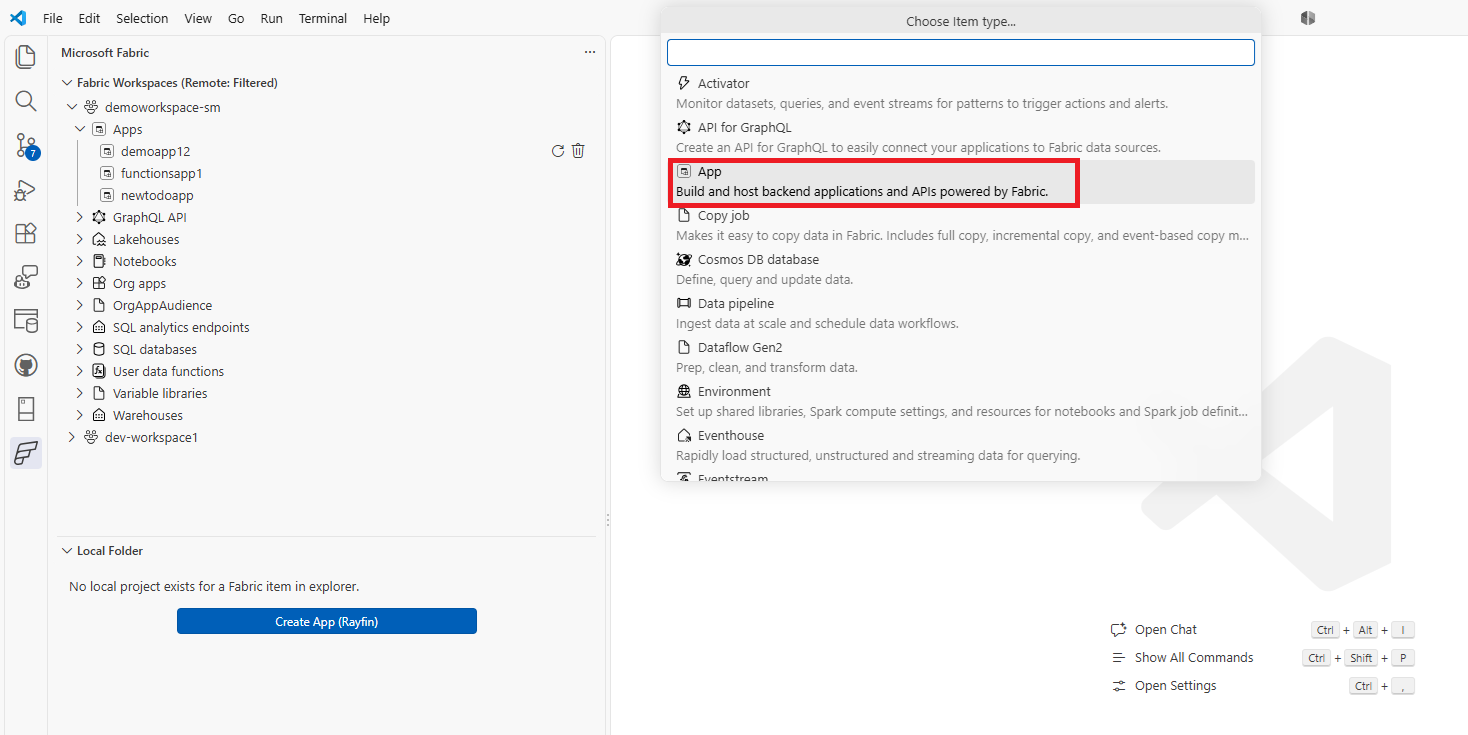
Select App.
Enter a name and press Enter to confirm.
Open the app's getting started page
You can return to the setup instructions at any time.
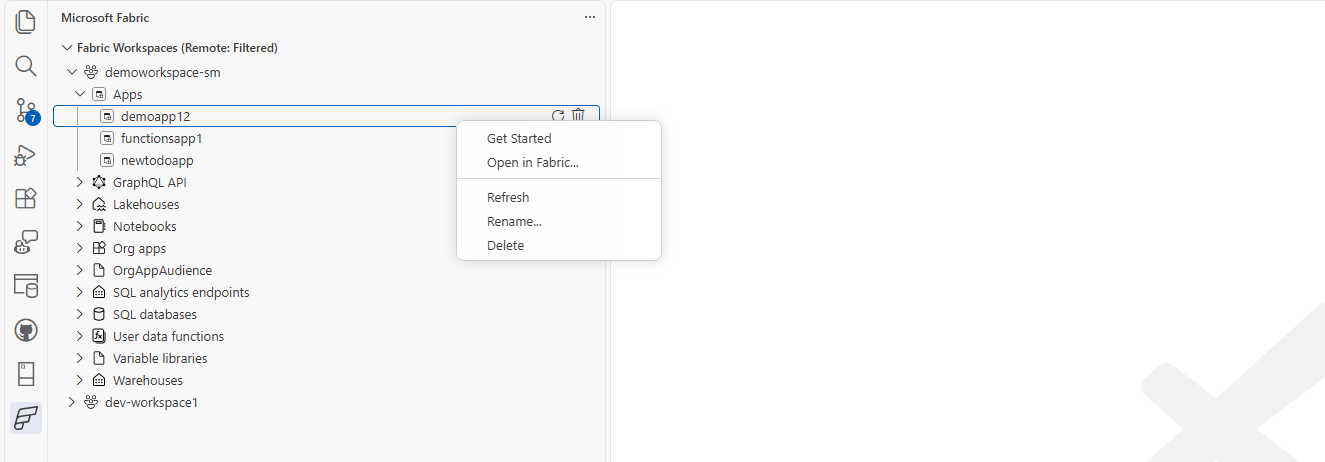
Right-click your app item.
Select Get Started.
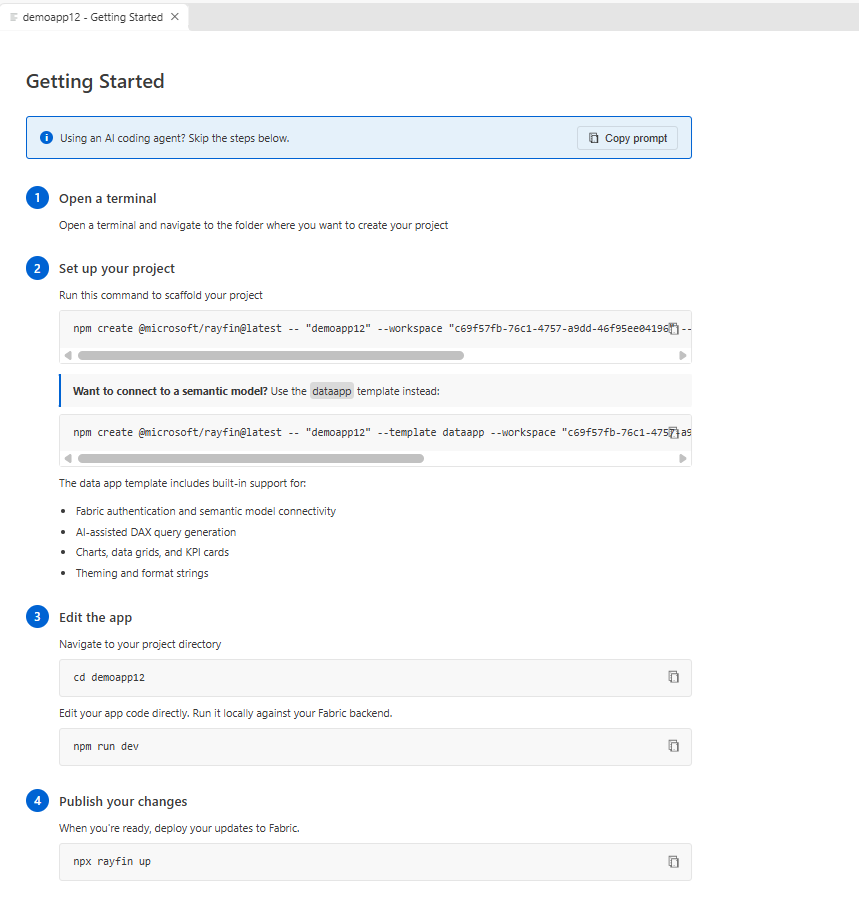
The Getting Started page contains the project setup command for the selected app and workspace, along with instructions for editing the app.
Set up the local project
Use the command from your app's Getting Started page rather than copying the example values from the following screenshot.
In VS Code, select Terminal > New Terminal.
Go to the parent folder where you want to create the project.
Under Set up your project on the Getting Started page, copy the full scaffold command and run it in the terminal. Follow any prompts.
The command uses
npm create @microsoft/rayfin@latestand includes settings for your selected app and workspace. Copy the complete command, including any text that extends beyond the visible code block.After setup finishes, go to the generated project folder. If you used
demoapp12, run:cd demoapp12Select File > Open Folder and open the generated project folder.
Review the generated files before making changes. For an explanation of the configuration and source files, see Understand the project structure.
Tip
If you want an app connected to a semantic model, the Getting Started page also provides a command that uses the dataapp template. Use that command instead of the default scaffold command, not in addition to it. See Create an app connected to a semantic model for the additional requirements and setup.
Use a coding agent instead
If you use an AI coding agent, select Copy prompt at the top of the Getting Started page and paste it into your agent's chat. For GitHub Copilot in VS Code, use Agent mode with terminal access.
Review the prompt before submitting it, approve commands as required, and complete any browser sign-in prompts. Review the generated files before deployment. You don't need to repeat the manual scaffold steps if the agent already completed them.
Run and deploy the app
Run these commands from the generated project folder, not its parent folder. The frontend runs locally, but the backend runs in Fabric.
Deploy the initial app and backend to Fabric:
npx rayfin upComplete the browser sign-in flow if prompted. Check the selected workspace before proceeding with deployment.
Confirm the deployment status:
npx rayfin up statusIf deployment fails, resolve the reported error before continuing. See Troubleshoot Fabric Apps.
Start the frontend development server:
npm run devOpen the local URL printed in the terminal to view your app. Keep the development server running while you edit and preview the frontend.
Customize the app in VS Code and review your changes in the local preview.
When you're ready to publish your changes, run
npx rayfin upagain. You can use another terminal while the development server is running.Run
npx rayfin up statusagain and open the hosted app URL printed by the deployment command.
You created a Fabric app item, set up its local project, and deployed the app to your workspace. For more deployment options, see Deploy a Fabric app to Fabric.