Note
Access to this page requires authorization. You can try signing in or changing directories.
Access to this page requires authorization. You can try changing directories.
The Fabric Data Engineering Visual Studio (VS) Code extension fully supports the create, read, update, and delete (CRUD) Spark job definition operations in Fabric. After you create a Spark job definition, you can upload more referenced libraries, submit a request to run the Spark job definition, and check the run history.
Create a Spark job definition
To create a new Spark job definition:
In the VS Code Explorer, select the Create Spark Job Definition option.

Enter the initial required fields: name, referenced lakehouse, and default lakehouse.
The request processes and the name of your newly created Spark job definition appears under the Spark Job Definition root node in VS Code Explorer. Under the Spark job definition name node, you see three subnodes:
- Files: List of the main definition file and other referenced libraries. You can upload new files from this list.
- Lakehouse: List of all lakehouses referenced by this Spark job definition. The default lakehouse is marked in the list, and you can access it via the relative path
Files/…, Tables/…. - Run: List of the run history of this Spark job definition and the job status of each run.

Upload a main definition file to a referenced library
To upload or overwrite the main definition file, select the Add Main File option.

To upload the library file that the main definition file references, select the Add Lib File option.

After you have uploaded a file, you can override it by clicking the Update File option and uploading a new file, or you can delete the file via the Delete option.

Submit a run request
To submit a request to run the Spark job definition from VS Code:
From the options to the right of the name of the Spark job definition you want to run, select the Run Spark Job option.

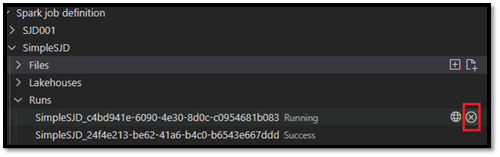
After you submit the request, a new Apache Spark application appears in the Runs node in the Explorer list. You can cancel the running job by selecting the Cancel Spark Job option.


Open a Spark job definition in the Fabric portal
You can open the Spark job definition authoring page in the Fabric portal by selecting the Open in Browser option.
You can also select Open in Browser next to a completed run to see the detail monitor page of that run.

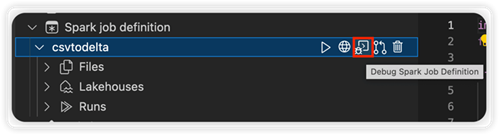
Debug Spark job definition source code (Python)
If the Spark job definition is created with PySpark (Python), you can download the .py script of the main definition file and the referenced file, and debug the source script in VS Code.
To download the source code, select the Debug Spark Job Definition option to the right of the Spark job definition.
After the download completes, the folder of the source code automatically opens.
Select the Trust the authors option when prompted. (This option only appears the first time you open the folder. If you don't select this option, you can't debug or run the source script. For more information, see Visual Studio Code Workspace Trust security.)
If you have downloaded the source code before, you're prompted to confirm that you want to overwrite the local version with the new download.
Note
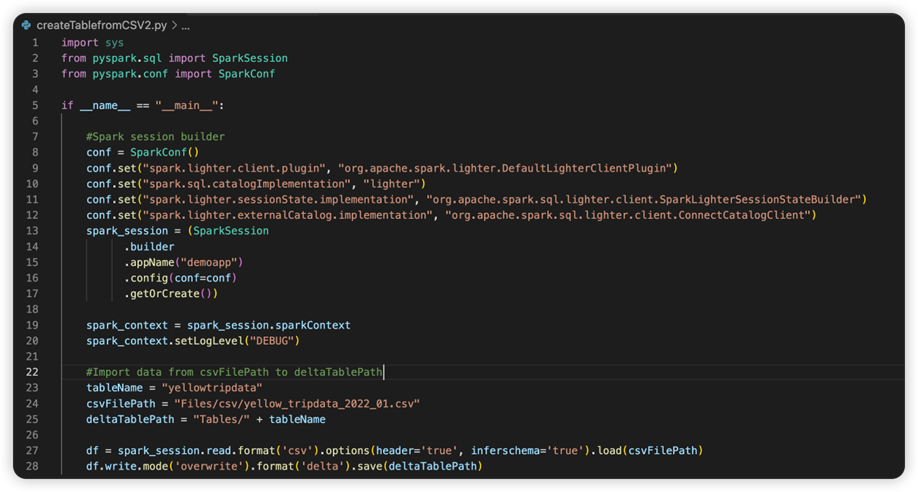
In the root folder of the source script, the system creates a subfolder named conf. Within this folder, a file named lighter-config.json contains some system metadata needed for the remote run. Do NOT make any changes to it.
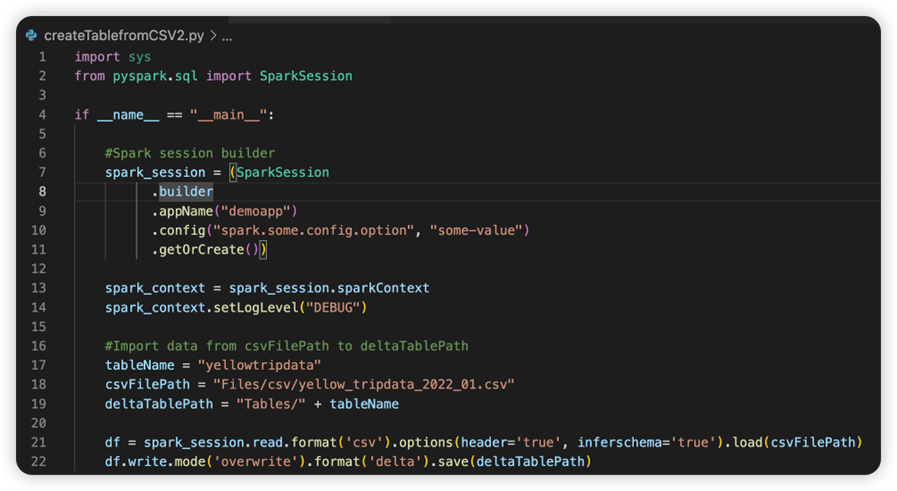
The file named sparkconf.py contains a code snippet that you need to add to set up the SparkConf object. To enable the remote debug, make sure the SparkConf object is set up properly. The following image shows the original version of the source code.
The next image is the updated source code after you copy and paste the snippet.
After you have updated the source code with the necessary conf, you must pick the right Python Interpreter. Make sure to select the one installed from the synapse-spark-kernel conda environment.


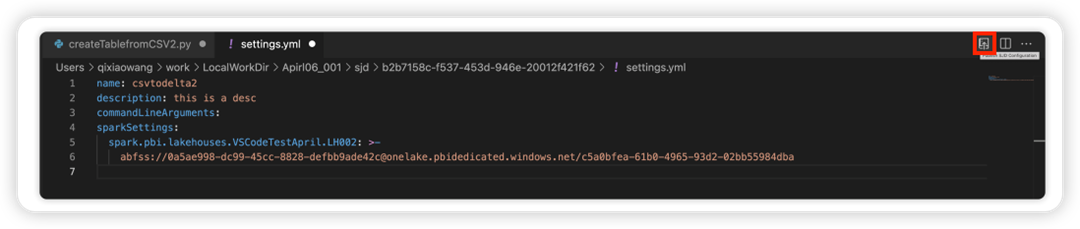
Edit Spark job definition properties
You can edit the detail properties of Spark job definitions, such as command-line arguments.
Select the Update SJD Configuration option to open a settings.yml file. The existing properties populate the contents of this file.
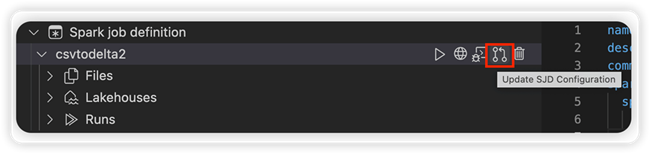
Update and save the .yml file.
Select the Publish SJD Property option at the top right corner to sync the change back to the remote workspace.