Note
Access to this page requires authorization. You can try signing in or changing directories.
Access to this page requires authorization. You can try changing directories.
The Dataflow activity in Data Factory for Microsoft Fabric allows you to run a Dataflow Gen2.
Prerequisites
To get started, you must complete the following prerequisites:
- You must have access to a Microsoft Fabric tenant with a provisioned capacity. You can try Fabric with a free trial.
- A Fabric workspace assigned to that capacity.
Add a Dataflow activity to a pipeline
To use a Dataflow activity in a pipeline, complete the following steps:
Create the activity
Create a new pipeline in your workspace.
Search for Dataflow in the pipeline Activities pane, and select it to add it to the pipeline canvas.

Select the new Dataflow activity on the canvas if it isn't already selected.

Refer to the General settings guidance to configure the General settings tab.
Note
Timeout and cancellation only apply to Dataflow Gen2 with CI/CD support. For runs for Dataflow Gen2 without CI/CD support, timeouts are ignored and pipeline cancellation won’t stop the dataflow run.
Dataflow activity settings
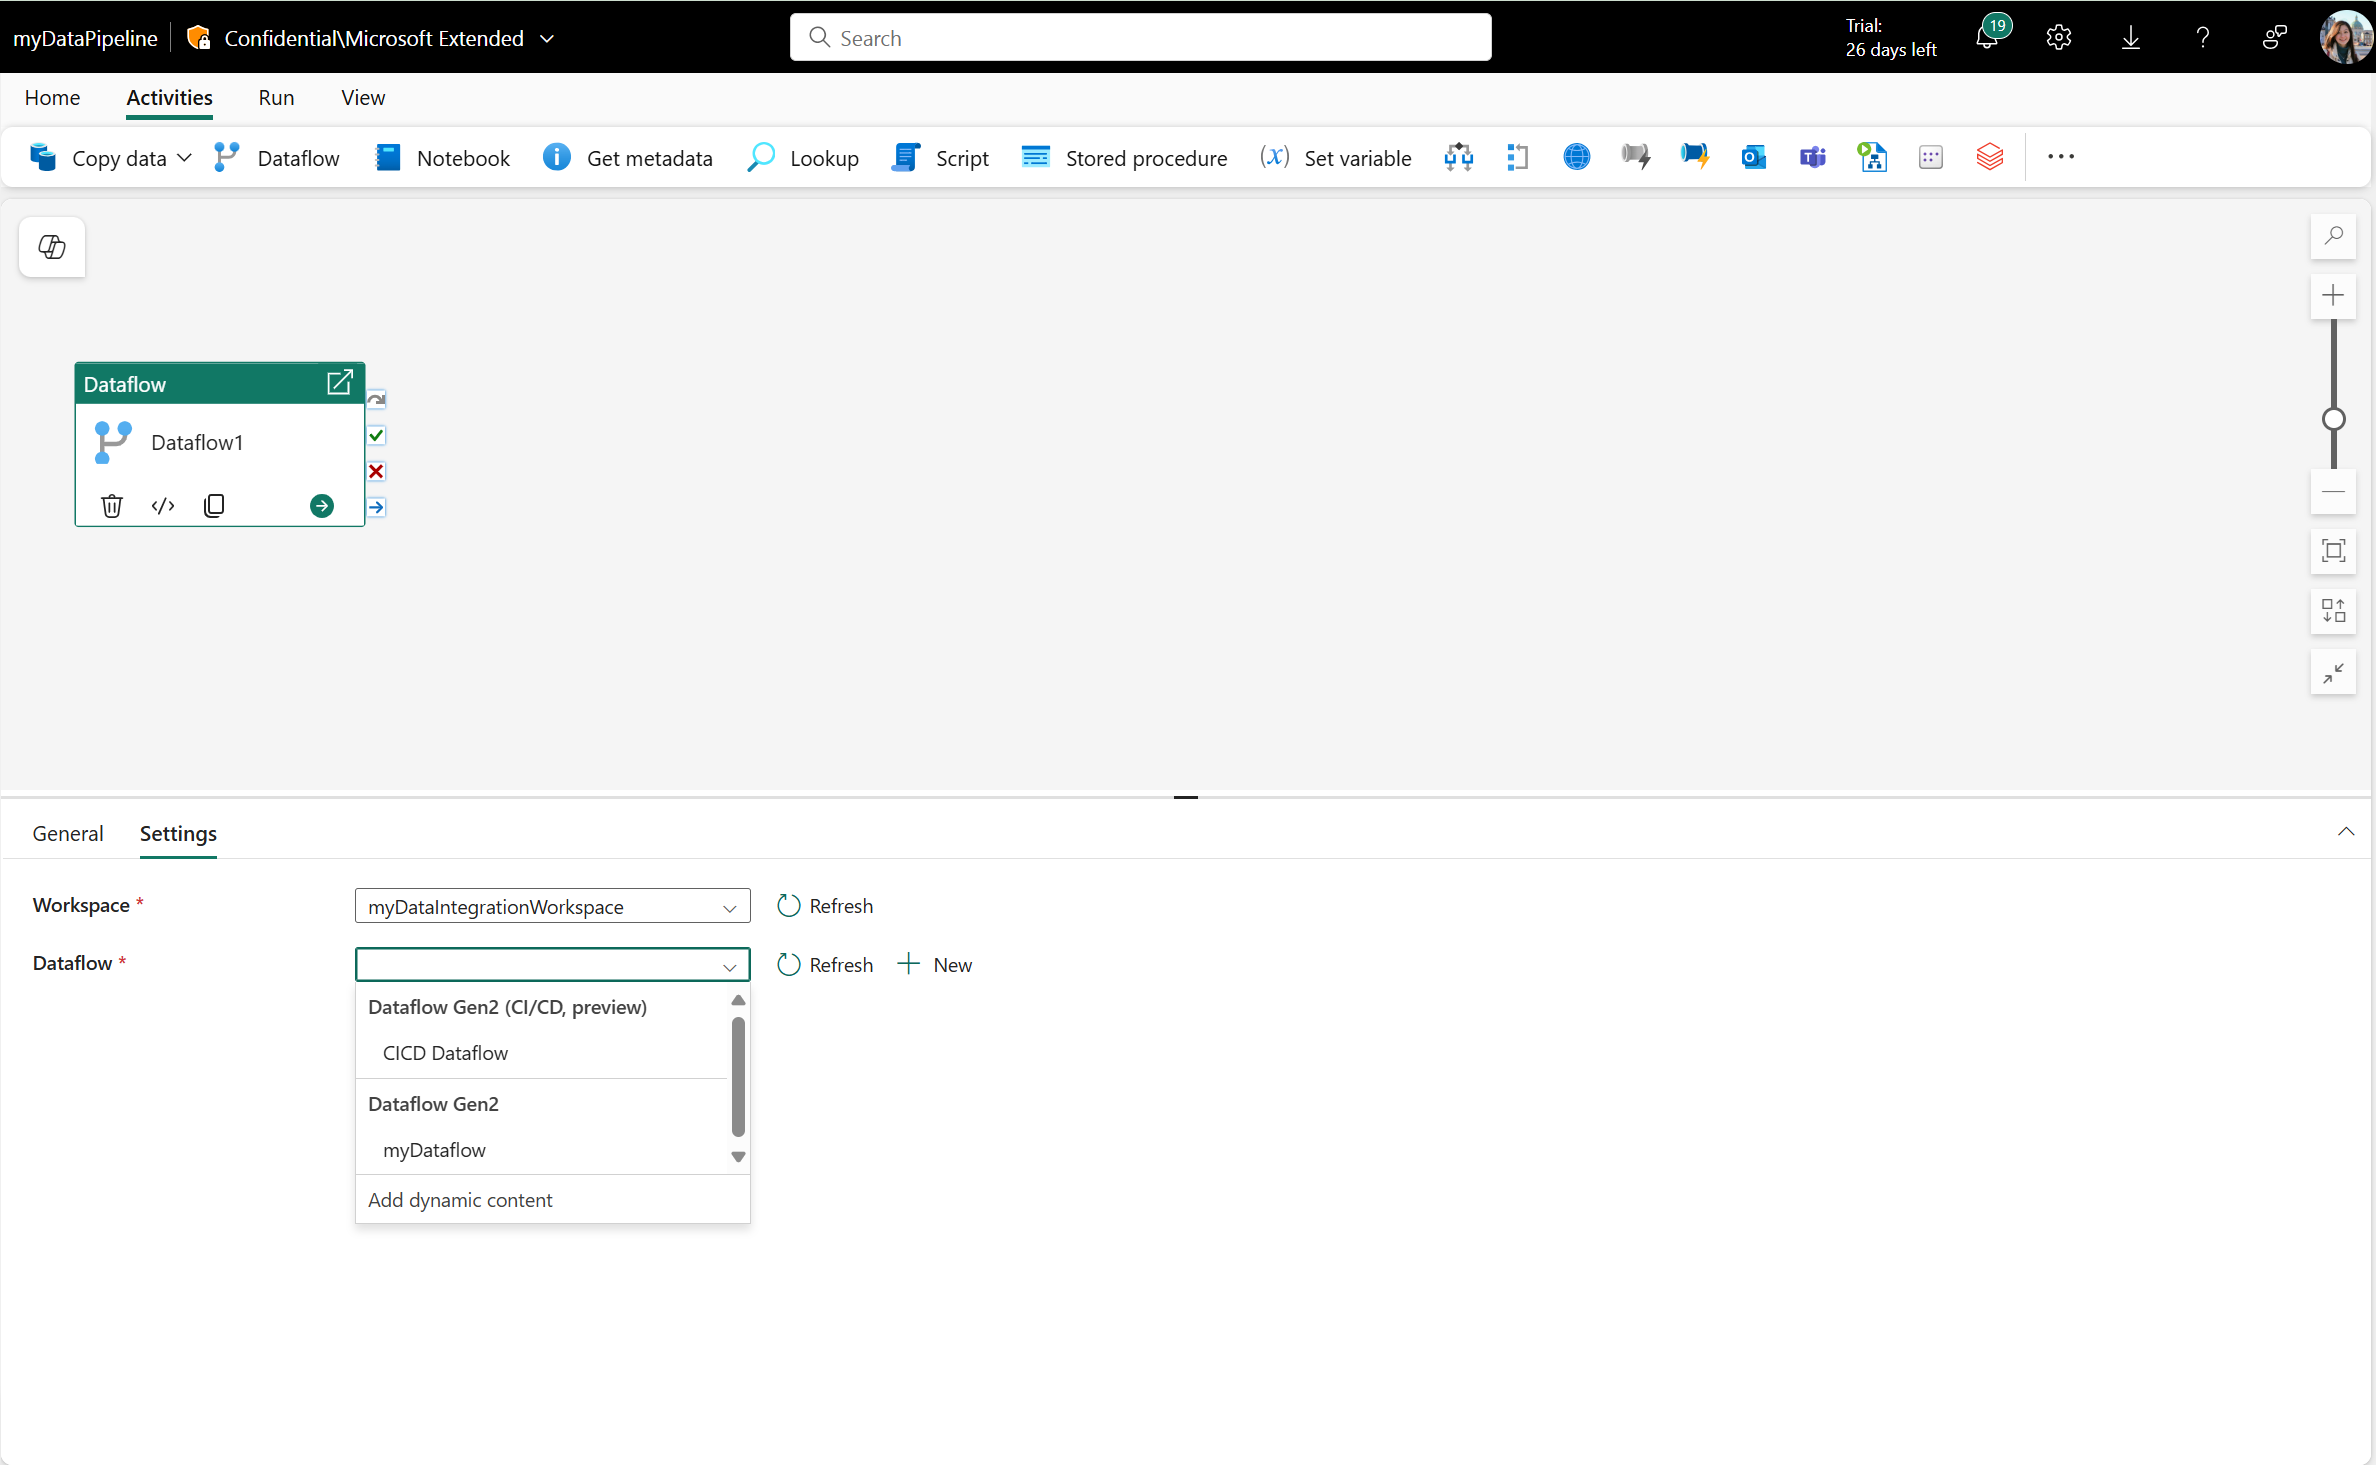
Select the Settings tab, then select an existing workspace and dataflow to run. If you have made a Dataflow Gen2 with CI/CD and Git integration support (Preview), you can also select it from the dropdown.
The notification option isn't currently available.
When selecting a Dataflow Gen2 with CI/CD that has the public parameters mode enabled, a Dataflow parameters section is displayed which lists all the available parameters, their types, and default values for the selected Dataflow.

Required parameters are shown with an asterisk next to their name, whereas optional parameters don't have the asterisk. Furthermore, optional parameters can be selected and deleted from the grid, but required parameters can't be deleted and must be passed for the dataflow to run.
You can select the refresh button to request the latest parameter information from your dataflow.
Inside the Dataflow parameters section you're able to enter the name of the parameter that you wish to pass and the type and value that you wish to pass.
Save and run or schedule the pipeline
Switch to the Home tab at the top of the pipeline editor and select the save button to save your pipeline. Select Run to run it directly or Schedule to schedule runs at specific times or intervals. For more information on pipeline runs, see: schedule pipeline runs.

After running, you can monitor the pipeline execution and view run history from the Output tab below the canvas.
Note
To successfully run a Dataflow Gen2 (CI/CD), users must have:
- Member (or higher) access to the workspace, and
- Access to all connections used by the dataflow
Not meeting these two requirements could result in run failures.
Troubleshooting tips
Caution
Error information showcased in the Dataflow activity could be incomplete or partial. Do not solely rely on the information shown in the Dataflow activity for troubleshooting scenarios.
Tip
Detailed information about a run of a Dataflow can be found in the Recent runs dialog available inside the Dataflow Gen2 (CI/CD) and through the workspace explorer.
When troubleshooting a Dataflow run, it is highly encouraged to start inside the Dataflow Gen2 (CI/CD) recent runs where you are able to download the detailed logs of a particular run. If your Dataflow used an On-Premises Data Gateway, you can also explore the detailed gateway logs found within the machine where your gateway is installed.
You can also request support through the Fabric Community Forum or by raising a dedicated support case where one of our engineers will be able to assist.
Known issues
Caution
When using a Dataflow Gen1 or a Dataflow Gen2 (non CI/CD) in the Dataflow activity, you might experience delays before the refresh operation starts. This issue doesn't affect Dataflow Gen2 (CI/CD). Consider migrating your existing solutions to Dataflow Gen2 (CI/CD) for a more reliable experience.
- Using Service Principal to run a notebook that contains Semantic Link code has functional limitations and supports only a subset of semantic link features. See the supported semantic link functions for details. To use other capabilities, you're recommended to manually authenticate semantic link with a service principal.
- Some customers may not see the Workspace Identity (WI) dropdown, or may see it but be unable to create a connection. This behavior is due to a known issue in one of our underlying platform components. The fix is currently being worked on.