Note
Access to this page requires authorization. You can try signing in or changing directories.
Access to this page requires authorization. You can try changing directories.
In this quickstart, you learn how dataflows and pipelines work together to create a powerful Data Factory solution. You'll clean data with dataflows and move it with pipelines.
Prerequisites
Before you start, you need:
- A tenant account with an active subscription. Create a free account.
- A Microsoft Fabric enabled workspace: Set up a workspace that isn’t the default My Workspace.
- An Azure SQL database with table data.
- A Blob Storage account.
Compare dataflows and pipelines
Dataflow Gen2 provide a low-code interface with 300+ data and AI-based transformations. You can easily clean, prep, and transform data with flexibility. Pipelines offer rich data orchestration capabilities to compose flexible data workflows that meet your enterprise needs.
In a pipeline, you can create logical groupings of activities that perform a task. This might include calling a dataflow to clean and prep your data. While there's some functionality overlap between the two, your choice depends on whether you need the full capabilities of pipelines or can use the simpler capabilities of dataflows. For more information, see the Fabric decision guide.
Transform data with dataflows
Follow these steps to set up your dataflow.
Create a dataflow
Select your Fabric-enabled workspace, then New, and choose Dataflow Gen2.

In the dataflow editor, select Import from SQL Server.


Get data
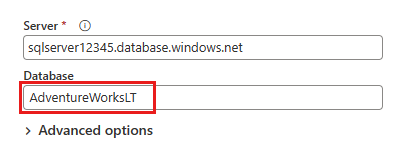
In the Connect to data source dialog, enter your Azure SQL database details and select Next. Use the AdventureWorksLT sample database from the prerequisites.
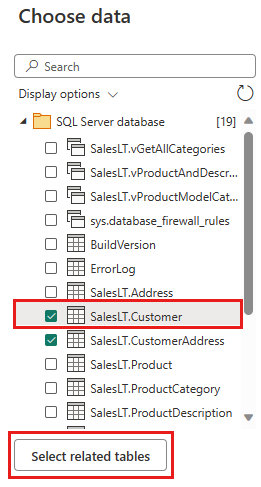
Select the data to transform, such as SalesLT.Customer, and use Select related tables to include related tables. Then select Create.


Transform your data
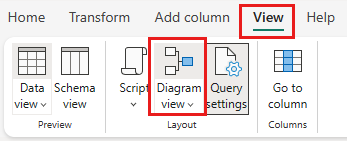
Select Diagram view from the status bar or the View menu in the Power Query editor.
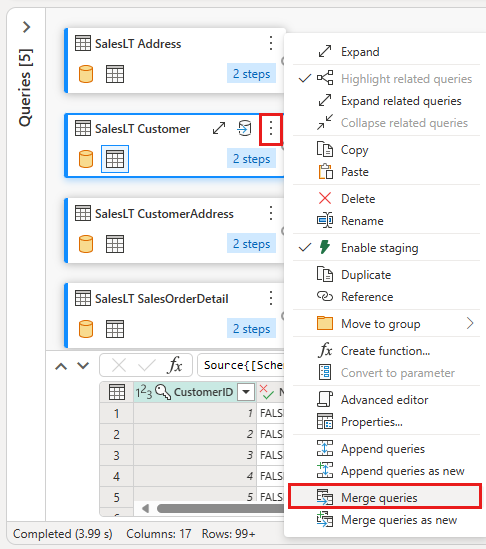
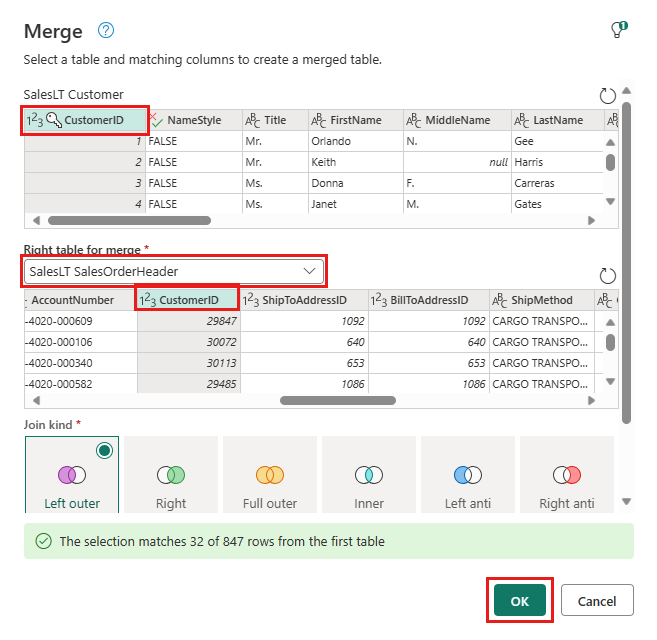
Right-select your SalesLT Customer query, or select the vertical ellipsis on the right of the query, then select Merge queries.
Configure the merge with SalesLTOrderHeader as the right table, CustomerID as the join column, and Left outer as the join type. Select OK.
Add a data destination by selecting the database symbol with an arrow. Choose Azure SQL database as the destination type.
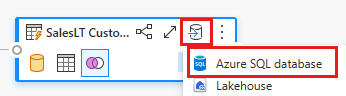
Provide the details for your Azure SQL database connection where the merge query is to be published. In this example, we use the AdventureWorksLT database we used as the data source for the destination too.
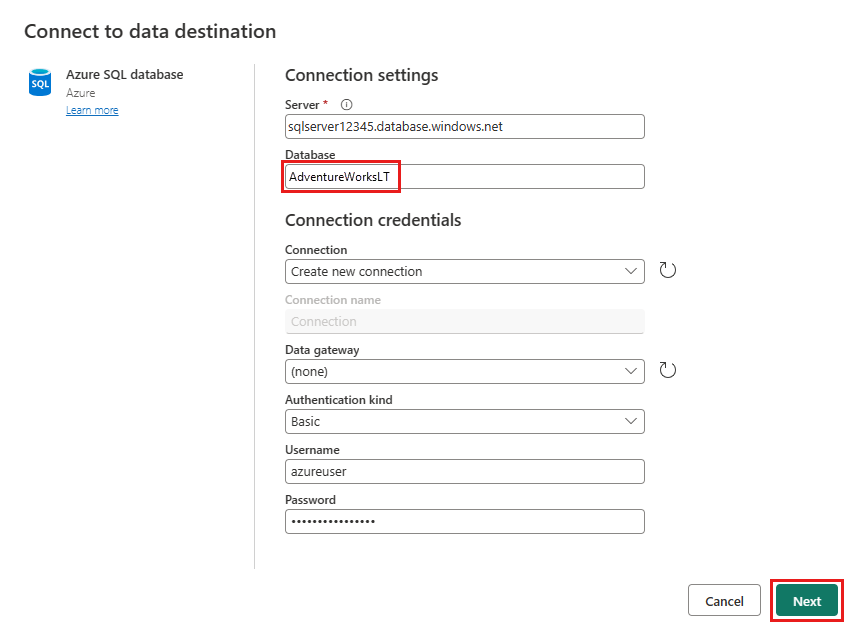
Choose a database to store the data, and provide a table name, then select Next.
Accept the default settings in the Choose destination settings dialog and select Save settings.

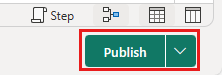
Select Publish in the dataflow editor to publish the dataflow.


Move data with pipelines
Now that you've created a Dataflow Gen2, you can operate on it in a pipeline. In this example, you copy the data generated from the dataflow into text format in an Azure Blob Storage account.
Create a new pipeline
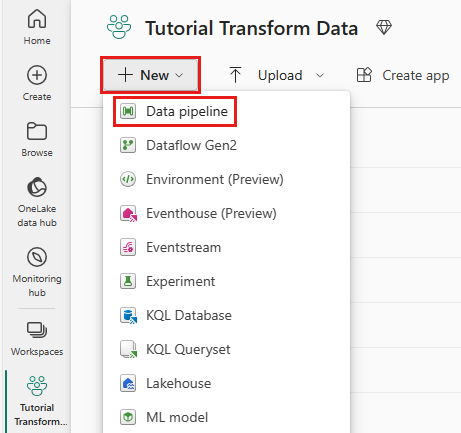
In your workspace, select New, then Pipeline.
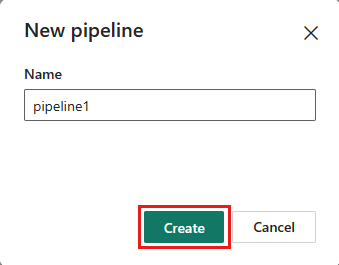
Name your pipeline and select Create.
Configure your dataflow
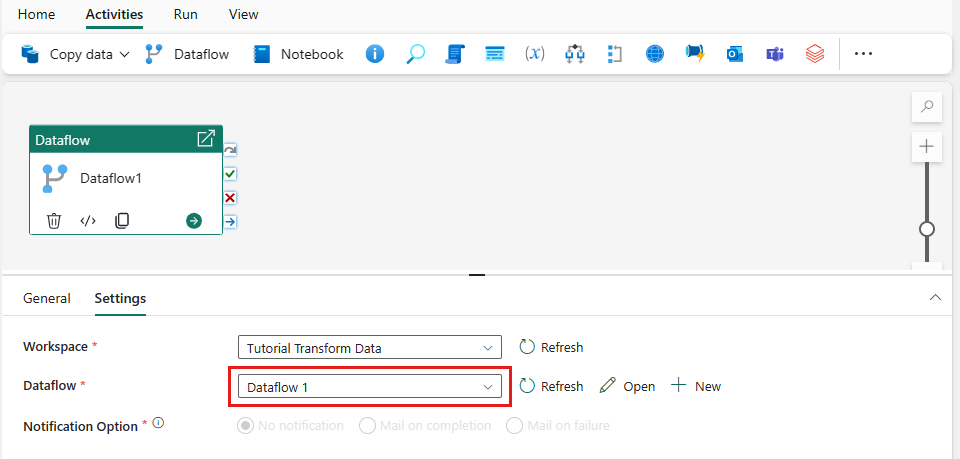
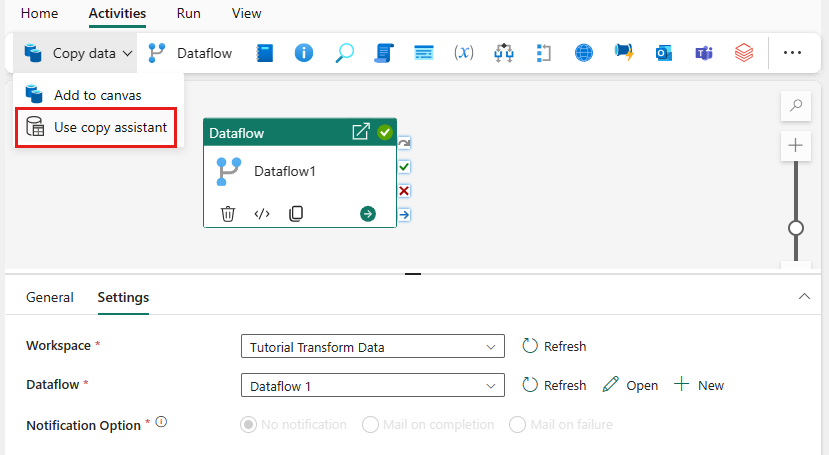
Add a dataflow activity to your pipeline by selecting Dataflow in the Activities tab.

Select the dataflow on the pipeline canvas, go to the Settings tab, and choose the dataflow you created earlier.
Select Save, then Run to populate the merged query table.

Add a copy activity
Select Copy data on the canvas or use the Copy Assistant from the Activities tab.
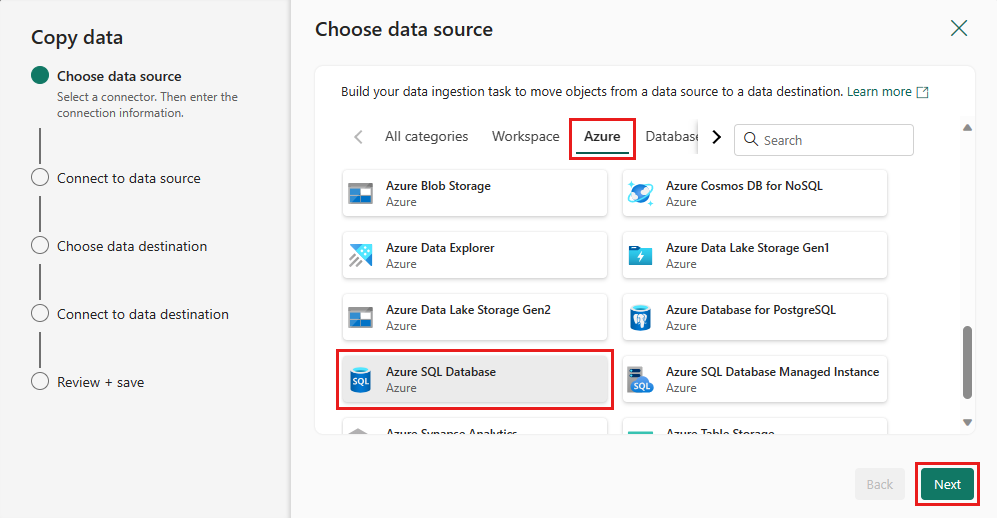
Choose Azure SQL Database as the data source and select Next.
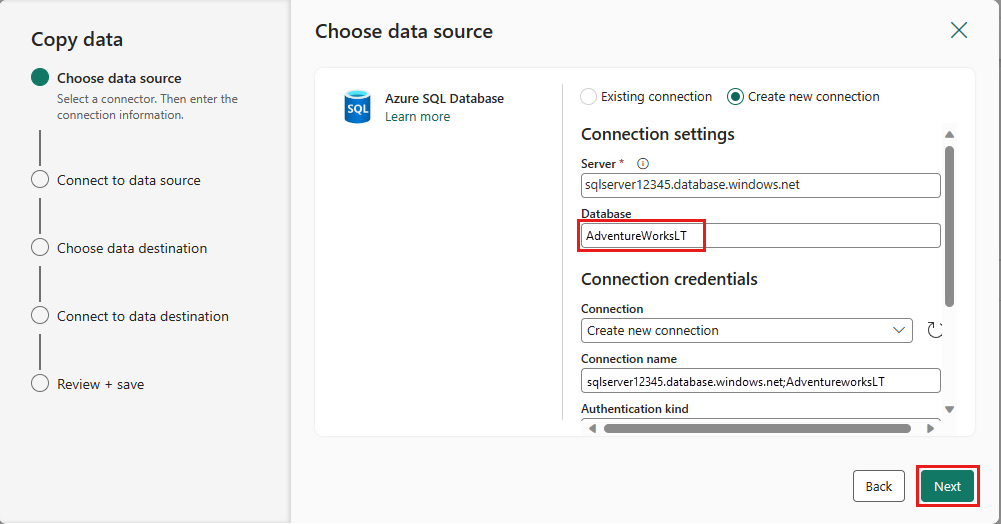
Create a connection to your data source by selecting Create new connection. Fill in the required connection information on the panel, and enter the AdventureWorksLT for the database, where we generated the merge query in the dataflow. Then select Next.
Select the table you generated in the dataflow step earlier, and then select Next.

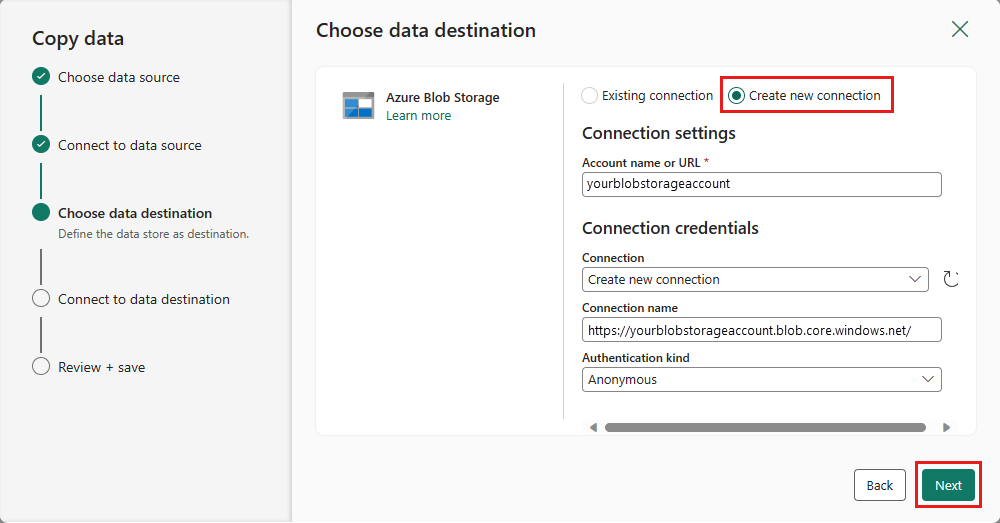
For your destination, choose Azure Blob Storage and then select Next.

Create a connection to your destination by selecting Create new connection. Provide the details for your connection, then select Next.
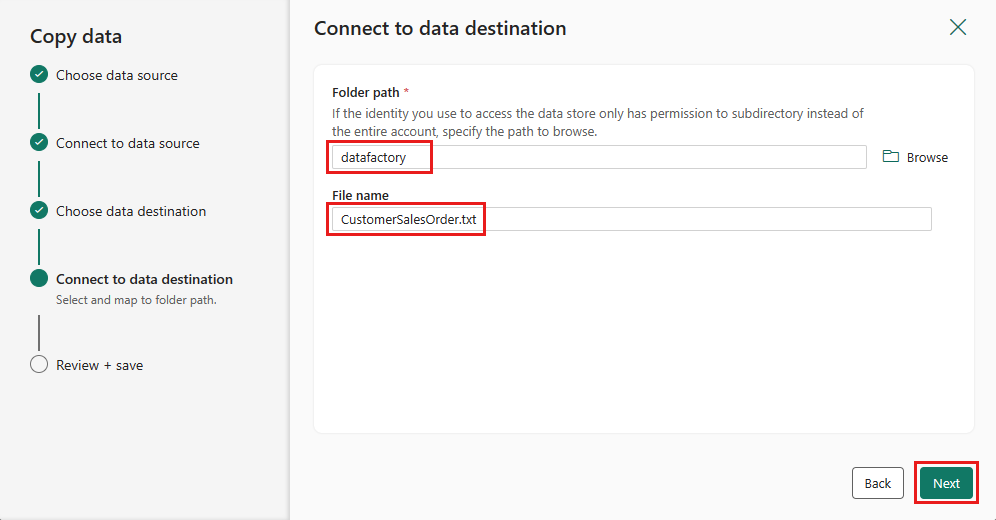
Select your Folder path and provide a File name, then select Next.
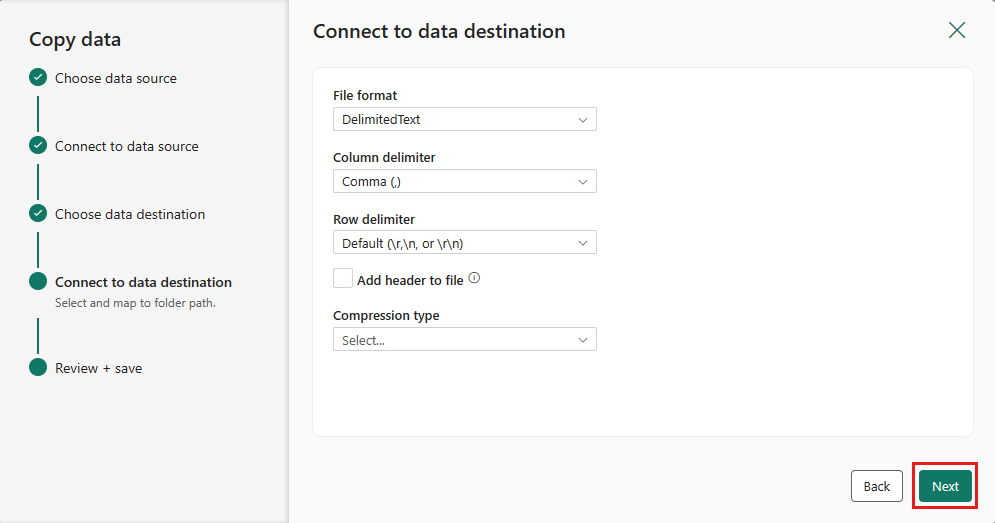
Select Next again to accept the default file format, column delimiter, row delimiter, and compression type, optionally including a header.
Finalize your settings. Then, review and select Save + Run to finish the process.

Design your pipeline and save to run and load data
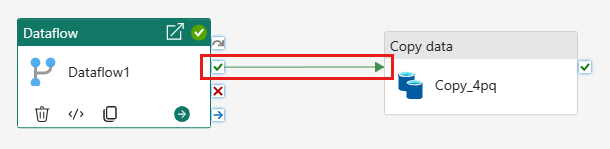
To run the Copy activity after the Dataflow activity, drag from Succeeded on the Dataflow activity to the Copy activity. The Copy activity only runs after the Dataflow activity succeeds.
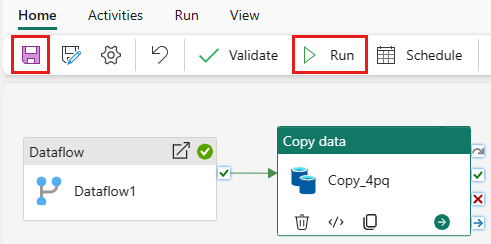
Select Save to save your pipeline. Then select Run to run your pipeline and load your data.
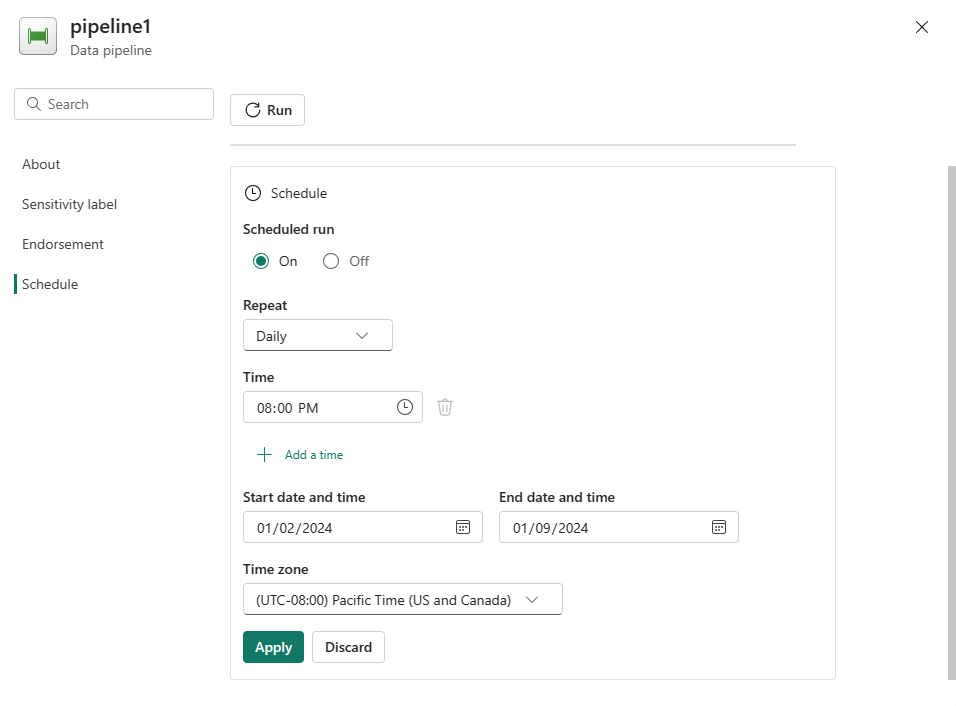
Schedule pipeline execution
Once you finish developing and testing your pipeline, you can schedule it to run automatically.
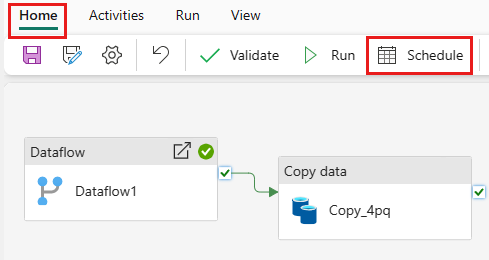
On the Home tab of the pipeline editor window, select Schedule.
Configure the schedule as required. The example here schedules the pipeline to run daily at 8:00 PM until the end of the year.
Related content
This sample shows you how to create and configure a Dataflow Gen2 to create a merge query and store it in an Azure SQL database, then copy data from the database into a text file in Azure Blob Storage. You learned how to:
- Create a dataflow.
- Transform data with the dataflow.
- Create a pipeline using the dataflow.
- Order the execution of steps in the pipeline.
- Copy data with the Copy Assistant.
- Run and schedule your pipeline.
Next, advance to learn more about monitoring your pipeline runs.