Note
Access to this page requires authorization. You can try signing in or changing directories.
Access to this page requires authorization. You can try changing directories.
The Until activity provides the same functionality that a do-until looping structure provides in programming languages. It executes a set of activities in a loop until the condition associated with the activity evaluates to true. If an inner activity fails, the Until activity doesn't stop. You can specify a timeout value for the until activity.
Prerequisites
To get started, you must complete the following prerequisites:
- A tenant account with an active subscription. Create an account for free.
- A workspace is created.
Add an Until activity to a pipeline with UI
To use an Until activity in a pipeline, complete the following steps:
Create the activity
Create a new pipeline in your workspace.
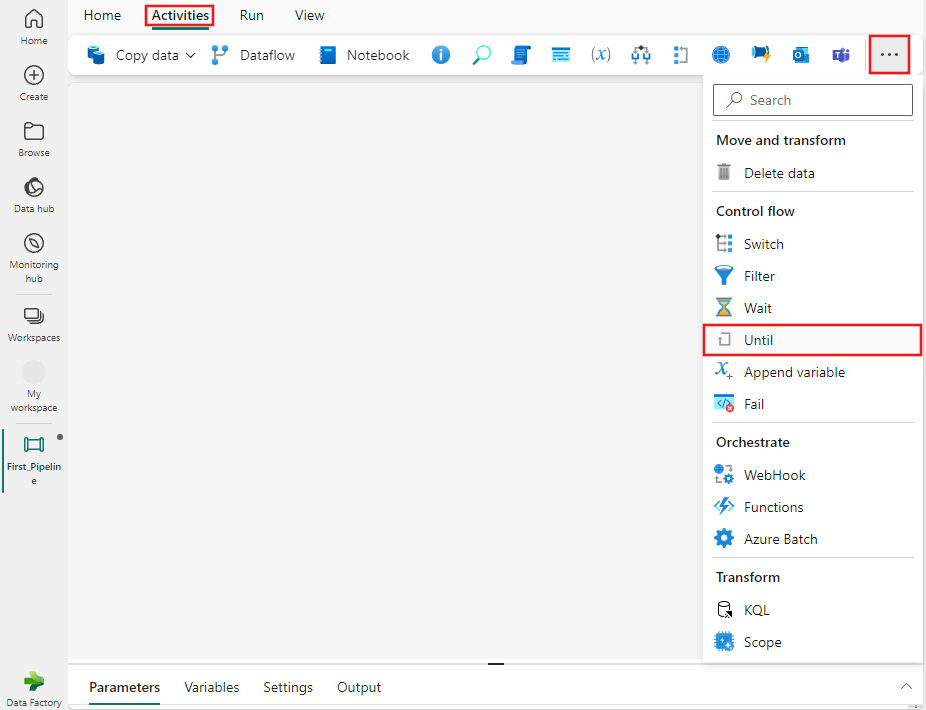
Search for Until in the pipeline Activities pane, and select it to add it to the pipeline canvas.
Select the new Until activity on the canvas if it isn't already selected.
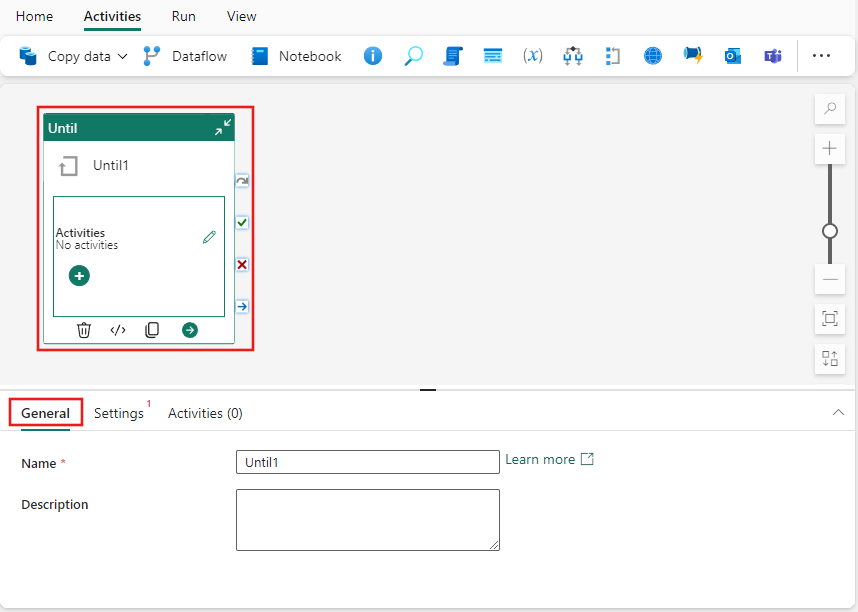
Refer to the General settings guidance to configure the General settings tab.
Add a pipeline variable
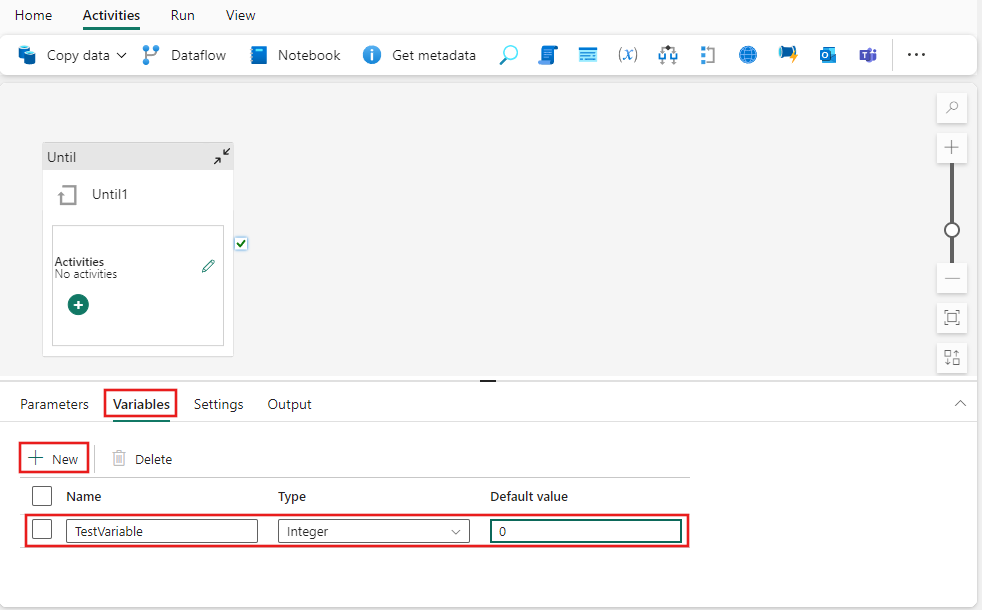
In this simple example, we test the value of a pipeline variable. Select the background of the pipeline editor canvas, then select the Variables tab, and add a new integer type variable called TestVariable with the value 0.
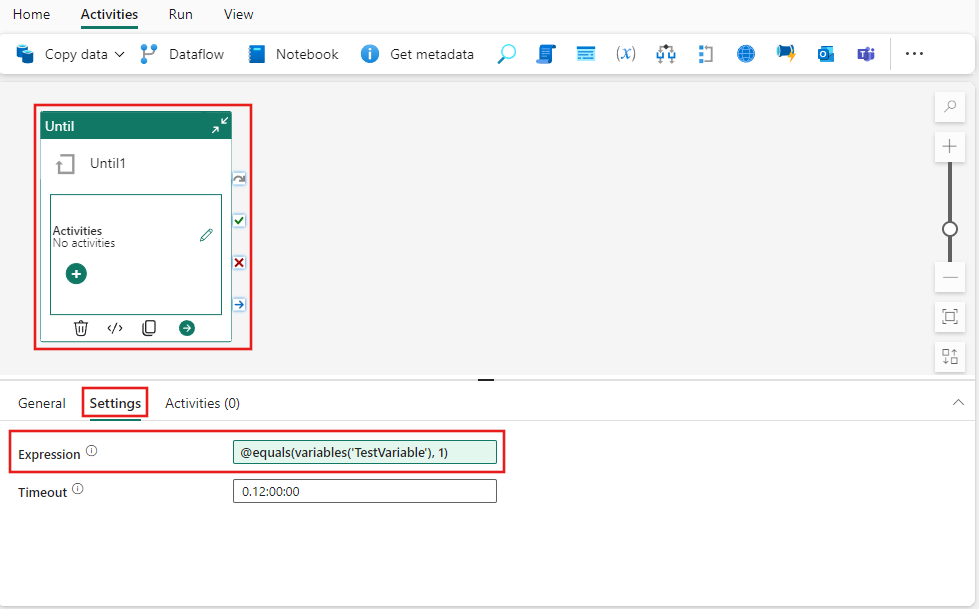
Until activity settings
Select the Until activity again on the pipeline canvas, and then select the Settings tab. Select the Expression field, and then select Add dynamic content, and provide the following expression: @equals(variables('TestVariable'), 1).
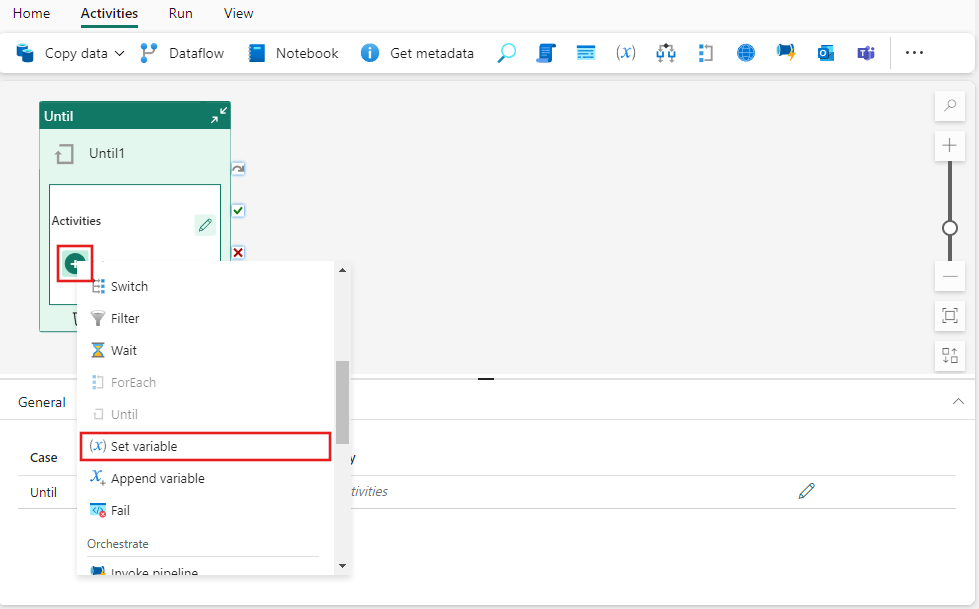
Select the Activities tab and then select the pencil icon to edit/add activities to the Until activity, or select the + icon on the Until activity on the pipeline editor canvas. Find the Set Variable activity and select it to add it to the list of child activities for the Until activity.
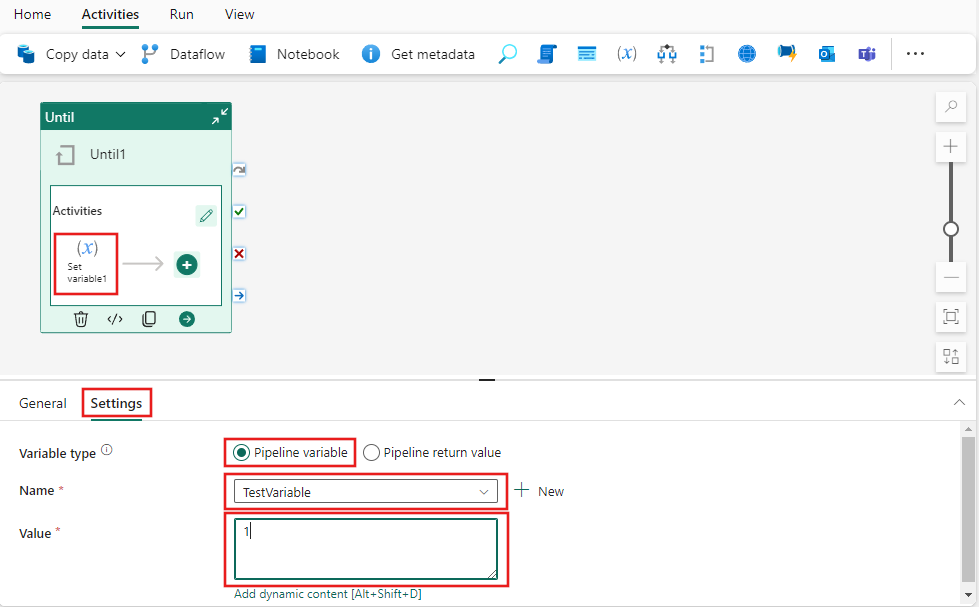
Select the newly added Set Variable activity from where it appears within the Until activity's Activities pane on the pipeline editor canvas, and then select its Settings tab from the activity properties pane. For Variable type, select Pipeline variable, and then choose your previously created TestVariable from the dropdown list. For this example, provide a Value of 1.
Save and run or schedule the pipeline
Switch to the Home tab at the top of the pipeline editor, and select the save button to save your pipeline. Select Run to run it directly, or Schedule to schedule it. You can also view the run history here or configure other settings. This simple pipeline will execute the child activity of the Until activity exactly 1 time, changing the pipeline variable value from 0 to 1, after which the Until expression evaluates to true and terminate.
