Note
Access to this page requires authorization. You can try signing in or changing directories.
Access to this page requires authorization. You can try changing directories.
This article describes how to work with tasks. The target audience is data analytics solution architects who are designing a data analytics solution, engineers who need to know how to use task flows to facilitate their work, and others who want to use the task flow to filter the item list to help navigate and understand the workspace.
Prerequisites
To create or edit the task flow, and to create items in the workspace via the task flow, you need to be an Admin, Member, or Contributor in the workspace.
Admins, Members, Contributors, and Viewers can use the task flow to filter the items list.
Task controls
Much of the work with tasks is accomplished either in the task details pane or via controls on the task card or on the task flow canvas.
Select a task to display the task details pane. The following image shows the main controls for working with tasks.
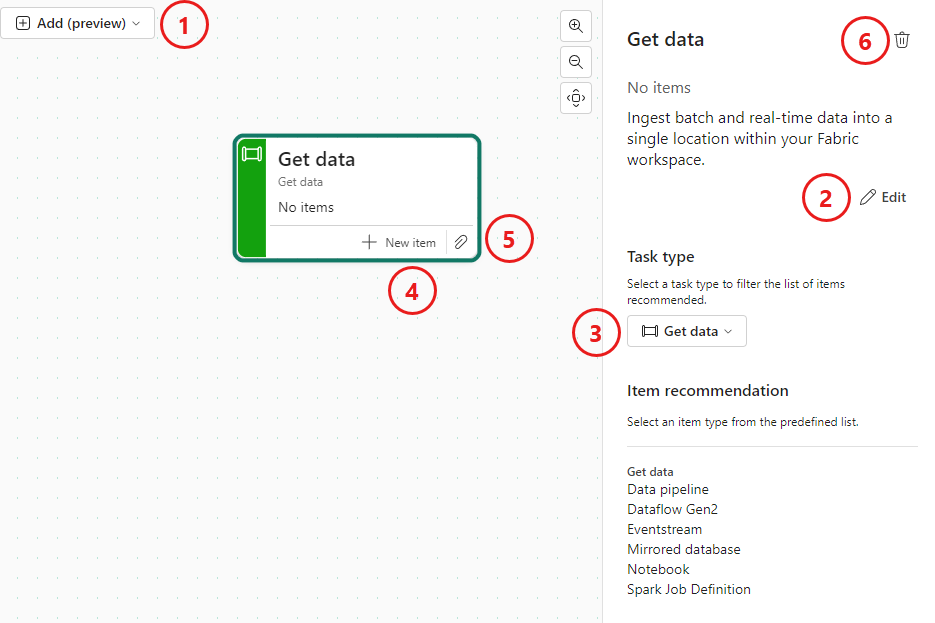
- Add task or connector
- Edit task name and description
- Change task type
- Create new item for task
- Assign existing items to task
- Delete task
Resize or hide the task flow
You can resize the task flow, or even hide it, according to your personal needs and preferences. Fabric remembers task flow resize and show/hide choices per user and per workspace, so each time you return to a workspace, the task flow size and show/hide status will be the same as it was the last time you left the workspace.
To resize the task flow, drag the resize bar on the horizontal separator up or down.
To show/hide the task flow, select the show/hide control at the right side of the separator.

Add a task
To add a new task to the task flow canvas, open the Add dropdown menu and select the desired task type.

The task of the selected task type is added onto the canvas. The name and description of the new task are the default name and description of the task type. Consider changing the name and description of the new task to better describe its purpose in the work flow. A good task name should identify the task and provide a clear indication of its intended use.
Edit task name and description
To edit a task's name or description:
Select the task on the canvas to open the task details pane.
Select Edit and change the name and description fields as desired. When done, select Save.
Change task type
To change a task to a different type:
Select the task on the canvas to open the task details pane.
Open the Task type dropdown menu and choose the new desired task type.
Note
Changing the task type doesn't change the task name or description. Consider changing these fields to suit the new task type.
Arrange tasks on the canvas
Part of building a task flow is arranging the tasks in the proper order. To arrange the tasks, select and drag each task to the desired position in the task flow.
Tip
When you move tasks around on the canvas, they stay in the place where you put them. However, due to a known issue, when you add a new task to the canvas, any unconnected tasks will move back to their default positions. Therefore, to safeguard your arrangement of tasks, it's highly recommended to connect them all with connectors before adding any new tasks to the canvas.
Connect tasks
Connectors show the logical flow of work. They don't make or indicate any actual data connections - they are graphic representations of the flow of tasks only.
Add a connector
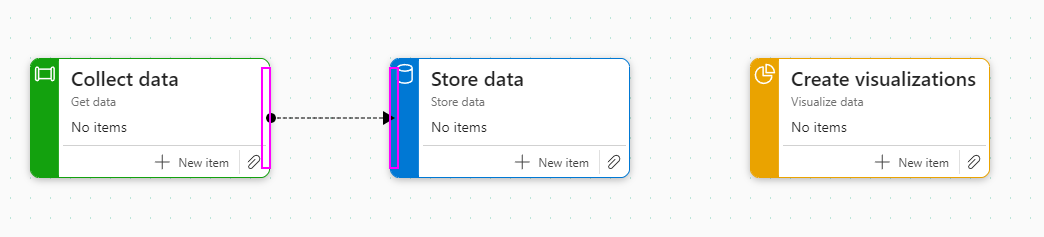
To connect two tasks, select the edge of the starting task and drag to an edge of the next task.
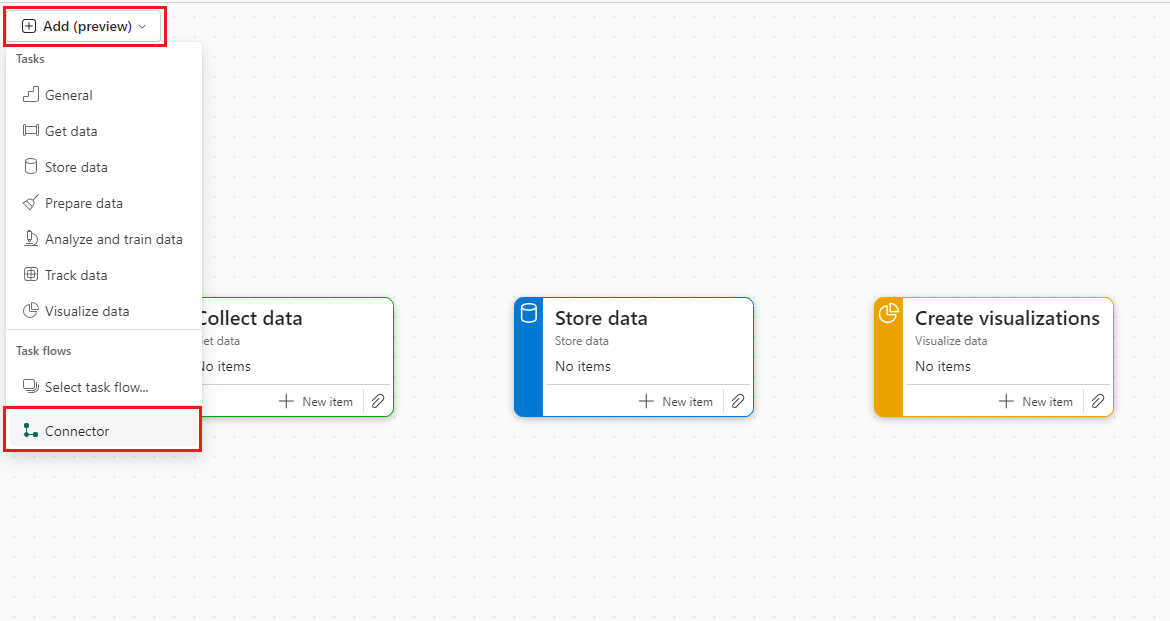
Alternatively, you can select Add > Connector from the Add dropdown on the canvas.
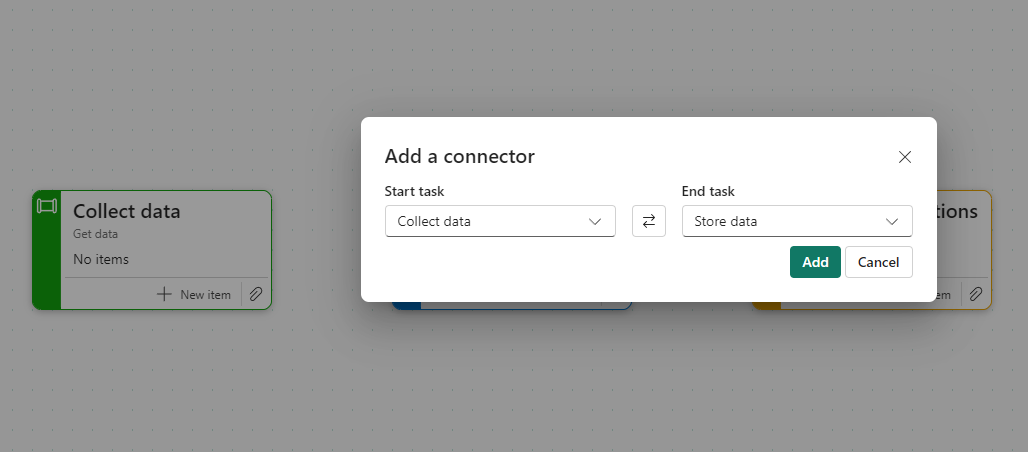
Then, in the Add connector dialog, select the start and end tasks, then select Add.
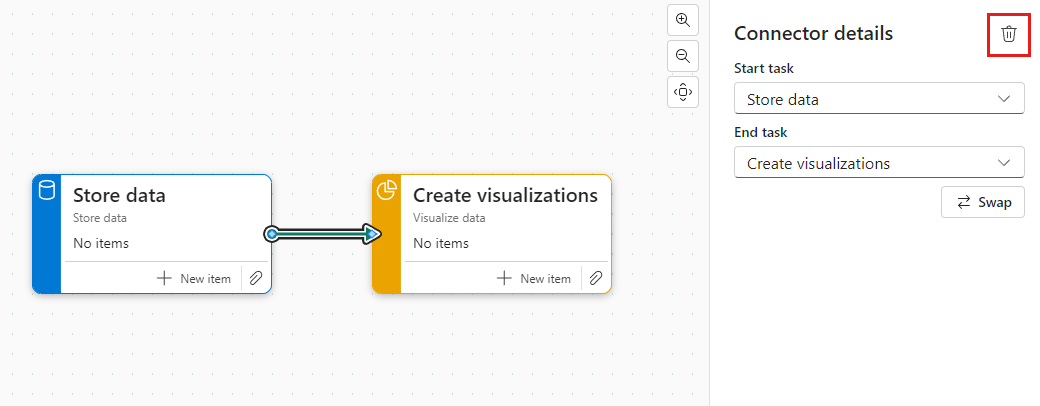
Delete a connector
To delete a connector, select it and press Enter.
Alternatively, select the connector to open the connector details pane, then select the trash can icon.
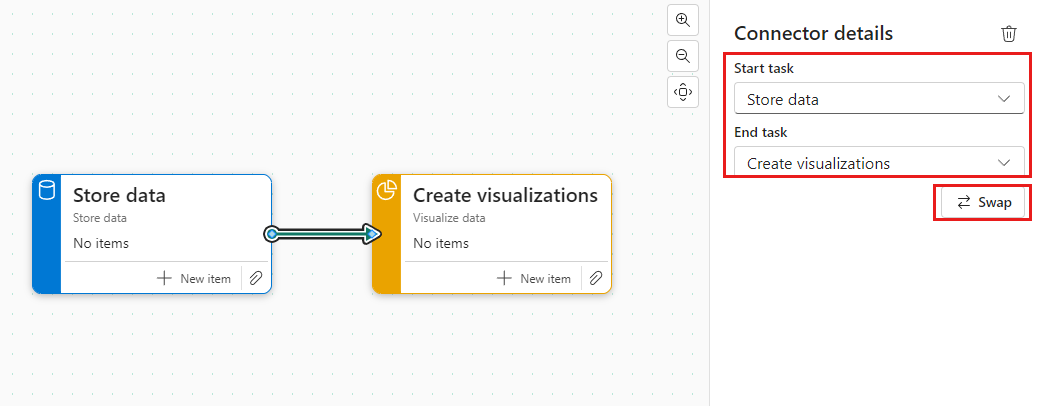
Change connector start and end points or direction
To change a connector's start and end values, or switch its direction:
Select the connector to open the connector details pane.
In the details pane, change the start and end values as desired, or select Swap to change connector direction.
Assign items to a task
Once a task has been placed on the canvas, you can assign items to it to help structure and organize your work. You can create new items to be assign to the task, or you can assign items that already exist in the workspace.
Note
An item can only be assigned to a single task. It can't be assigned to multiple tasks.
Create a new item for a task
To create a new item for a specific task:
Select + New item on the task.
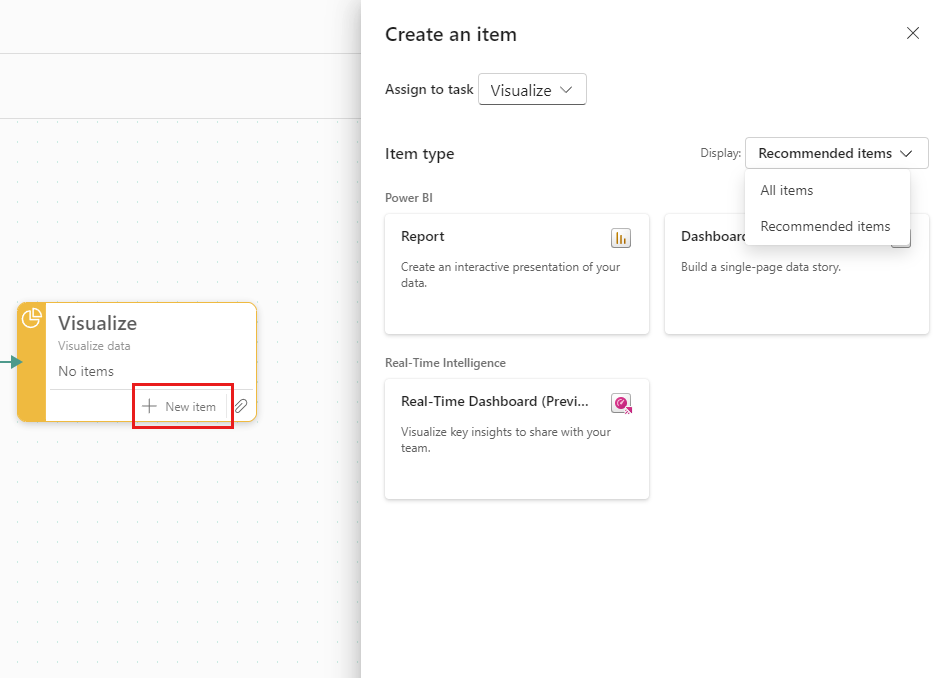
On the Create an item pane that opens, the recommended item types for the task are displayed by default. Choose one of the recommended types.
If you don't see the item type you want, change the Display selector from Recommended items to All items, and then choose the item type you want.
Note
When you first save a new report, you'll be given the opportunity to assign it to any task that exists in the workspace.
Assign existing items to a task
To assign existing items to a task:
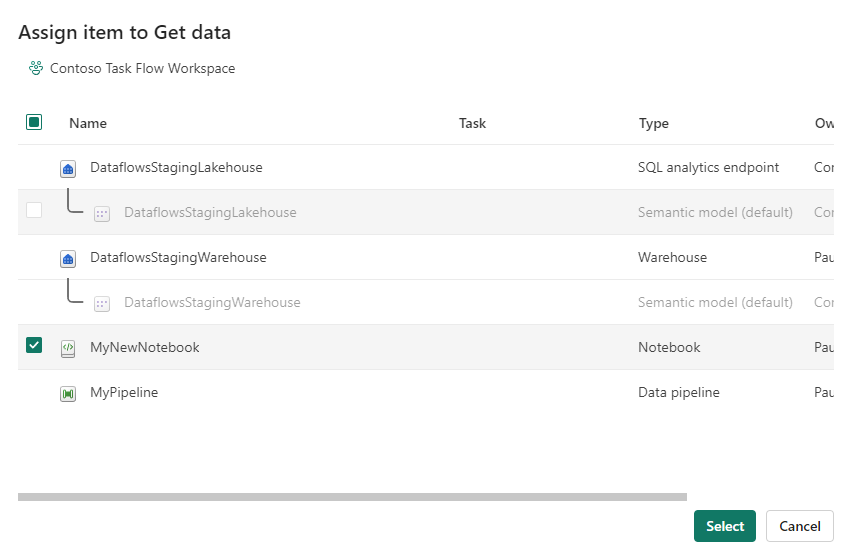
Select the clip icon on the task.
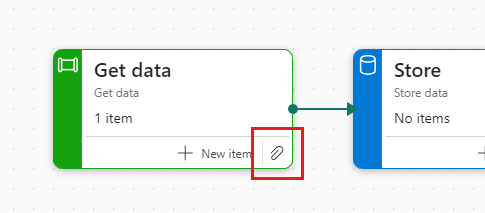
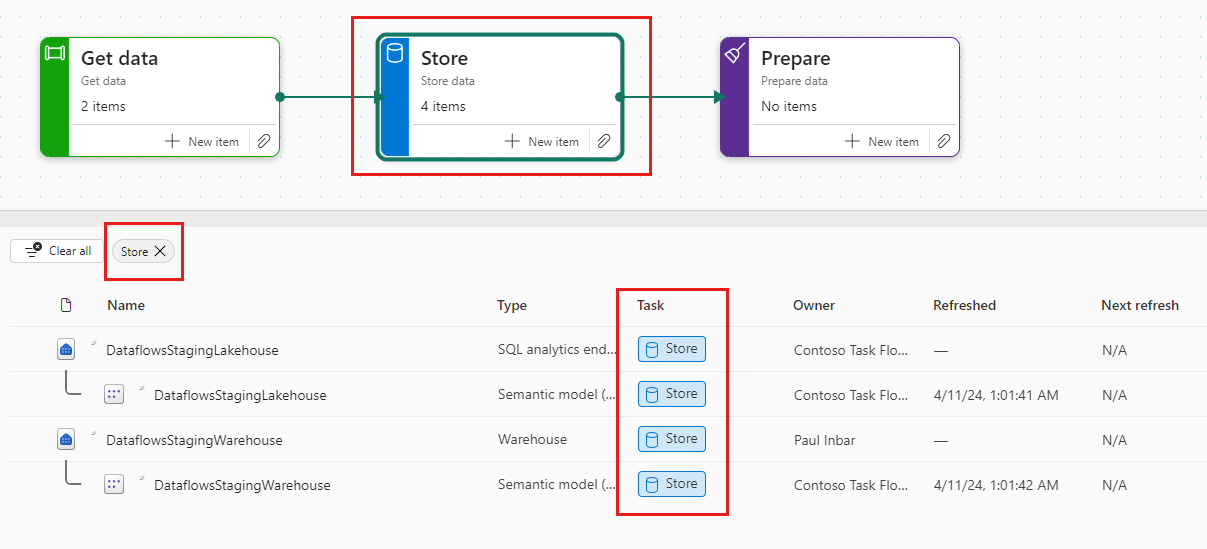
In the Assign item dialog box that opens, hover over item you want to assign to the task and mark the checkbox. You can assign more than one item. When you're done choosing the items you want to assign to the task, choose Select to assign the selected items to the task.
The items you selected items are assigned to the task. In the item list, task assignments are shown in the Task column.
Unassign items from tasks
You can unassign items from a selected task or from multiple tasks.
Note
Unassigning items from tasks does not remove the items from the workspace.
Unassign items from a task
To unassign items from a task:
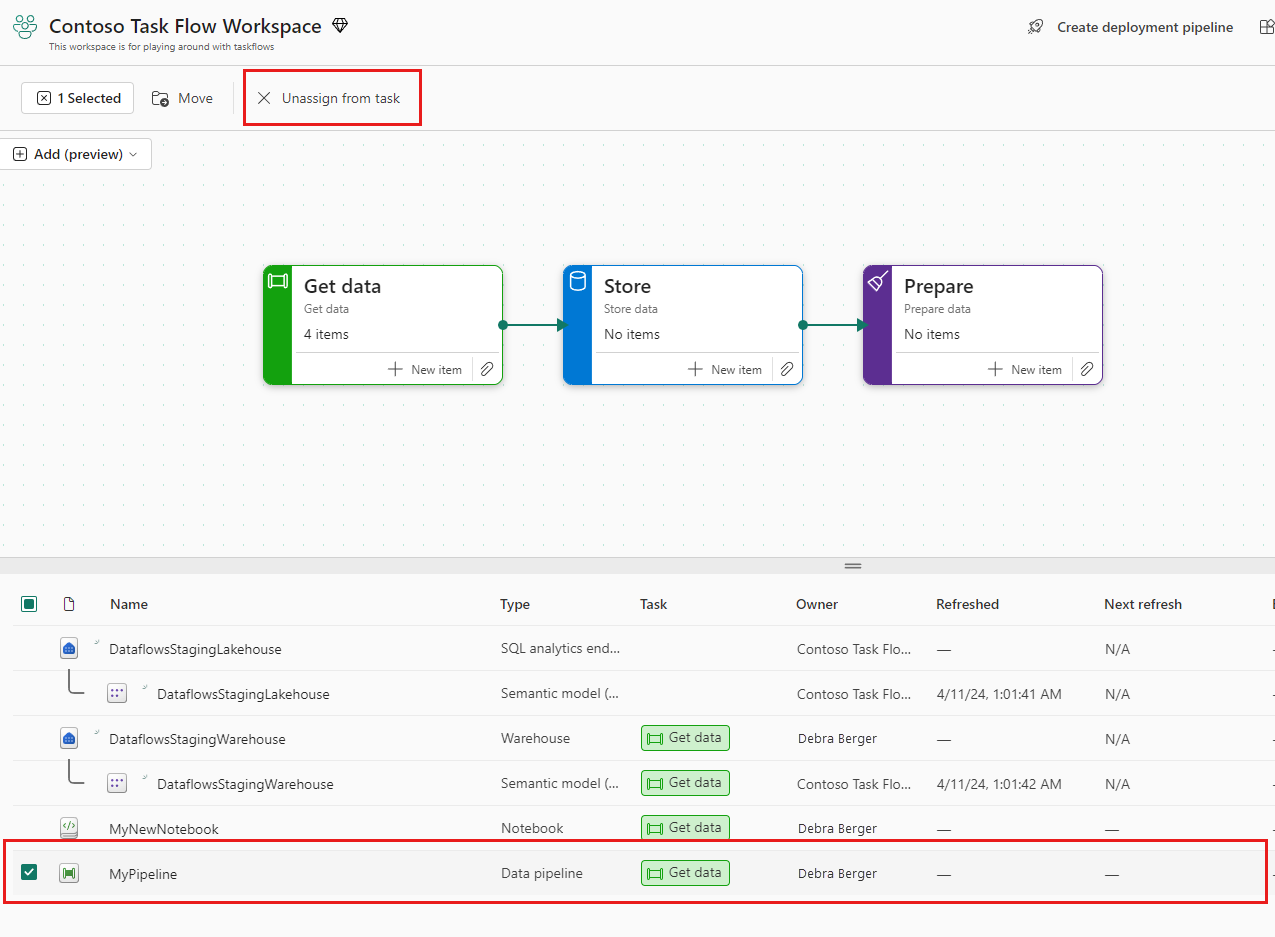
Select the task you want to unassign the items from. This filters the item list to show just the items that are assigned to the task.
In the item list, hover over the items you want to unassign and mark the checkboxes that appear.
On the workspace toolbar, choose Unassign from task (or Unassign from all tasks, if you've selected multiple items).
Unassign items from multiple tasks
To unassign items from multiple tasks:
Select Clear all at the top of the items list to clear all filters so that you can see all the items in the workspace. Note that items that are assigned to tasks list the task name in the Task column.
Hover over the items you want to unassign and mark the checkboxes.
When you've finished making your selections, select Unassign from all tasks in the workspace toolbar.

Delete a task
To delete a task:
Select the task to open the task details pane.
Select the trash can icon.
Alternatively,
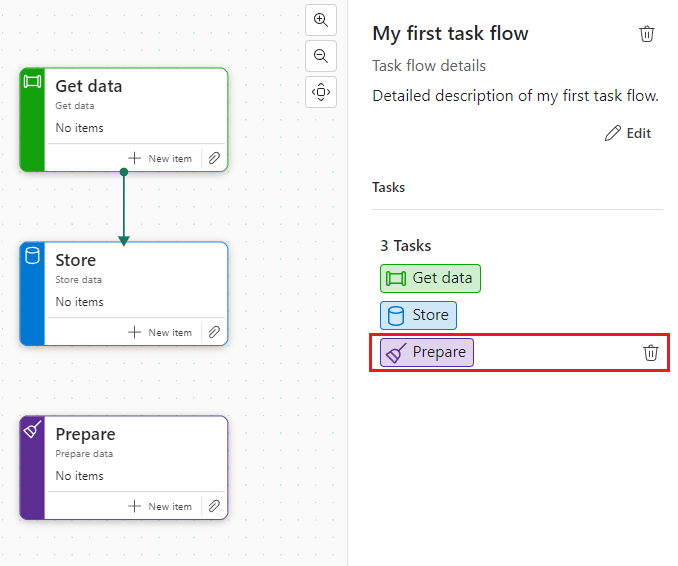
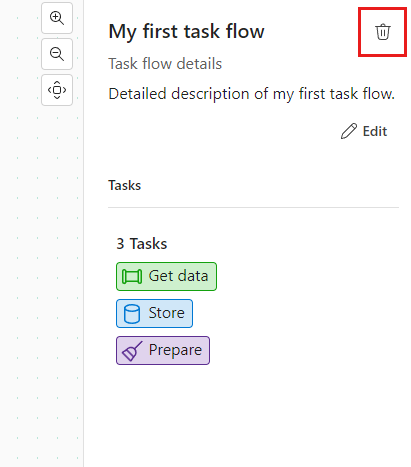
Select the task flow canvas to open the task flow details pane.
In the task flow details pane, hover over the task you want to delete in the Tasks list and select the trash can icon.
Note
Deleting a task doesn't delete the items assigned to it. They remain in the workspace.
Navigate items with the task flow
With items assigned to tasks in a task flow, you can use the task flow to quickly understand how the items in the workspace work together, and get a clear picture of your work in the workspace.
For each item that you see in the items list, you can see the item type and what task it's assigned to, if any.
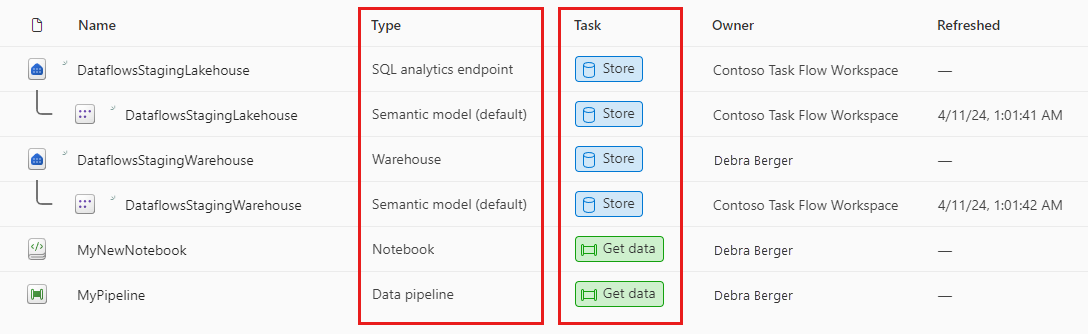
When you select a task, the items list is filtered to show only the items that are assigned to that task.
Select a new predefined task flow
At any point, you can choose to apply one of the predefined task flows to the canvas.
To select one of the predefined task flows:
Open the Add dropdown on the canvas and choose Select task flow. The predefined task flows pane will open.
Choose one of the predefined task flows and the select Select. If there already is a task flow on the canvas, you'll be asked whether to overwrite the current task flow or to append the predefined task flow to the current task flow.
Edit task flow details
To edit the task flow name or description:
Open the task flow details pane by selecting the task flow canvas.
Select Edit and change the name and description fields as desired. When done, select Save.
Note
A good task flow name and description should help others understand the intended purpose and use of the task flow.
Delete a task flow
To delete a task flow:
Select a blank area of the canvas to display the task flow details pane.
Select the trash icon to delete the task flow.
Deleting a task flow removes all tasks, the task list, and any item assignments, and resets the task flow to its original default empty state.
Note
Items that were assigned to tasks in the deleted task flow remain in the workspace. When you create a new task flow, you need to assign them to the tasks in the new flow.
Import or export a task flow
If you have a task flow that you'd like to reuse, you can export it from the workspace it's in and import it into other workspaces where you'd like to use it.
The task flow is exported as a .json file that you save to a location of your choice. The .json file preserves the structure and flow of the task flow, and includes:
- The task flow name and description.
- The tasks, along with their names and descriptions.
- The connectors between the tasks.
The .json file doesn't include item associations. When you import a task flow into a workspace, you have to create the item associations there.
After you've imported the task flow into a new workspace, modify it to suit your needs as described in this article. Make sure the task flow name and description suit the task flow in its new context, and adjust if necessary.
To import or export a task flow select the Import and export task flow icon in the task flow details pane and choose the relevant option.
