Note
Access to this page requires authorization. You can try signing in or changing directories.
Access to this page requires authorization. You can try changing directories.
This part of the tutorial provides an end-to-end walkthrough of building an asset management app using PowerTable inside Fabric Plan.
Move your IT asset data out of spreadsheets and into PowerTable, a governed data app in Fabric planning.
Business context
In this tutorial, you move the Northwind FMCG's IT asset data out of spreadsheets and into a governed data app on Microsoft Fabric. You create the database, build a PowerTable sheet for each table, format and connect the columns, and then keep the data relevant by using appropriate insertions and updates.
Work through the parts in order:
Get started with PowerTable: Import Northwind FMCG’s IT assets data from Excel sheets where you currently track it, into a Fabric SQL Database by using PowerTable. Then, set up the PowerTable sheet connecting to the assets table and format it so you can maintain it by using PowerTable going forward. Keep the data relevant by updating or inserting data to it.
Setting up approvals, access control, and automations: Enhance Northwind’s assets PowerTable sheet by setting up approval workflows to govern changes being made in data. Also, set up access controls to restrict who can make changes to the data. Finally, set up automations to enable one-click operations for asset retirement.
Sample dataset
This tutorial uses the Northwind FMCG asset dataset. Download it here: Northwind FMCG assets dataset
The dataset includes one central table and two reference tables that it looks up against:
- Assets: Hardware records covering classification, make and model, serial number, custody, status, purchase price, and lifecycle dates. This dataset also contains columns to identify who an asset is assigned to, and the current location of the asset.
- Employees: Employee staff records, looked up by the Assigned To column to display a full name instead of an ID.
- Locations: Location site records, looked up by the Location column to display a site name instead of an ID.
Getting started with PowerTable
Northwind FMCG needs an asset management data app. It currently tracks its asset data in spreadsheets. Move that data to a database and manage it in a data app on Microsoft Fabric by using Fabric Plan. This exercise takes 30 to 45 minutes to complete.
Create and connect the Fabric Plan item
Create the Fabric SQL database that the PowerTable app uses for data management, and create the Fabric Plan item that holds the PowerTable app.
Create a new Fabric SQL database
Create the database that stores the asset data.
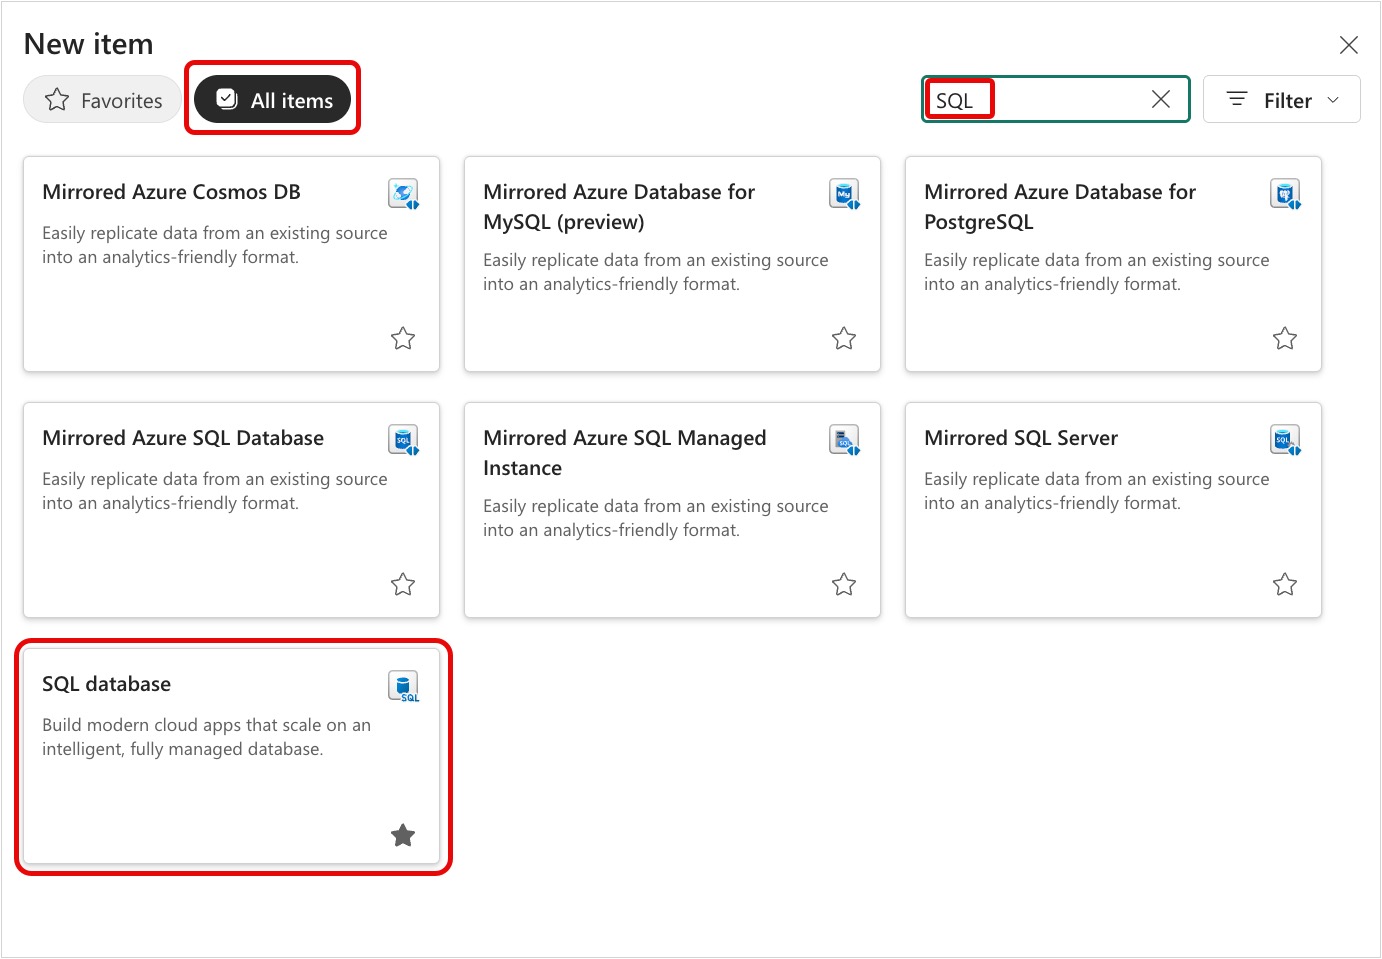
Go to the training workspace and select New item.

In the New item side panel, select All items, search for SQL in the Filter by keyword search box, and select SQL database. This database is where you import the data.
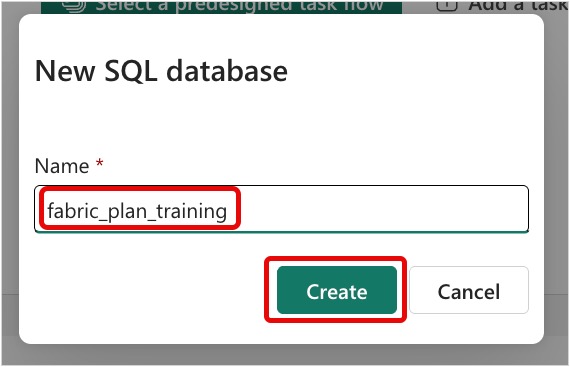
Enter fabric_plan_training for Name and select Create.
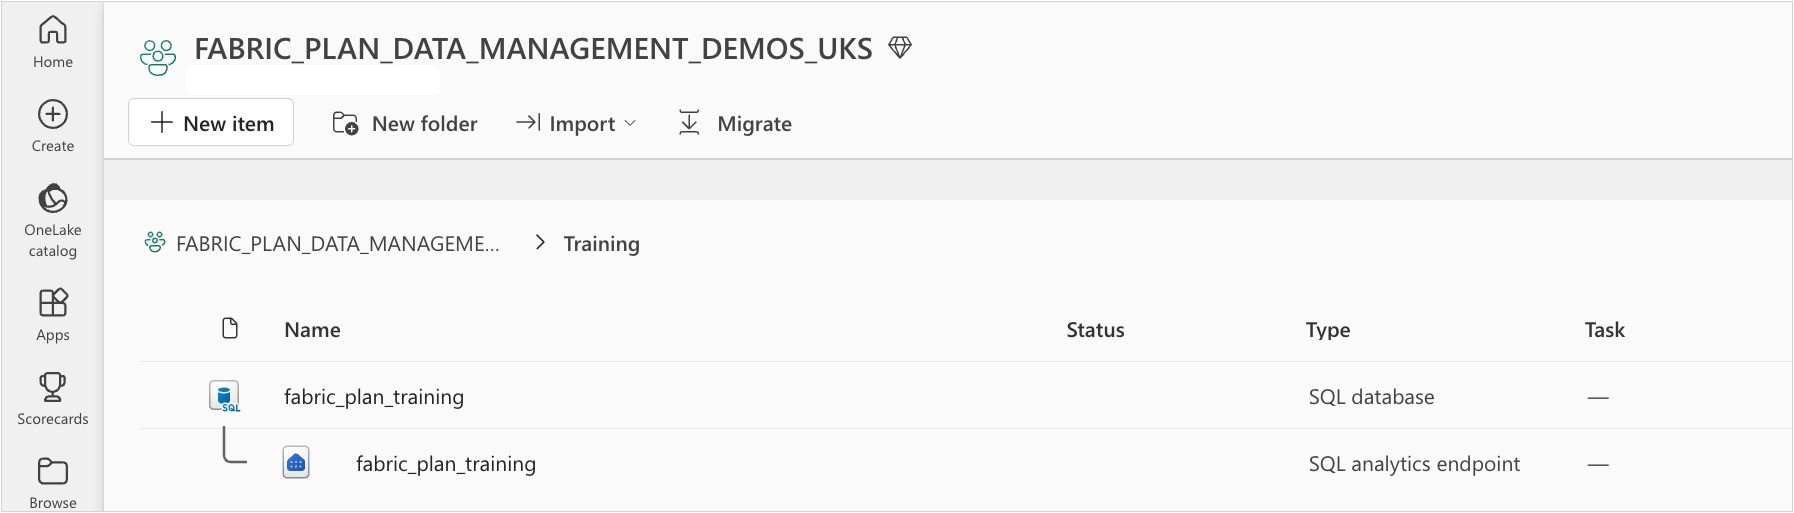
View the newly created database in the training workspace.
Create a new Fabric Plan item
Create the Plan item that holds the PowerTable app.
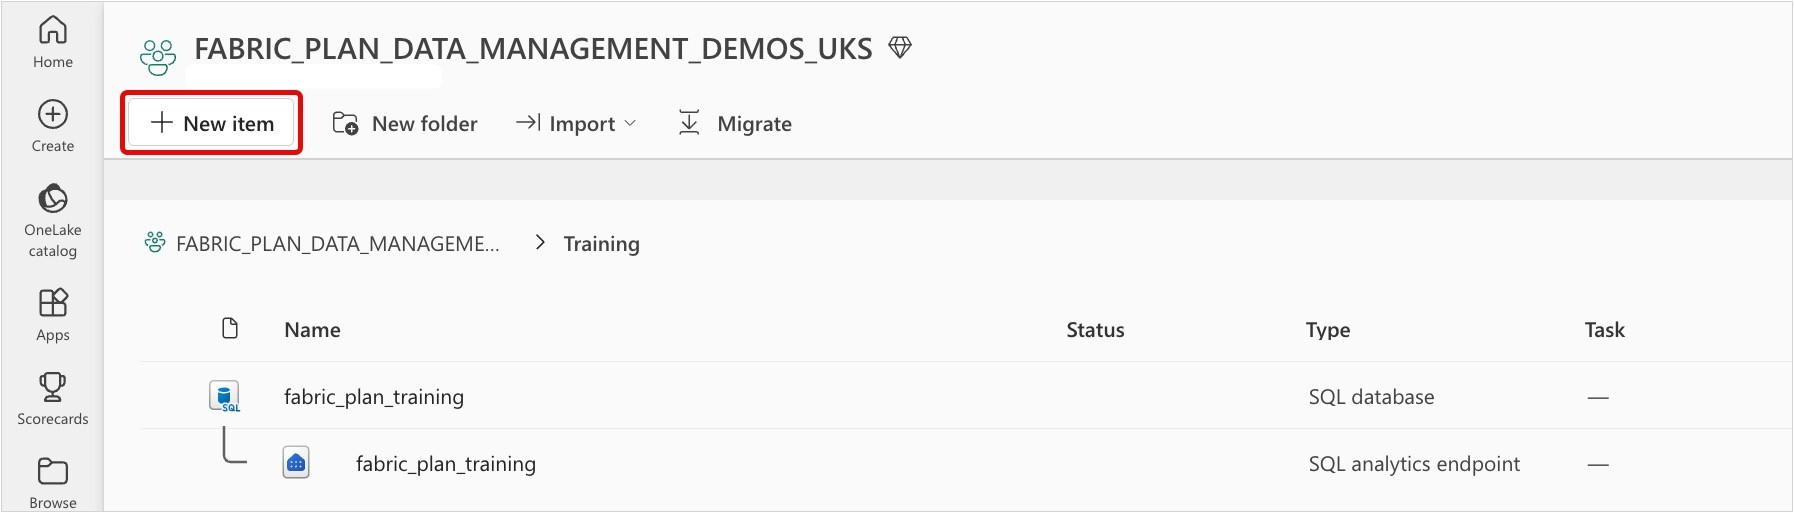
In the same training workspace, select New item.
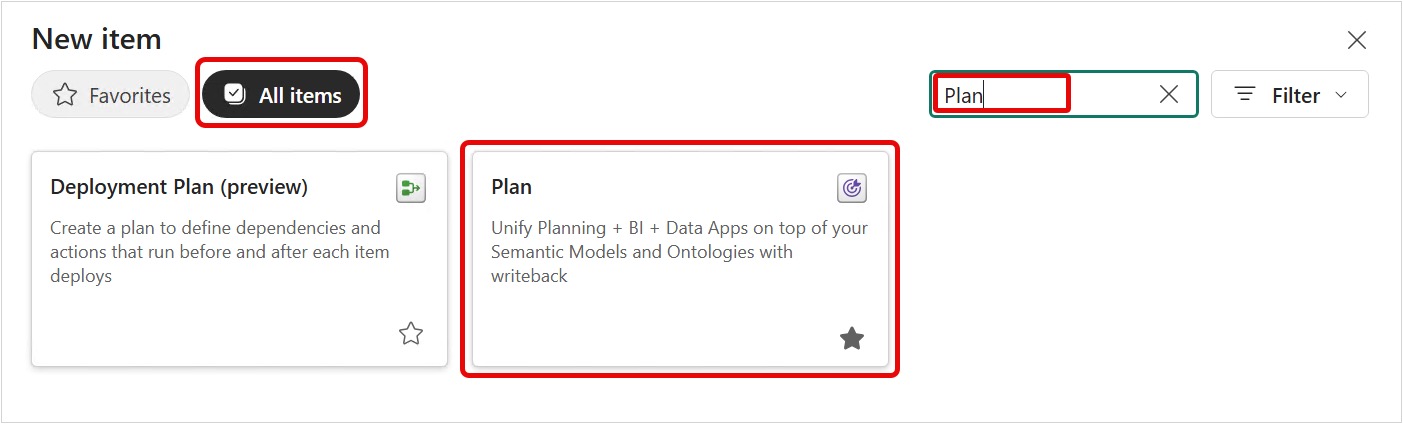
In the New item side panel, select All items, search for Plan in the Filter by keyword search box, and select Plan.
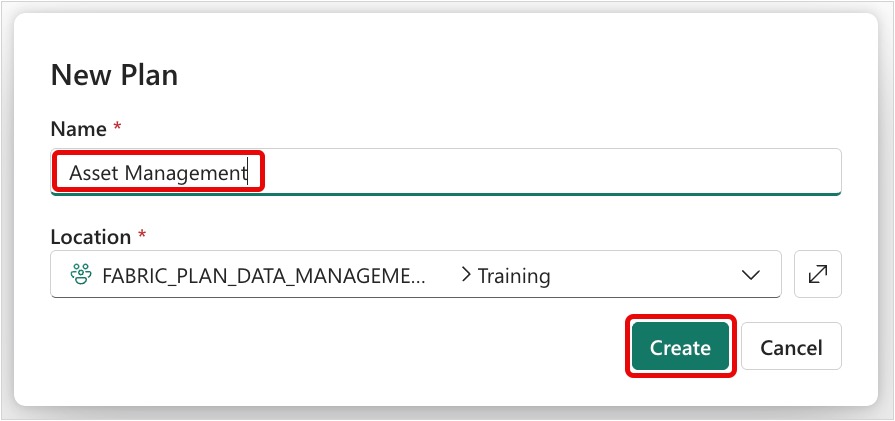
Enter Asset Management for Name and select Create.
Create the PowerTable sheets
Create the assets, employees, and locations sheets by importing data from an Excel spreadsheet. This part takes about 20 minutes.
Create the assets PowerTable sheet
Create your first PowerTable sheet, set up the database connection, and import all three tables from the source workbook.
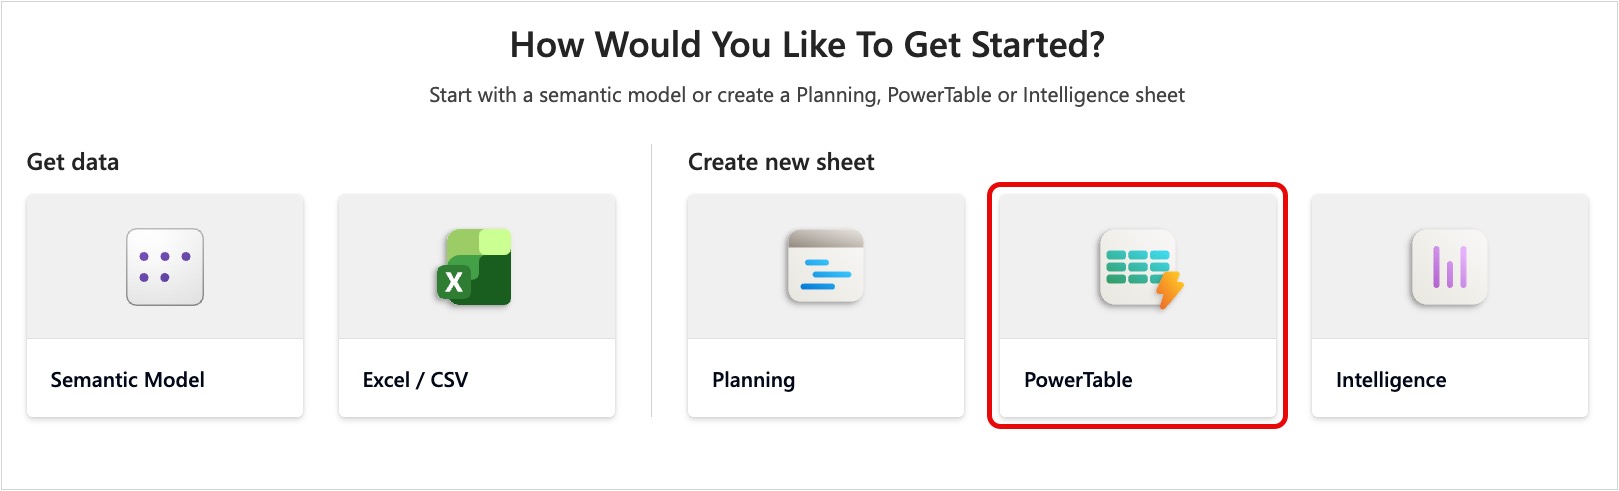
In the Plan welcome screen, select PowerTable.
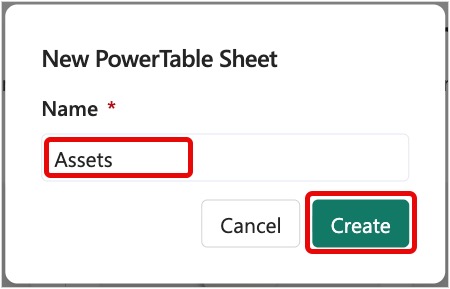
In the New PowerTable Sheet pop-up, enter Assets as the Name and select Create.
Important
You complete the following Set up connection steps only once for each Fabric Plan item. This connection links the Plan item to the app database, so users with a Viewer workspace role can use and work with the Plan item.
Select the Set up connection button. This connection is required so users using the app can collaborate with each other.

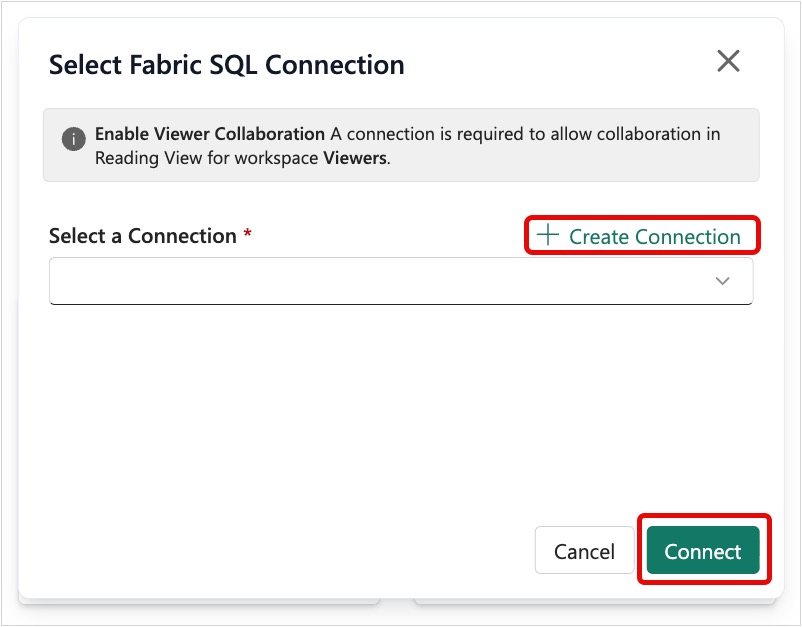
In the Select Fabric SQL Connection pop-up, select + Create Connection. If you already set up a connection, use the Select a Connection dropdown menu to select your connection.
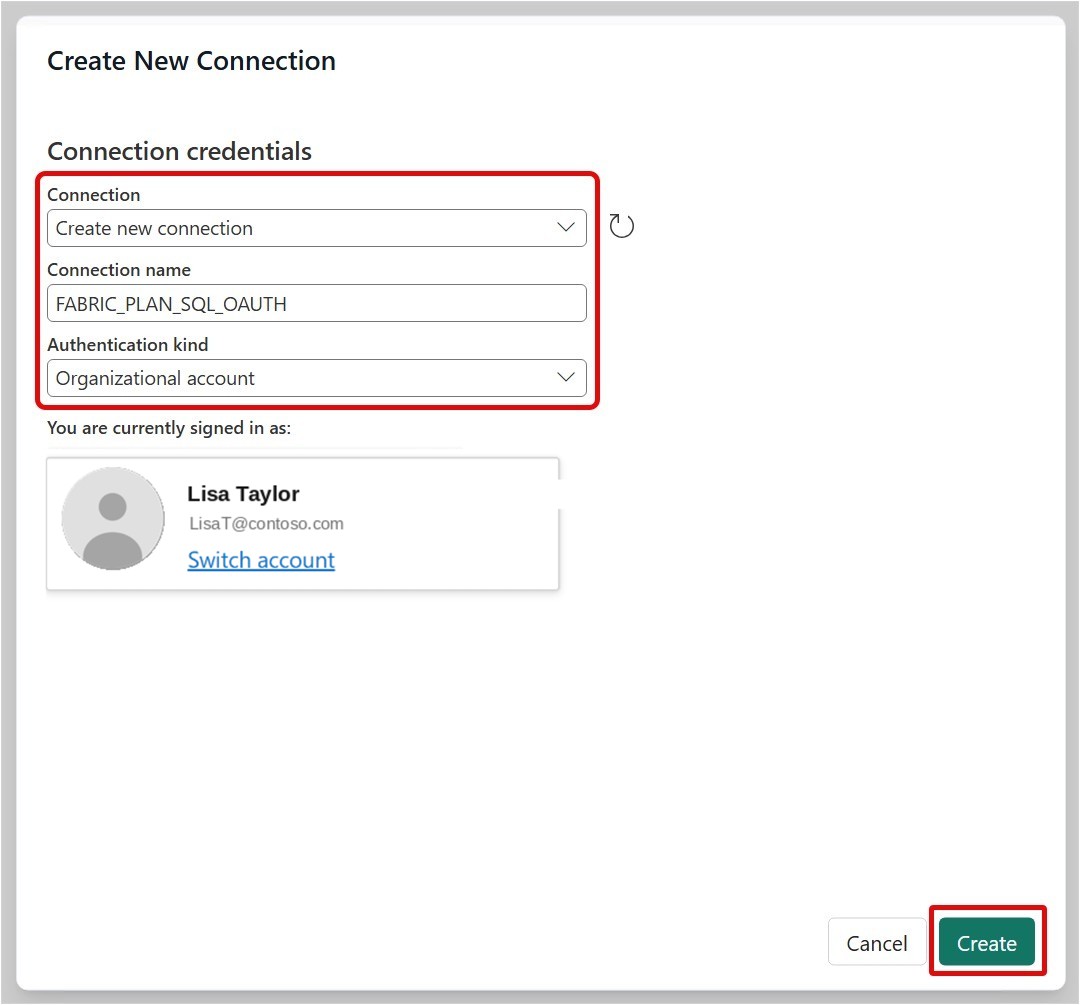
Configure the Create New Connection dialog with the following values and then select Create.
- Connection: select Create new connection
- Connection Name: enter the name of your new connection
- Authentication kind: select Organizational account
- You are currently signed in as: this defaults to your account, select Switch account to change it.
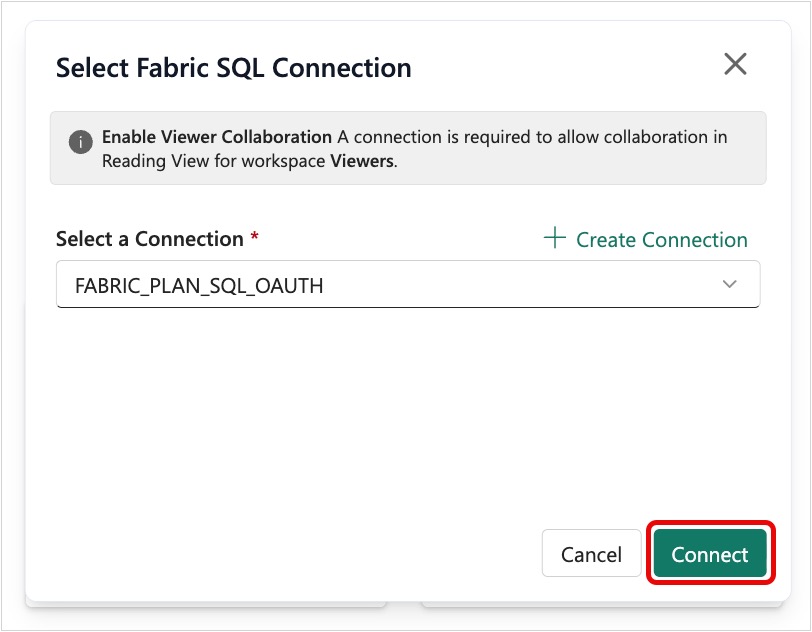
Back in the Select Fabric SQL Connection pop-up, select Connect and finalize the connection.
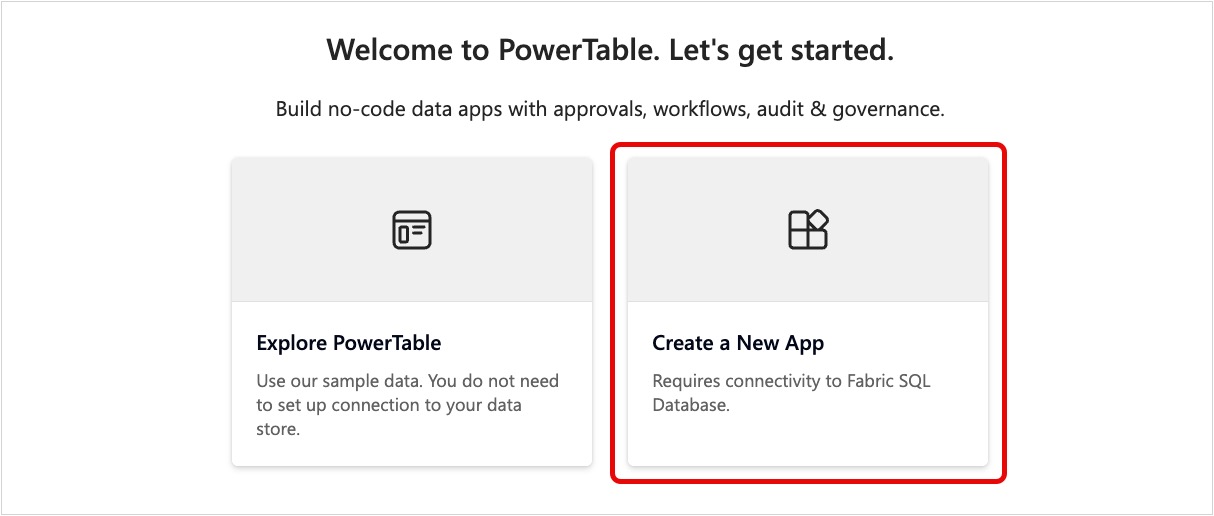
On the PowerTable welcome screen, select Create a New App.
In Select Fabric SQL Connection, select the connection you previously created. Set the Select Database From option to Database Item. Then, select the database you previously created and select Connect.
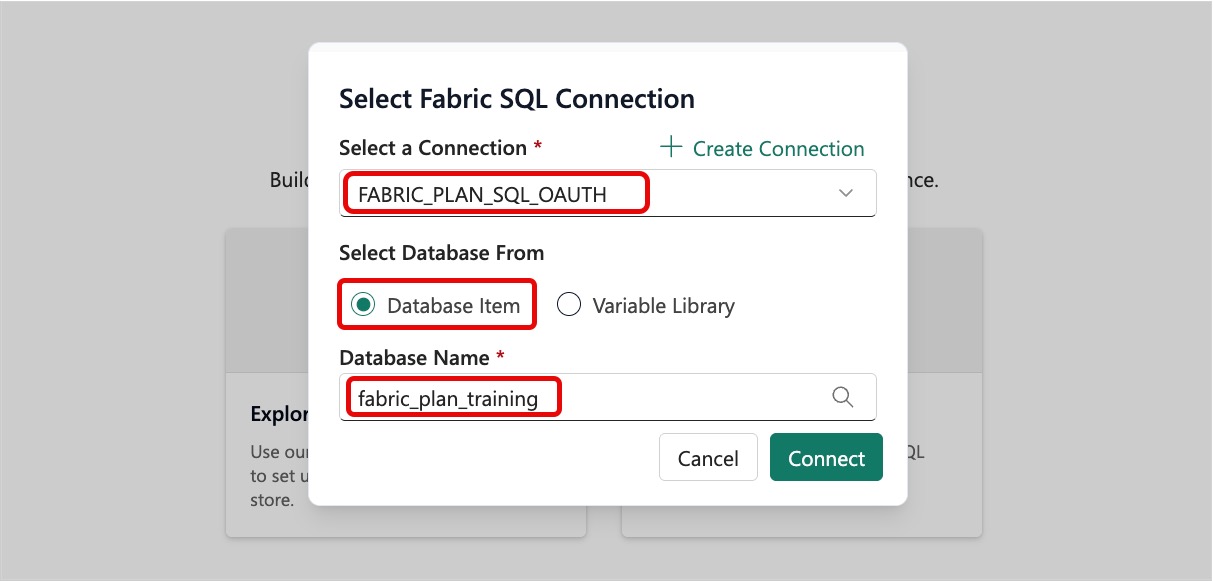
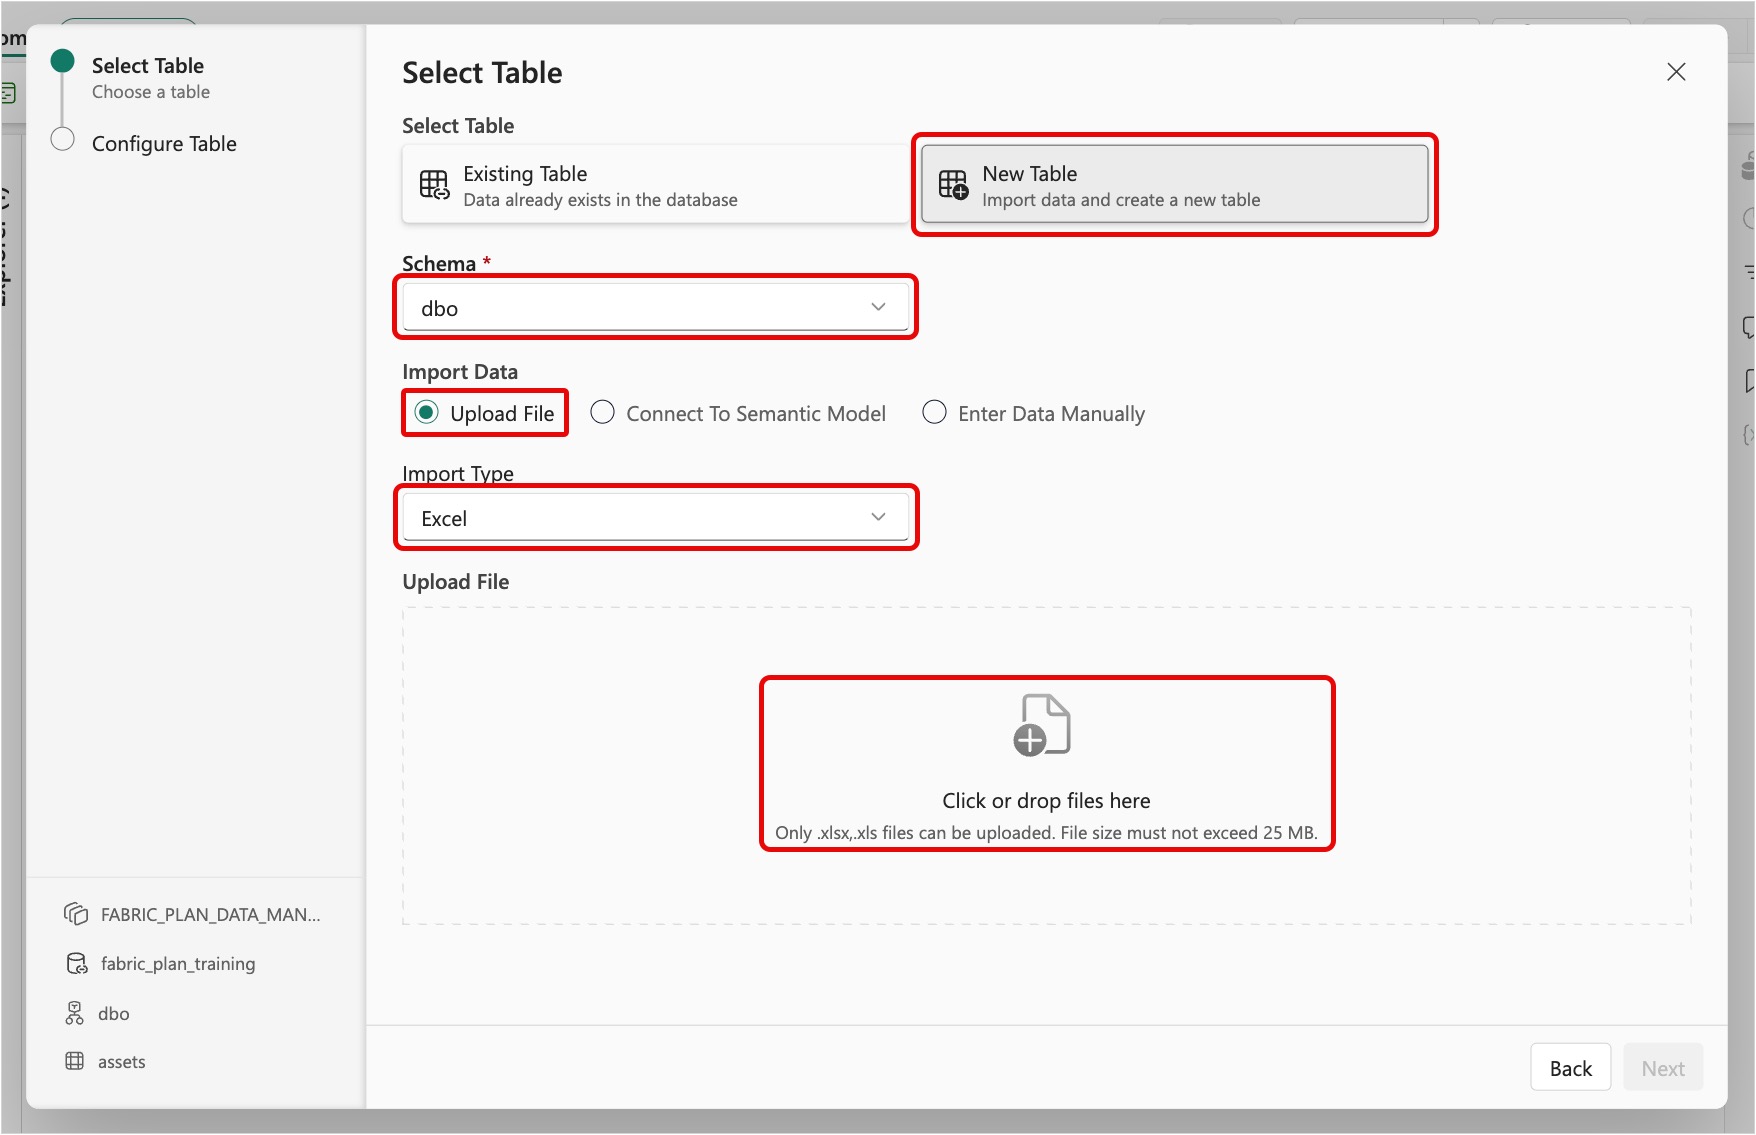
Configure the Select Table dialog as follows and then select on the Next button once it is enabled.
- Select Table: select New Table
- Schema: select dbo
- Table Name: enter assets
- Import Data: select Upload File
- Import Type: select Excel
- Upload File: select the Upload File section and choose the assets.xlsx file.
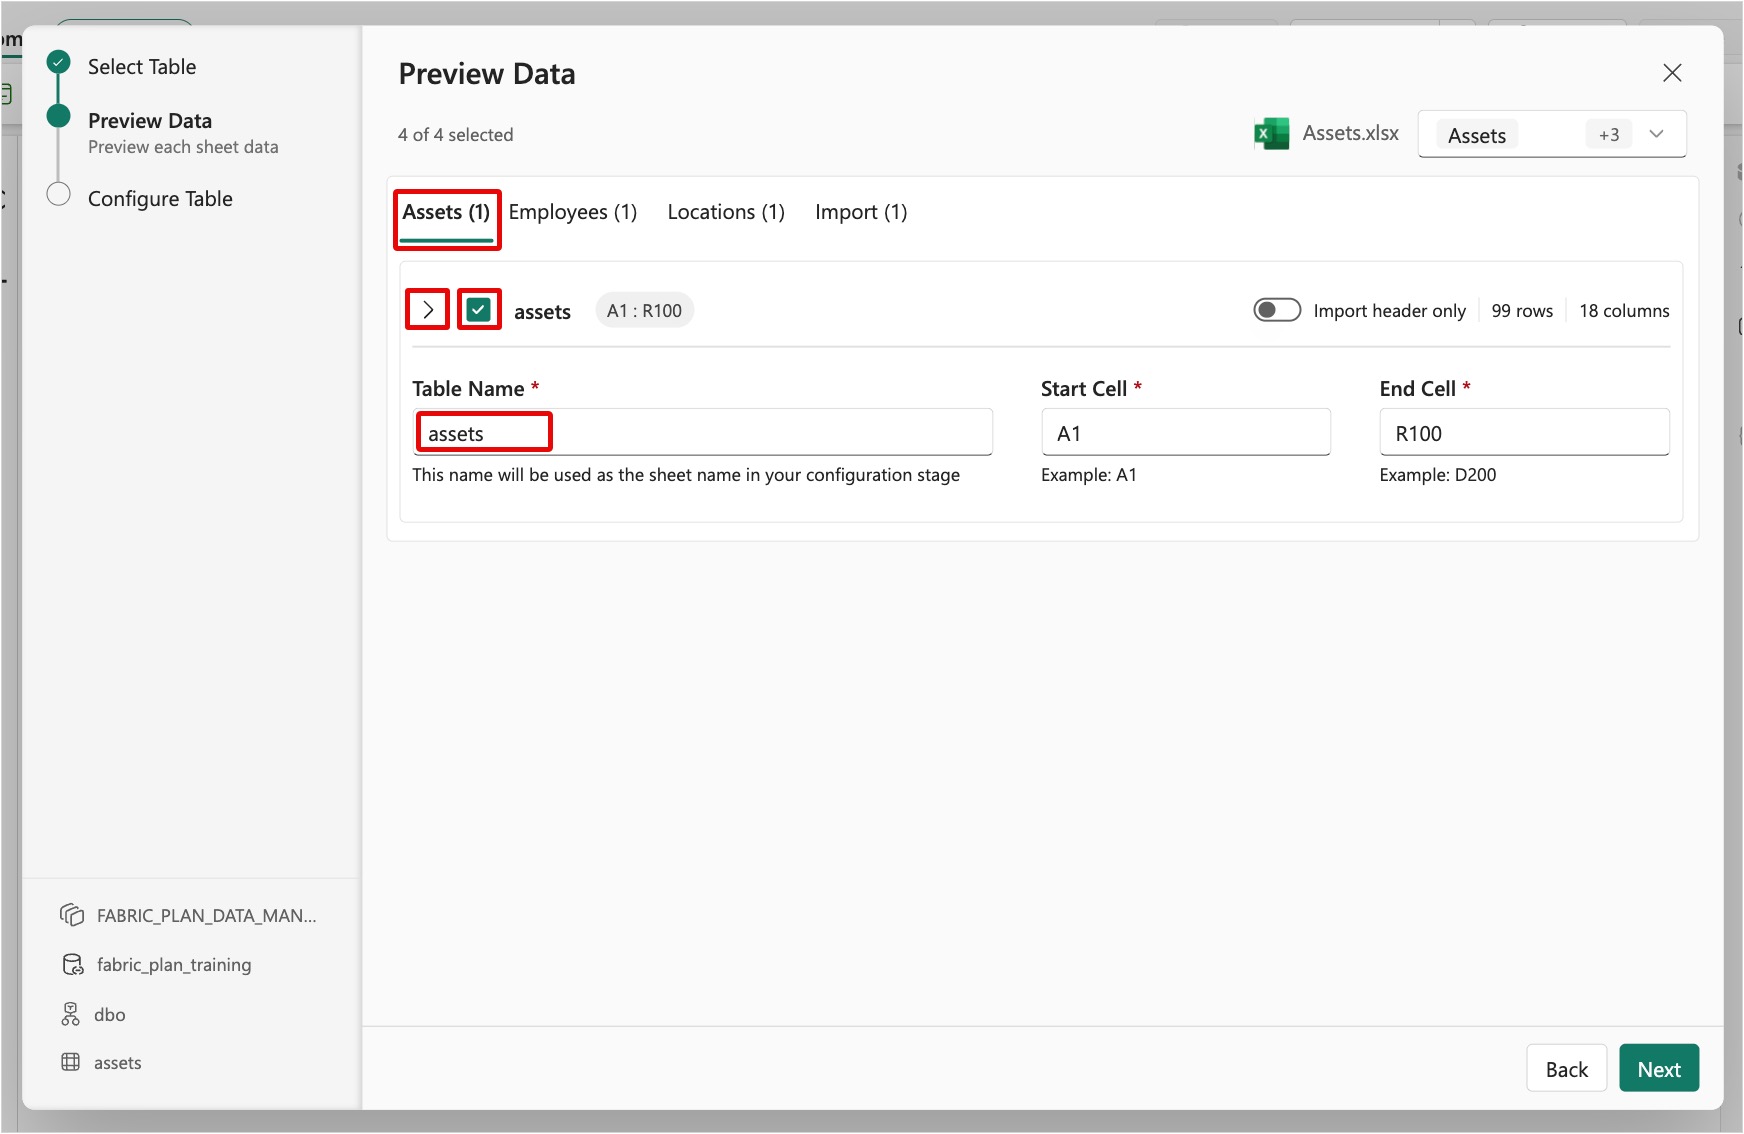
On the Preview Data screen of the pop-up dialog, select the Assets (1) tab. Set the Table Name to assets. Don't modify the values for Start Cell and End Cell. Ensure that the checkbox next to the assets label is selected. Use the chevron next to the checkbox to expand and view a preview of the data.
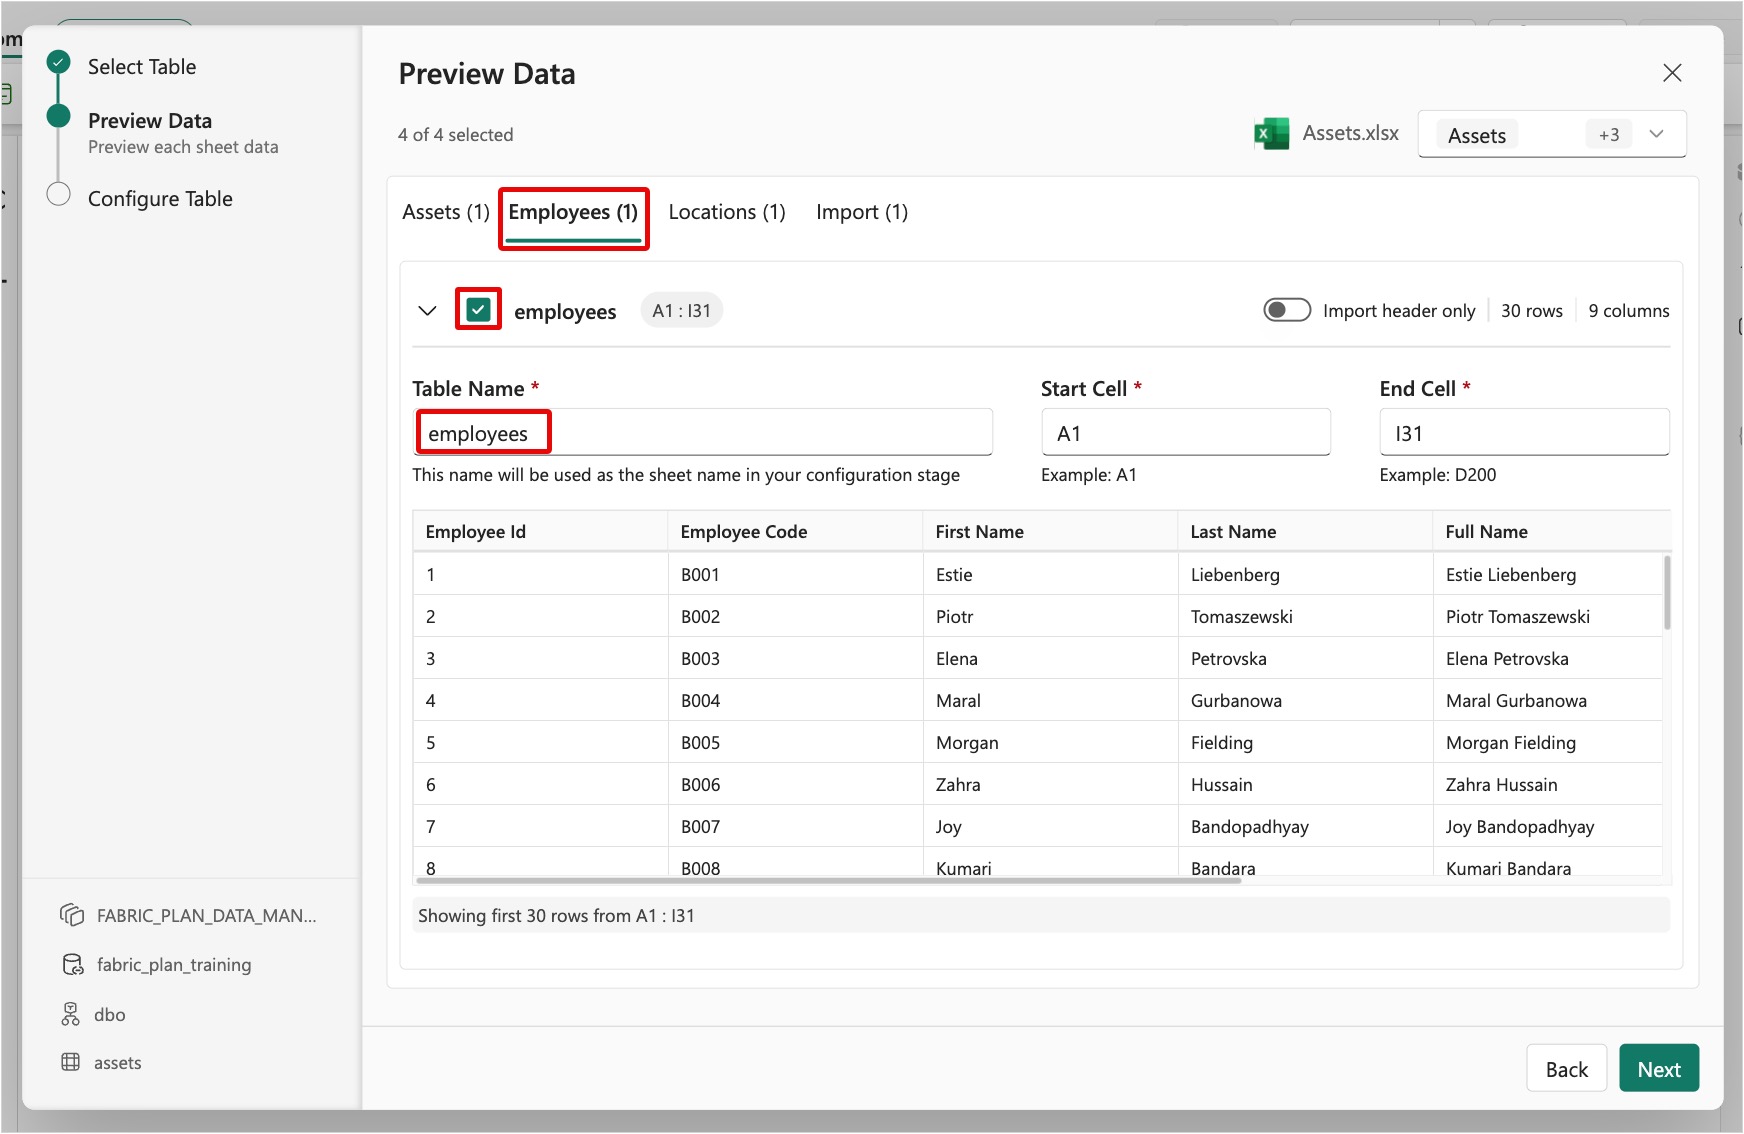
While still on the Preview Data screen, select the Employees (1) tab. Set the Table Name to employees. Don't modify the values for Start Cell and End Cell. Ensure that the checkbox next to the employees label is selected.
On the same screen, select the Locations (1) tab. Set the Table Name to locations. Don't modify the values for Start Cell and End Cell. Ensure that the checkbox next to the locations label is selected.
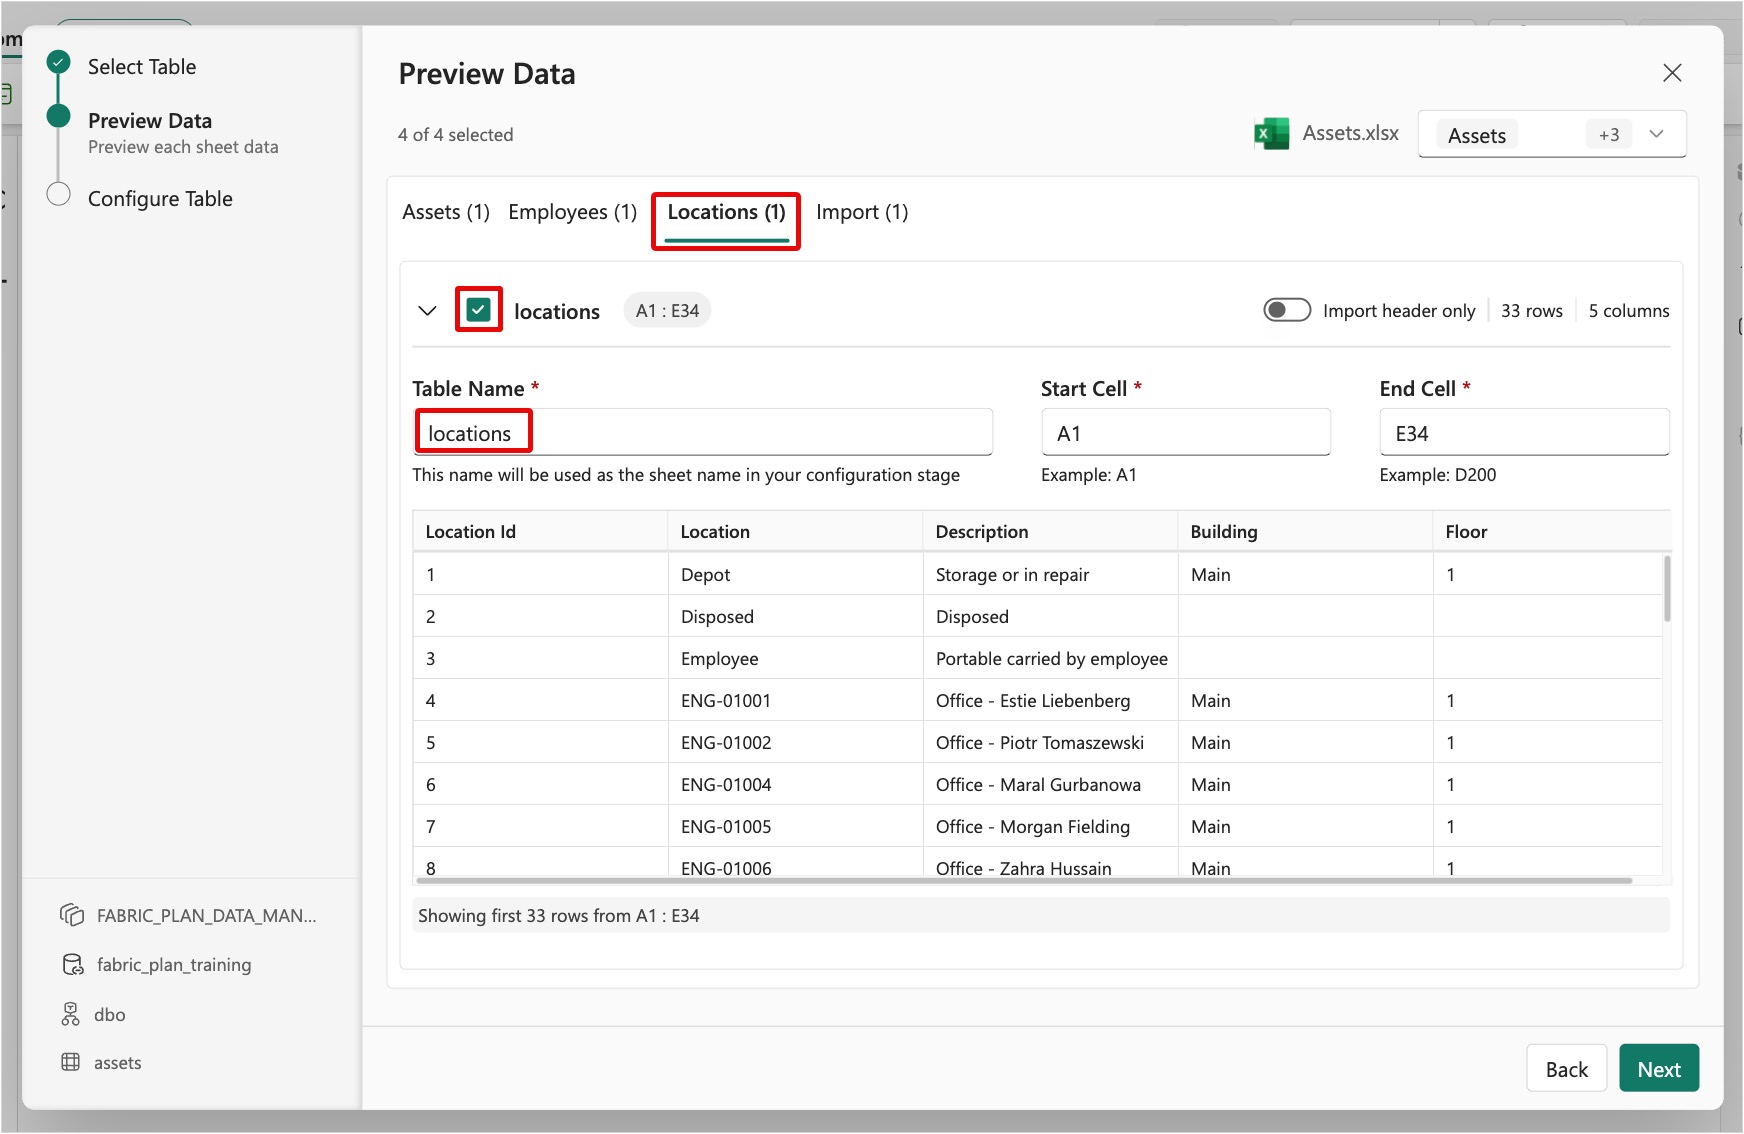
While still on the Preview Data screen, select the Import (1) tab. Clear the checkbox next to the Import label. The tab name changes to Import. Select Next.
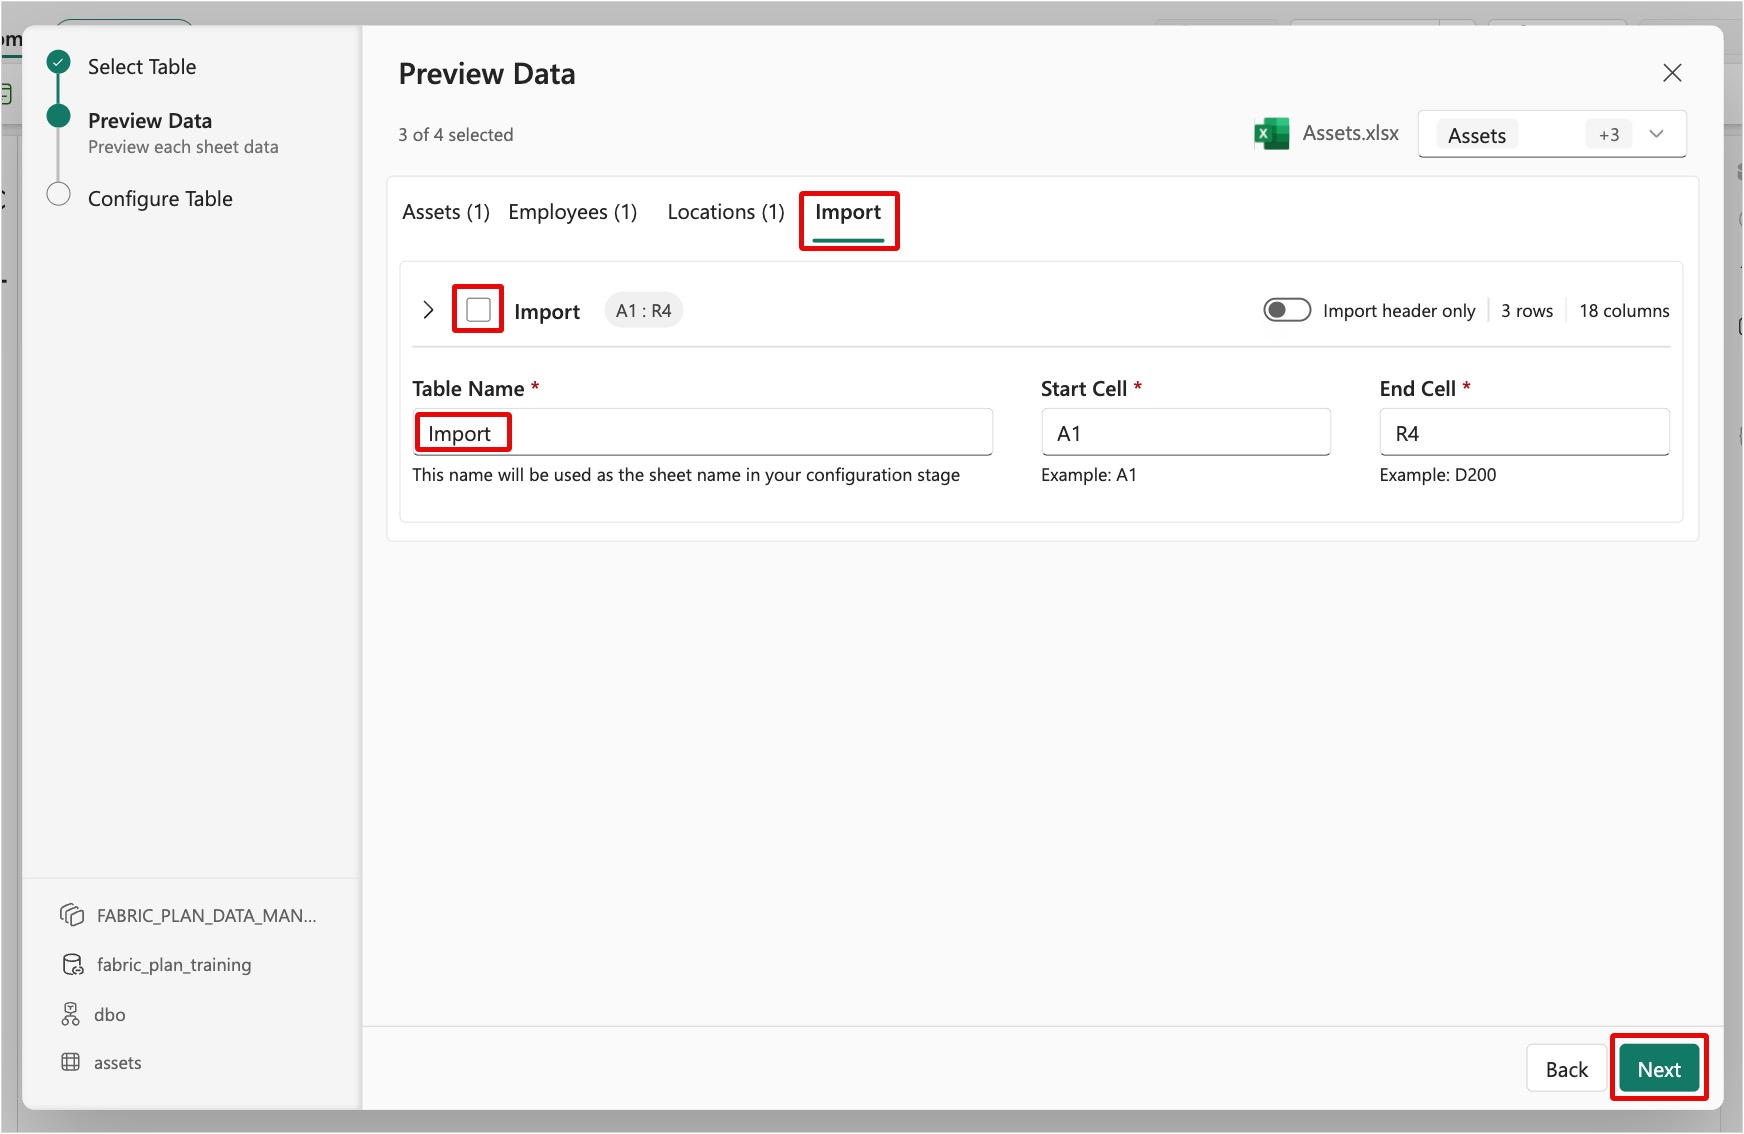
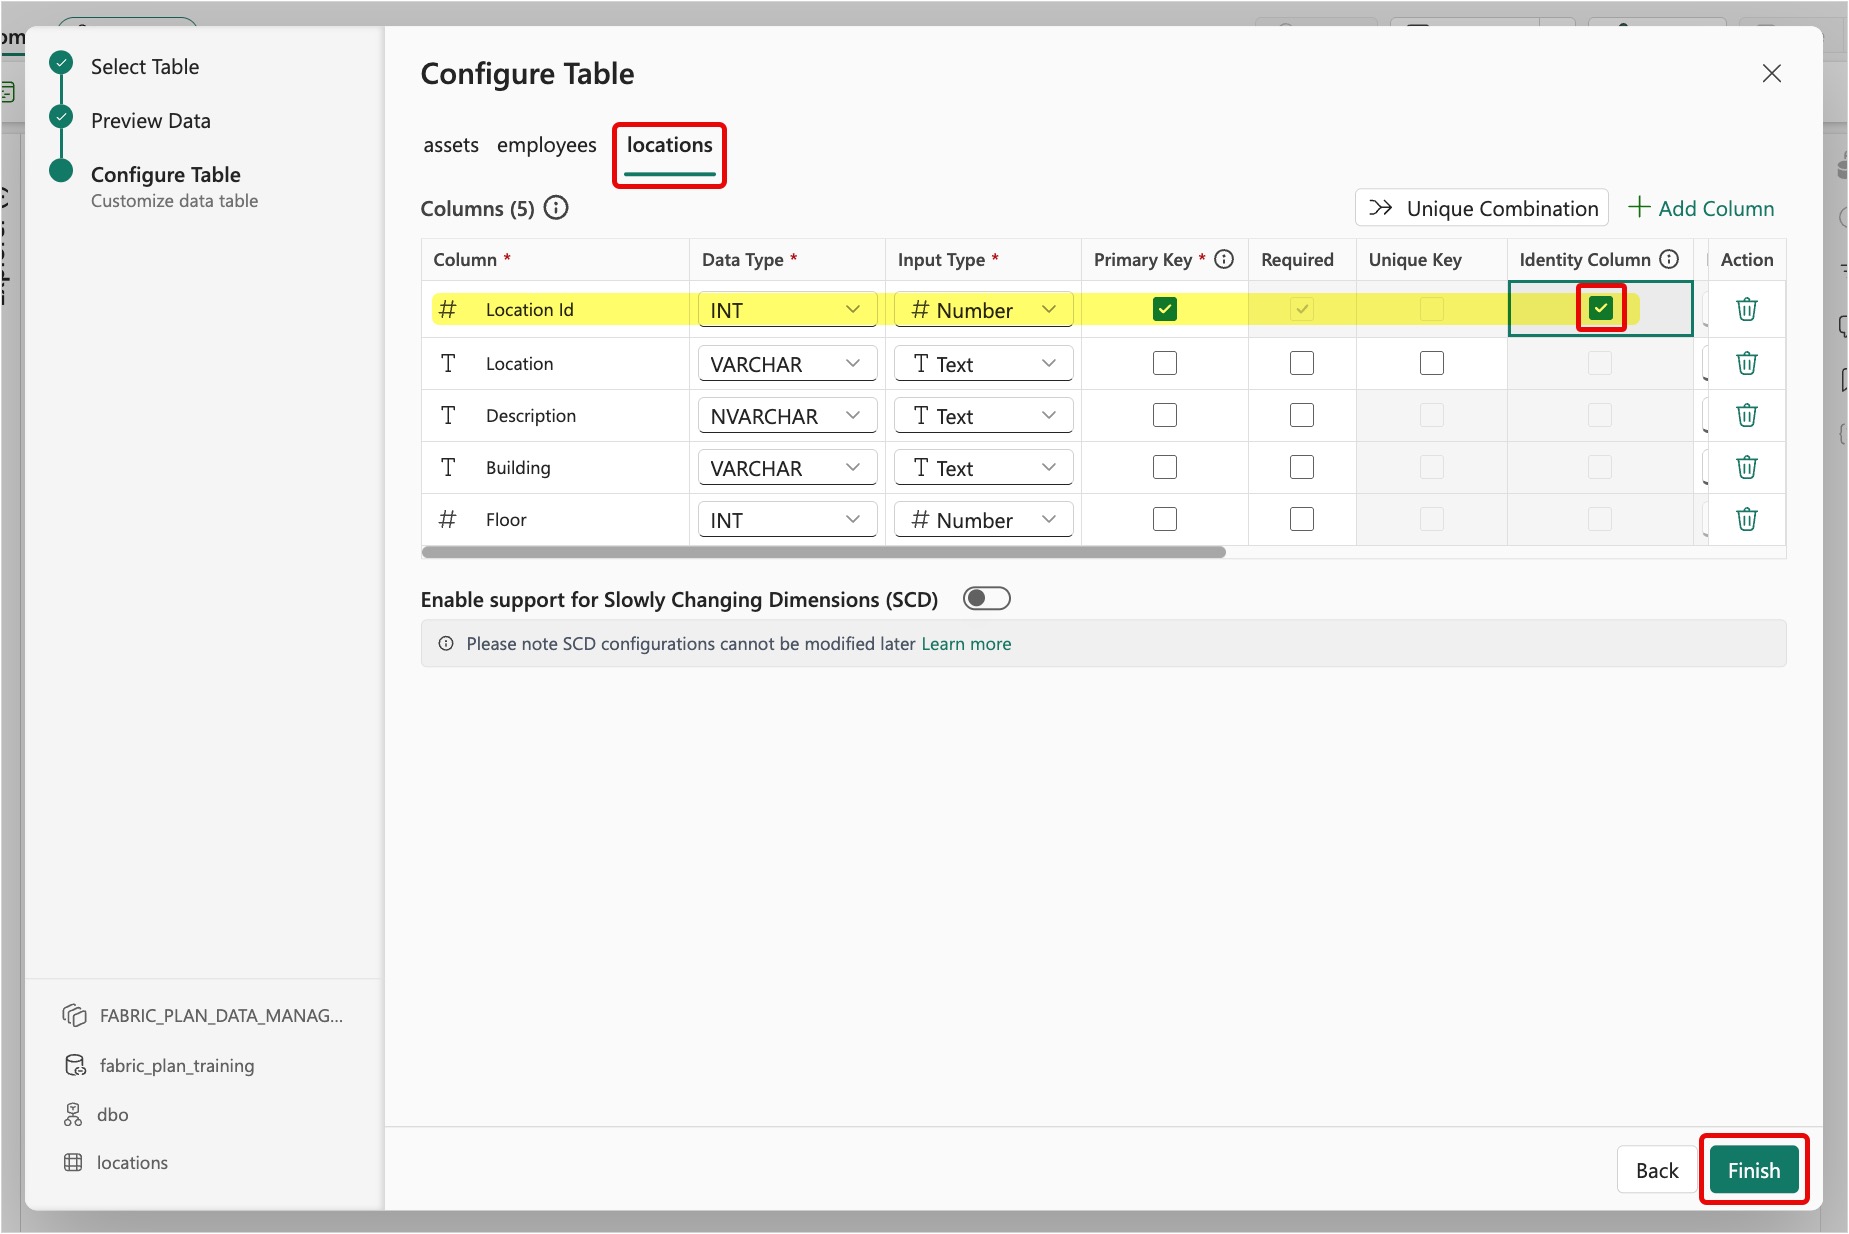
On the Configure Table screen, select the assets tab. Select the checkbox under the Identity Column section corresponding to the Asset Id column.
The identity column uniquely identifies each row, which is what lets PowerTable match edits and imports back to the correct record. This column also creates the next value in the sequence automatically when creating new rows.
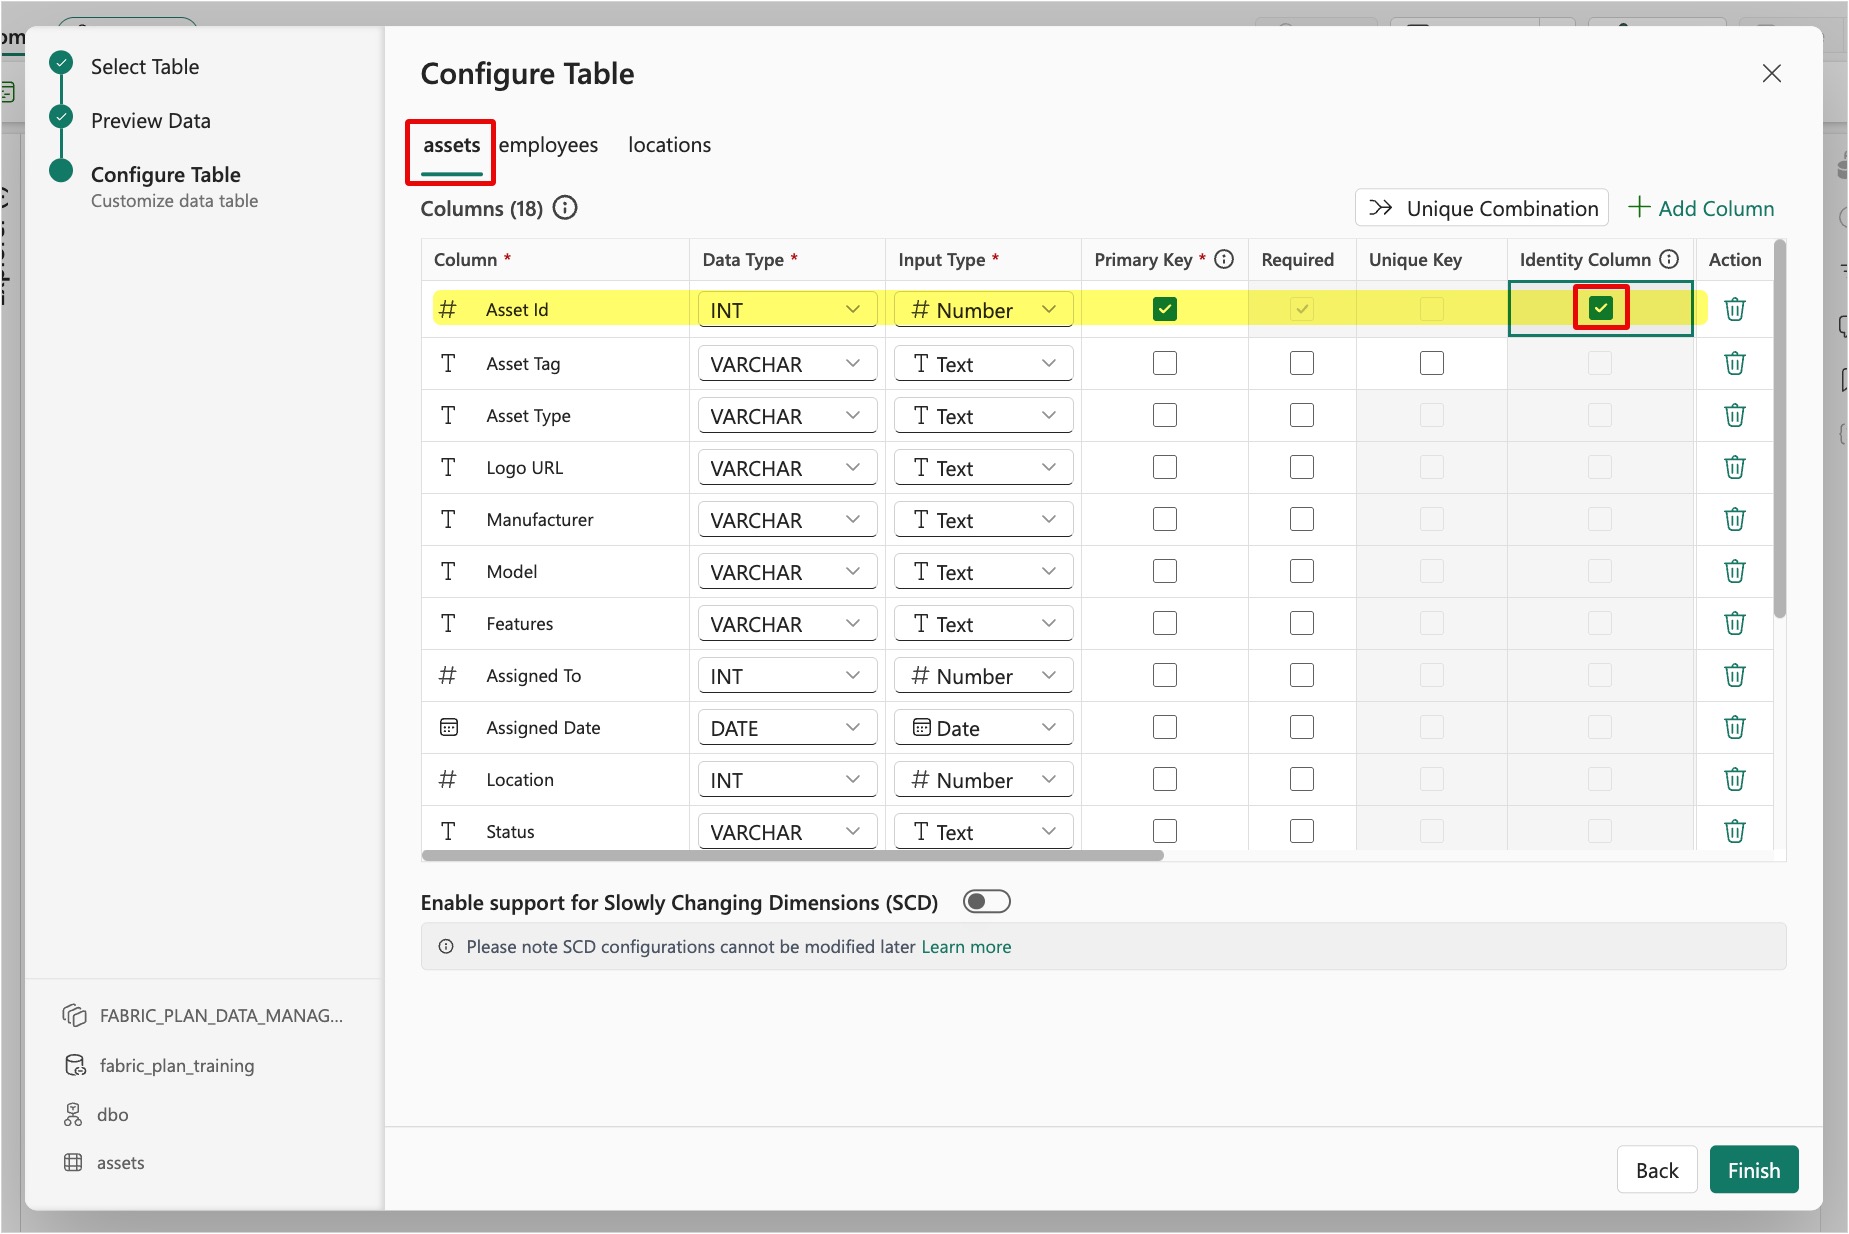
Next, go to the employees tab. Select the checkbox under the Identity Column section corresponding to the Employee Id column.
Finally, go to the locations tab. Select the checkbox under the Identity Column section corresponding to the Location Id column. Then select Finish.
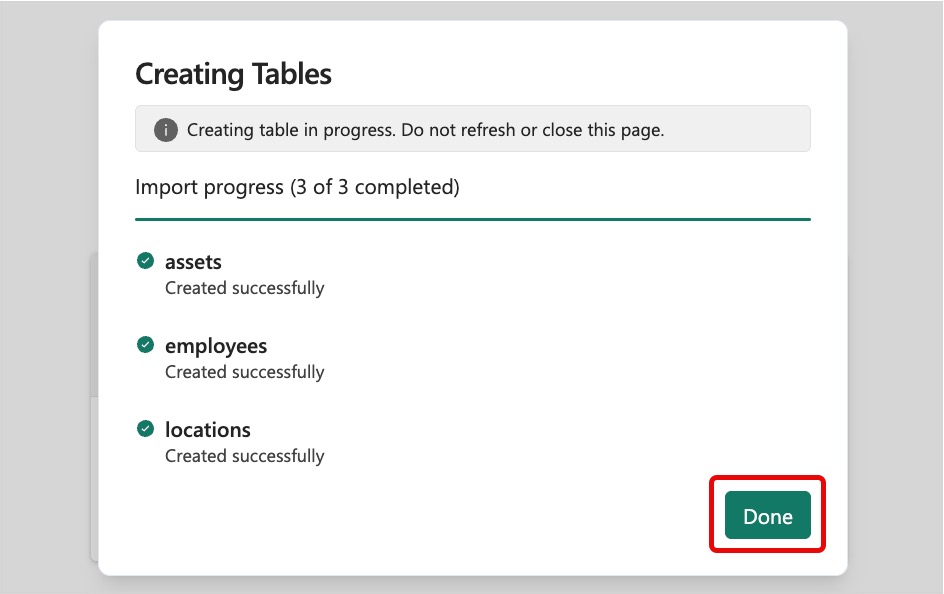
On the Creating Tables pop-up dialog, after PowerTable creates all three tables, select Done. PowerTable now has all three tables and their corresponding sheets.
Set up the assets sheet
You format the assets sheet columns, add a conditional formatting rule, configure lookups, and add a formula column.
Format the Logo URL column
Change the column input type so the sheet renders the logo images.
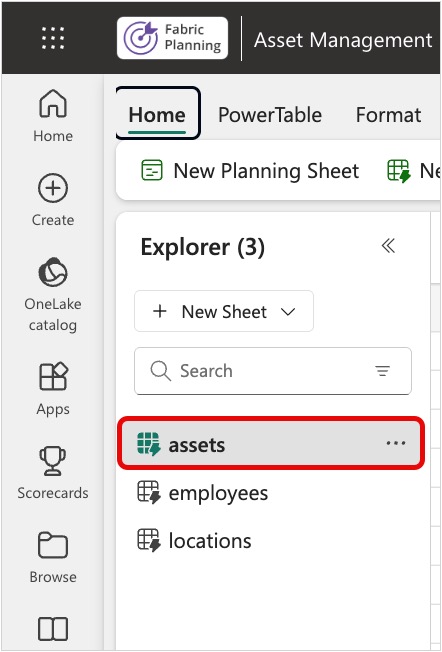
In the asset management app you created, expand the Explorer pane on the left side and select the assets sheet if you're not already on it. Collapse the pane after you select the sheet.
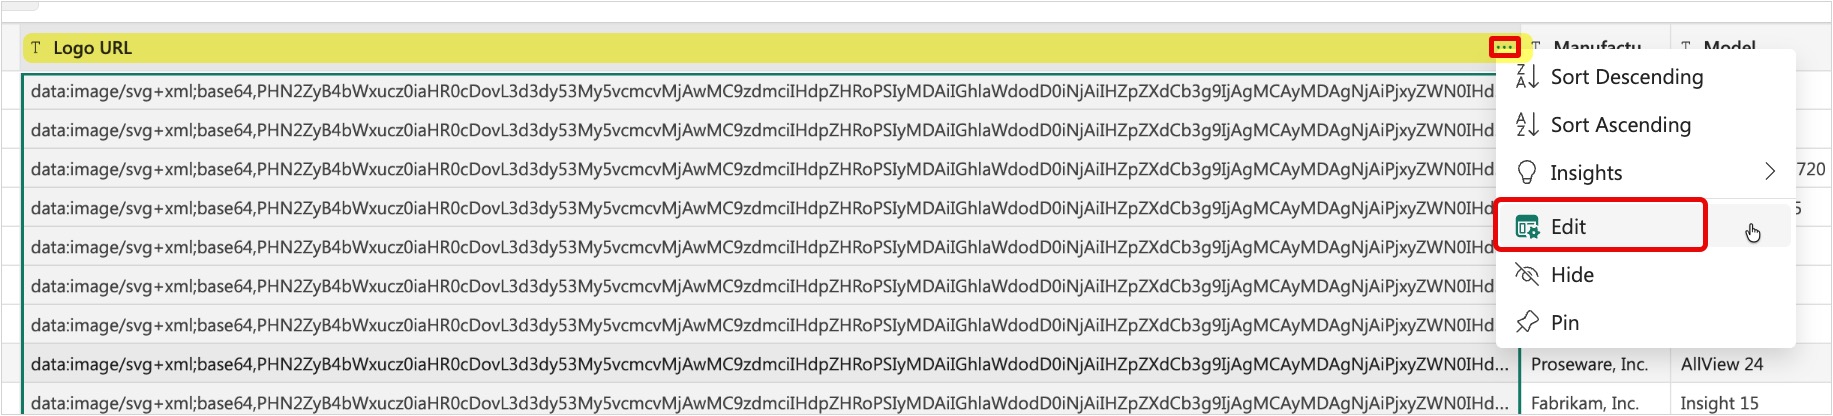
Hover over the Logo URL column, select the ellipsis "..." button in the column header, and then select Edit on the context menu that appears.
On the Logo URL side panel that appears on the right, set the value of the Input Type dropdown to Image. This setting tells PowerTable to render the stored URL as a thumbnail instead of raw text.

Within the Logo URL side panel, navigate to the Display tab. Type Logo into the Display Name field. Then select Save.
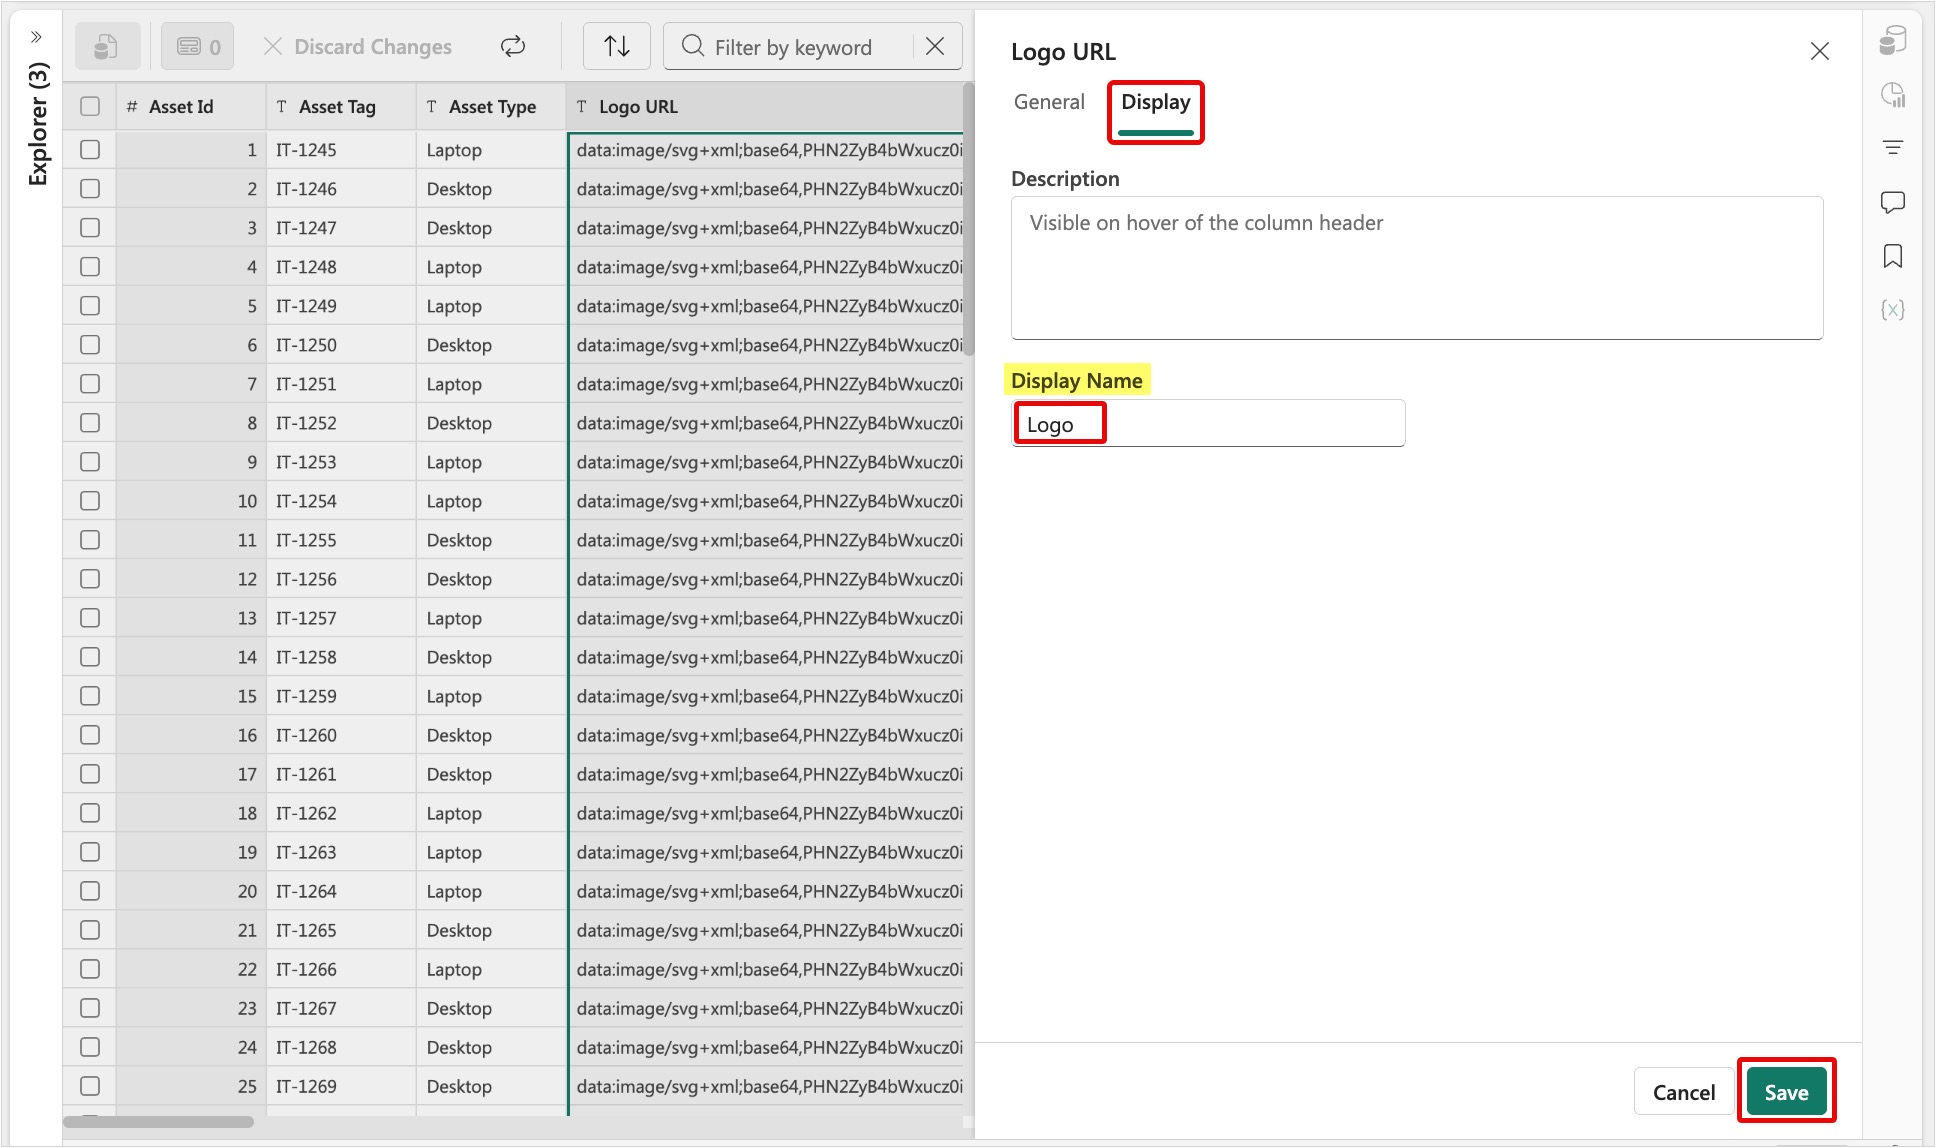
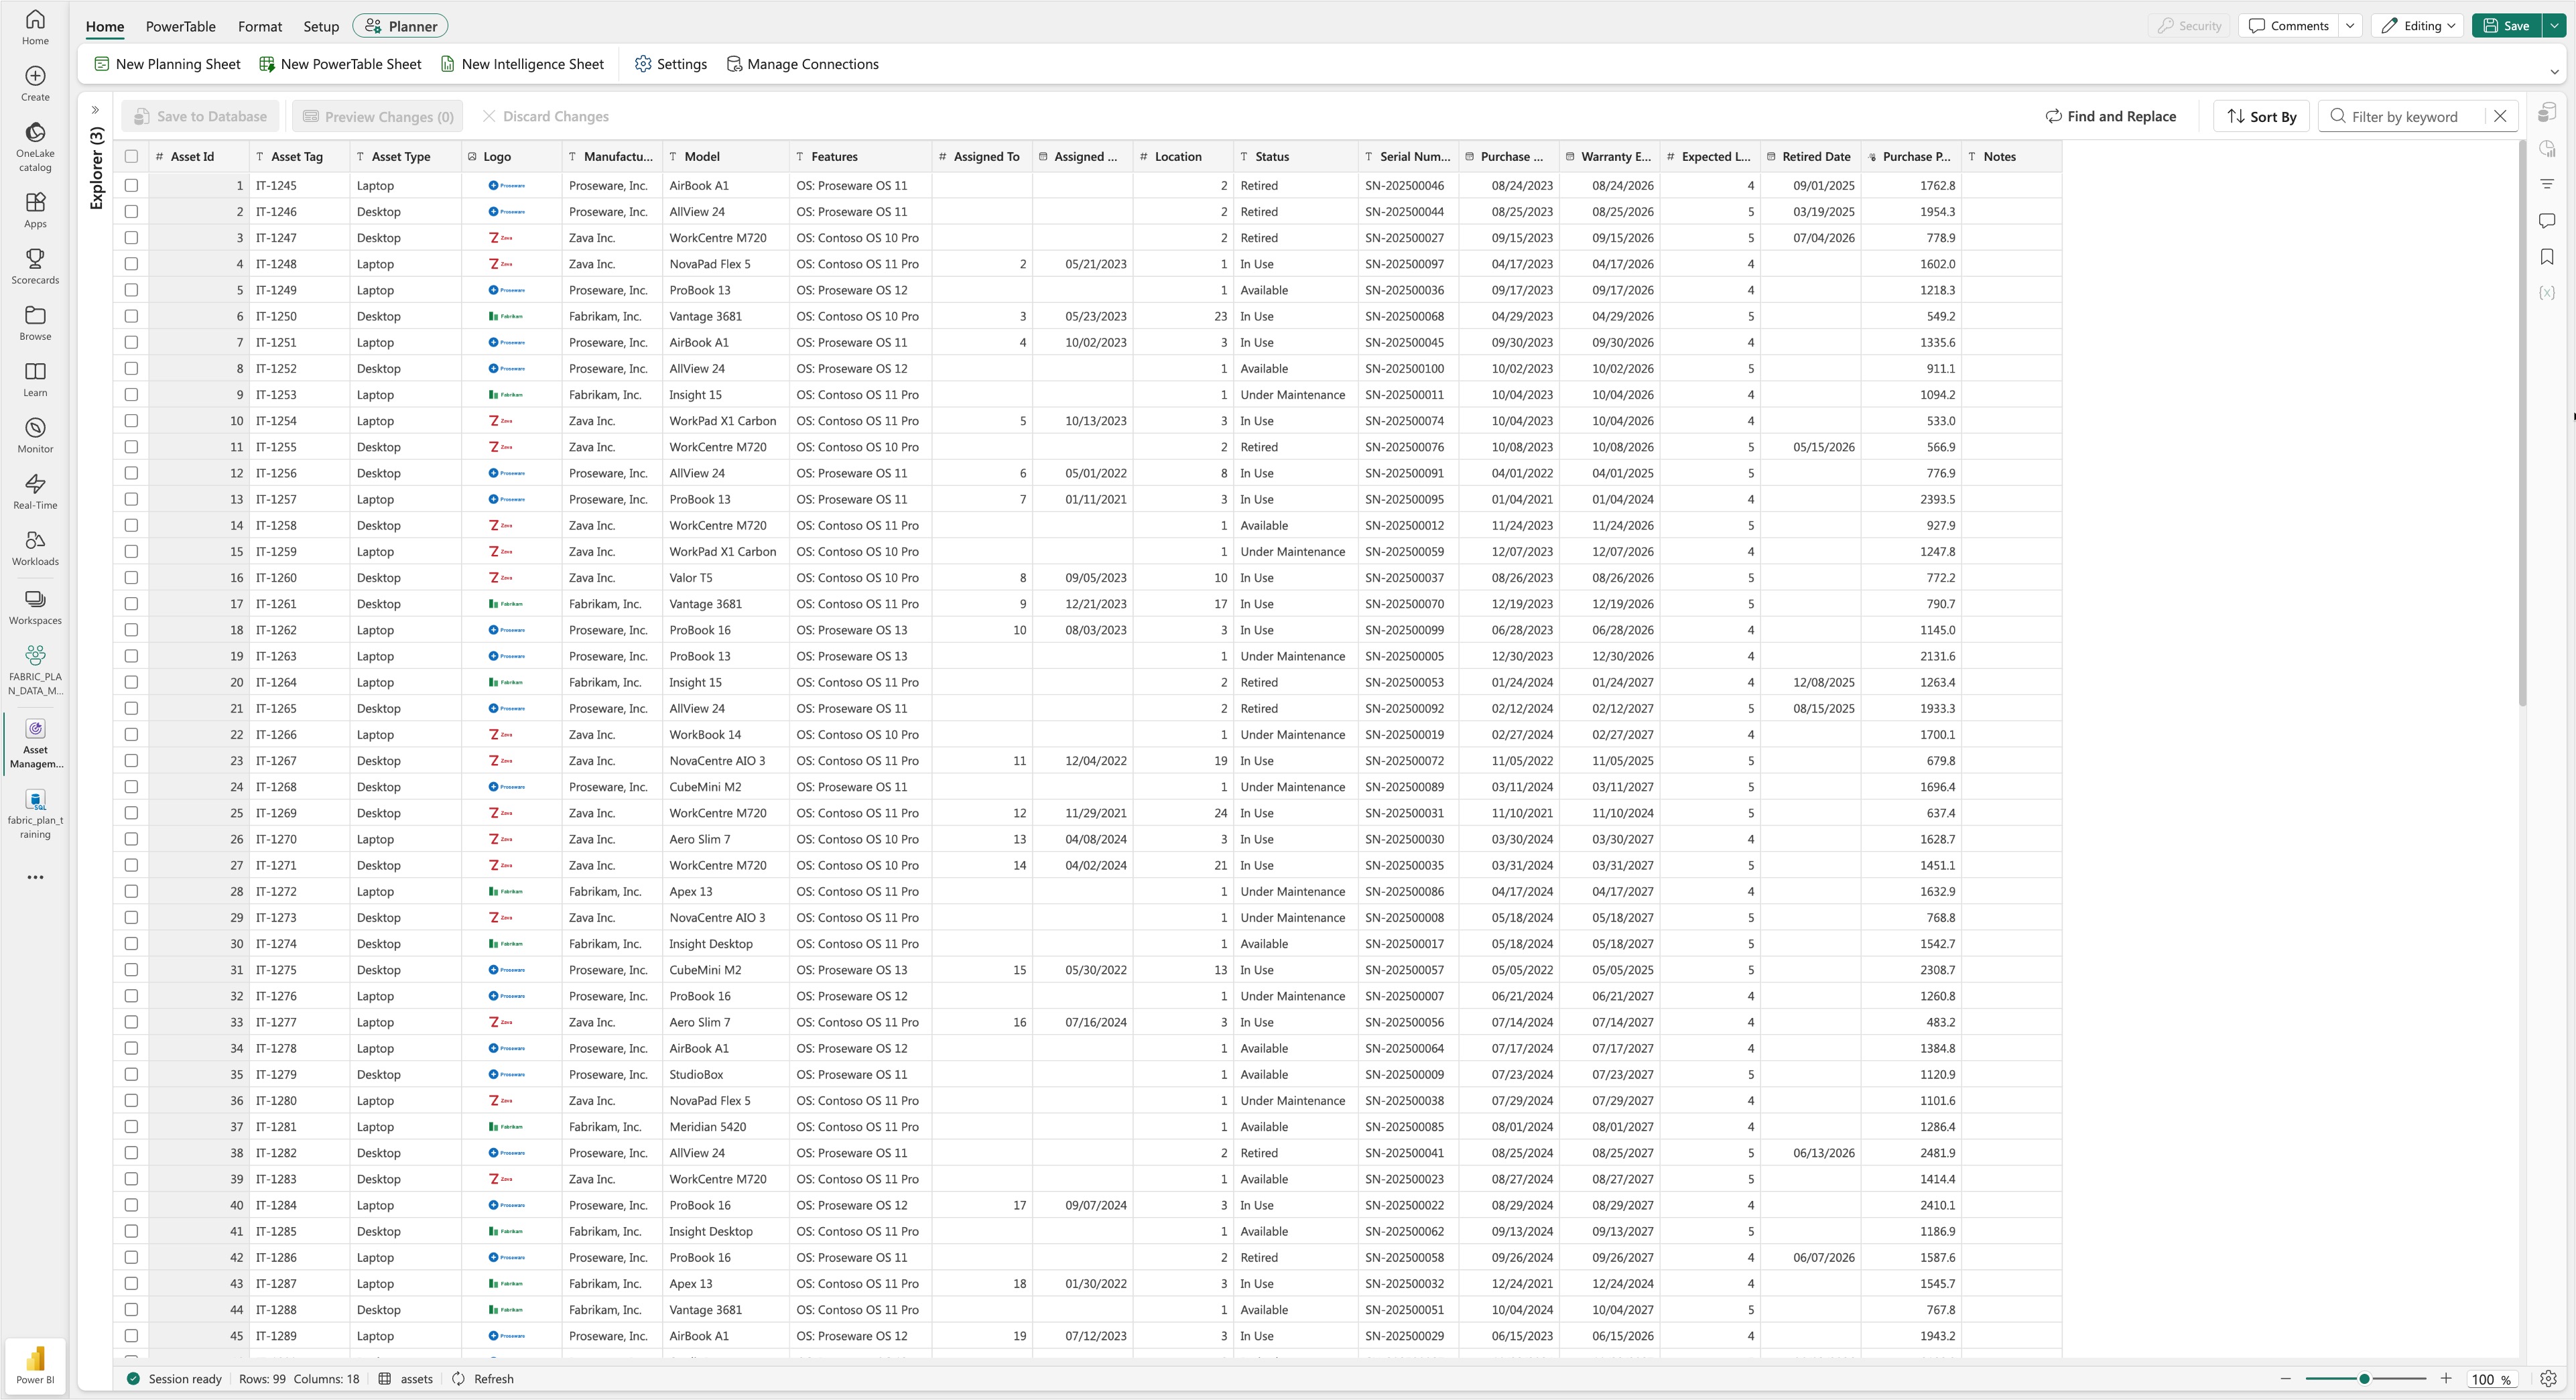
Resize the Logo column by dragging the edge of the column with your cursor. Then, select Save in the toolbar in the top-right corner.

Your Assets sheet should now look like this.
Format the asset type and status columns
Convert both columns to single-select lists based on the values already in the data.
Hover over the Asset Type column, select the ellipsis "..." button in the column header, and then select Edit in the context menu.

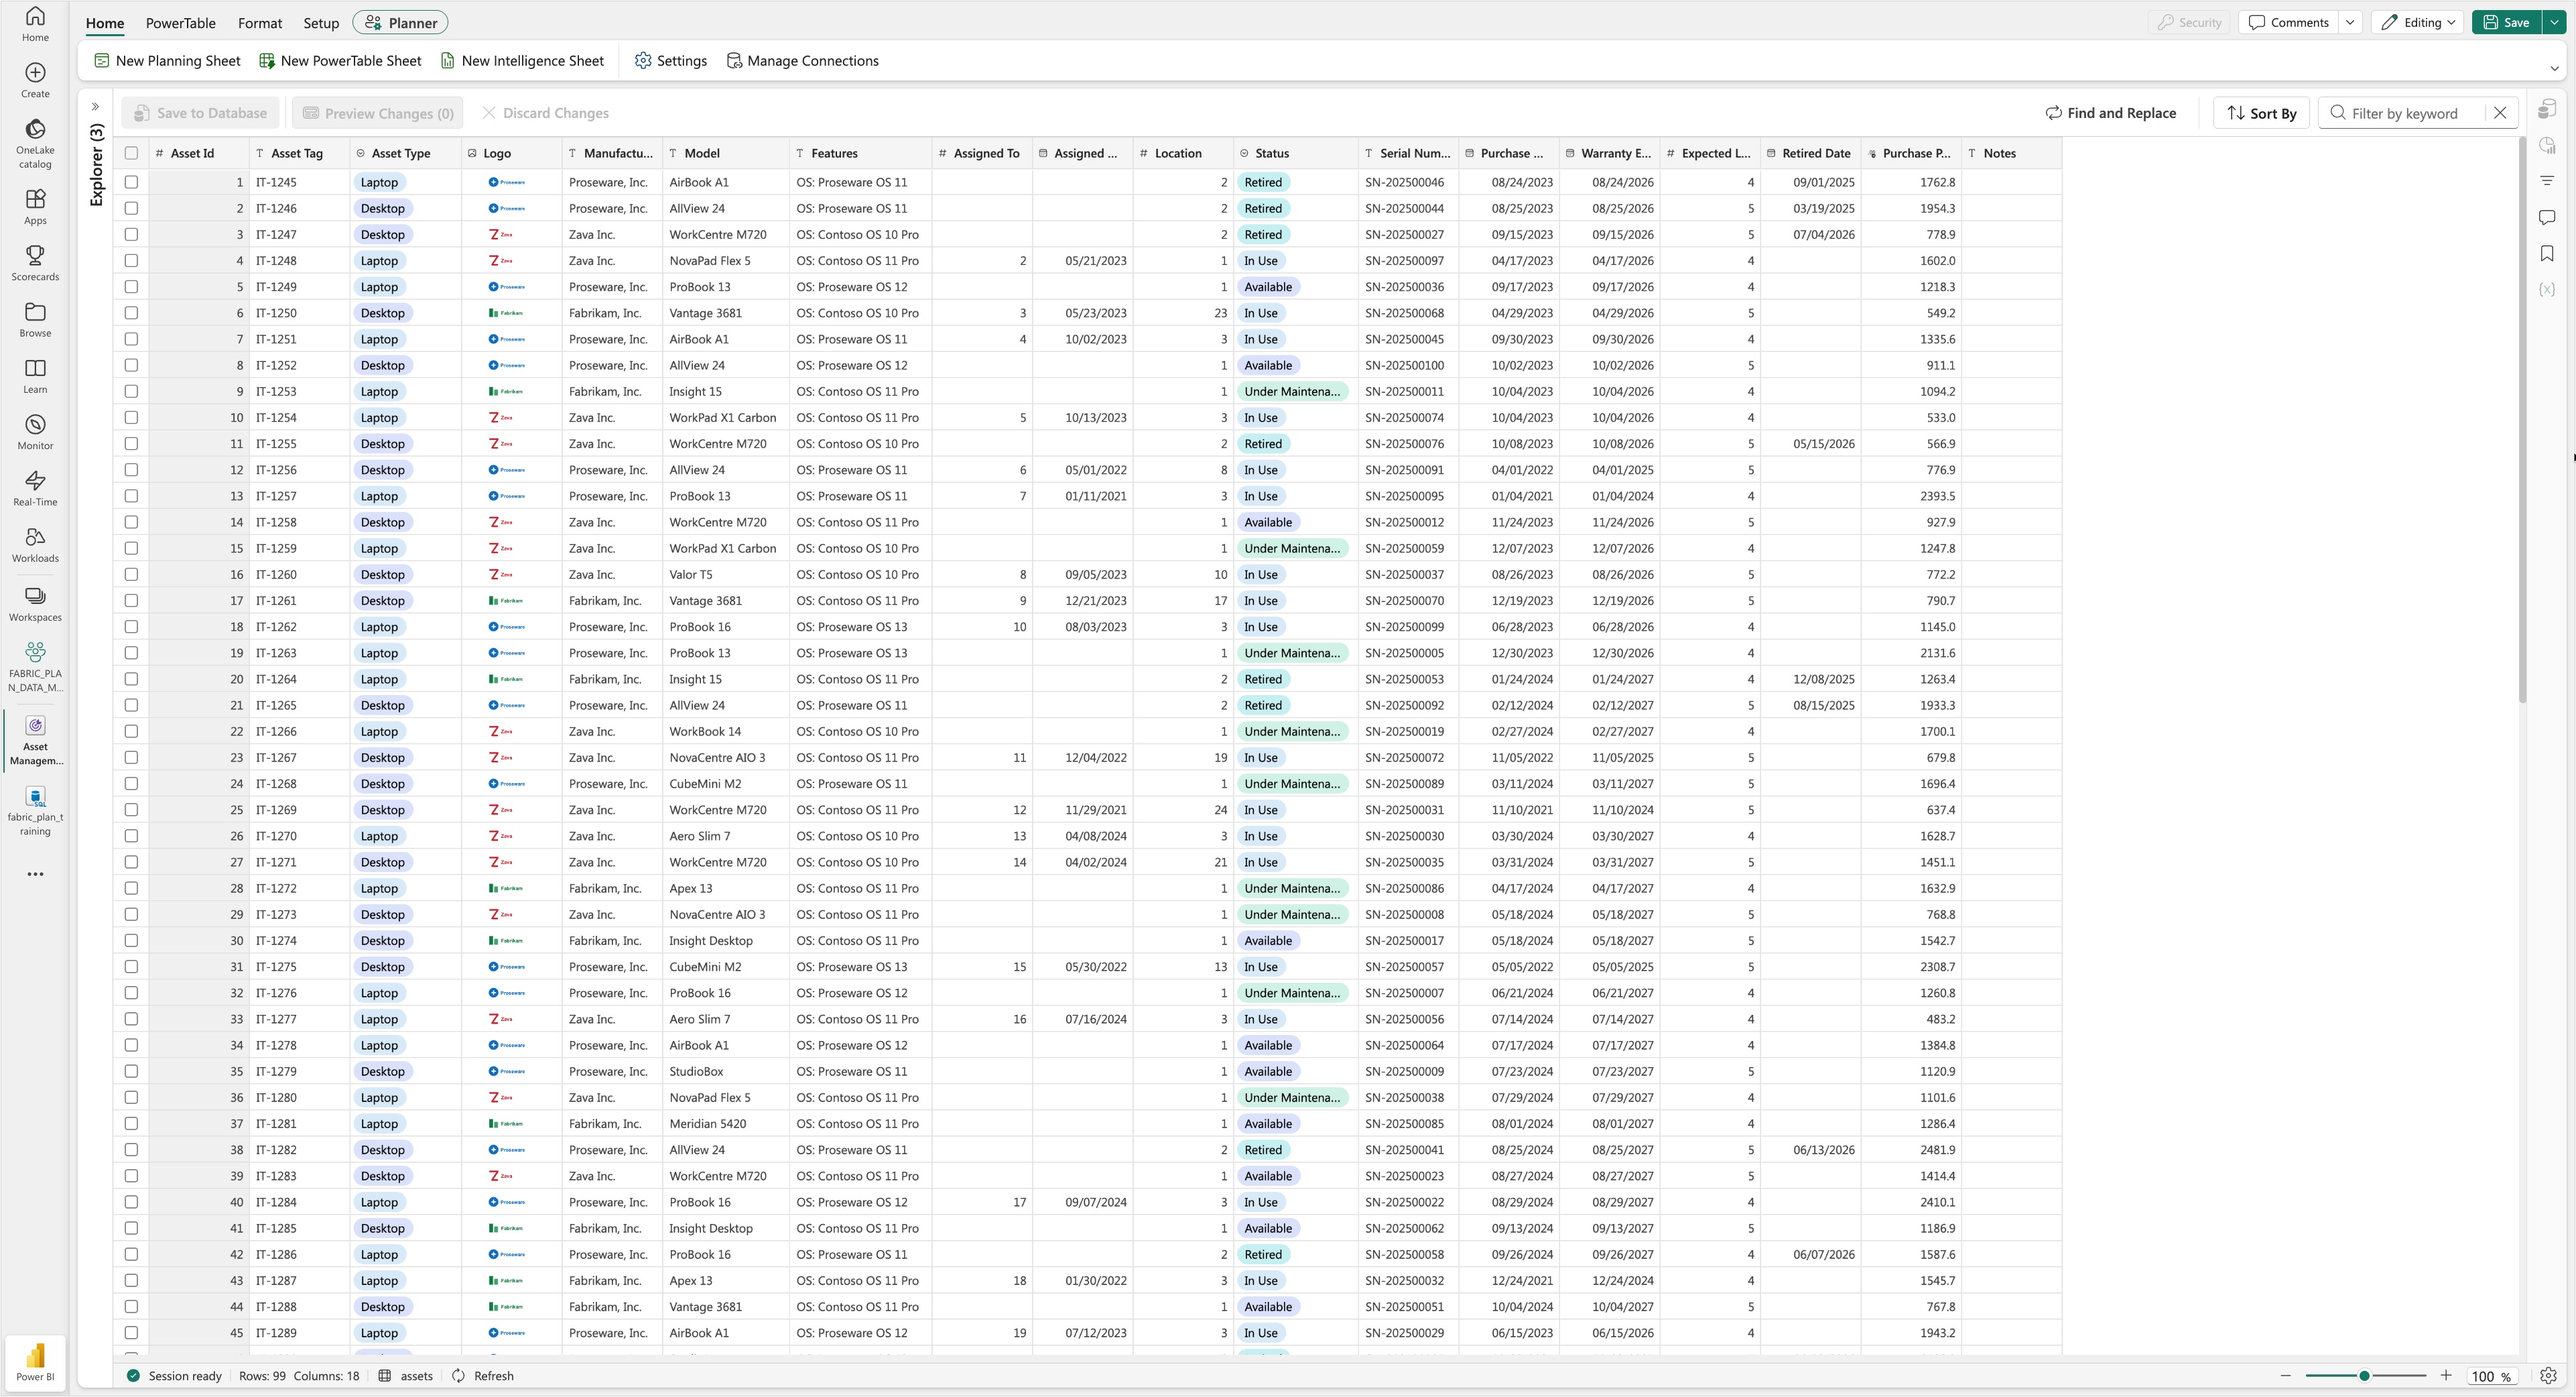
Change Input Type to Single Select and change Values Type to Distinct Values. This setting restricts entry to values already present in the column, which prevents typos and keeps filtering reliable. Select Save.

Repeat the previous two steps for the Status column.
Select Save in the toolbar.
Your Assets sheet should now look like this.

Create a conditional formatting rule for retired assets
Add a rule that styles every row whose status is Retired.
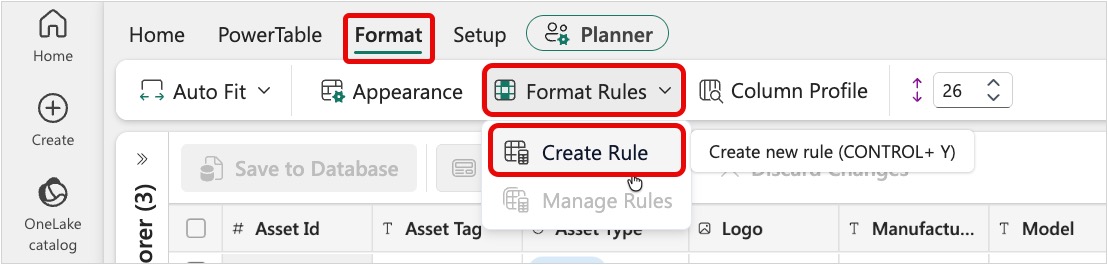
Select the Format tab in the toolbar, select the Format Rules dropdown, and select Create Rule.
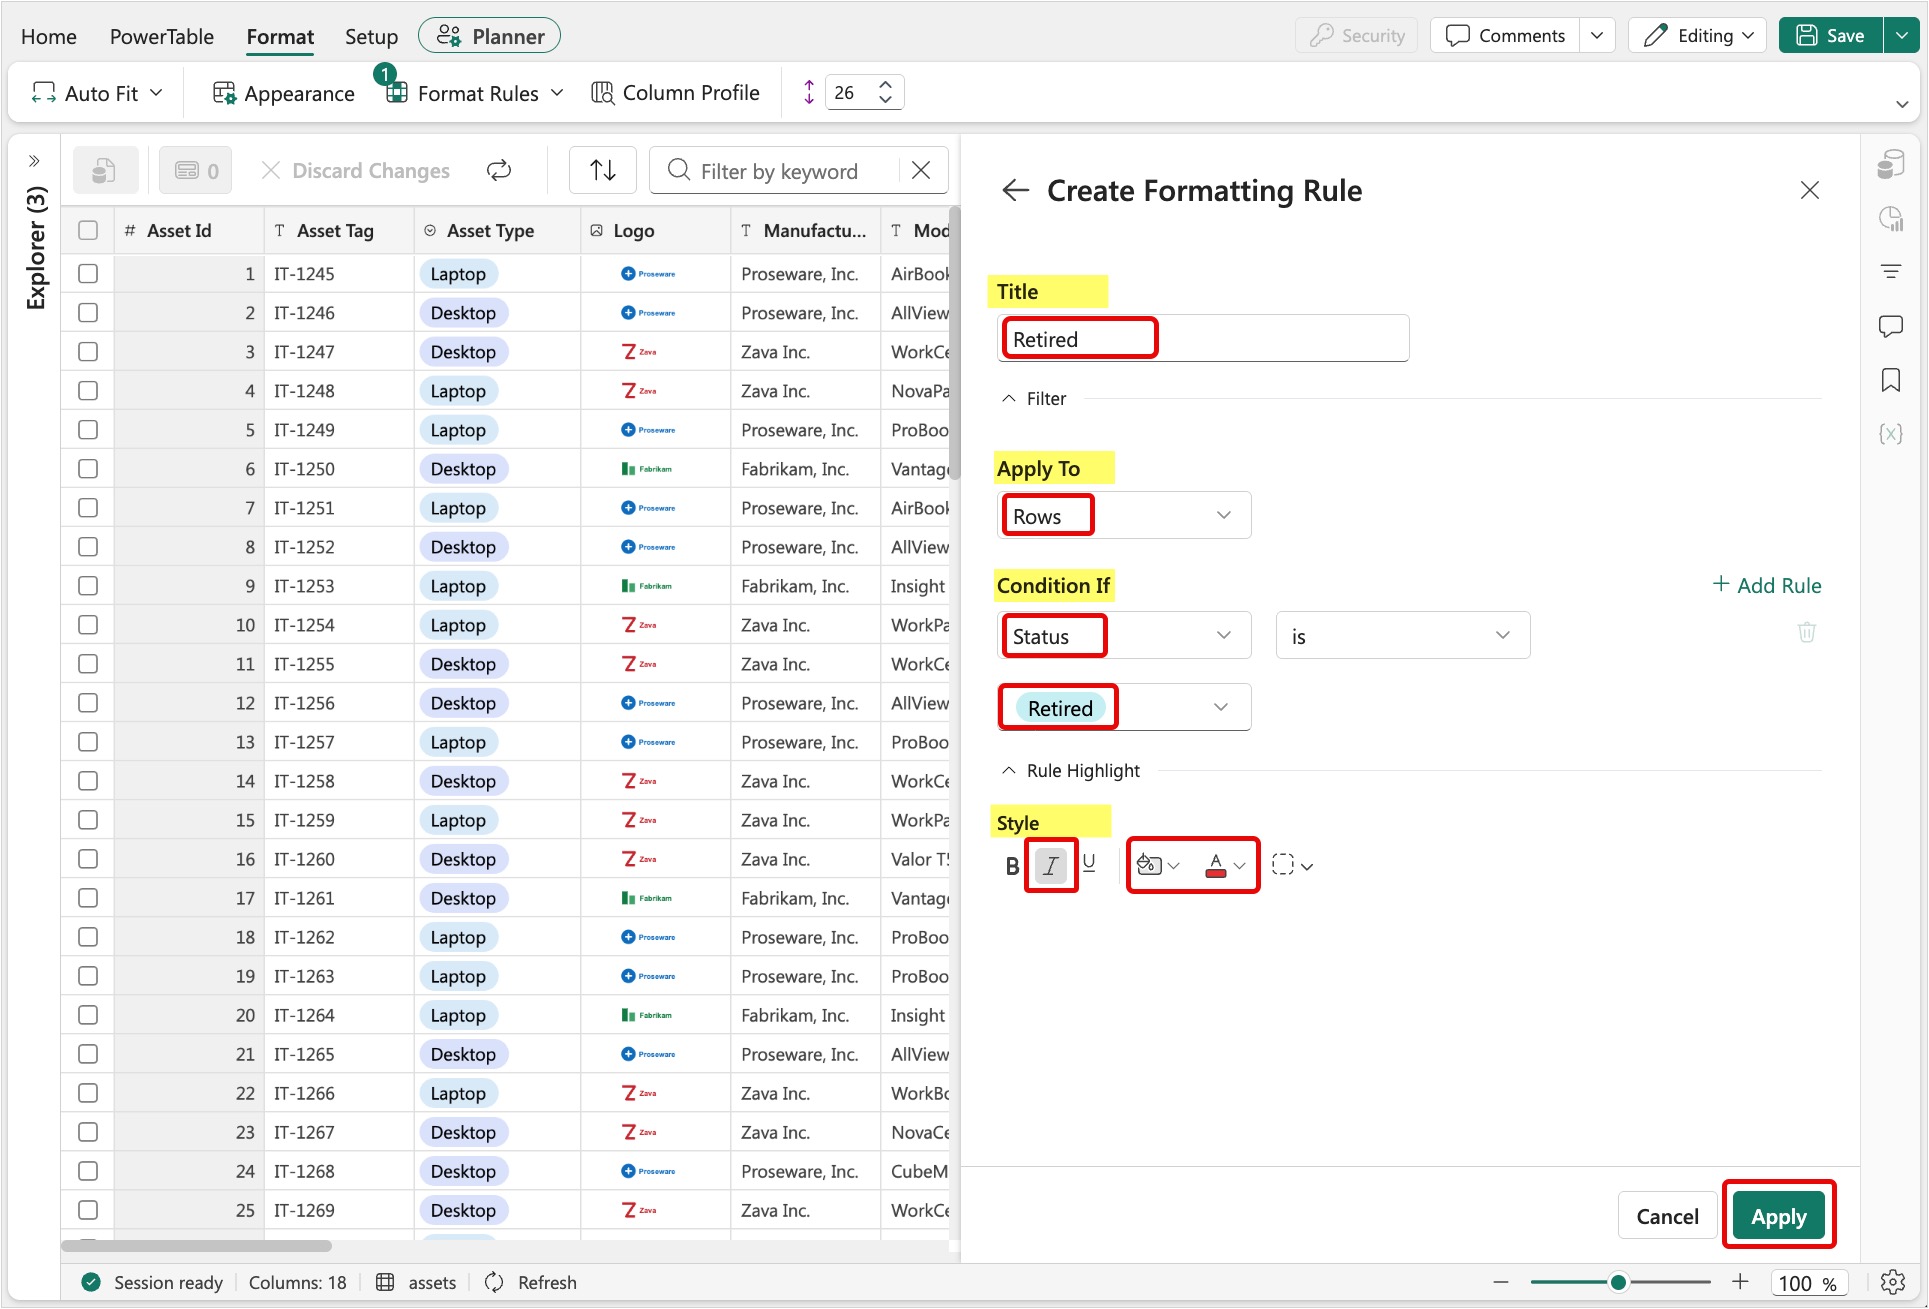
Configure the Create Formatting Rule dialog as shown in the following image and then select Apply.
- Title: enter Retired
- Apply To: select Rows
- Condition If: select Status, select Is, select Retired
- Style: select Italics, select gray for Fill Color, and select red for Font Color
Select the X to close the Manage Rule dialog.

Select Save in the toolbar.
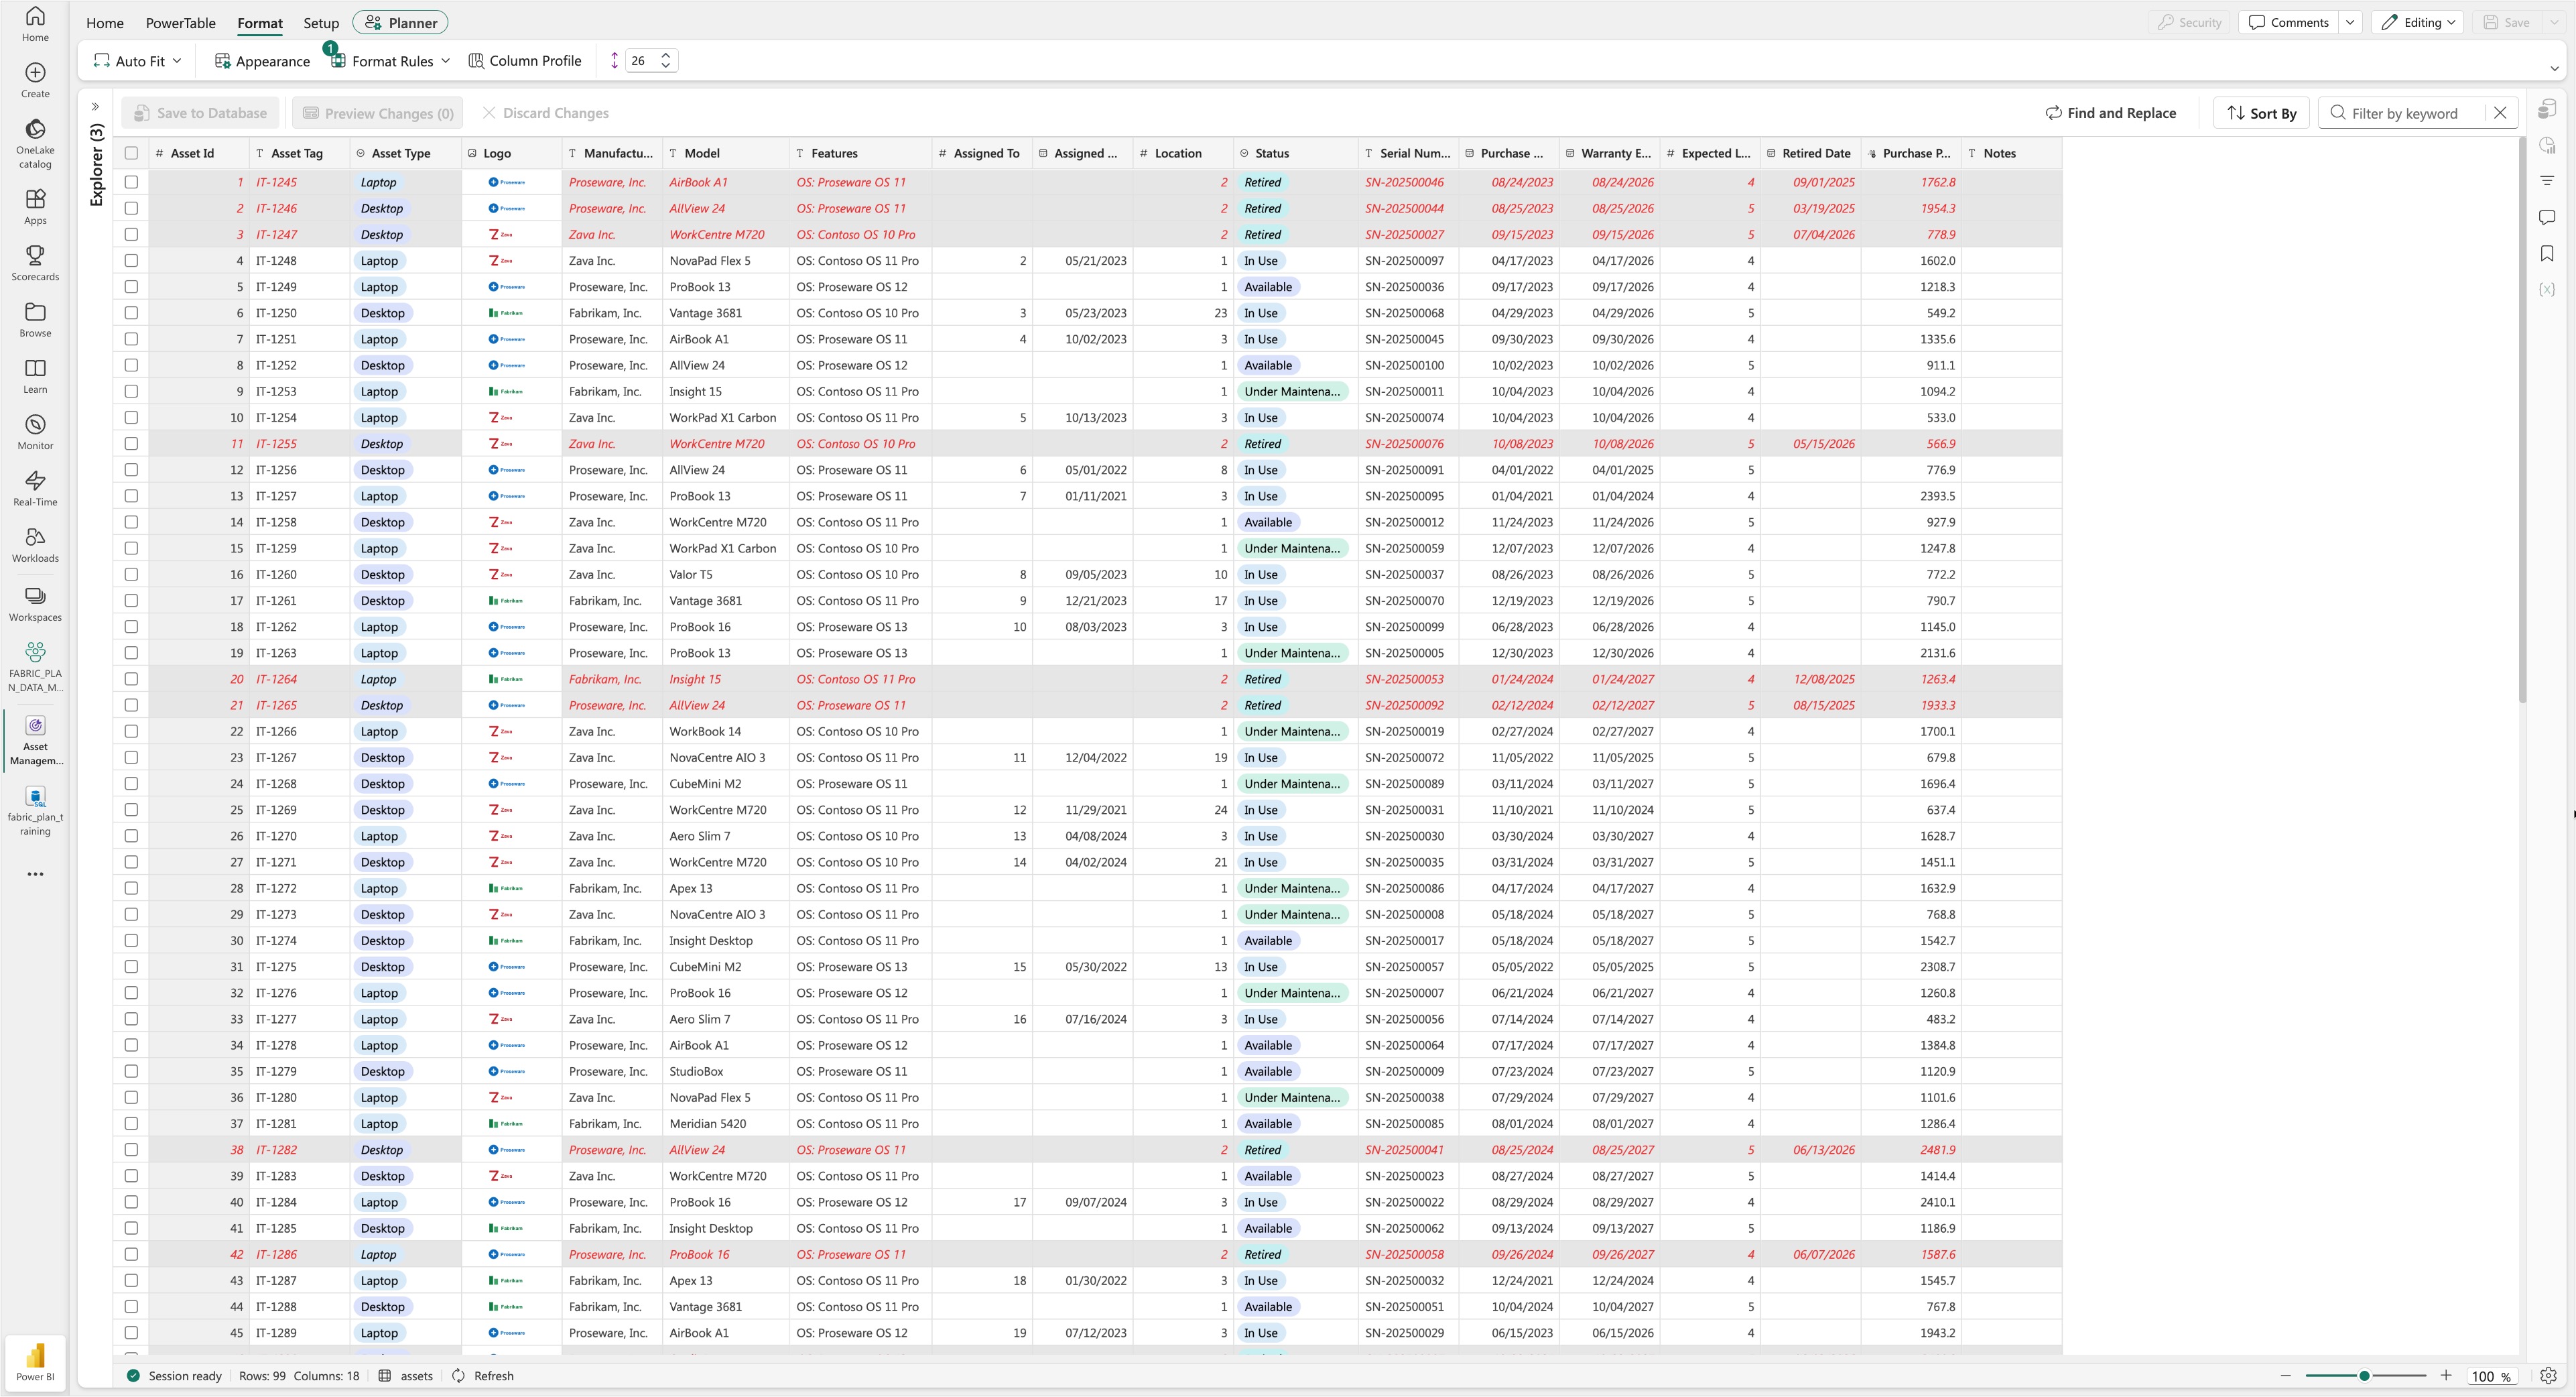
Your Assets sheet should now look like this.
Configure lookup values for the assigned to and location columns
Point both columns at the employees and locations tables so they display readable names instead of ID numbers.
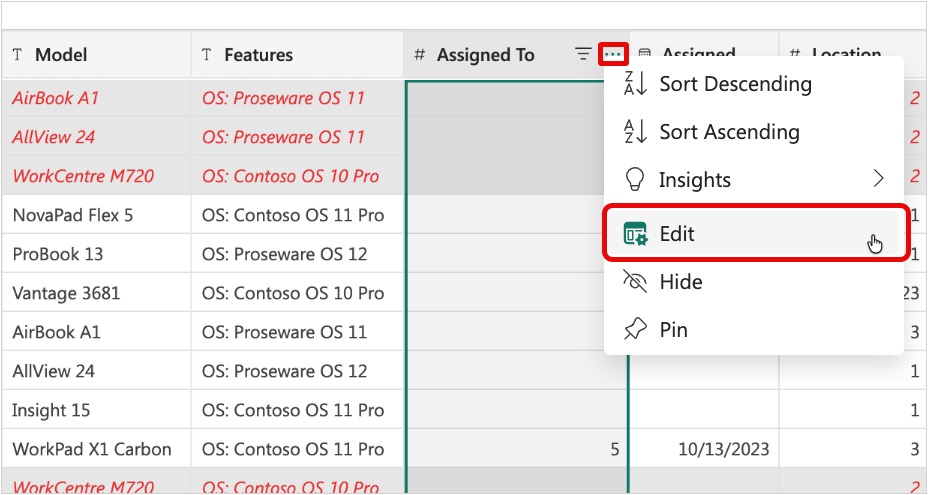
Hover over the Assigned To column, select the ellipsis "..." in the column header, and then select Edit on the context menu that appears.
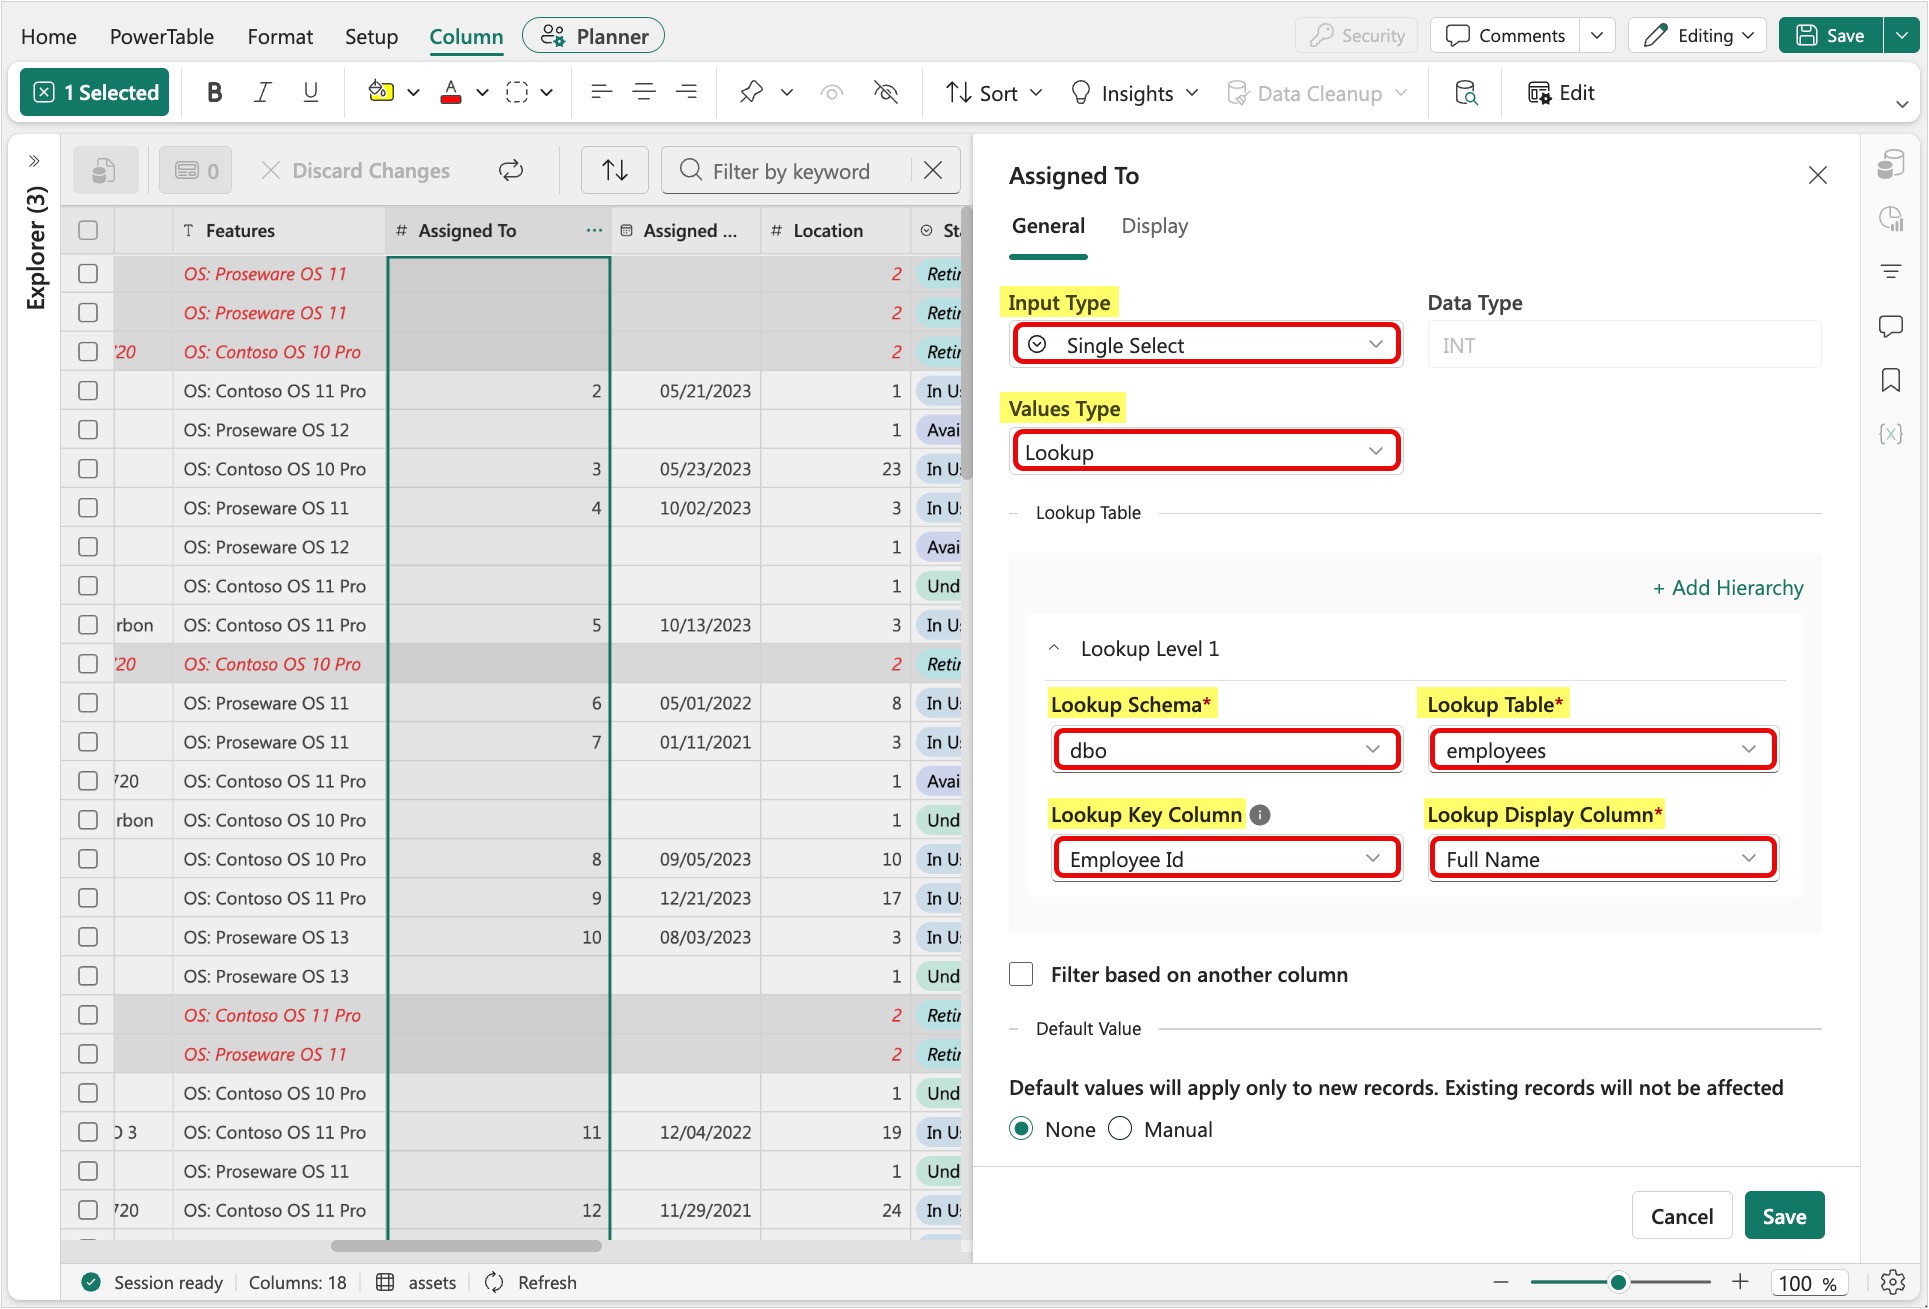
In the Assigned To side panel, set the following values for the indicated options under the General tab. A lookup pulls its values from another table, so the assets sheet shows employee names while still storing the underlying Employee Id.
- Input Type: select Single Select
- Values Type: select Lookup
- Lookup Schema: select dbo
- Lookup Table: select employees
- Lookup Key Column: select Employee Id
- Lookup Display Column: select Full Name
Within the Assigned To side panel, go to the Display tab and set the value for the Display Name field to Assigned Employee. Then, select Save.
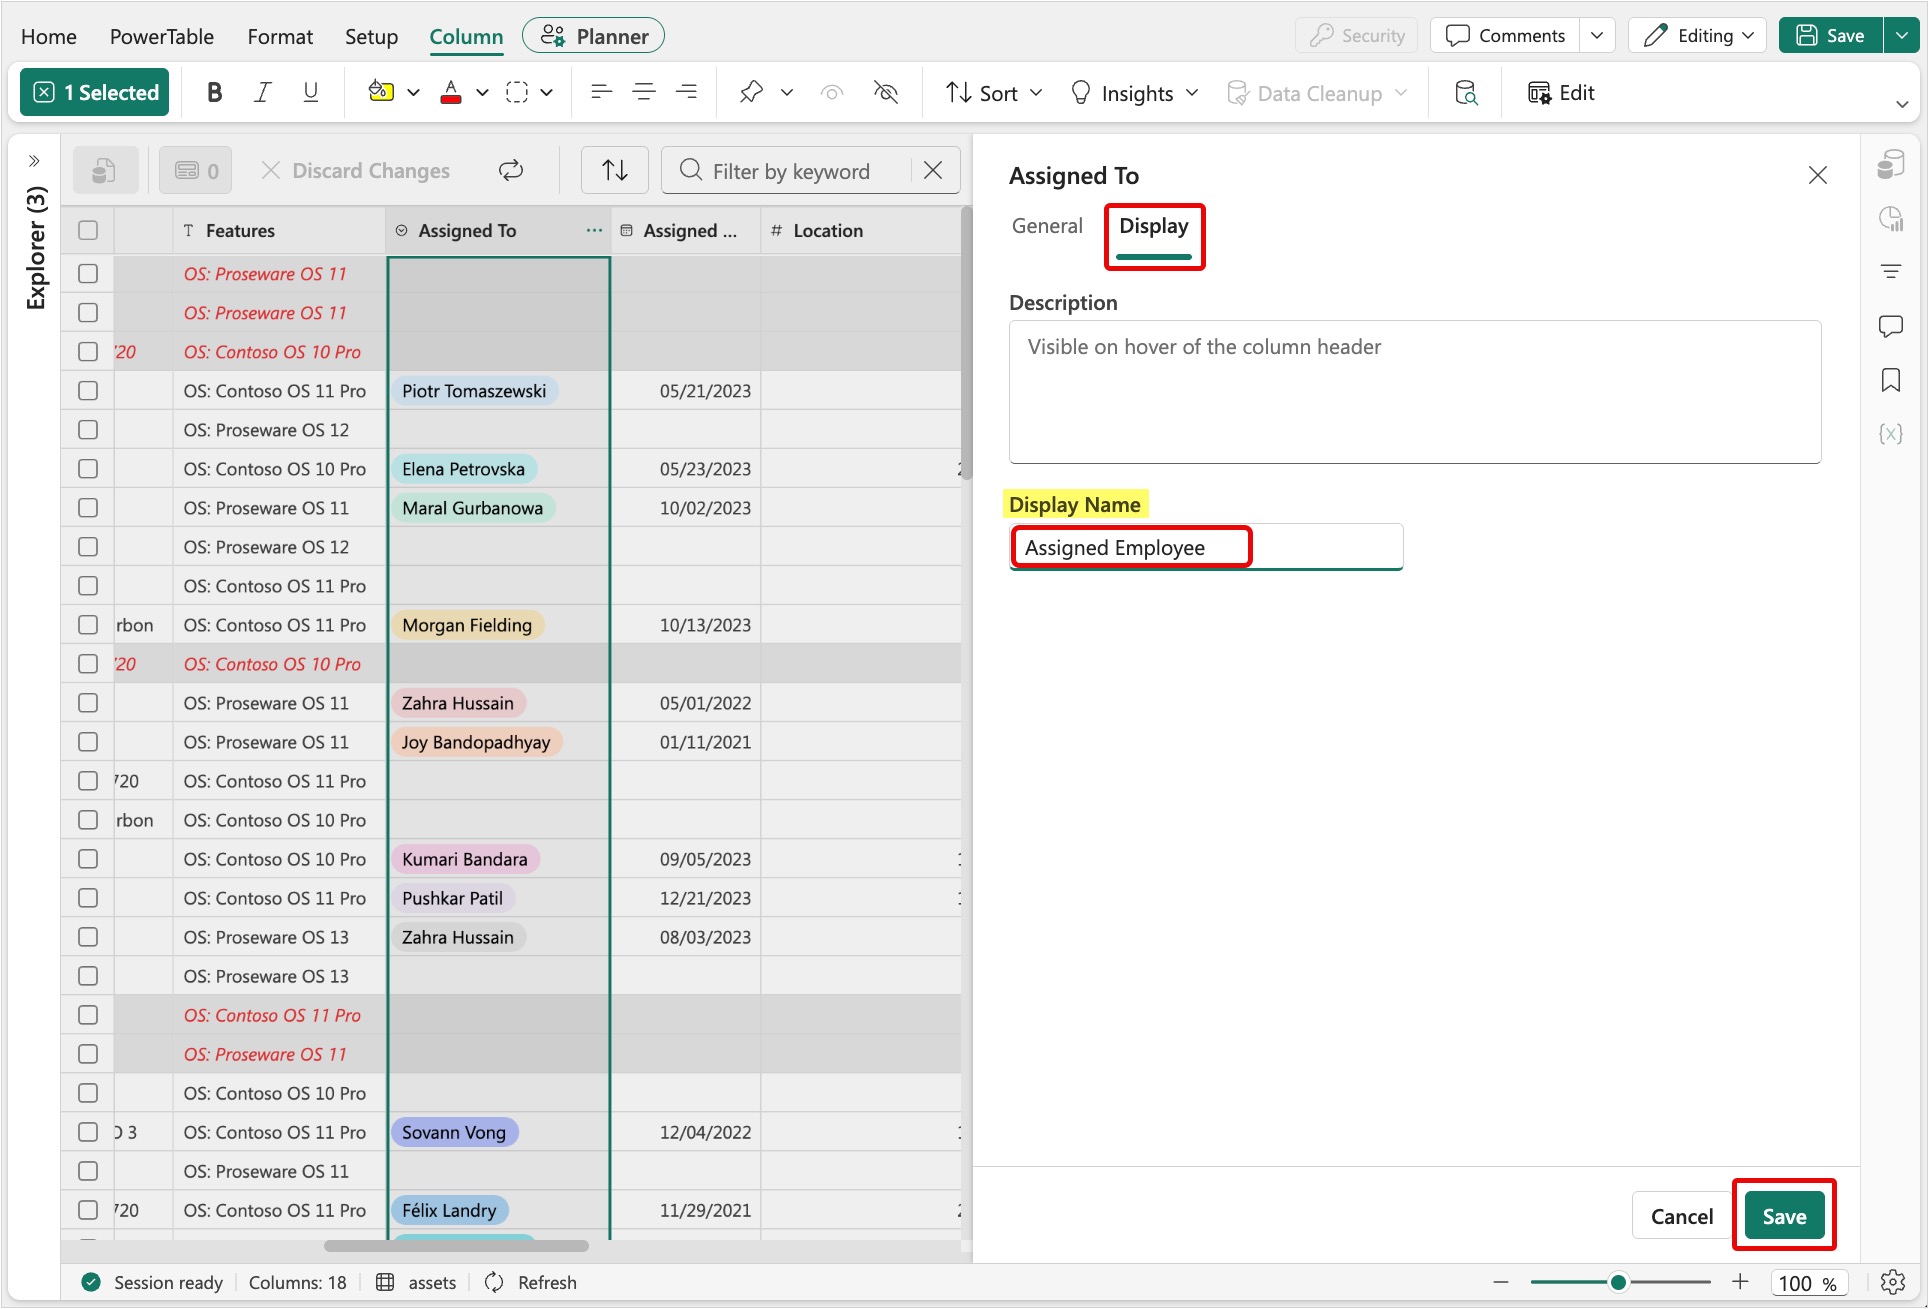
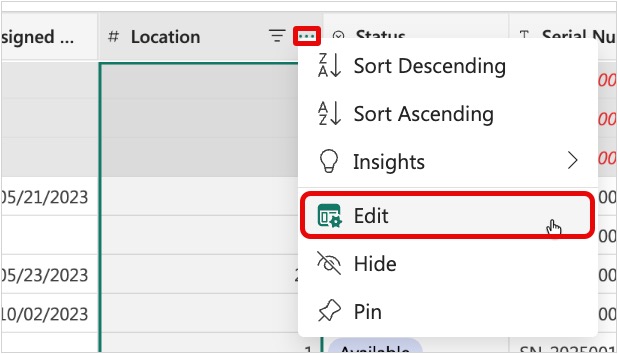
Next, hover over the Location column, select on the ellipsis "..." in the column header, and then select Edit on the context menu that appears.
Within the Location side panel, set the following values for the indicated options under the General tab, and then select Save.
- Input Type: select Single Select
- Values Type: select Lookup
- Lookup Schema: select dbo
- Lookup Table: select locations
- Lookup Key Column: select Location Id
- Lookup Display Column: select Location
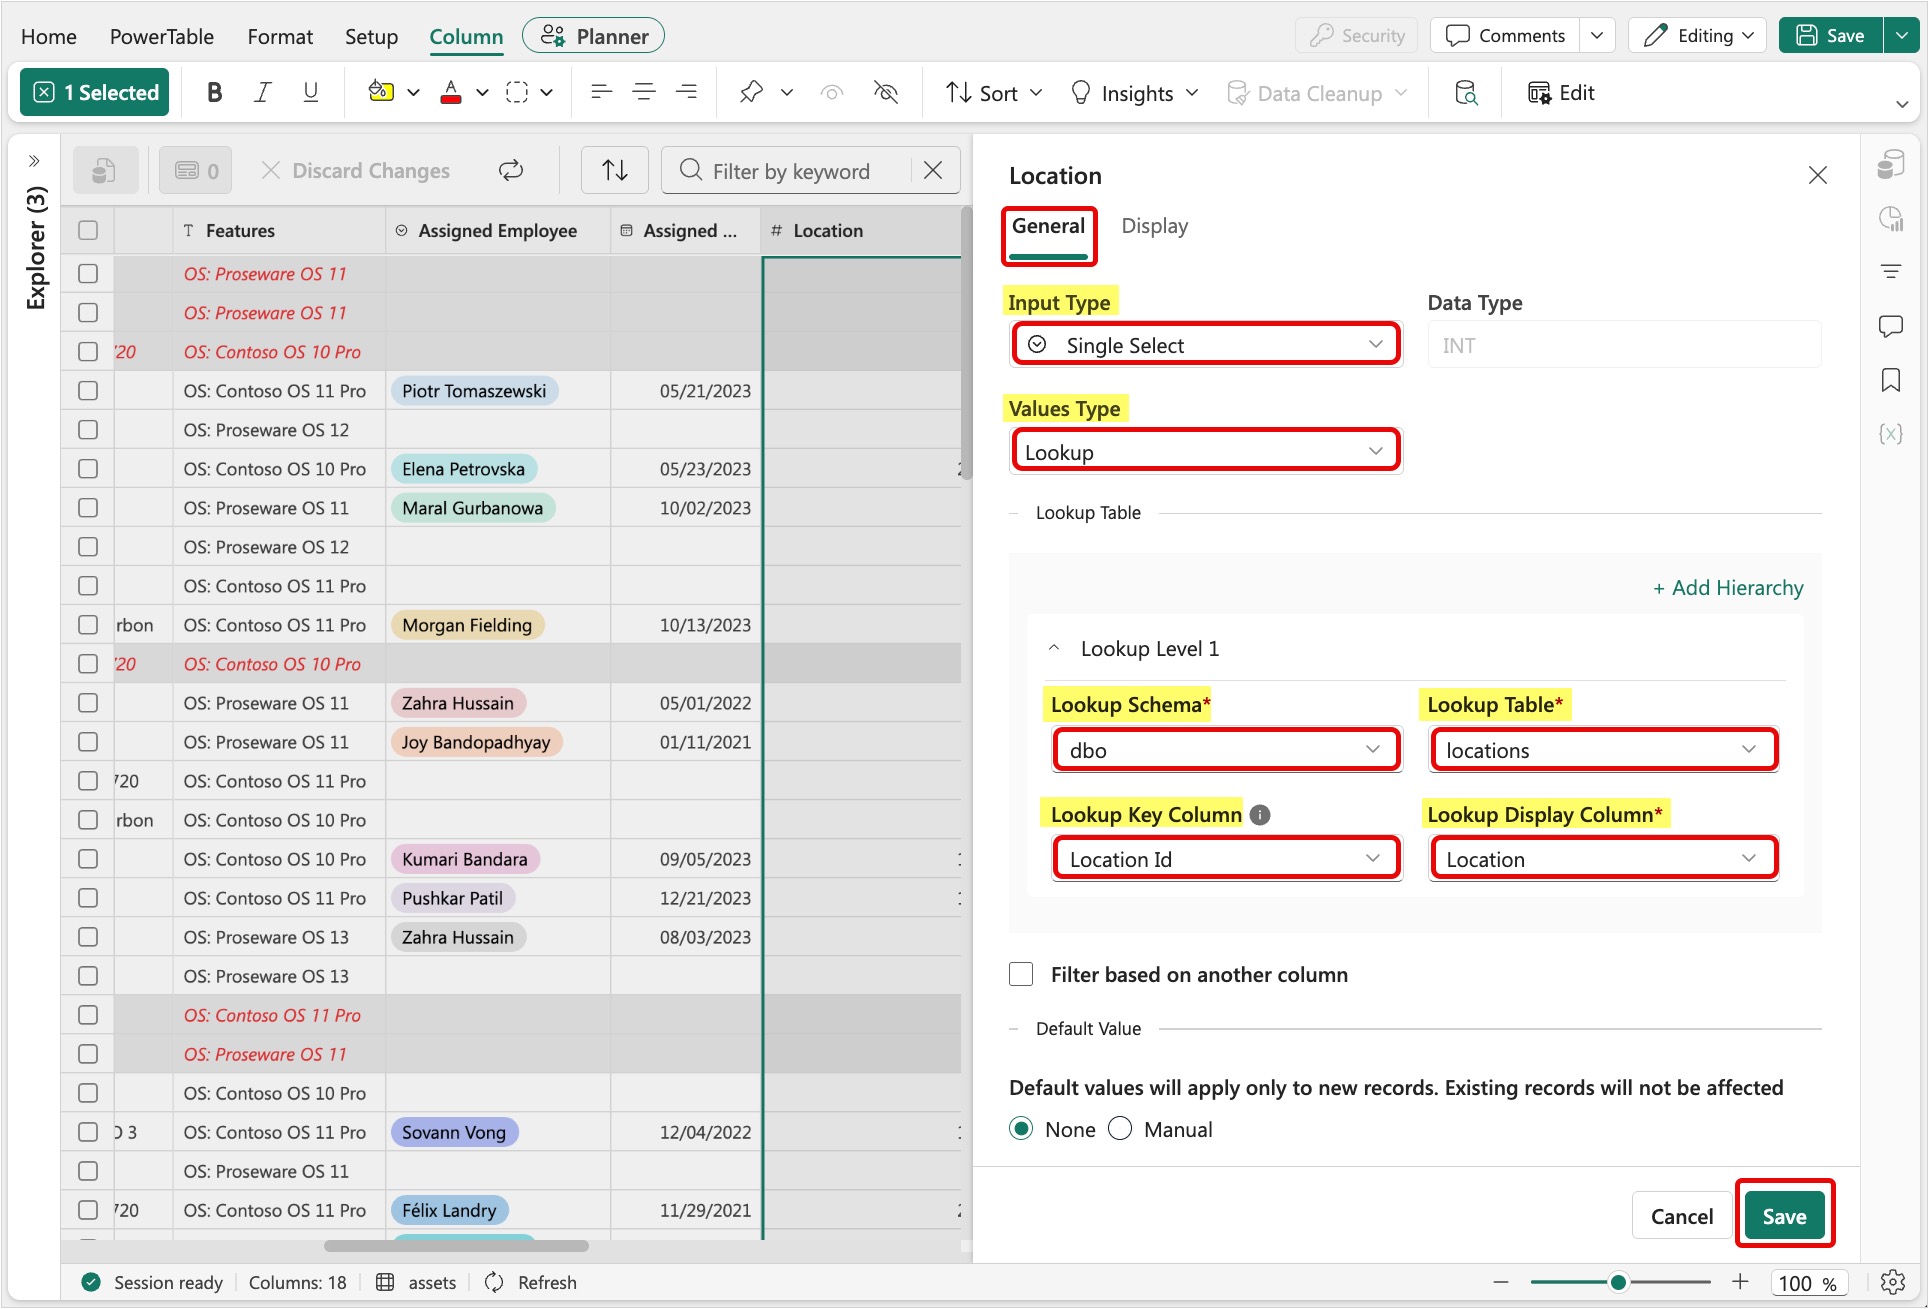
Select Save in the toolbar.
Add a new formula column to calculate the end-of-life date
Derive an expected end-of-life date from the purchase date and the expected lifetime.
In the PowerTable ribbon of the toolbar, select Insert Column, and then select Formula Column in the dropdown menu that appears.
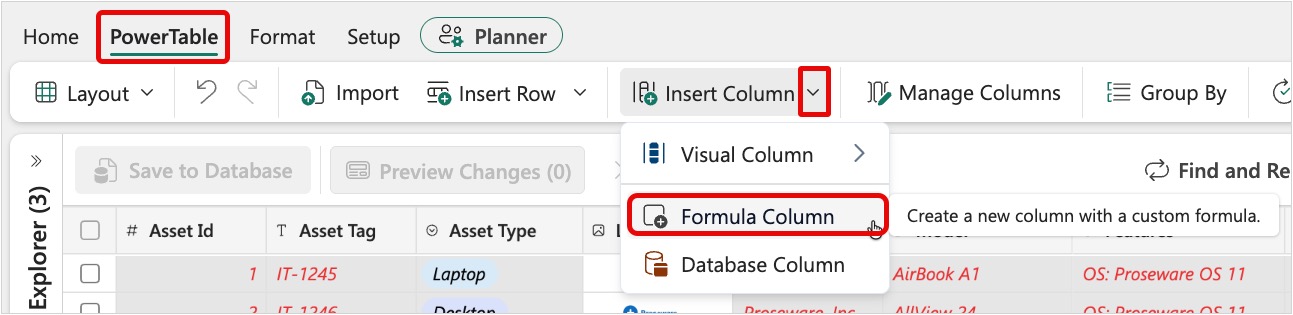
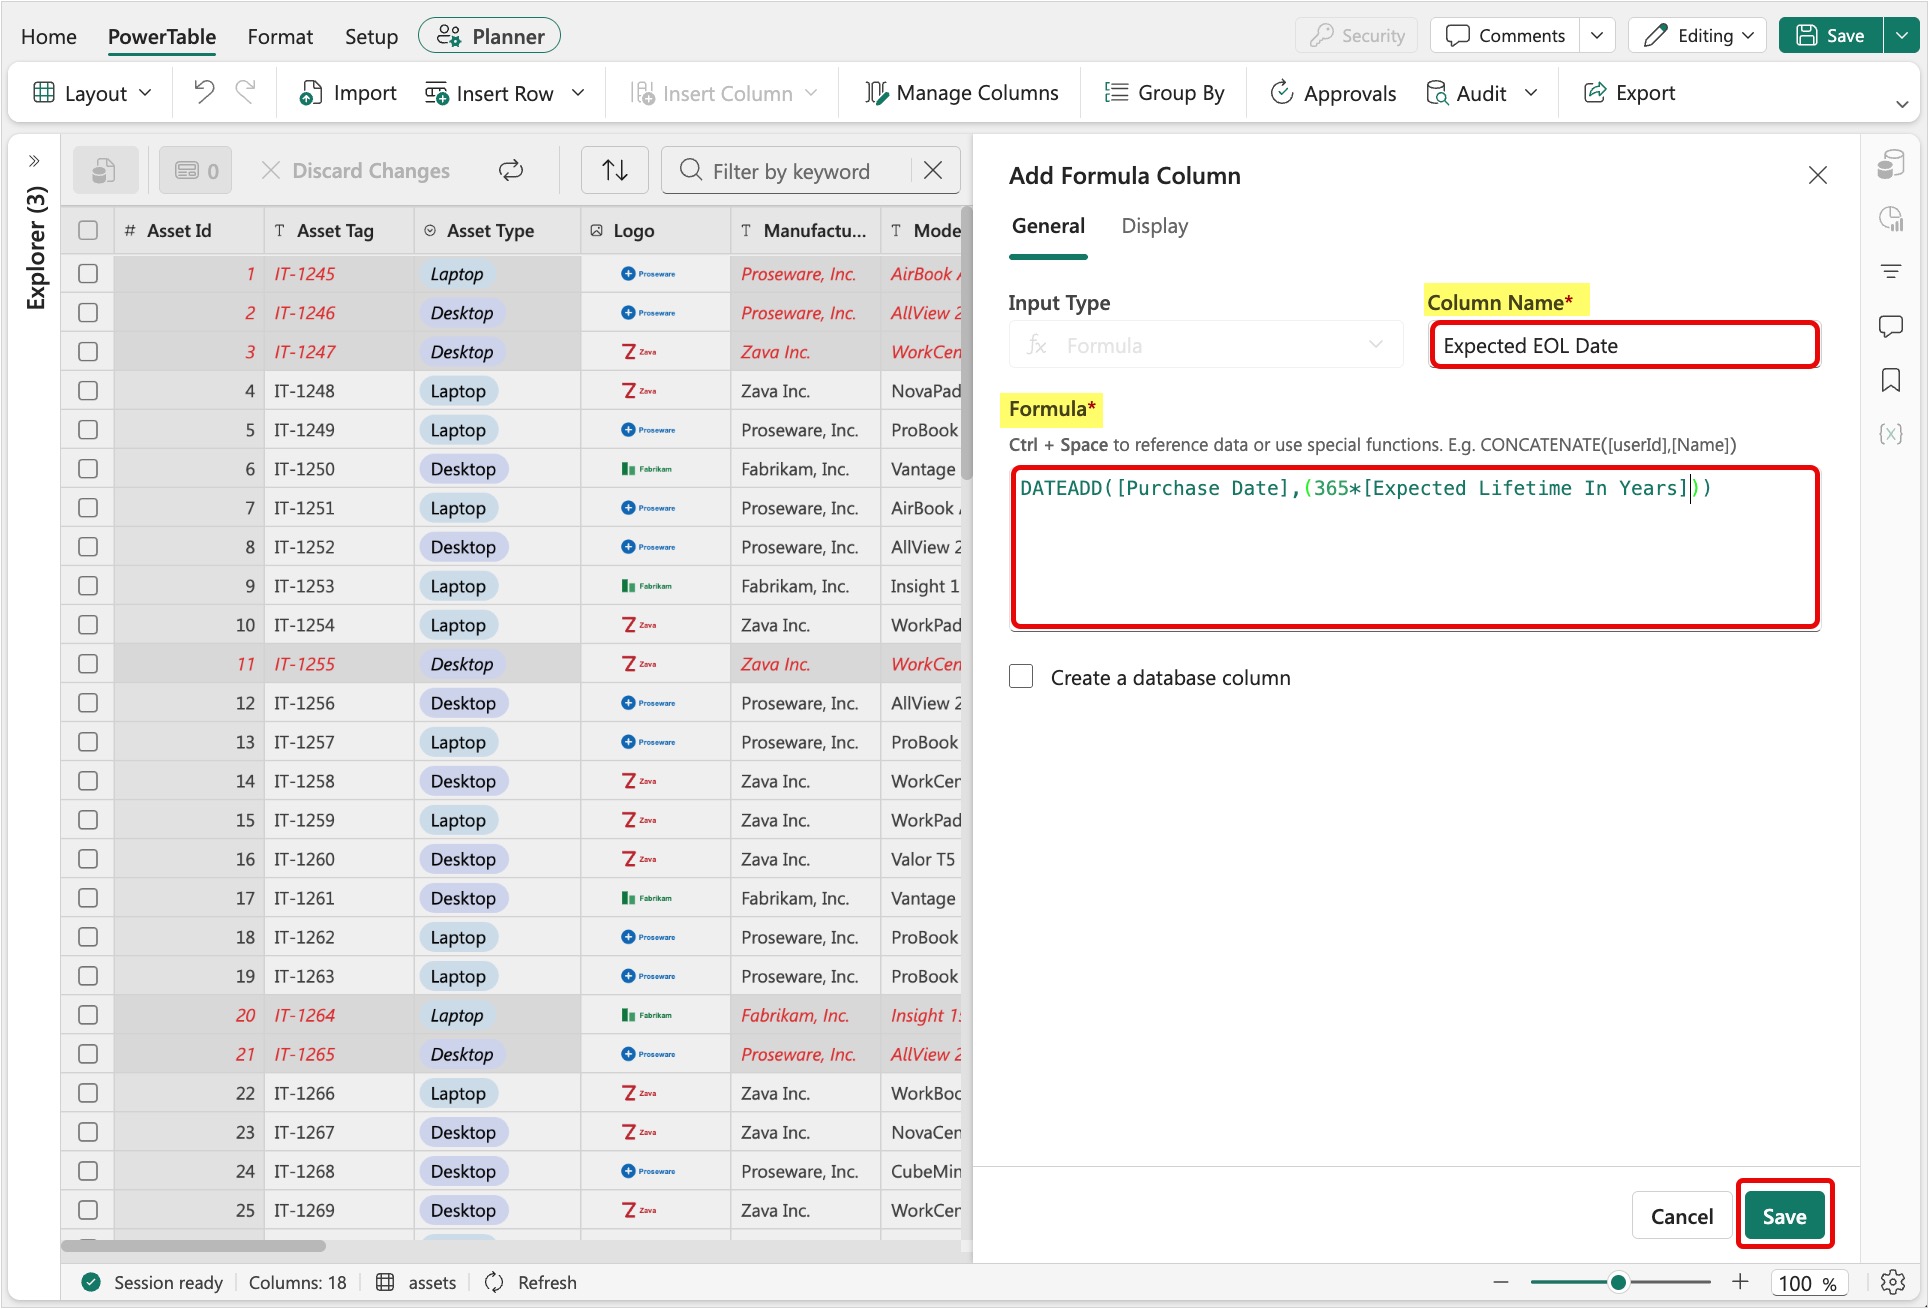
Configure the Add Formula Column dialog with the following values and then select Save.
- Column Name: Expected EOL Date
- Formula: enter
DATEADD([Purchase Date], (365*[Expected Lifetime In Years]))
Note
Don't copy and paste the formula. It doesn't work. Type the formula manually, because of the way PowerTable references columns behind the scenes.
Select Save in the toolbar.
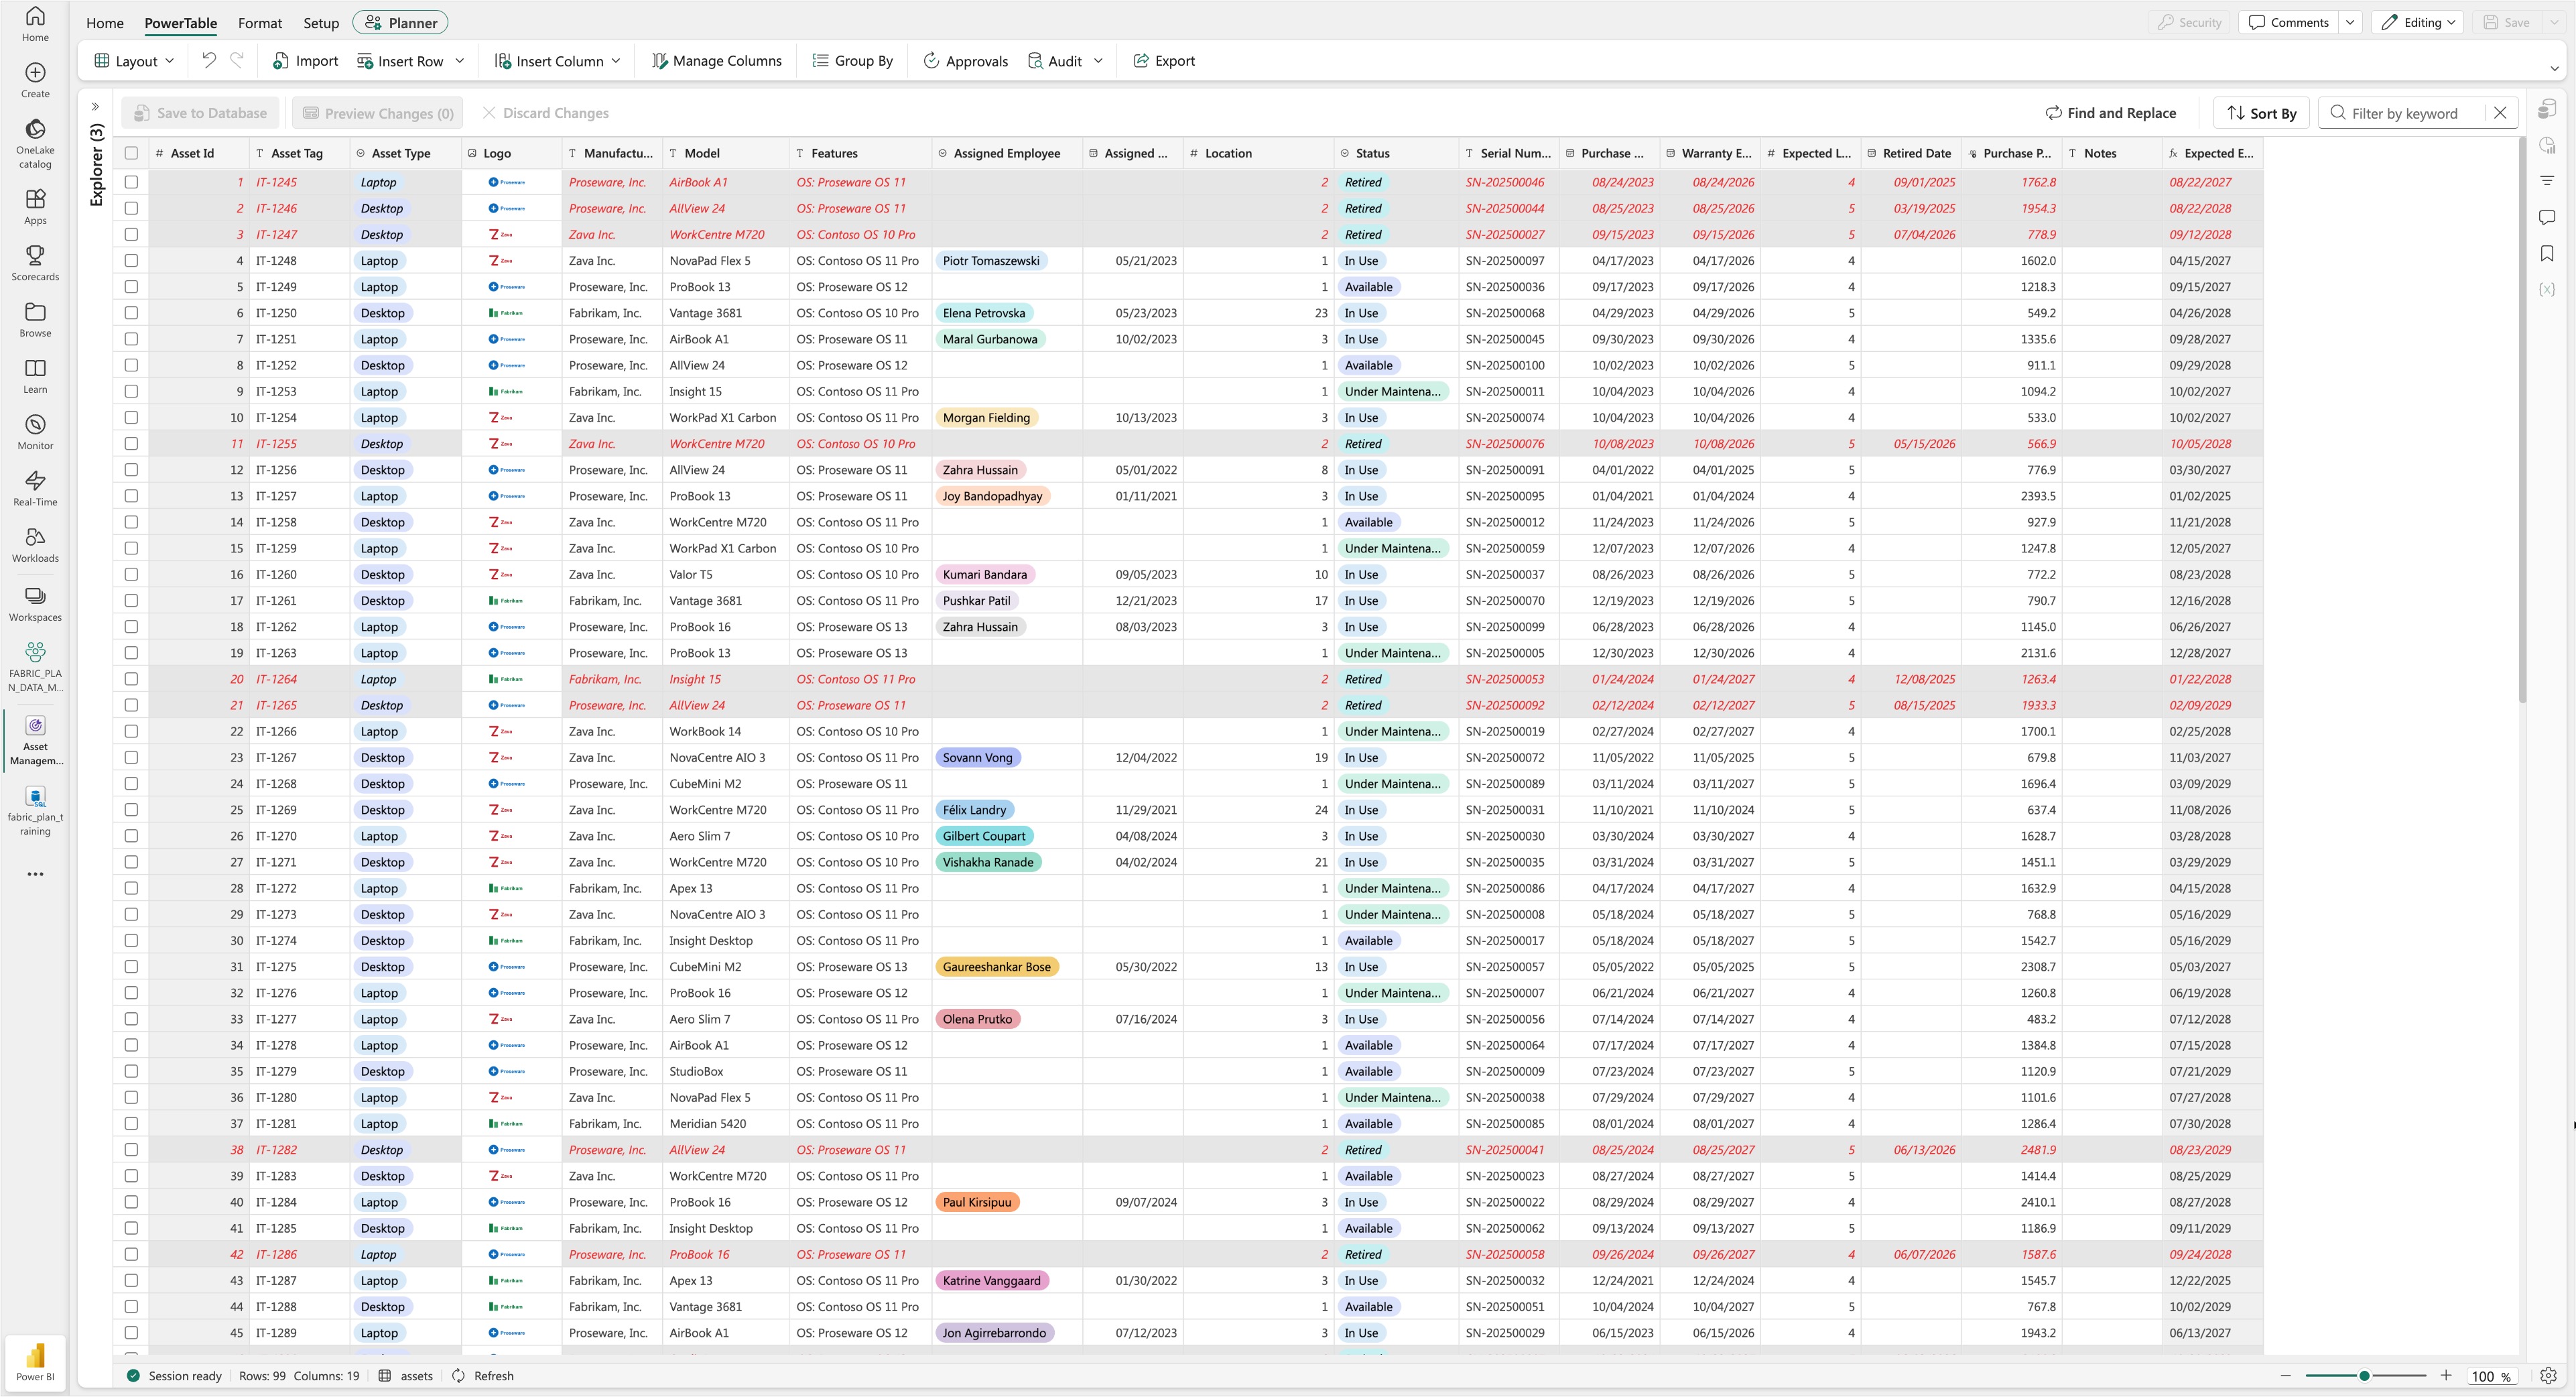
Your Assets sheet should now look like this.
Manage data in PowerTable
You edit rows by using single-row edits, the Bulk Editor, and the Form Editor. You can also import new data into PowerTable from files.
Row editor
Edit cells directly in the grid and commit the changes to the database.
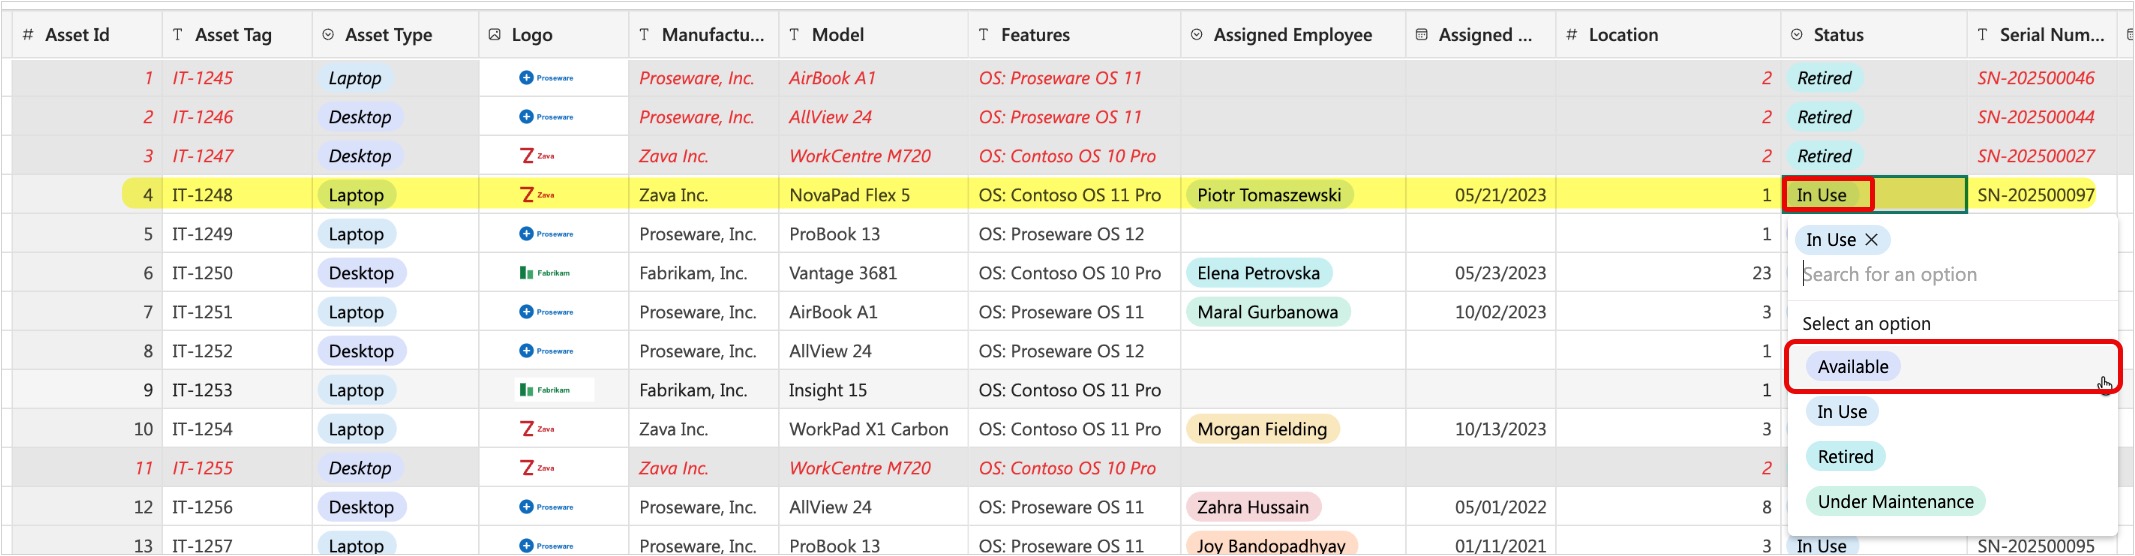
In the Assets sheet, make the following changes in the fourth row, which has the Asset Tag value IT-1248.
Change Status from In Use to Available.
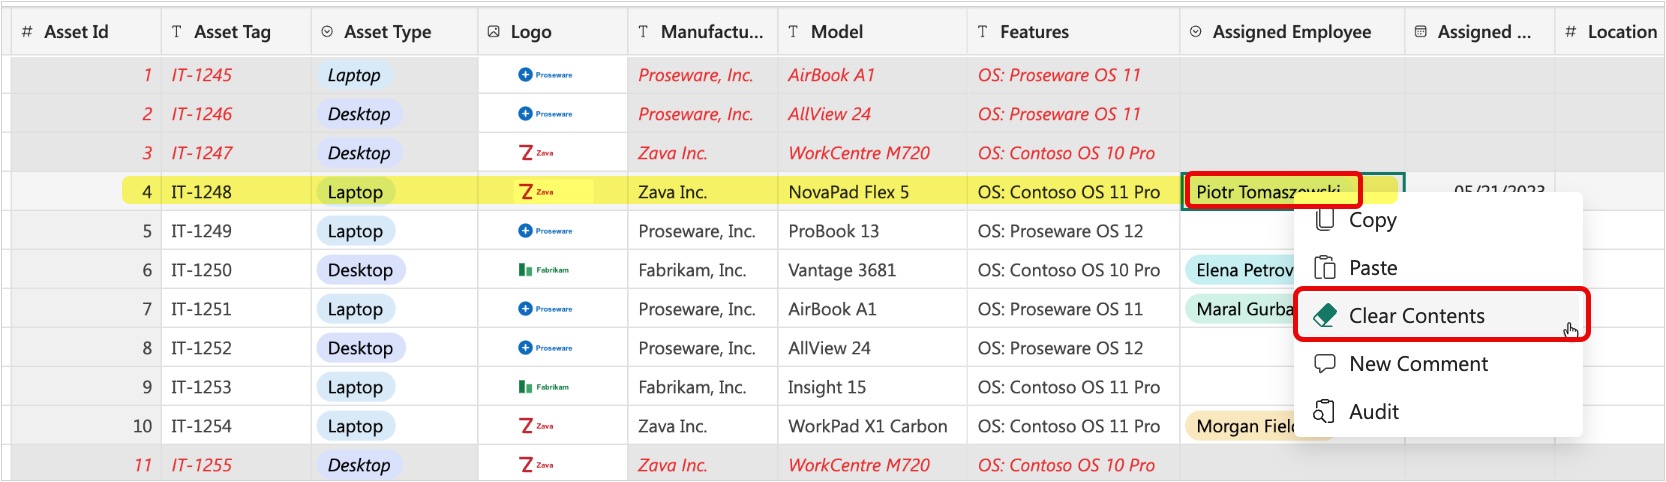
Clear the Assigned To value by right-clicking on the cell and selecting Clear Contents in the context menu.
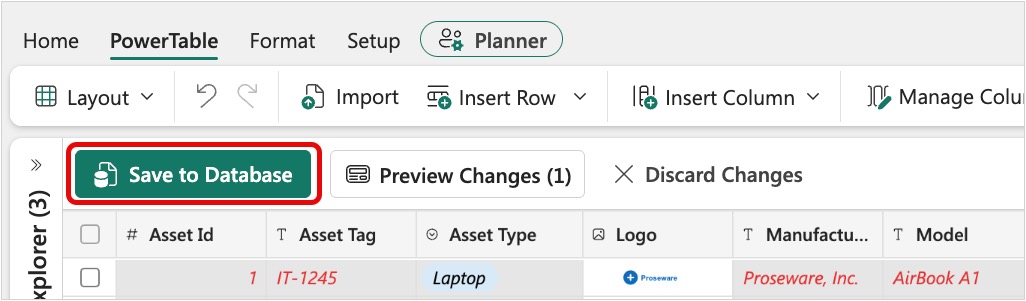
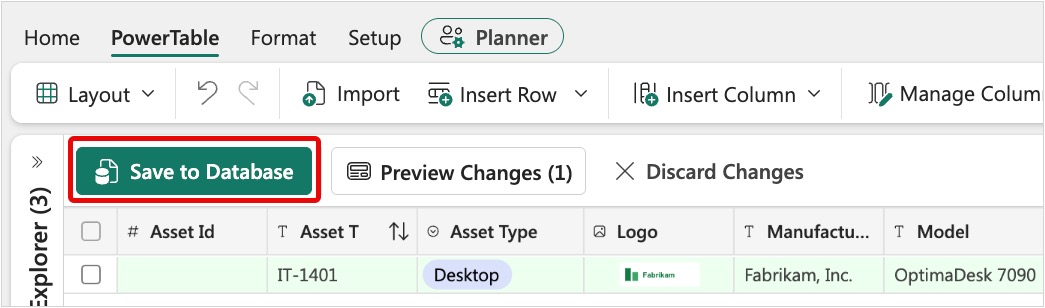
PowerTable then enables the Save to Database, Preview Changes, and Discard Changes buttons. Select Save to Database.
Note
Use your keyboard or mouse to navigate between the rows and columns. You can also copy and paste values between columns and rows as well as from other applications into the rows.
PowerTable asks you to confirm the save. Check the Don't show this again option if you don't want to confirm with every change and then select Proceed.
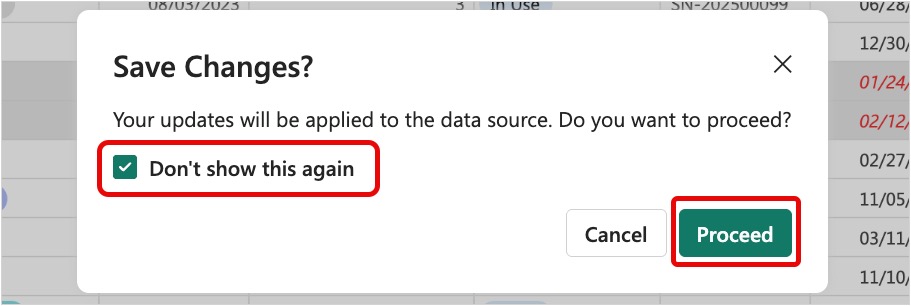
PowerTable displays the Data saved successfully toast message when the save completes, and then refreshes the page to show the changes. PowerTable then disables the Save to Database, Preview Changes, and Discard Changes buttons again.

Insert a row
Switch the insert behavior to use a form, and then add a record.
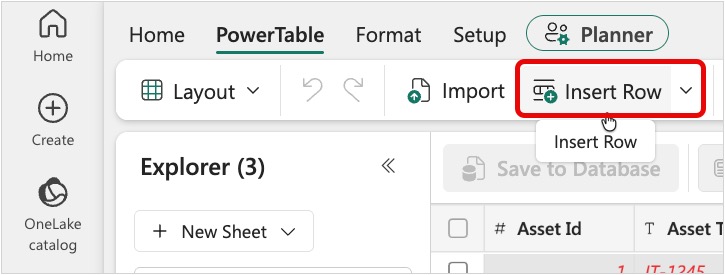
On the Assets sheet, go to the PowerTable tab on the toolbar. Select the chevron in the Insert Row button. In the dropdown menu, toggle the option labeled Insert Using Form By Default to the on position. The form view shows every column with its configured input type, which is easier than typing across a wide row in the grid.

Now, on the PowerTable tab, select Insert Row rather than the arrow that opens the dropdown. PowerTable displays a form for inserting new data.
Enter values for the new row, and then select Apply. This action creates the new row.
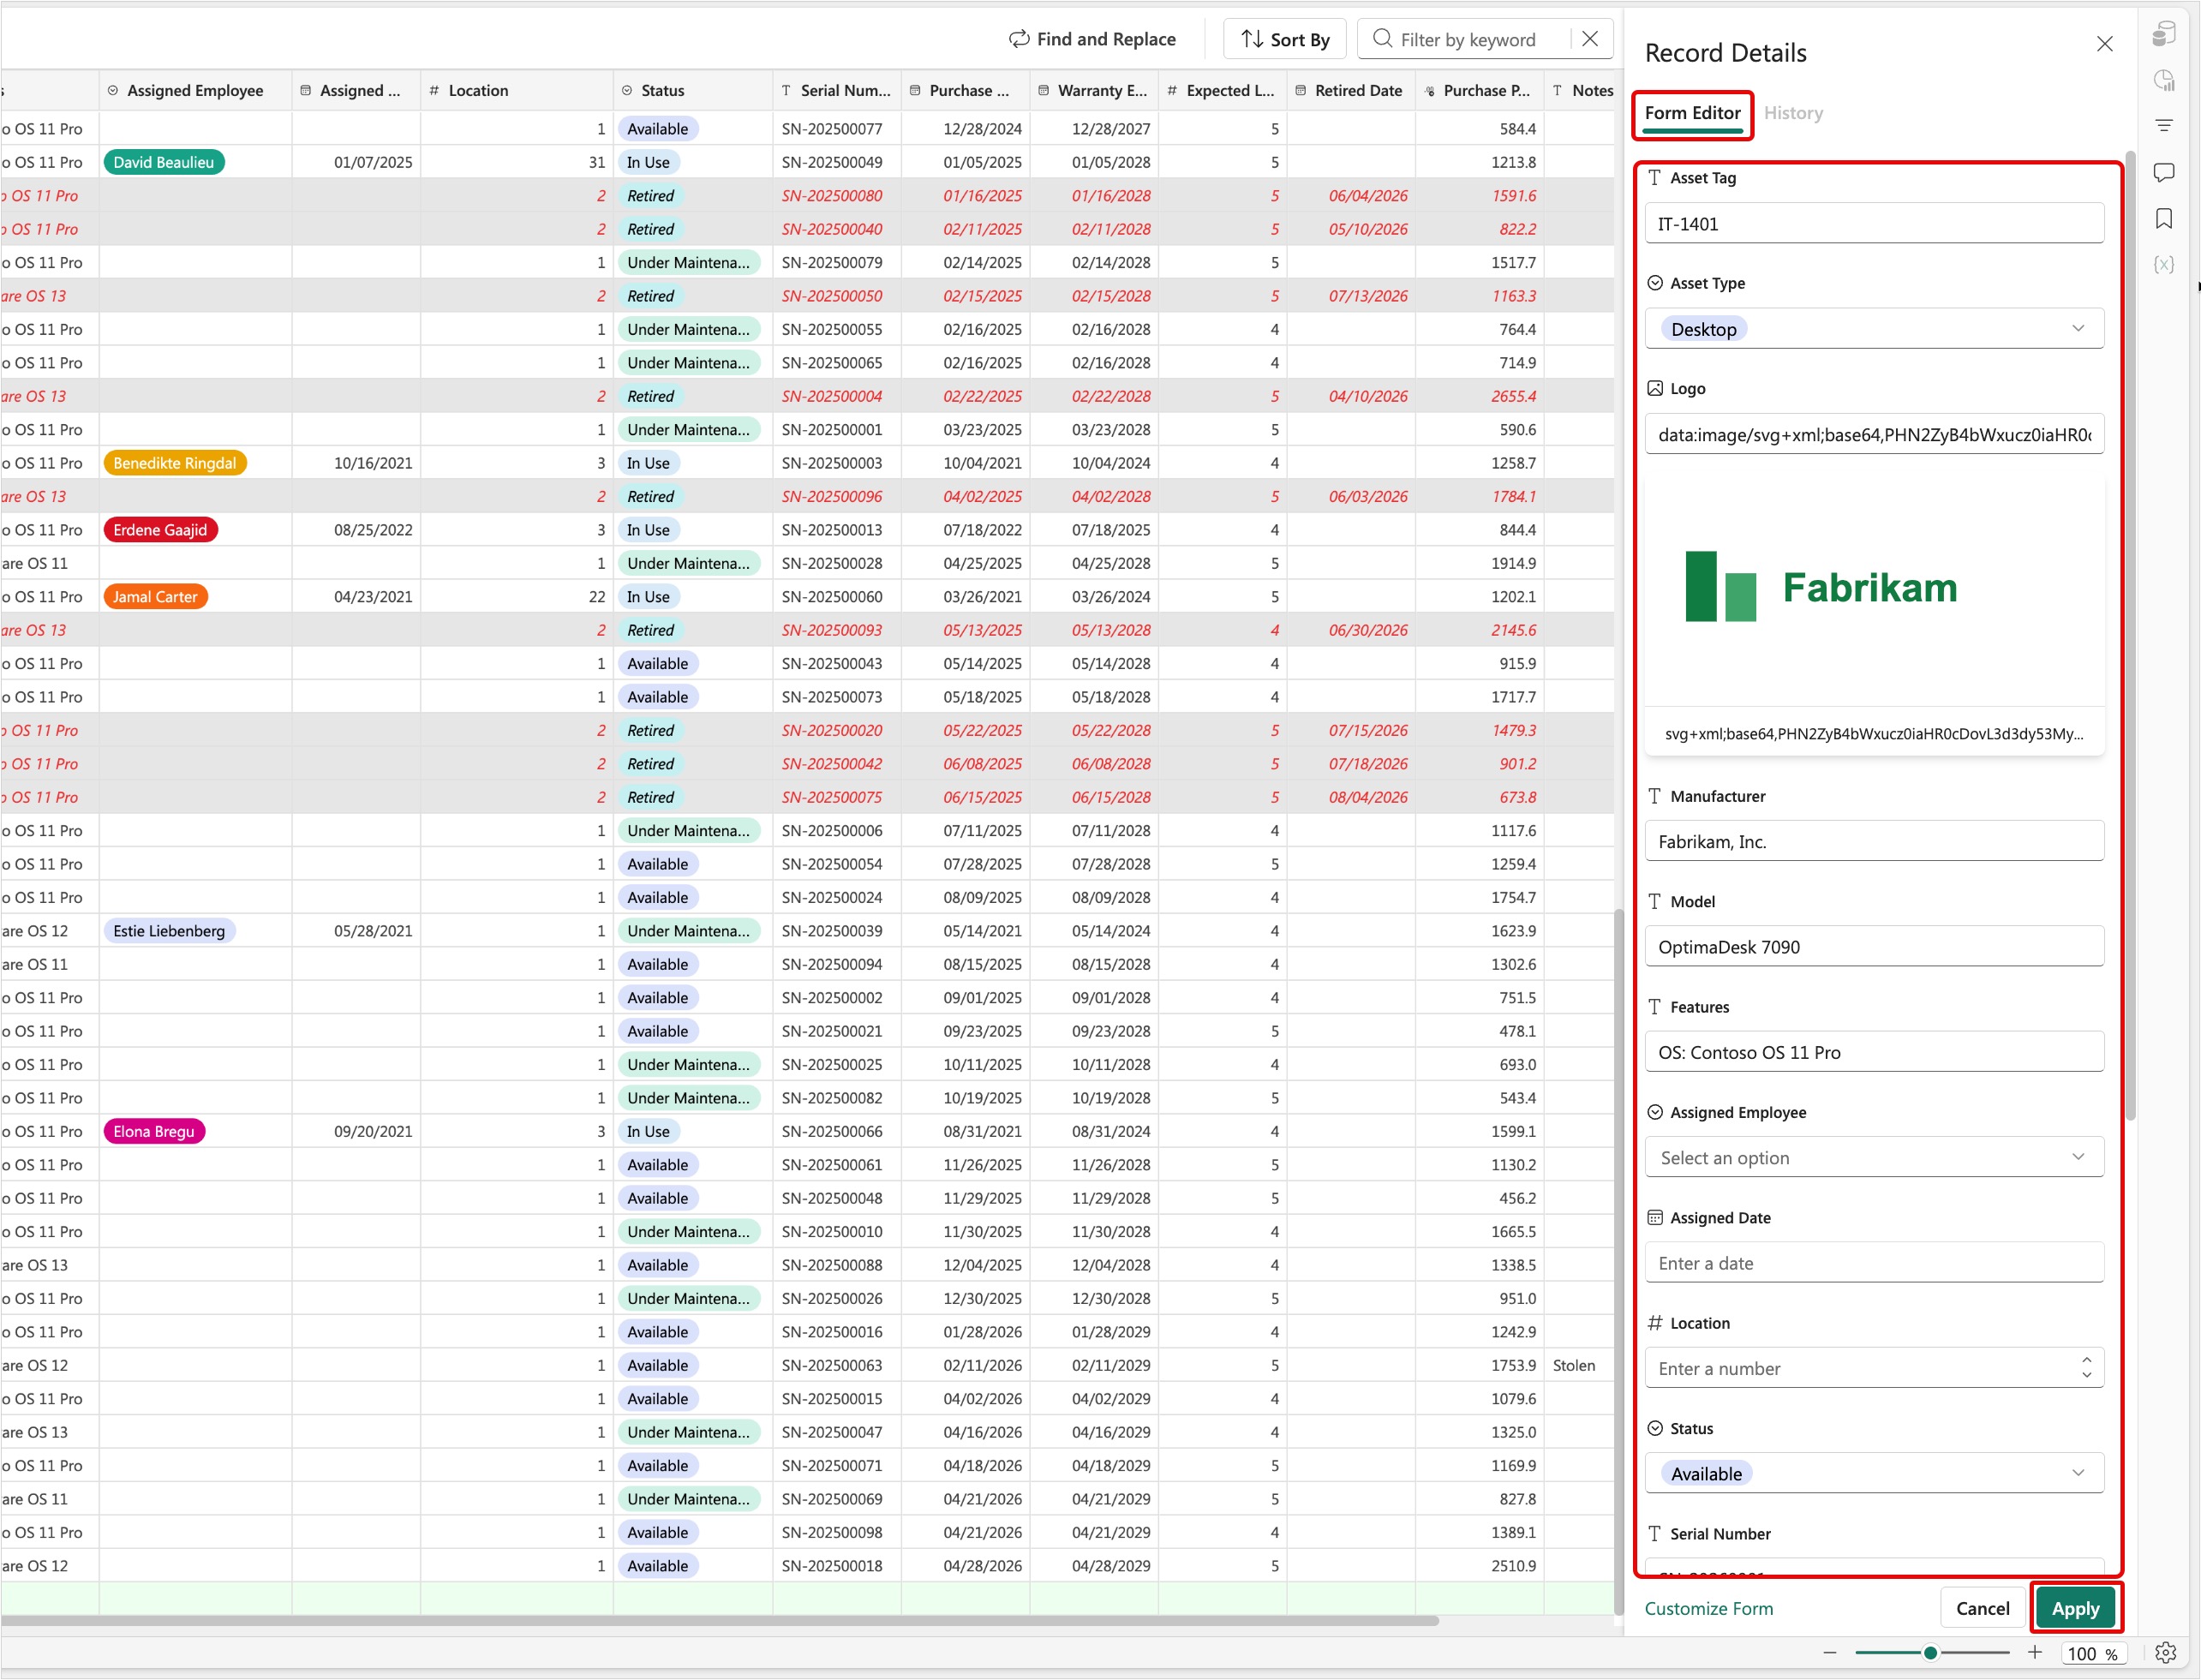
Select Save to Database to commit the change to the database.
Update a single row by using the form editor (optional)
Edit one record through the Record Details side panel instead of the grid.
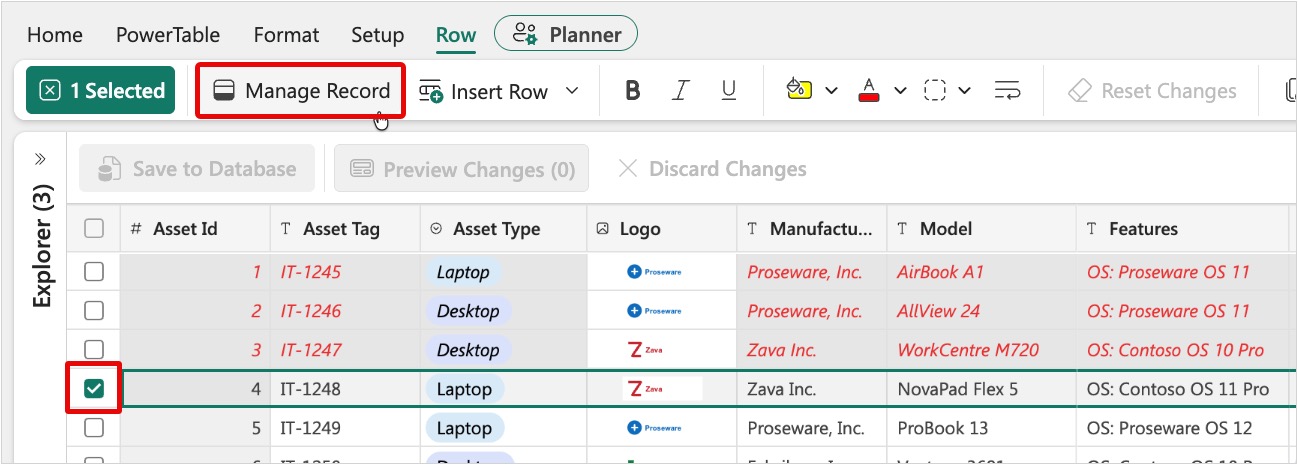
Select the row selector next to any row, and then select Manage Record in the toolbar.
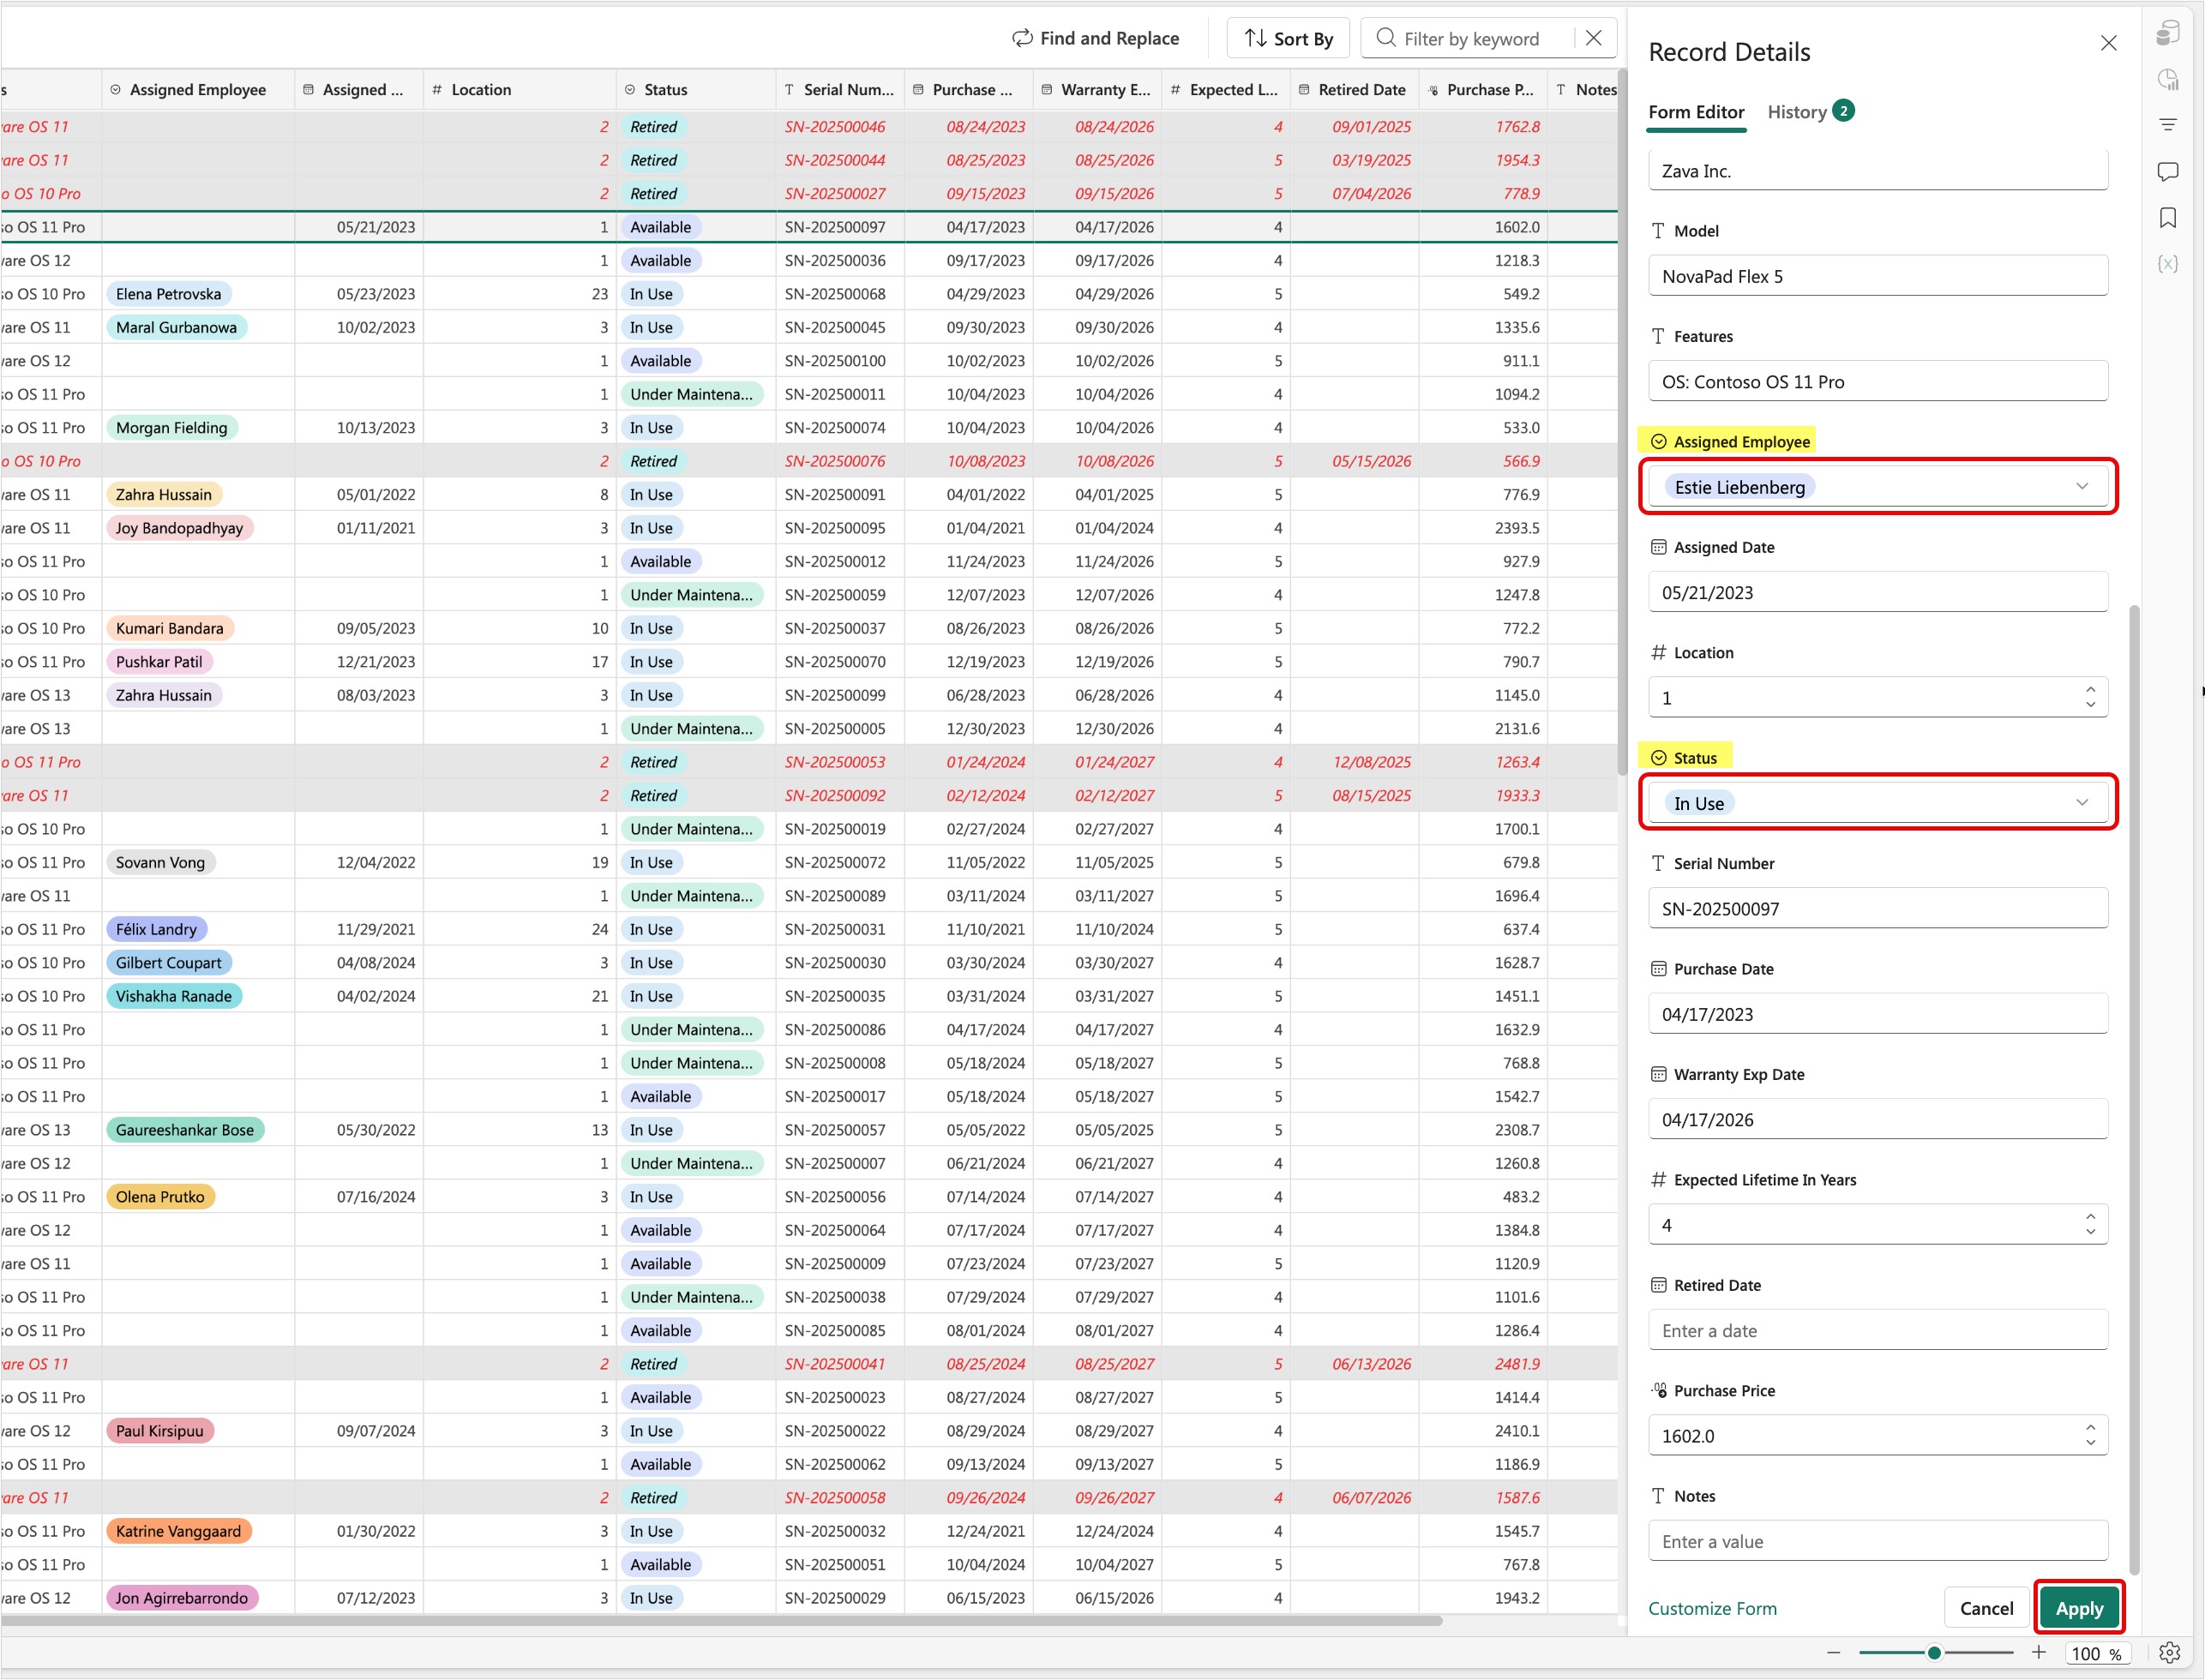
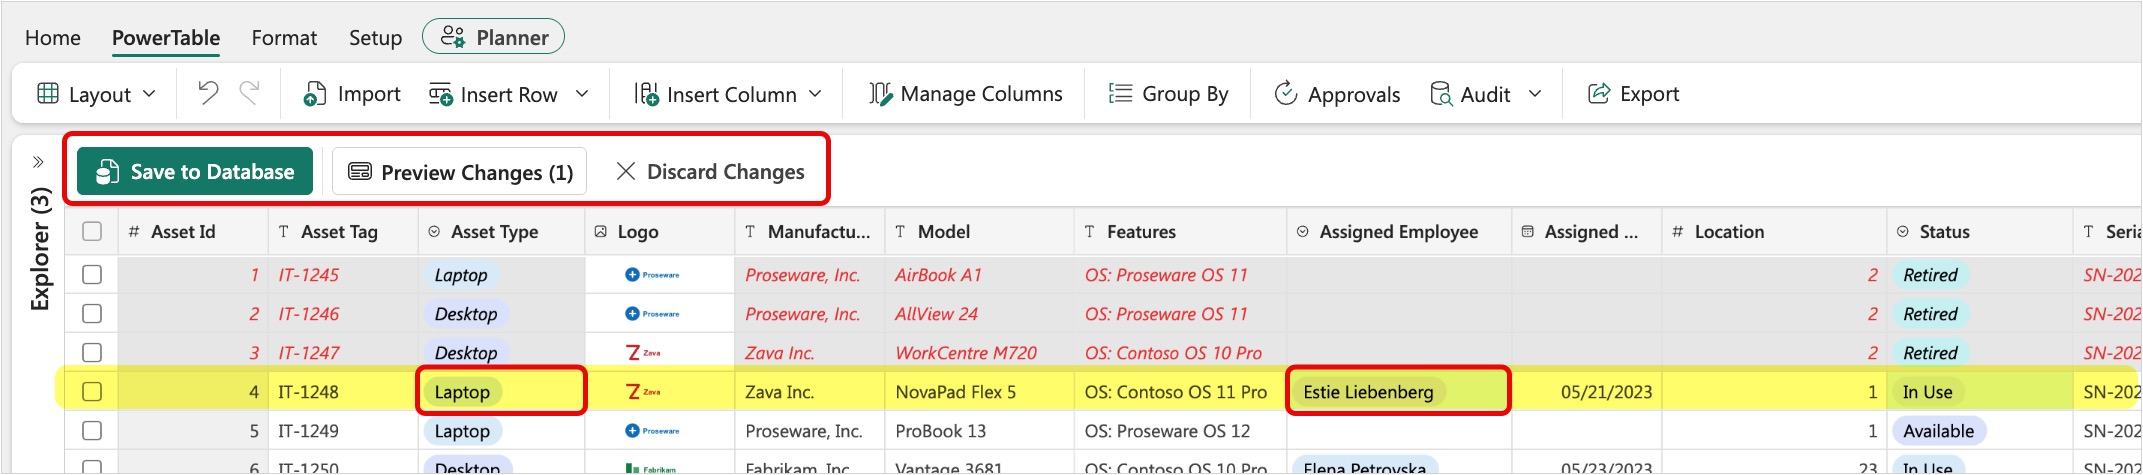
In the Record Details side panel that appears, under the Form Editor tab, change the Assigned To column to Estie Liebenberg and then change the Status to In Use. Select Apply.
Combine these changes with other changes, then Preview Changes together, Save to Database, or Discard Changes from here.
Update multiple rows by using the form editor (optional)
Apply the same field edits across several selected records at once.
Note
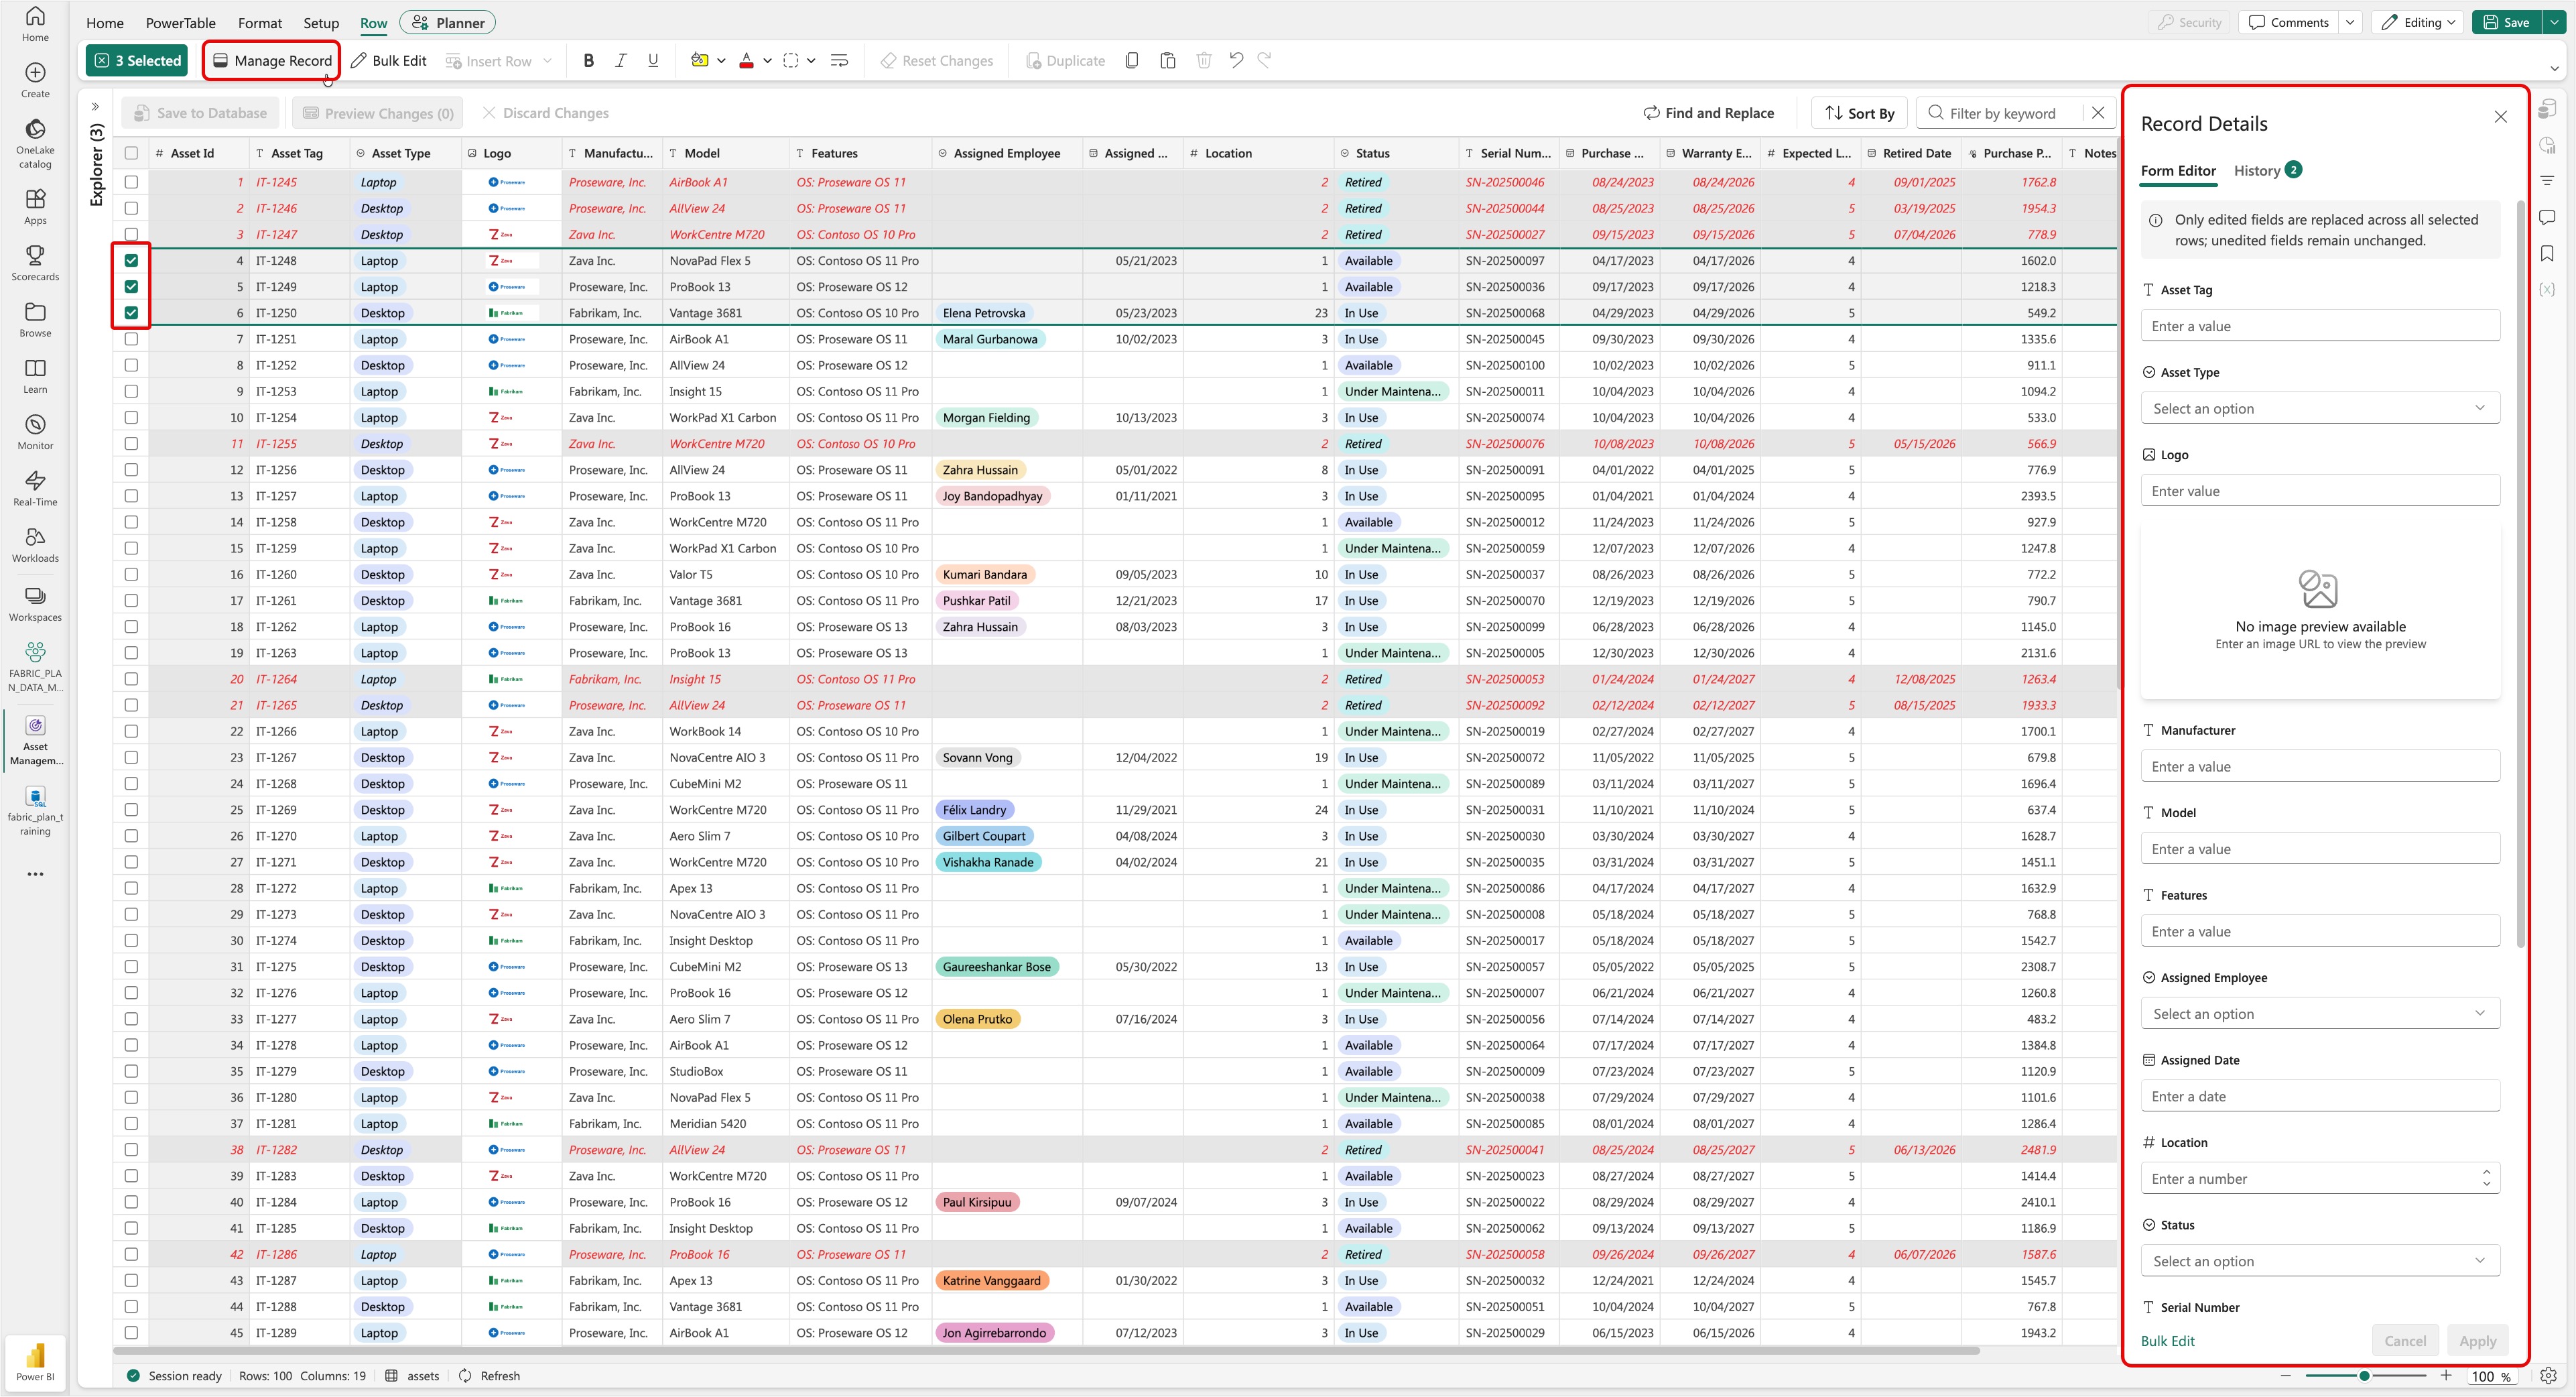
The Form Editor behaves differently for single row versus multiple row edits. The multiple row Form Editor replaces only the fields you edit across all selected rows. Unedited fields remain unchanged.
Select the row selector for multiple rows, and then select Manage Record in the toolbar. This selection displays the Record Details side panel on the Form Editor tab. Change the Location column to Depot and then change the Status to Under Maintenance. Select Apply.
Bulk Editor (optional)
Run calculated offsets against a field across a range of selected rows.
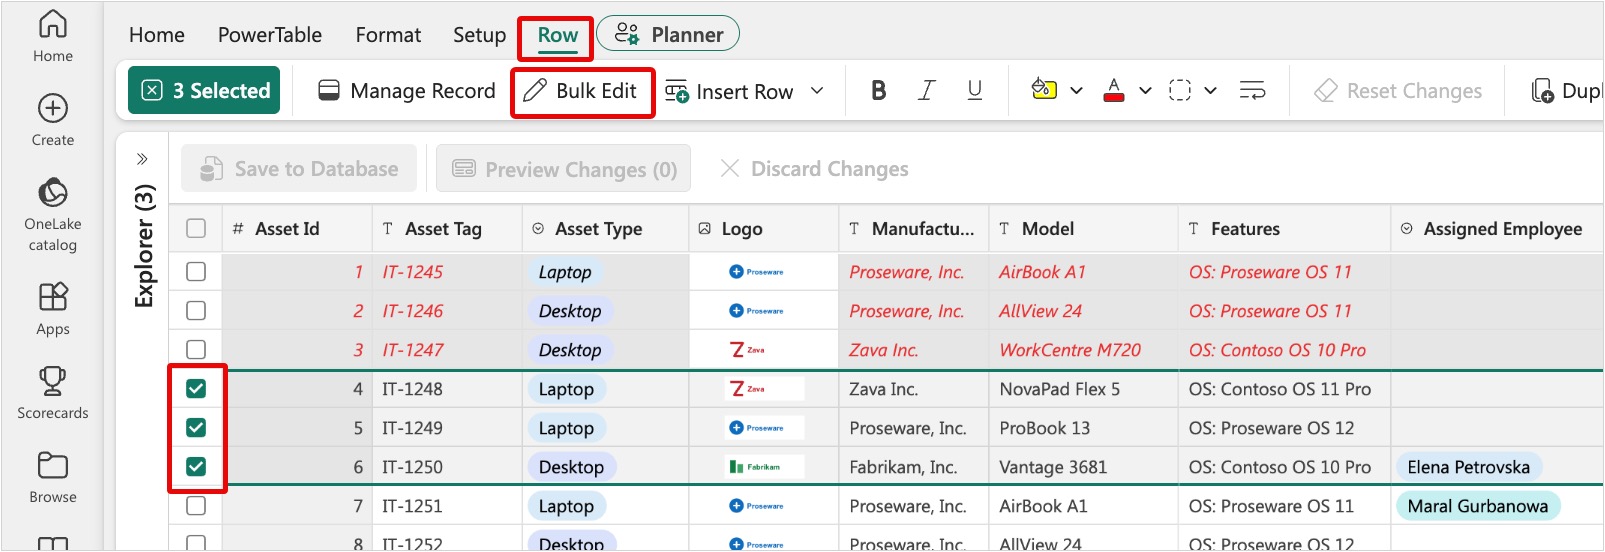
Select the row selector next to the fourth through sixth rows. On the Row tab of the toolbar, select Bulk Edit. PowerTable displays the Bulk Edit side panel.
On the Bulk Edit side panel, perform the following actions and select the Apply button.
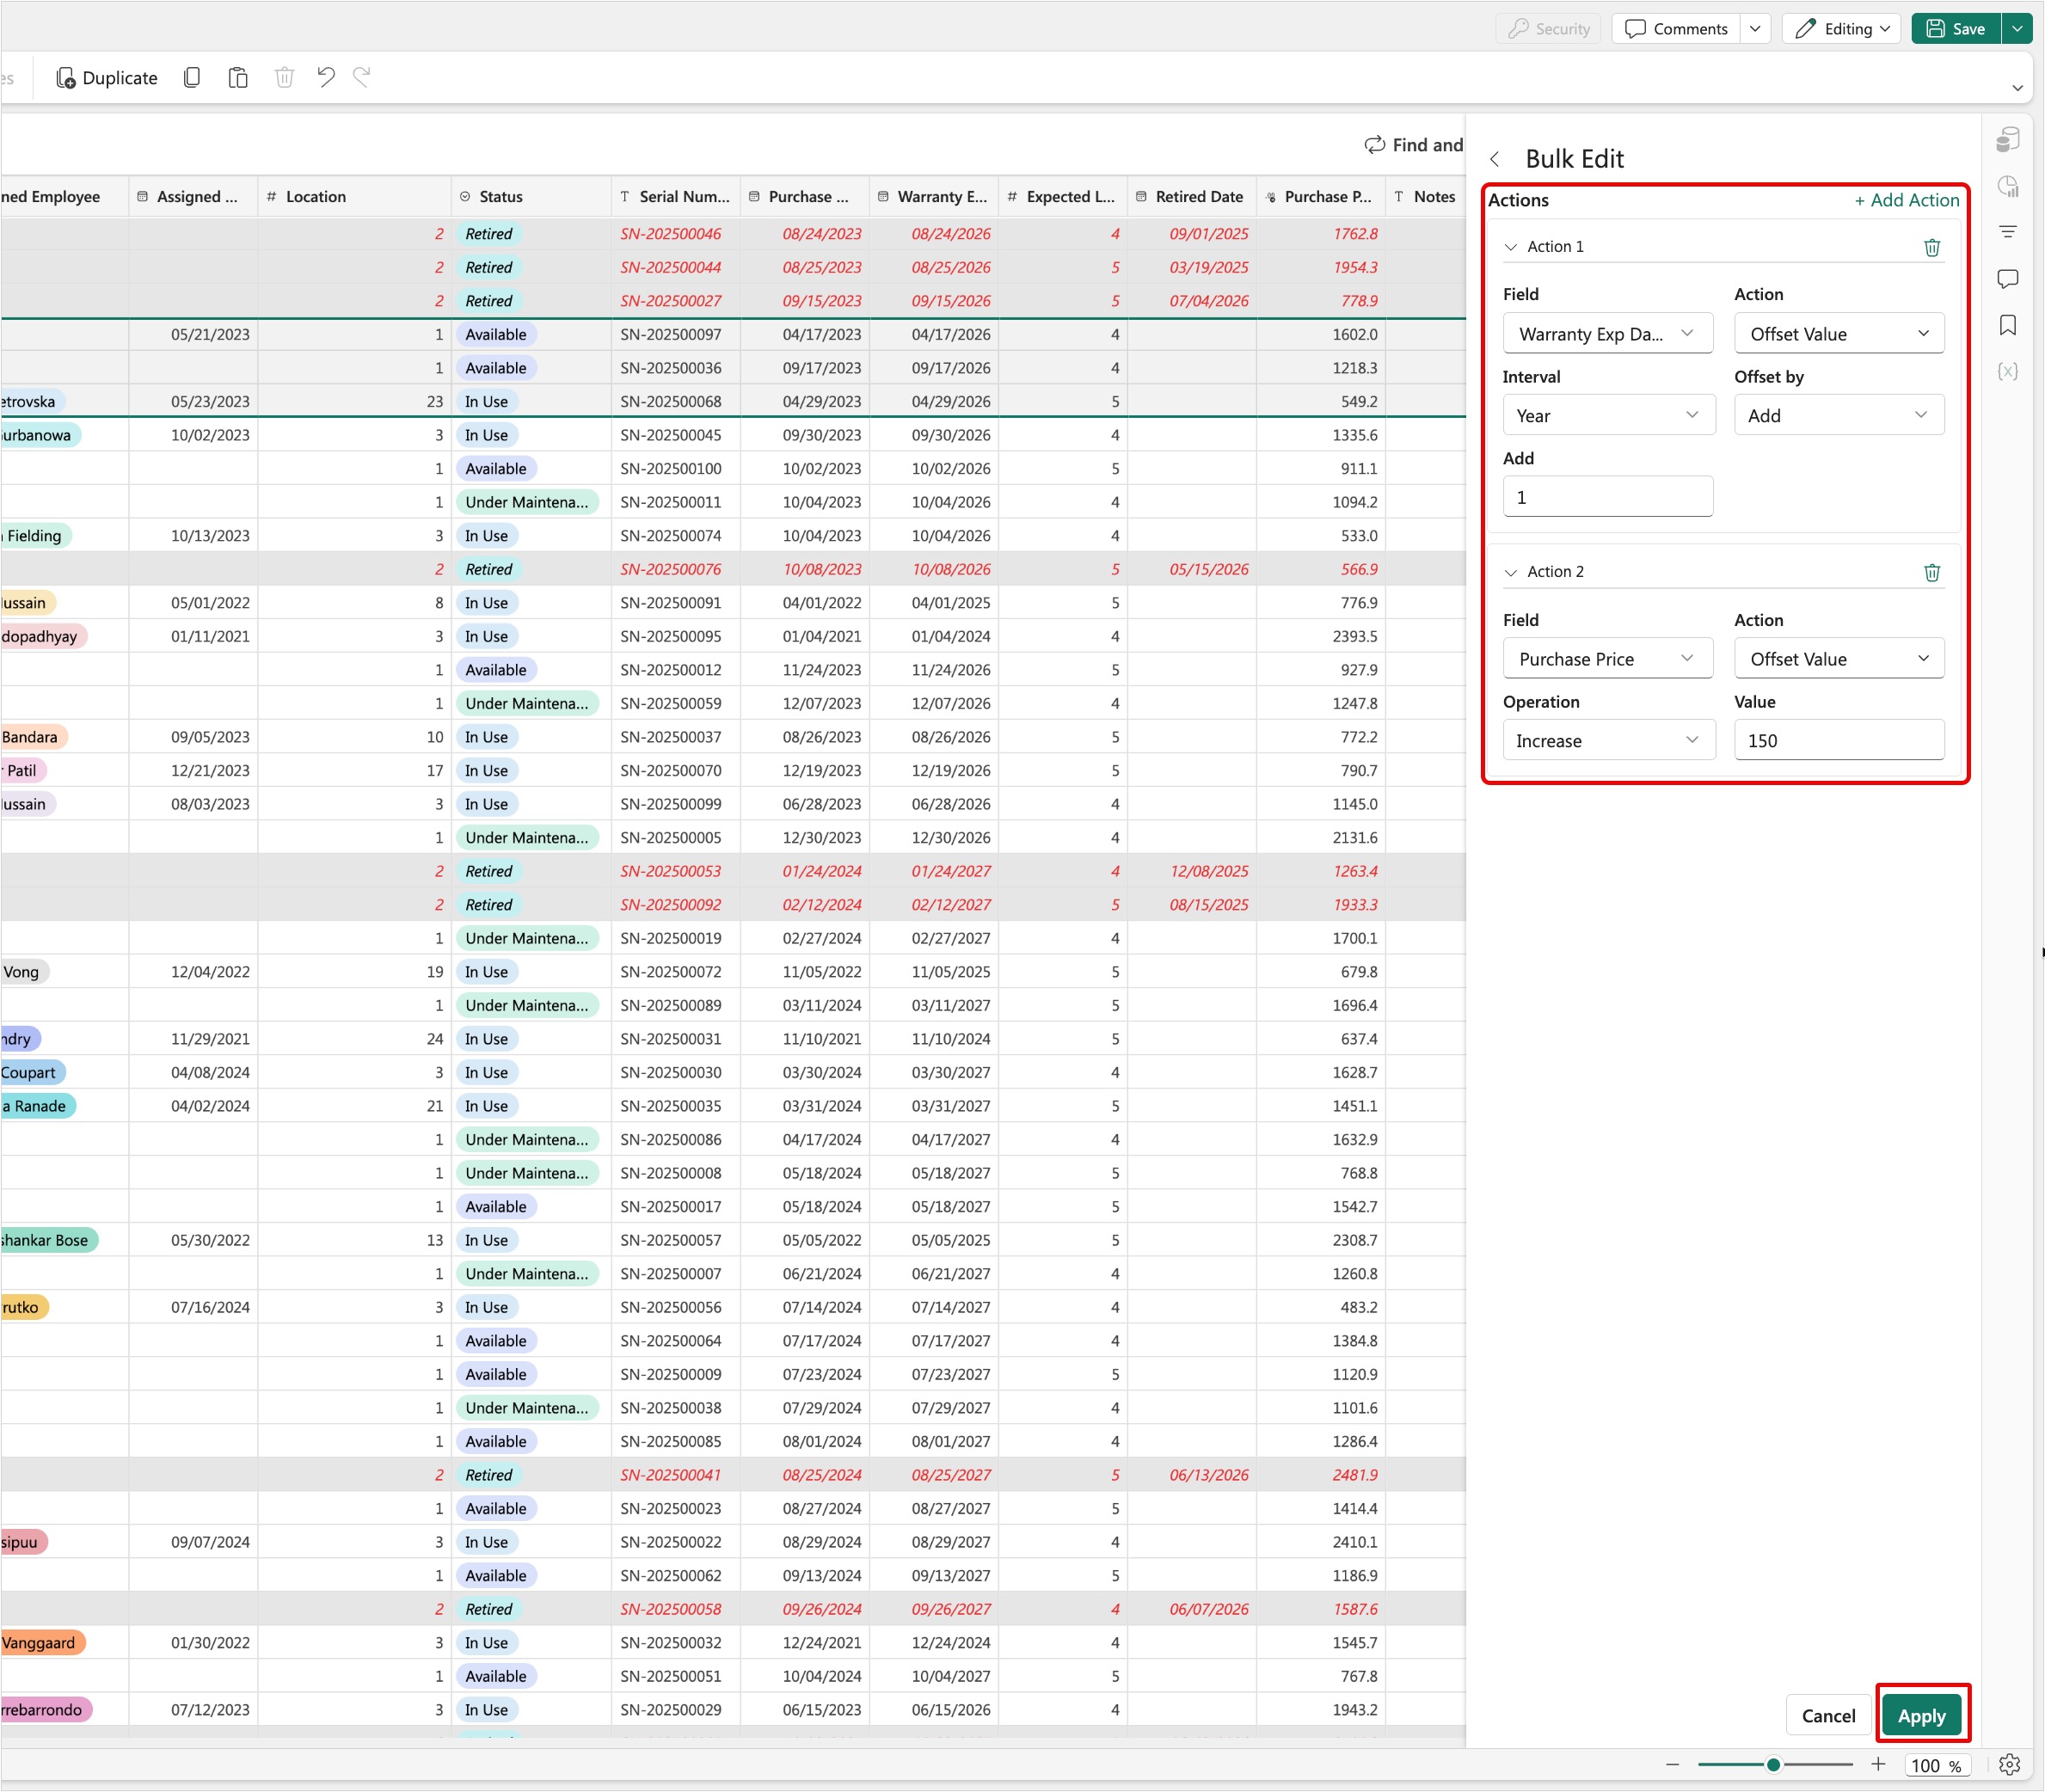
- Under the Action 1 section, add one year to the current warranty expiry date:
- Set Field to Warranty Exp Date.
- Set Action to Offset Value.
- Set Interval to Year.
- Set Offset by to Add.
- Set the Add field value to 1.
- Select the + Add Action option to add a new action.
- Under the Action 2 section:
- Set Field to Purchase Price.
- Set Action to Offset Value.
- Set Operation to Increase.
- Set Value to 150.
- Select Apply. Once changes are applied, close the Bulk Edit side panel, then select Save to Database to commit the changes to the database.
- Under the Action 1 section, add one year to the current warranty expiry date:
Preview changes and save to database (optional)
Review pending edits before you commit them.
PowerTable enables the Preview Changes and Discard Changes buttons whenever a pending change to the database exists. Select Preview Changes to view the pending changes or select Discard Changes to revert all pending changes.
Select Preview Changes in the toolbar.
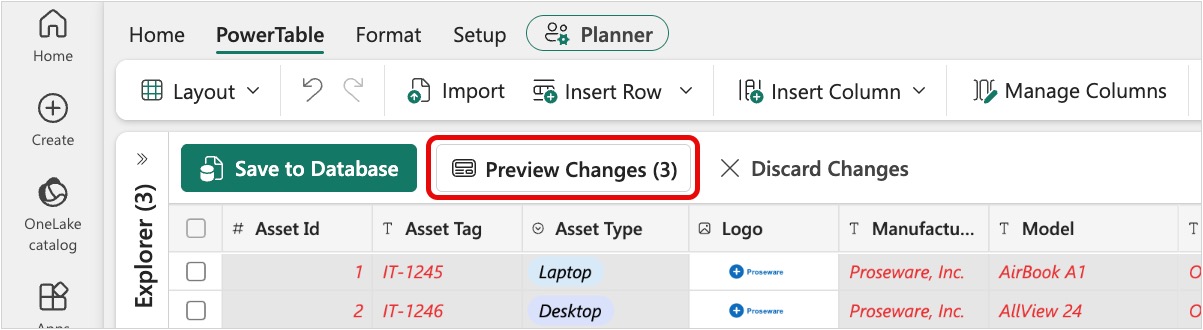
Note that you can select one or more rows and revert the pending changes using Reset option.

Ensure that you don't select any rows. Select Save to Database and then select Proceed if the Save Changes? popup appears.

Find and replace (optional)
Find a text string or value across one or more columns in the table, and replace it with another text string or value.
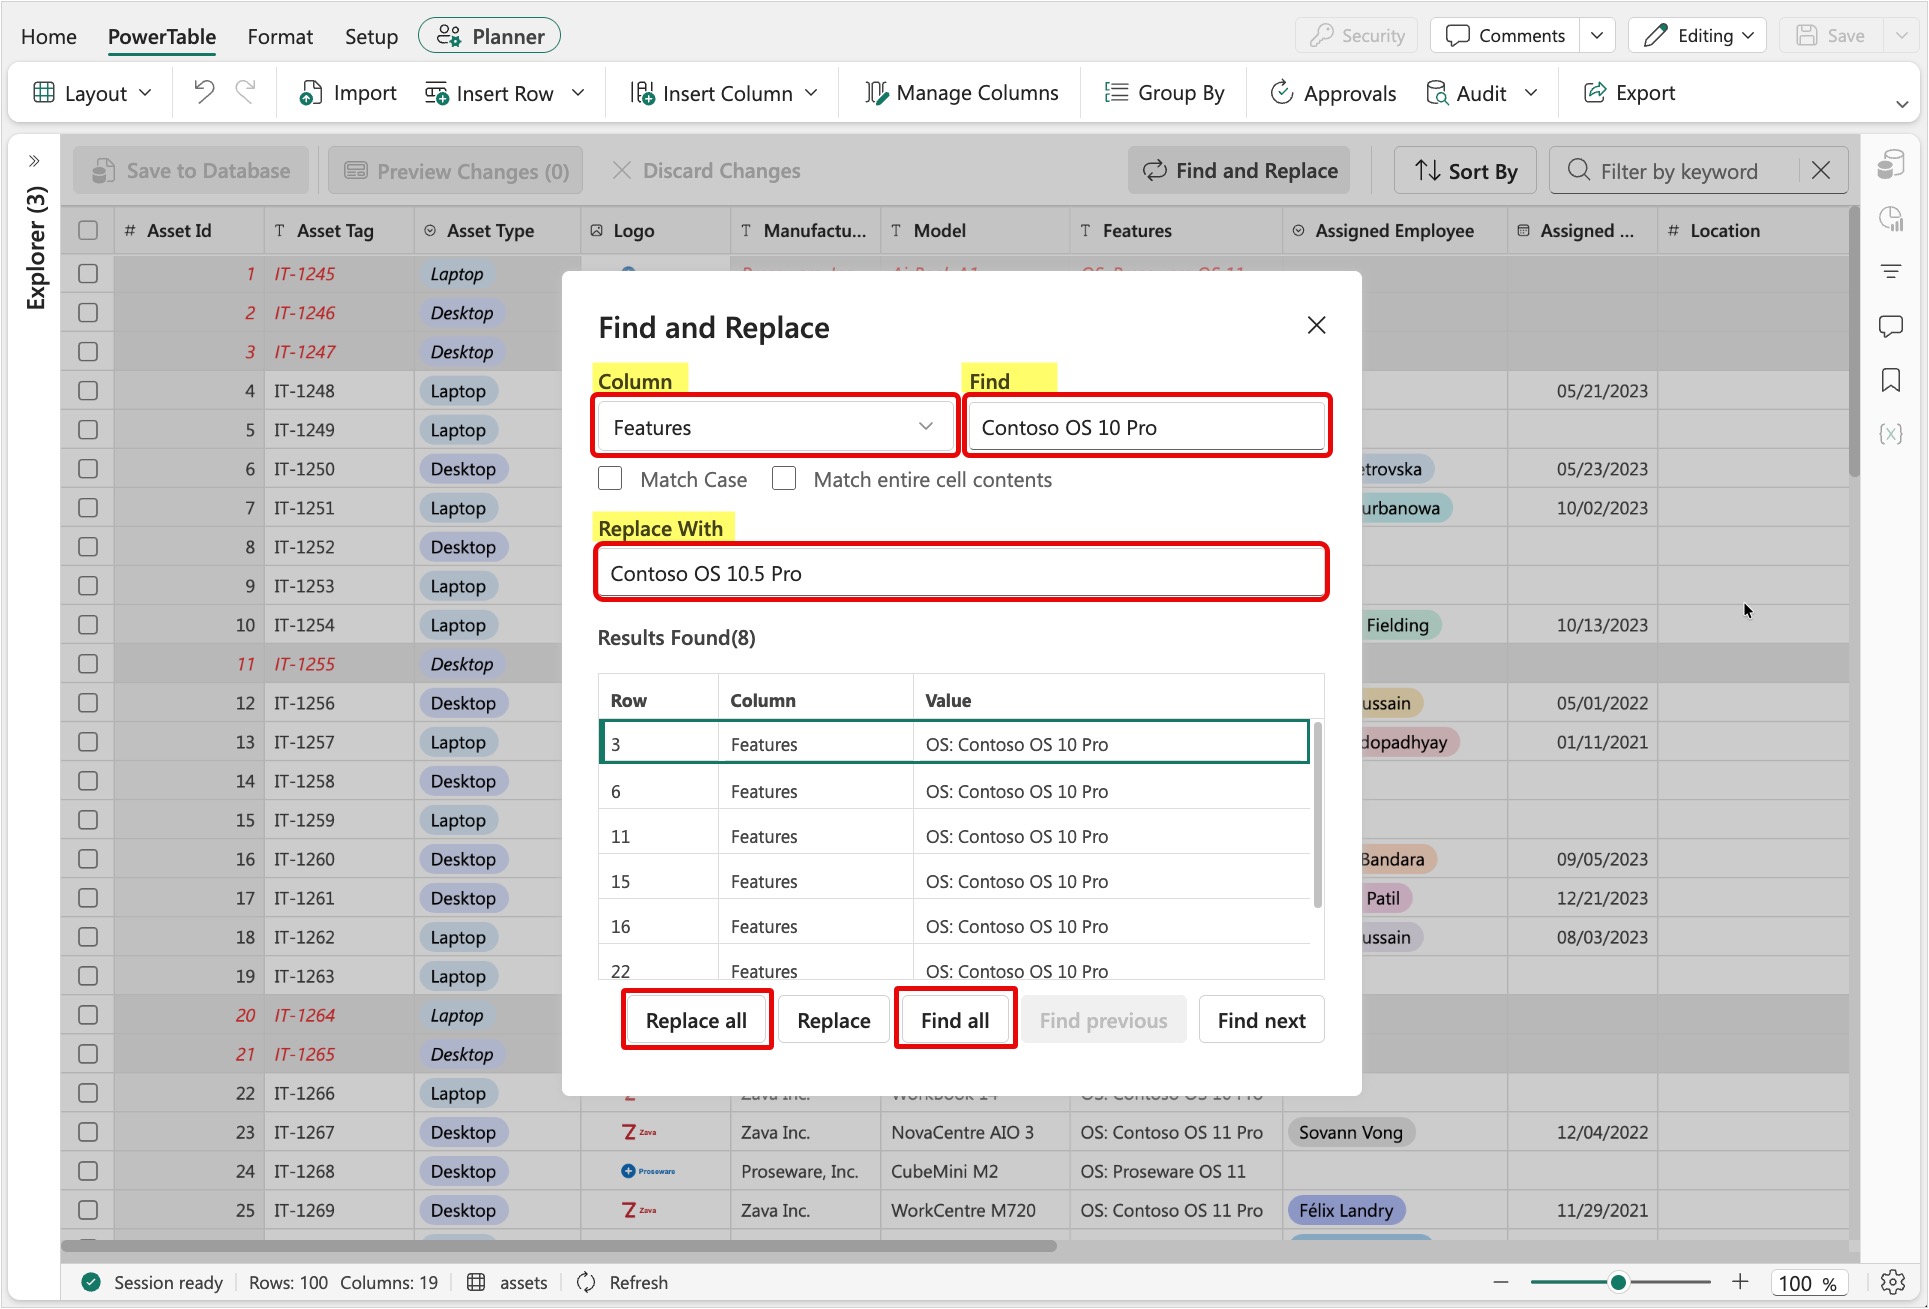
Select Find and Replace in the toolbar. Configure the following inputs, select Find all to preview the matches, and then select Replace all.

- Set Column to Features.
- Set Find to Contoso OS 10 Pro.
- Set Replace With to Contoso OS 10.5 Pro.
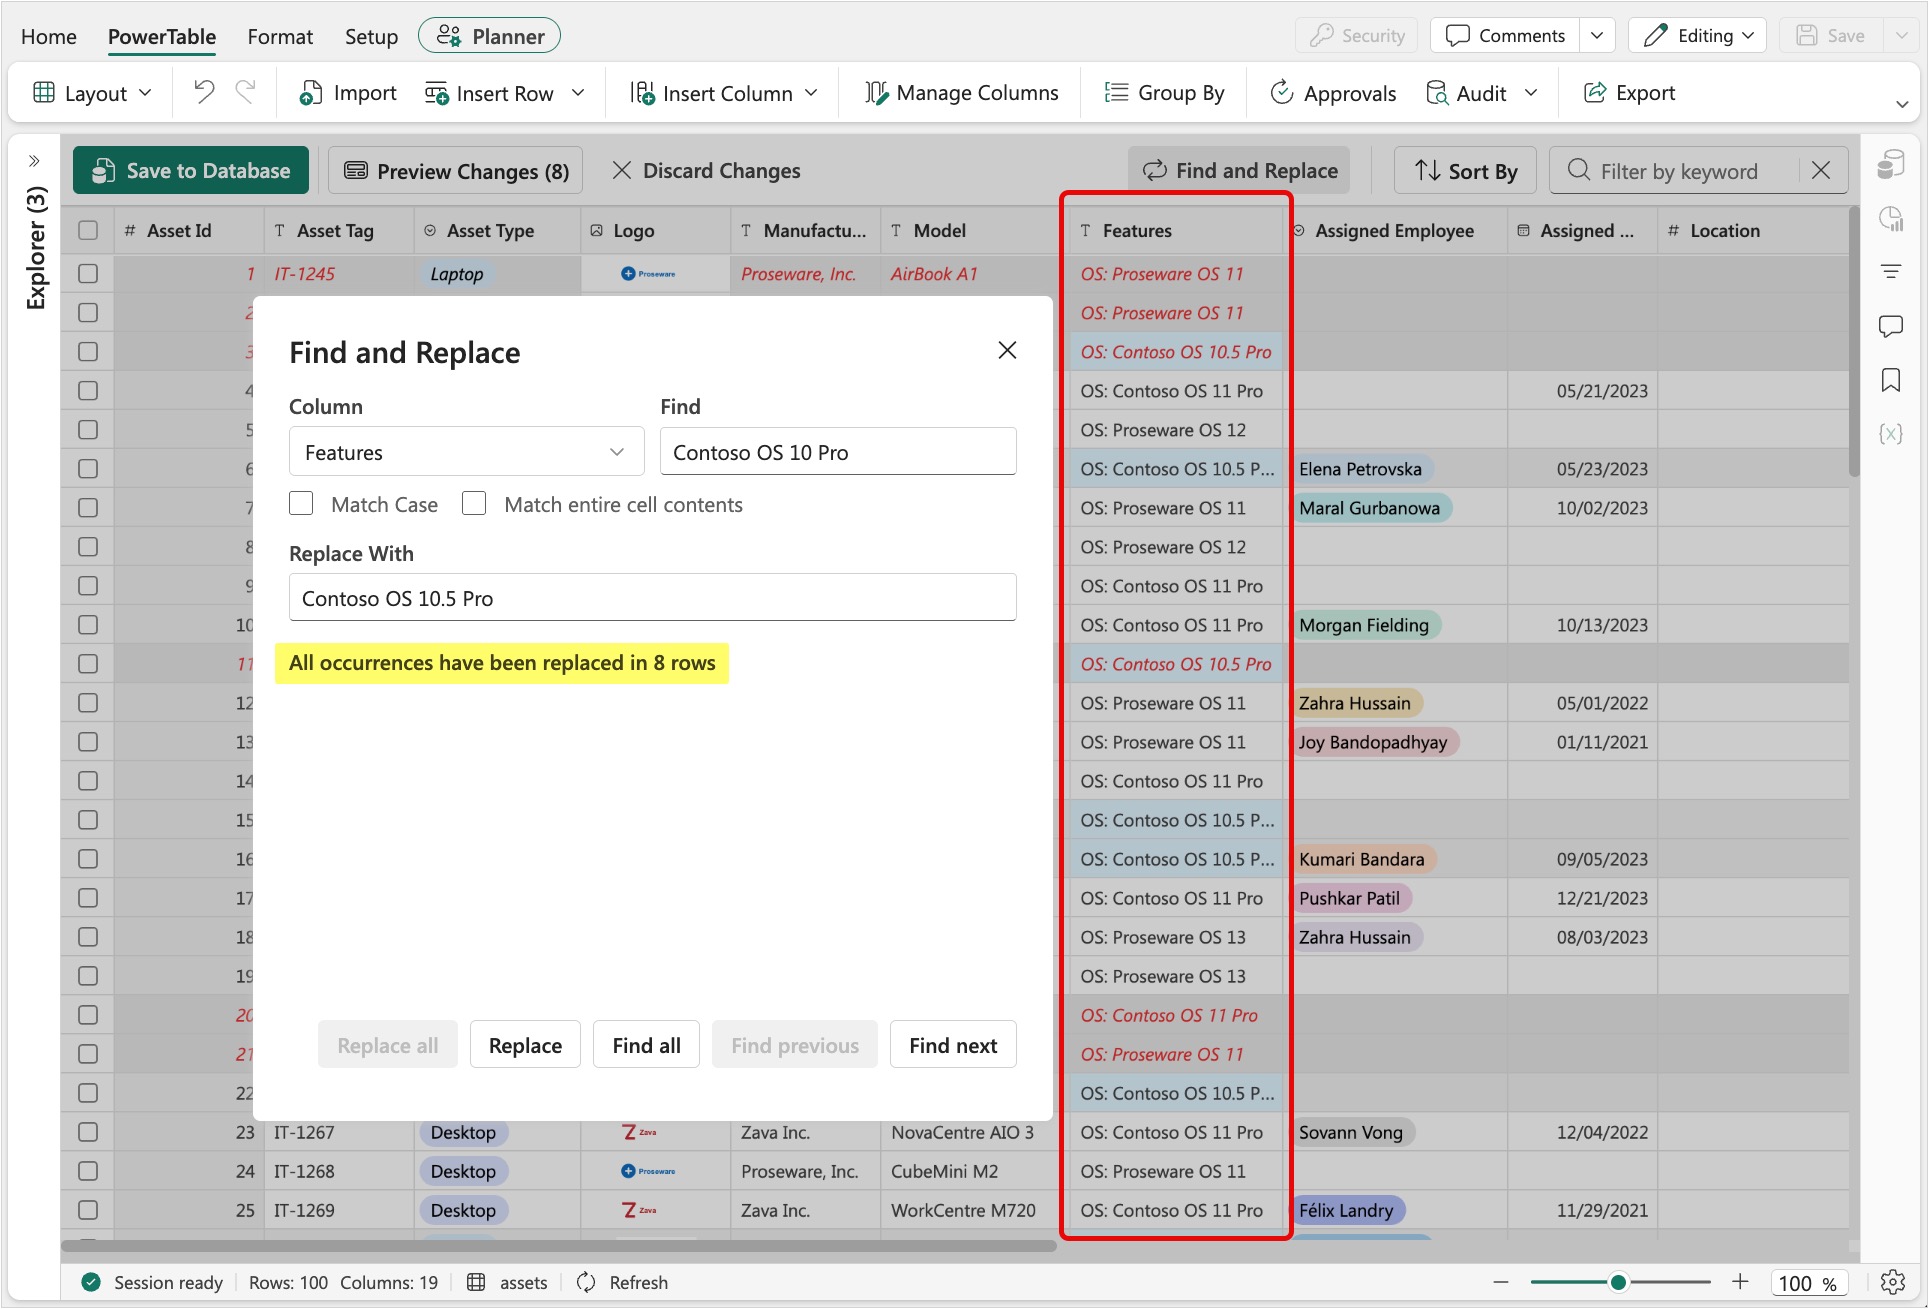
Verify the updates in the Features column. Select the X button to close the Find and Replace popup, and select Save to Database.
Summary of row-editing methods
The following table lists the features that each row-editing method supports.
| Feature | Row Editor | Form Editor (single row) | Form Editor (multiple rows) | Bulk Edit | Find and Replace |
|---|---|---|---|---|---|
| View existing field values | Yes | Yes | No | No | No |
| Set field value | Yes | Yes | Yes | Yes | Yes |
| Clear field value | Yes | Yes | No | Yes | Yes |
| Offset field values (add, subtract, multiply, divide, prefix, suffix) | Yes, manually | No | No | Yes | No |
| Replace text within existing text | Yes, manually | No | No | No | Yes |
| Replace a value across multiple rows and columns in a single action | No | No | No | No | Yes |
| Copy and paste values across multiple rows | Yes | N/A | N/A | N/A | N/A |
| Fill down values to adjacent rows | Yes | N/A | N/A | N/A | N/A |
| Preview changes | Yes | Yes | Yes | Yes | Yes |
| Discard changes | Yes | Yes | Yes | Yes | Yes |
Import data from a file (optional)
Load more records into the sheet from an Excel workbook.
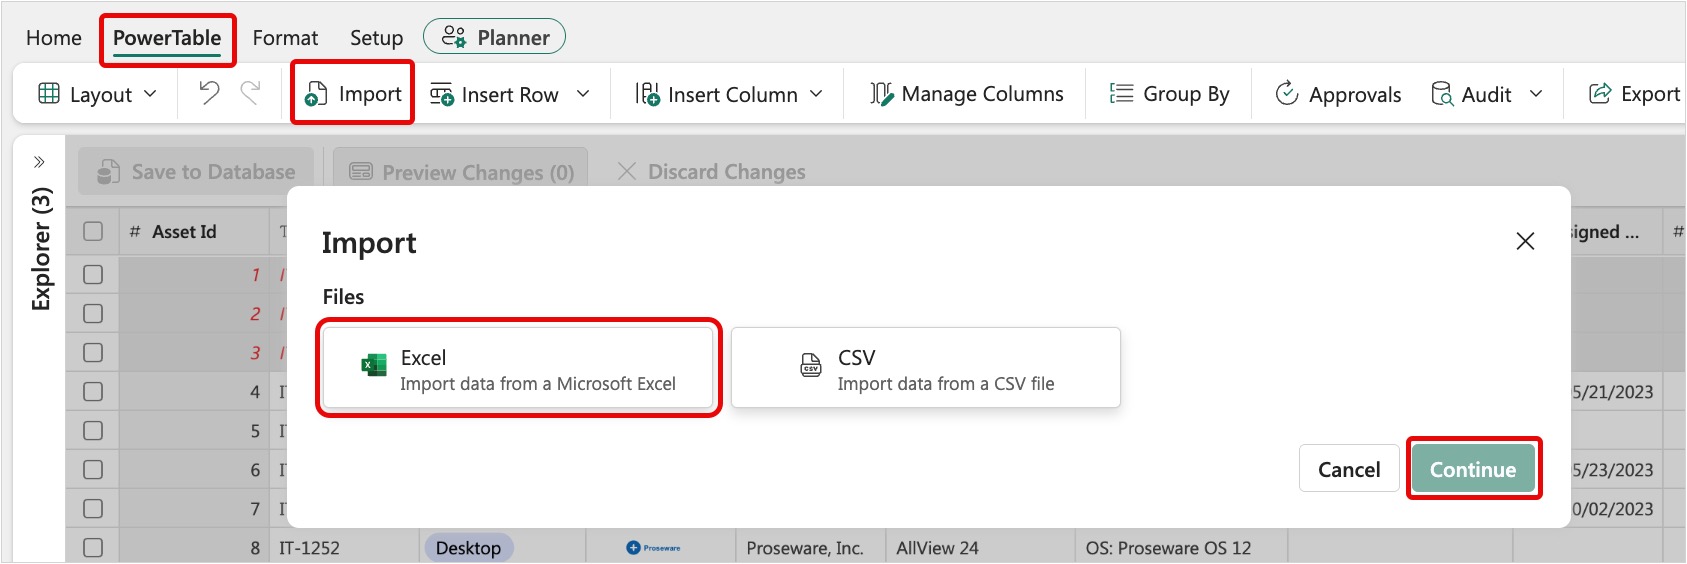
On the Assets sheet, in the PowerTable tab of the toolbar, select Import. In the Import pop-up dialog, select Excel and then select Continue.
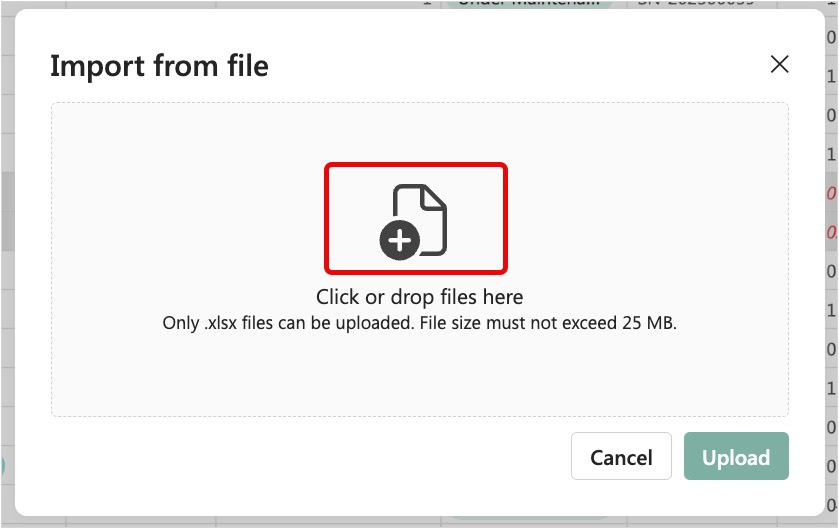
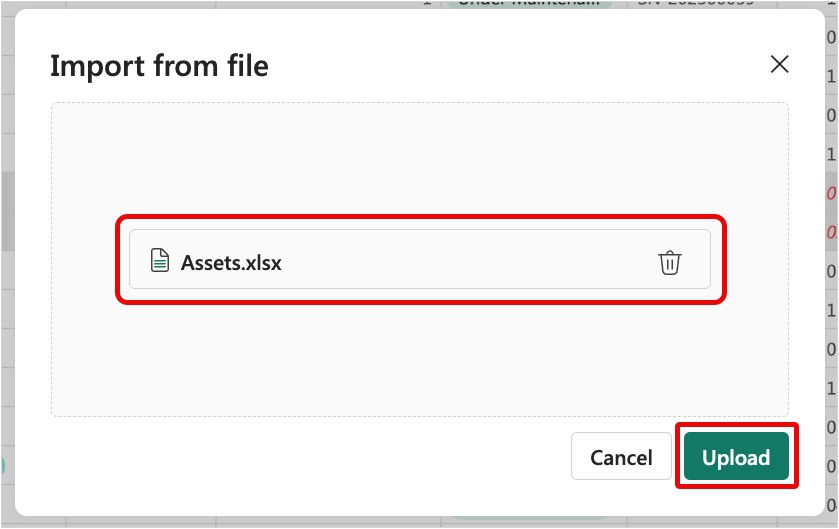
Select the space to upload the Assets.xlsx file and then select Upload.
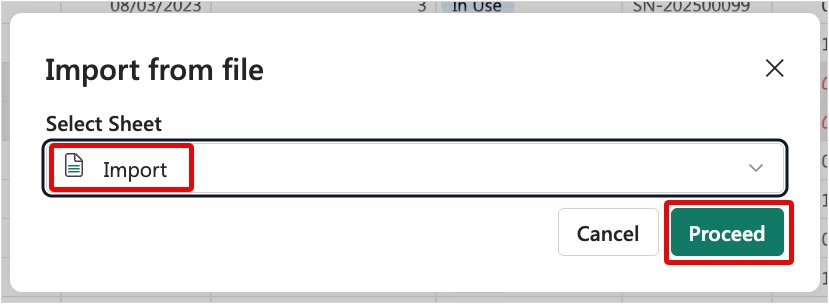
Select the Import sheet and then select Proceed.
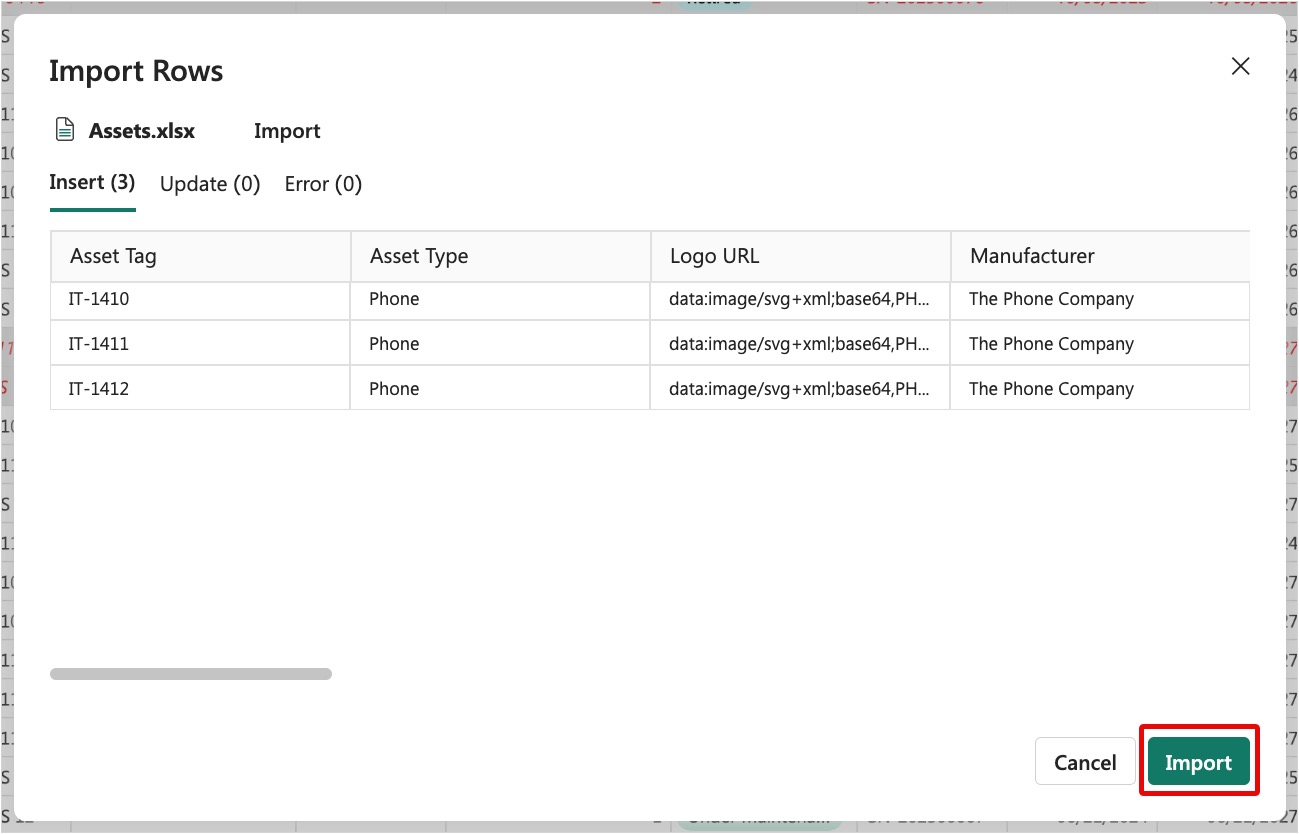
PowerTable scans the file and determines which rows result in an insert, update, or error. View the results and then select Import.
After PowerTable imports the rows, close the Import Rows pop-up dialog.
Expand the Filter panel, select Phone to filter Asset Type, and view the newly imported phone records.


Outcomes
You completed the following work in this exercise.
- You created a Fabric SQL database for data management.
- You created a Fabric Plan item with a PowerTable sheet for each of the assets, employees, and locations tables.
- You configured the Assets sheet with formatted columns and lookups.
- You ran update and insert operations by using several different approaches.