Note
Access to this page requires authorization. You can try signing in or changing directories.
Access to this page requires authorization. You can try changing directories.
This article describes how to add MySQL Database Change Data Capture (CDC) as an event source in Fabric Real-Time hub.
The Azure MySQL Database Change Data Capture (CDC) connector allows you to capture a snapshot of the current data in an Azure MySQL database. You specify the tables to be monitored and get alerted when any subsequent row-level changes to the tables. Once the changes are captured in a stream, you can process this CDC data in real-time and send it to different destinations within Fabric for further processing or analysis.
Prerequisites
- Access to a workspace in the Fabric capacity license mode (or) the Trial license mode with Contributor or higher permissions.
- Created an instance of Azure Database for MySQL – Flexible Server.
Set up MySQL database
The Azure MySQL database connector uses the Debezium MySQL connector to capture changes in your MySQL Database. You must define a MySQL user with permissions on all databases that connector monitors. For step-by-step instructions, see Set up MySQL Database (DB).
Enable the binlog
You must enable binary logging for MySQL replication. The binary logs record transaction updates for replication tools to propagate changes. For example, Azure Database for MySQL.
In the Azure portal, navigate to your Azure MySQL database.
On the left navigation menu, select Server parameters.
Configure your MySQL server with the following properties.
- binlog_row_image: Set the value to full.
- binlog_expire_logs_seconds: The number of seconds for automatic binlog file removal. Set the value to match the needs of your environment. For example, 86400.


Get events from Azure MySQL Database (CDC)
You can get events from an Azure MySQL Database CDC into Real-Time hub in one of the ways:
Data sources page
Sign in to Microsoft Fabric.
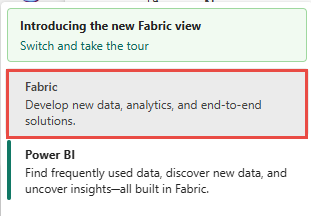
If you see Power BI at the bottom-left of the page, switch to the Fabric workload by selecting Power BI and then by selecting Fabric.
Select Real-Time on the left navigation bar.
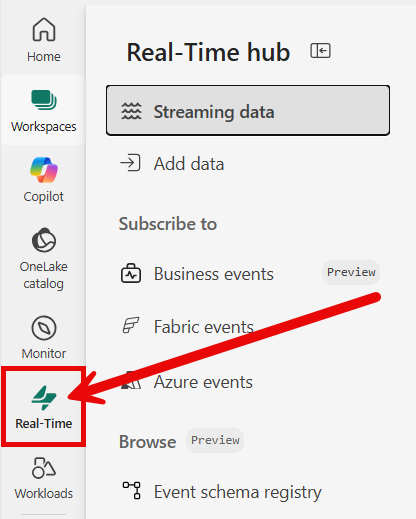
The Streaming data page opens by default. Click on the Add data button to get to the Data sources page.

You can also get to the Data sources page directly by selecting the Add data option in the left navigation bar.
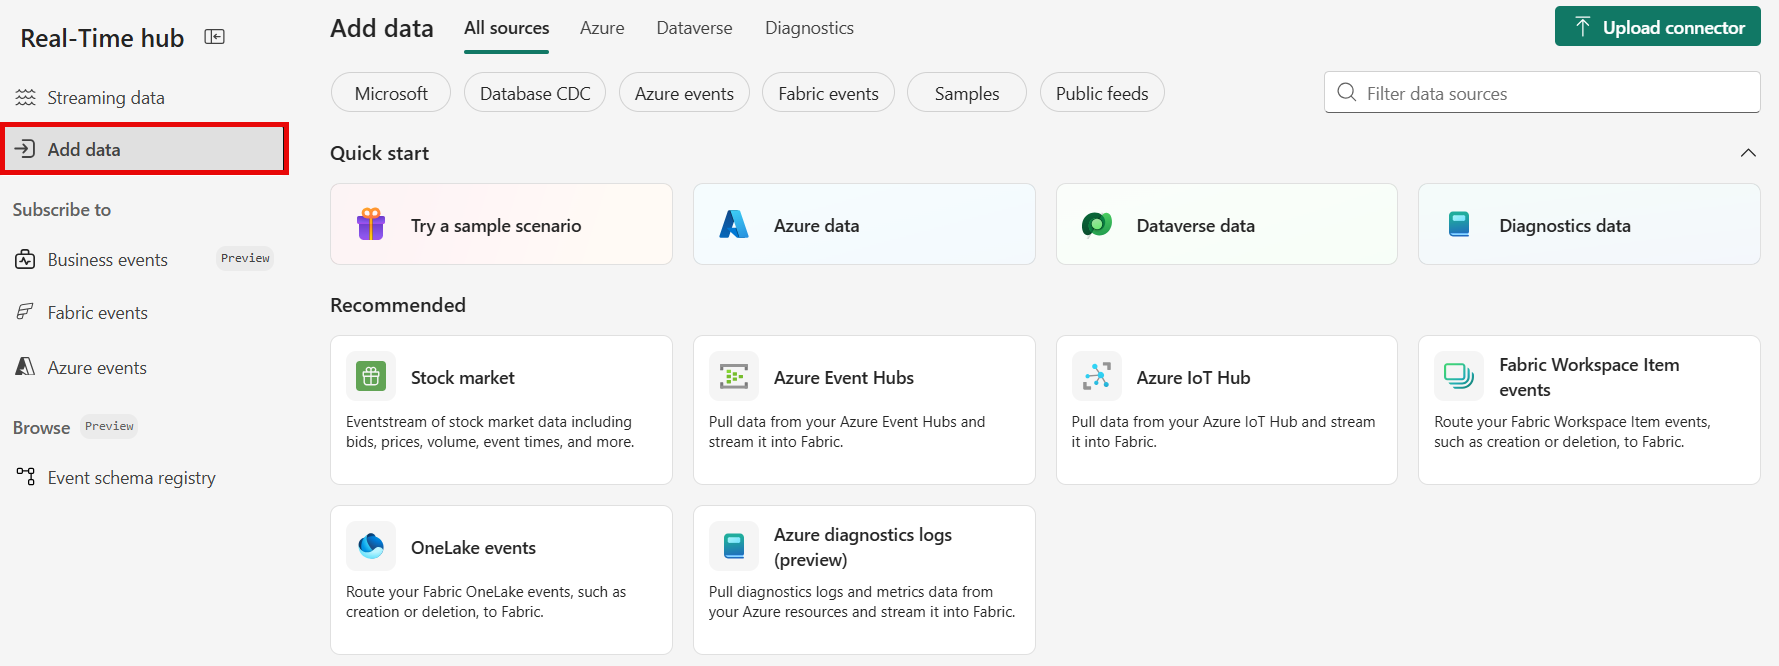


On the Data sources page, select Database CDC category at the top, and then select Connect on the MySQL DB (CDC) tile.

Use instructions from the Add Azure MySQL Database CDC as a source section.

Microsoft sources page
In Real-Time hub, select Microsoft sources.
In the Source drop-down list, select Azure MySQL DB (CDC).
For Subscription, select an Azure subscription that has the resource group with your Azure MySQL Database account.
For Resource group, select a resource group that has the database.
For Region, select a location where your database is located.
Now, move the mouse over the name of the Azure MySQL DB CDC source that you want to connect to Real-Time hub in the list of databases, and select the Connect button, or select ... (ellipsis), and then select the Connect button.

To configure connection information, use steps from the Add Azure MySQL DB CDC as a source section.

Add Azure MySQL Database CDC as a source
On the Connect page, select New connection.

In the Connection settings section, do these steps:
For Server, enter the URI for your Azure MySQL server.
For Database, enter the name of your database.

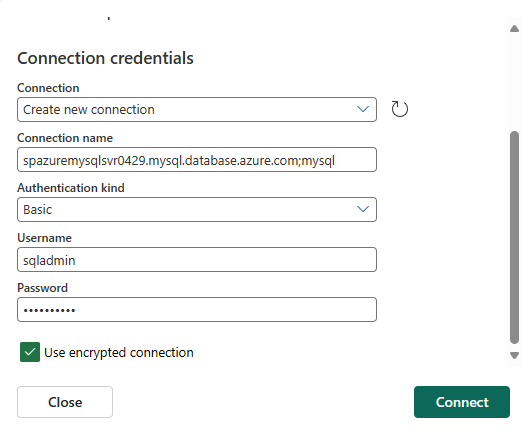
In the Connection credentials section, do these steps:
For Connection, select if there's an existing connection to the MySQL database. If not, keep the default value: Create new connection.
For Authentication kind, select Basic. Currently, only Basic authentication is supported.
Enter values for User name and Password.
Specify whether you want to use an encrypted connection.
Select Connect.
Back on the Connect page, do these steps:
- Enter the table name.
- Enter the server ID.
- Enter the port number or keep the default value.
In the Stream details section to the right, do these steps:
Select Fabric workspace where you want to save this connection and the eventstream that the wizard creates.
Enter a name for the eventstream.
The name of the stream in Real-Time hub is automatically created for you.

Now, select Next at the bottom of the page.
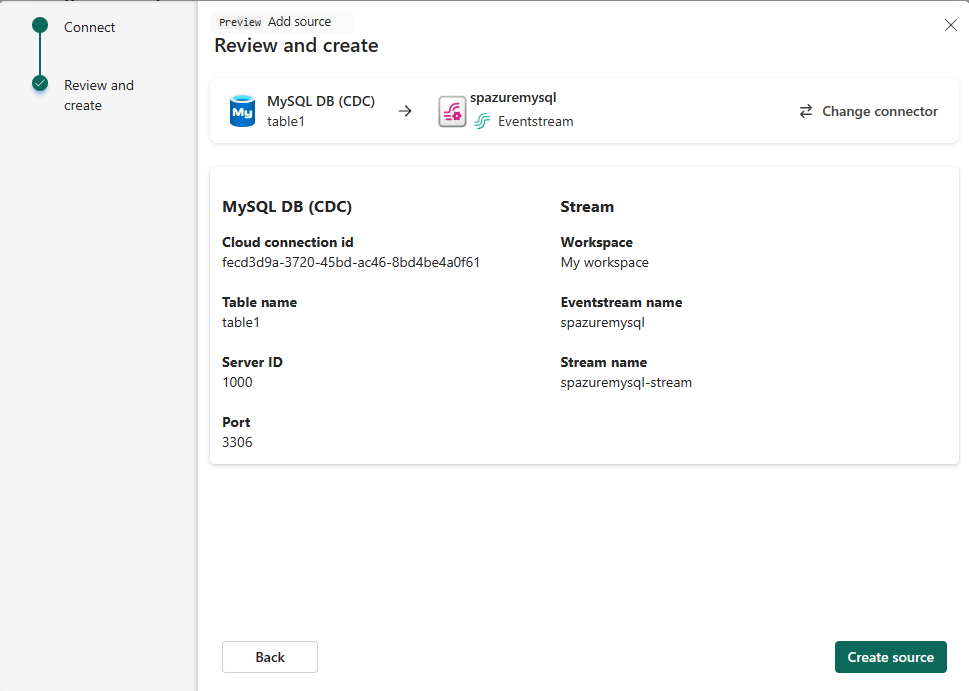
On the Review + connect, review settings, and select Create source.
On the Connect page, select Go to resource to navigate to the Azure PostgreSQL database. Take a note of the server name on the Overview page. It's in the following format:
mysqlserver.mysql.database.azure.com.


View data stream details
On the Review + connect page, if you select Open eventstream, the wizard opens the eventstream that it created for you with the selected Azure MySQL DB CDC as a source. To close the wizard, select Finish or X* in the top-right corner of the page.

You should see the stream in the Recent streaming data section of the Real-Time hub home page. For detailed steps, see View details of data streams in Fabric Real-Time hub.

.
Related content
To learn about consuming data streams, see the following articles: