Note
Access to this page requires authorization. You can try signing in or changing directories.
Access to this page requires authorization. You can try changing directories.
Microsoft Fabric provides built-in connectors for many real-time data sources. If a built-in connector isn't available for your source, use a custom stream connector to upload a Kafka Connect source connector plugin. The connector then appears as a source in Real-Time hub, where you can configure it and add it to an eventstream.
Important
This feature is in preview.
This article shows you how to prepare and upload a custom stream connector package, add the connector to an eventstream, and manage package versions.
Prerequisites
Before you begin, make sure you have:
- Access to a workspace assigned to a Fabric capacity or a trial capacity.
- Contributor or higher permissions in the workspace.
- A Kafka Connect source connector plugin package that meets the package requirements.
- The connector class name and the configuration properties required by the connector.
Prepare the connector package
You can develop a Kafka Connect source connector or use one supplied by an independent software vendor or an open-source project. Fabric doesn't provide a connector development environment. Develop and test the connector in your own environment before you upload it.
Important
If you use a third-party connector, review its license, dependencies, configuration properties, and documentation. Confirm that it's a source connector. Your access to and use of third-party connectors and data sources are governed by the third-party provider's terms and privacy statements.
For information about developing a connector, see the Kafka Connect connector development guide. Your implementation must meet these requirements:
- The connector class extends the Kafka Connect
SourceConnectorclass. - The task class extends the Kafka Connect
SourceTaskclass. - The plugin produces structured object data that the
JsonConvertercan convert to JSON. - You know the fully qualified connector class name. For example,
com.example.plugin.connector.MySourceConnector.
Build the connector and its dependencies into Java Archive (JAR) files. Place all required files in one folder without subfolders, and compress the folder as a ZIP file. For example:
my-custom-connector-package.zip
├── my-source-connector.jar
├── dependency-one.jar
└── dependency-two.jar
Important
A custom stream connector item can contain multiple package versions, but each item must represent only one connector. When you add the connector to an eventstream, you can specify only one connector class name.
Upload the connector package
Upload the package from Real-Time hub or create a custom stream connector item in a workspace first.
Upload from Real-Time hub
In Fabric, open Real-Time hub.
Select Upload custom connector. Find this option in the upper-right corner or on an empty search results page.

In the upload dialog, select the connector package and icon.
Enter the connector name and description.
Select the workspace where you want to create the custom stream connector item.
Select Finish + upload.
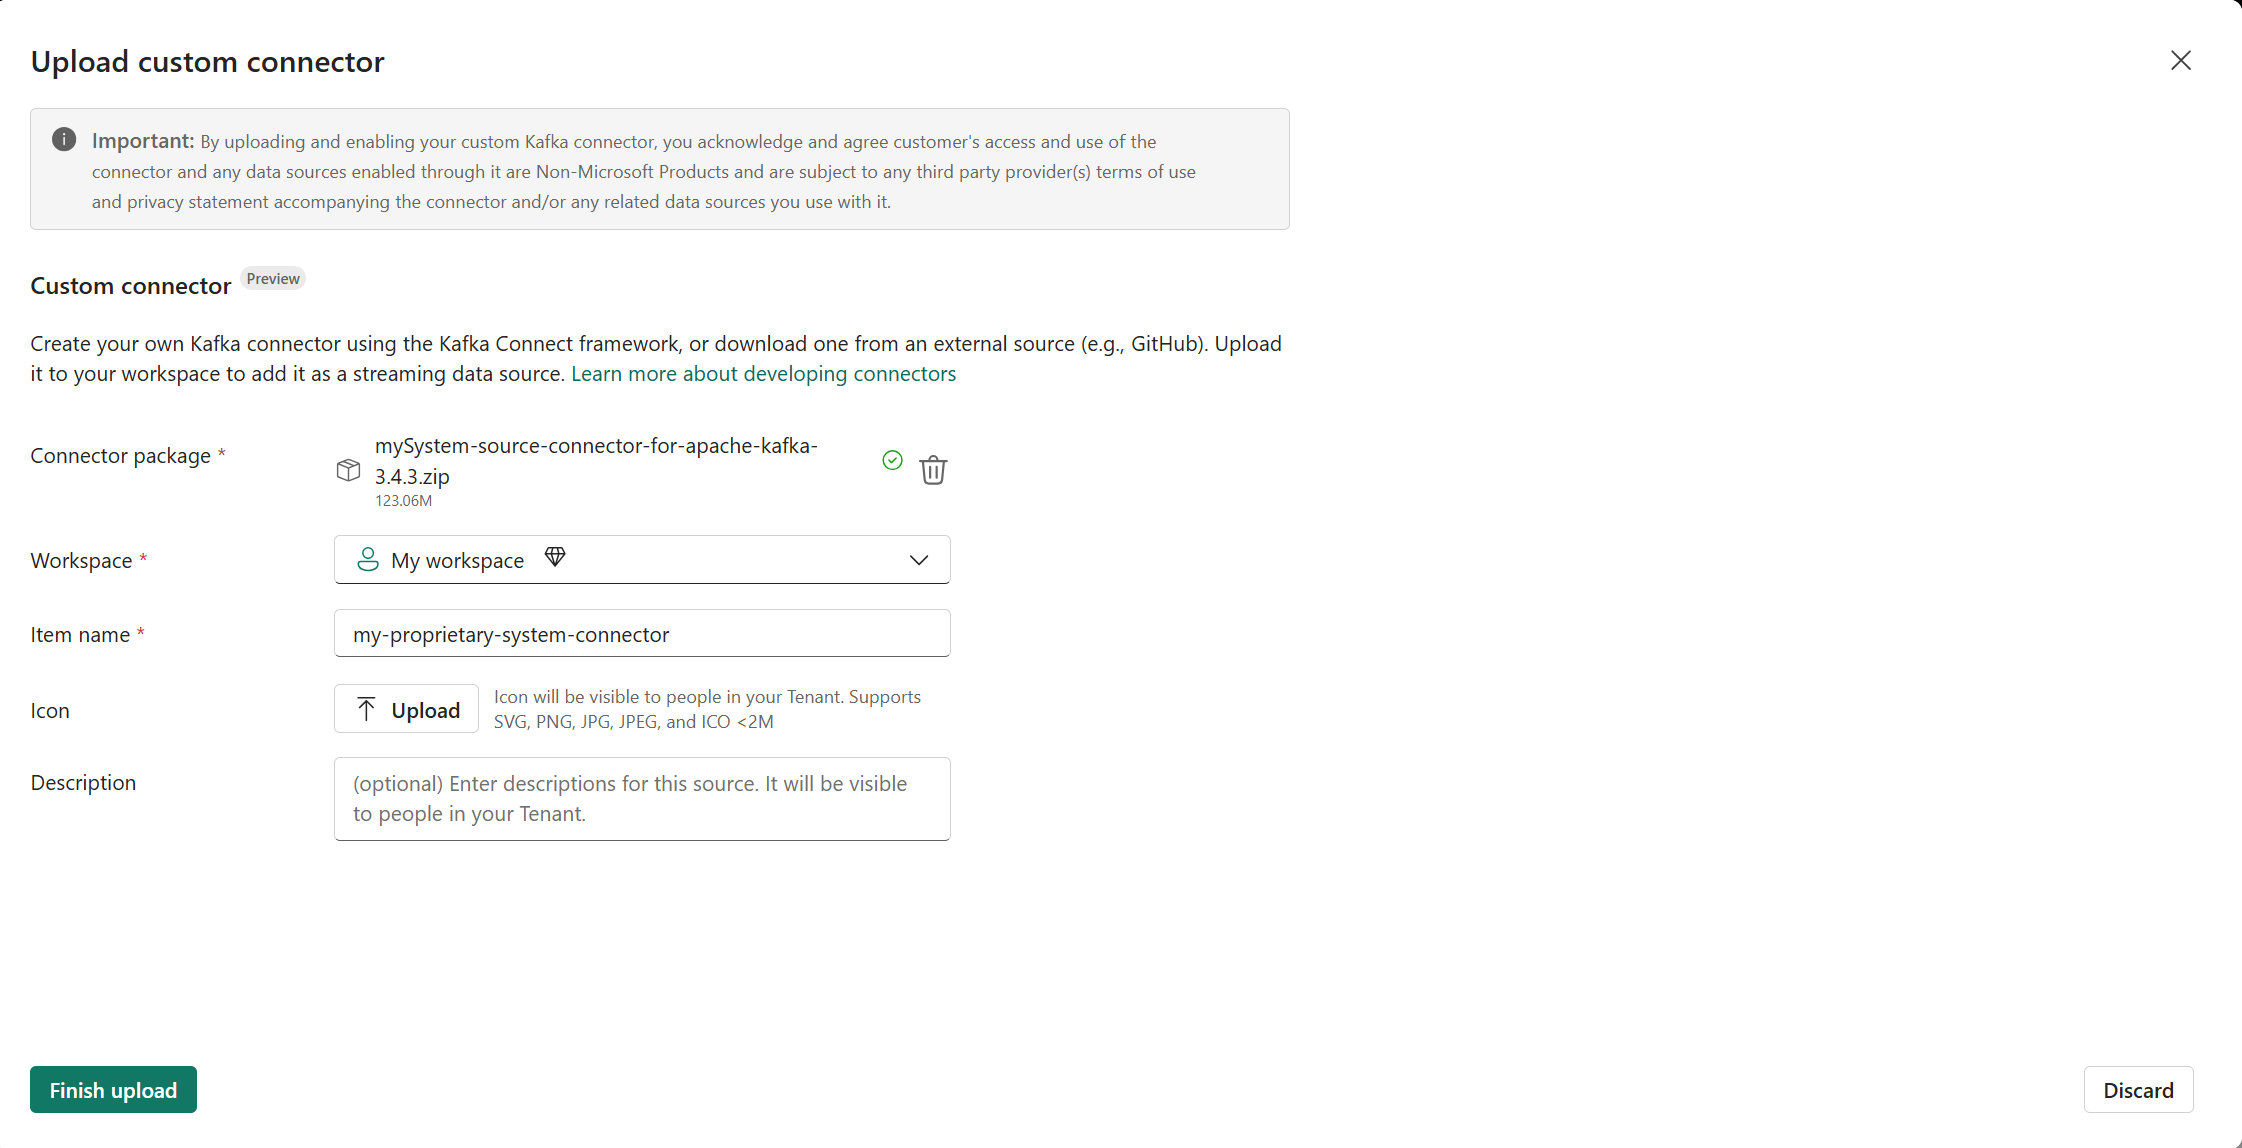
Fabric creates a custom stream connector item in the selected workspace. After the upload finishes, return to Real-Time hub and search for the connector name to find its source tile.
On the source tile, select More options (...) to perform one of these actions:
- Connect: Open the Get events wizard and add the source to an eventstream.
- Manage connector: Open the custom stream connector item to manage its details and package versions.
Upload from a custom stream connector item
- In a Fabric workspace, select New item > Custom stream connector.
- Enter a name, and then create the item.
- On the custom stream connector item page, upload the connector package and icon.
- Enter a description, and then select Finish + upload.
After the upload finishes, the connector appears as a source tile in Real-Time hub.
Add the connector to an eventstream
- In Real-Time hub, select the custom stream connector source tile.
- In the Get events wizard, create or select a connection to the source. Custom stream connectors support username and password authentication or API key authentication.
- If you have Contributor or higher permissions for the connector's workspace, select the package version under Connect to version. This setting isn't available with Viewer permissions.
- Under ClassName, enter the fully qualified Kafka connector class name. For example, enter
com.example.plugin.connector.MySourceConnector. - Under Configurations, add the connector properties as key-value pairs.
- Select the eventstream that you want to add the source to, and then complete the wizard.
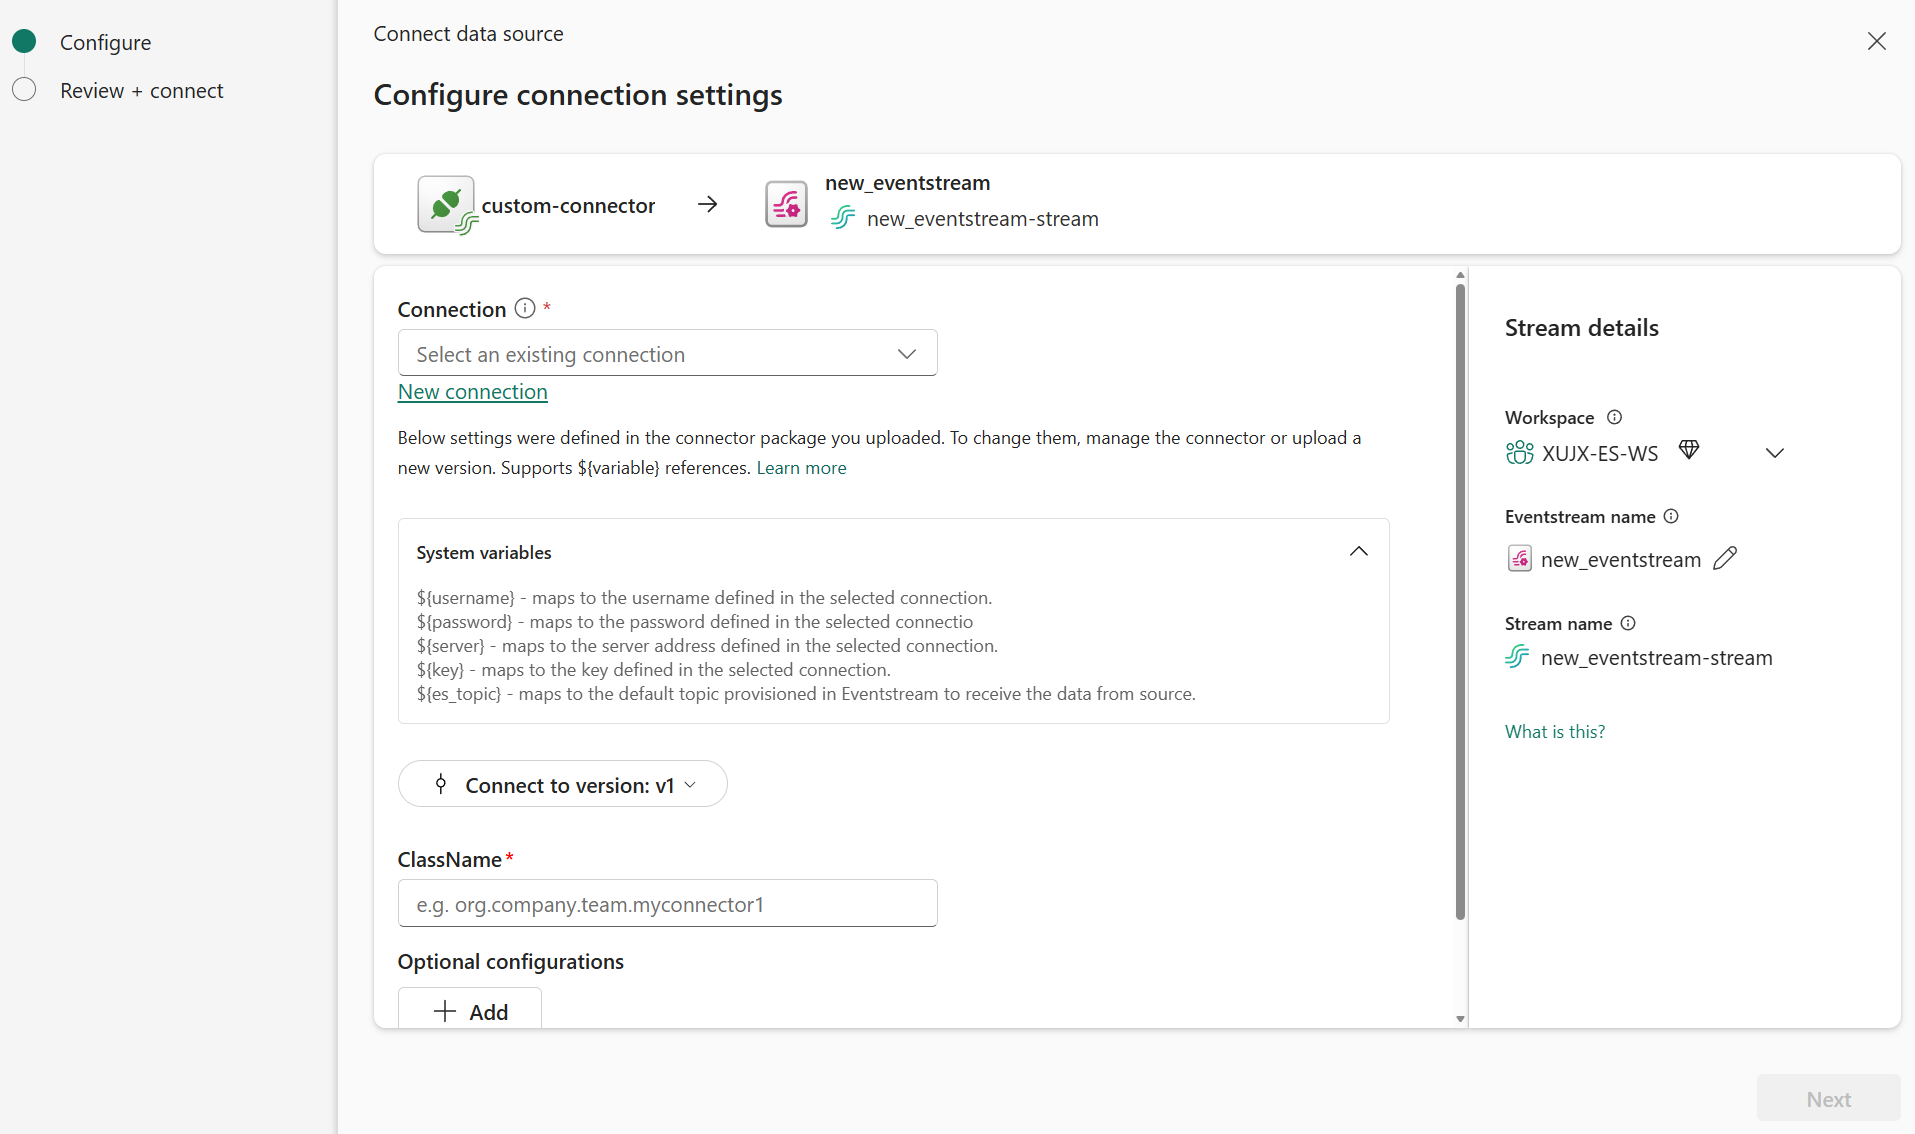
You can use these system variables as connector property values:
| System variable | Value |
|---|---|
${username} |
Username stored in the selected connection. |
${password} |
Password stored in the selected connection. |
${server} |
Server address stored in the selected connection. |
${key} |
API key stored in the selected connection. |
${es_topic} |
Default topic that Eventstream provides to receive source data. |
For example, set a connector's connection.password property to ${password}. Use system variables for credentials instead of entering secrets directly in connector properties.
You can also start this procedure from the custom stream connector item. Select Connect on the ribbon or on a package version's menu, and then complete the Get events wizard.
Verify the connector
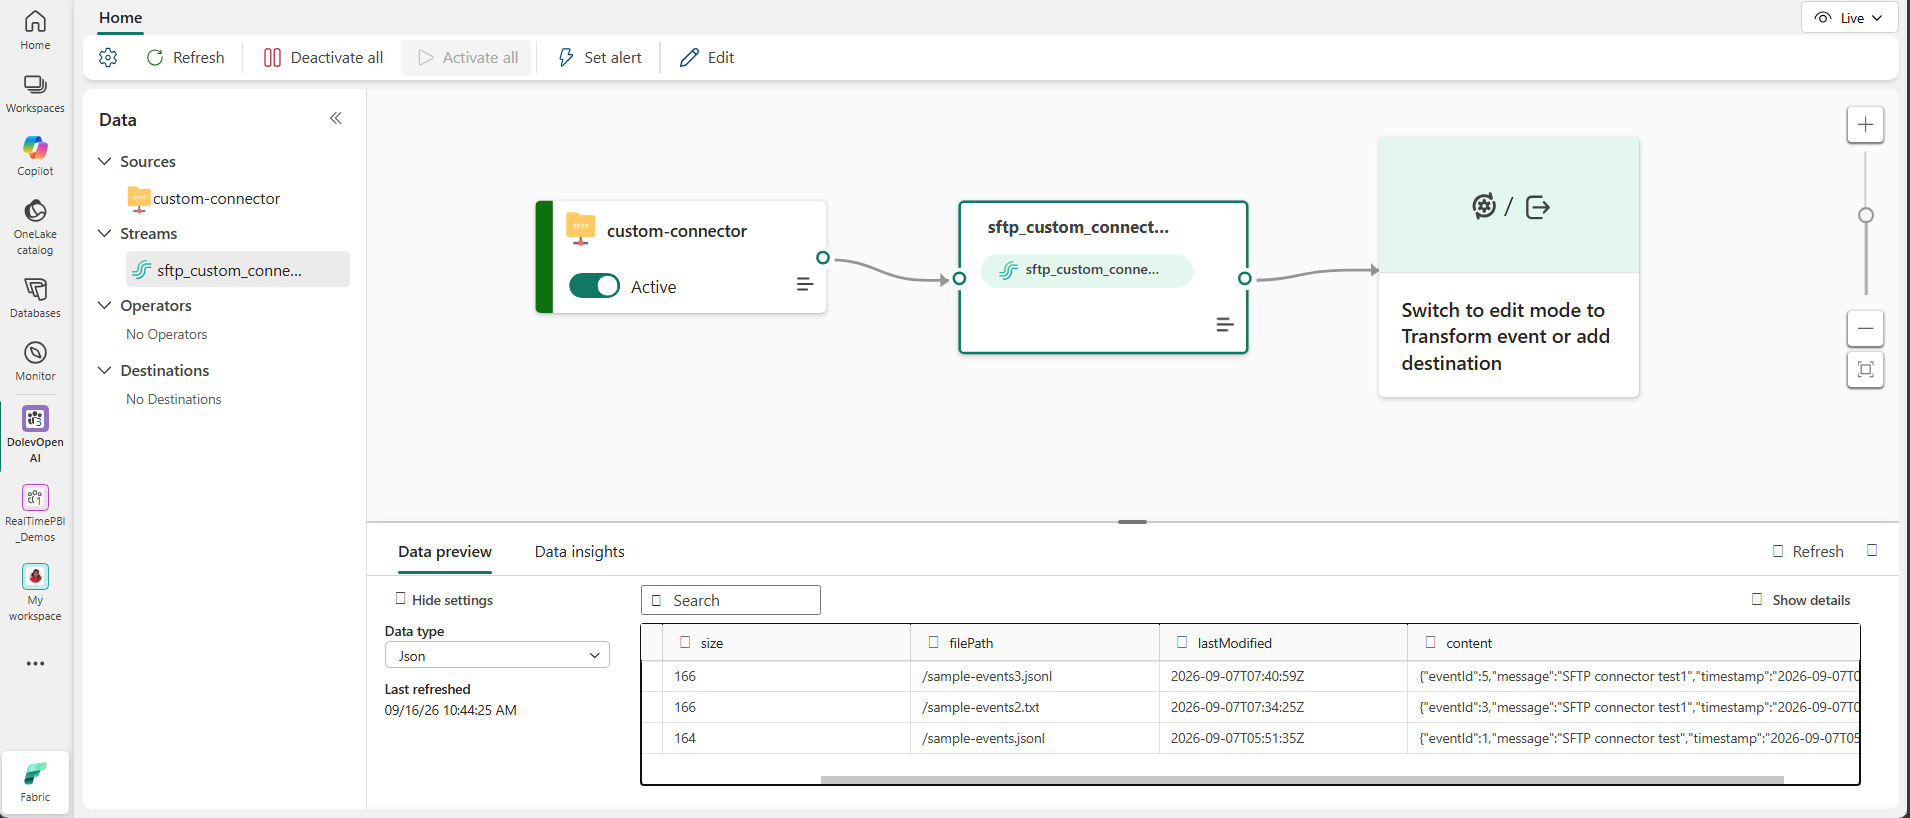
After you add the source, open the eventstream and confirm that the custom stream connector appears on the canvas. Publish the eventstream to deploy the connector.
Use one of these methods to verify that the connector works:
- Preview the source data in the eventstream.
- Check the source state and metrics.
- Open the source's runtime logs and check for connection, configuration, or processing errors.
Manage the custom stream connector
Open the custom stream connector item from its workspace to manage the connector.
On the Overview page, you can:
- Select New version package to upload a new package version.
- Select Edit overview to change the connector name, description, or icon.
- Select Connect to add the default version to an eventstream.
- Select Download to download the connector package.
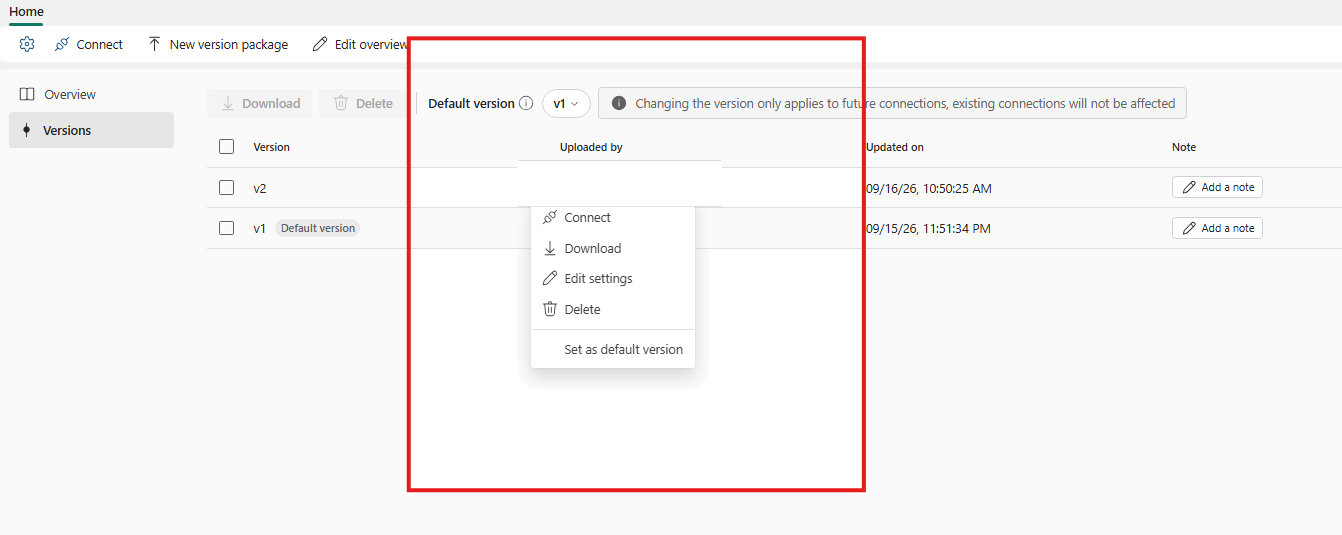
On the Versions page, you can:
- Select Set as default version to choose the version that Real-Time hub adds to an eventstream by default.
- Select Delete to remove a package version. Deleting a version prevents you from adding it to another eventstream but doesn't affect connectors that are already running.
Limitations
- Only Kafka Connect source connector plugins are supported. Sink connector plugins aren't supported.
- Eventstream uses
JsonConverterfor custom stream connectors.ByteArrayConverterand custom converters aren't supported. If the connector produces byte-array data, Eventstream writes it as a Base64-encoded value. - You must enter connector properties manually as key-value pairs in the Get events wizard.
- You can't view the relationship between a package version and the eventstreams that use it.
- Sources on private networks, including virtual networks and on-premises networks, aren't supported.
- Changes to a connector's icon or description in the custom stream connector item don't appear in Real-Time hub.